Hachimantai Aspite Line Iwate Side Complete Guide: Data Analysis of the 19km, 1,083m Elevation Gain Volcanic Sky Corridor Climb
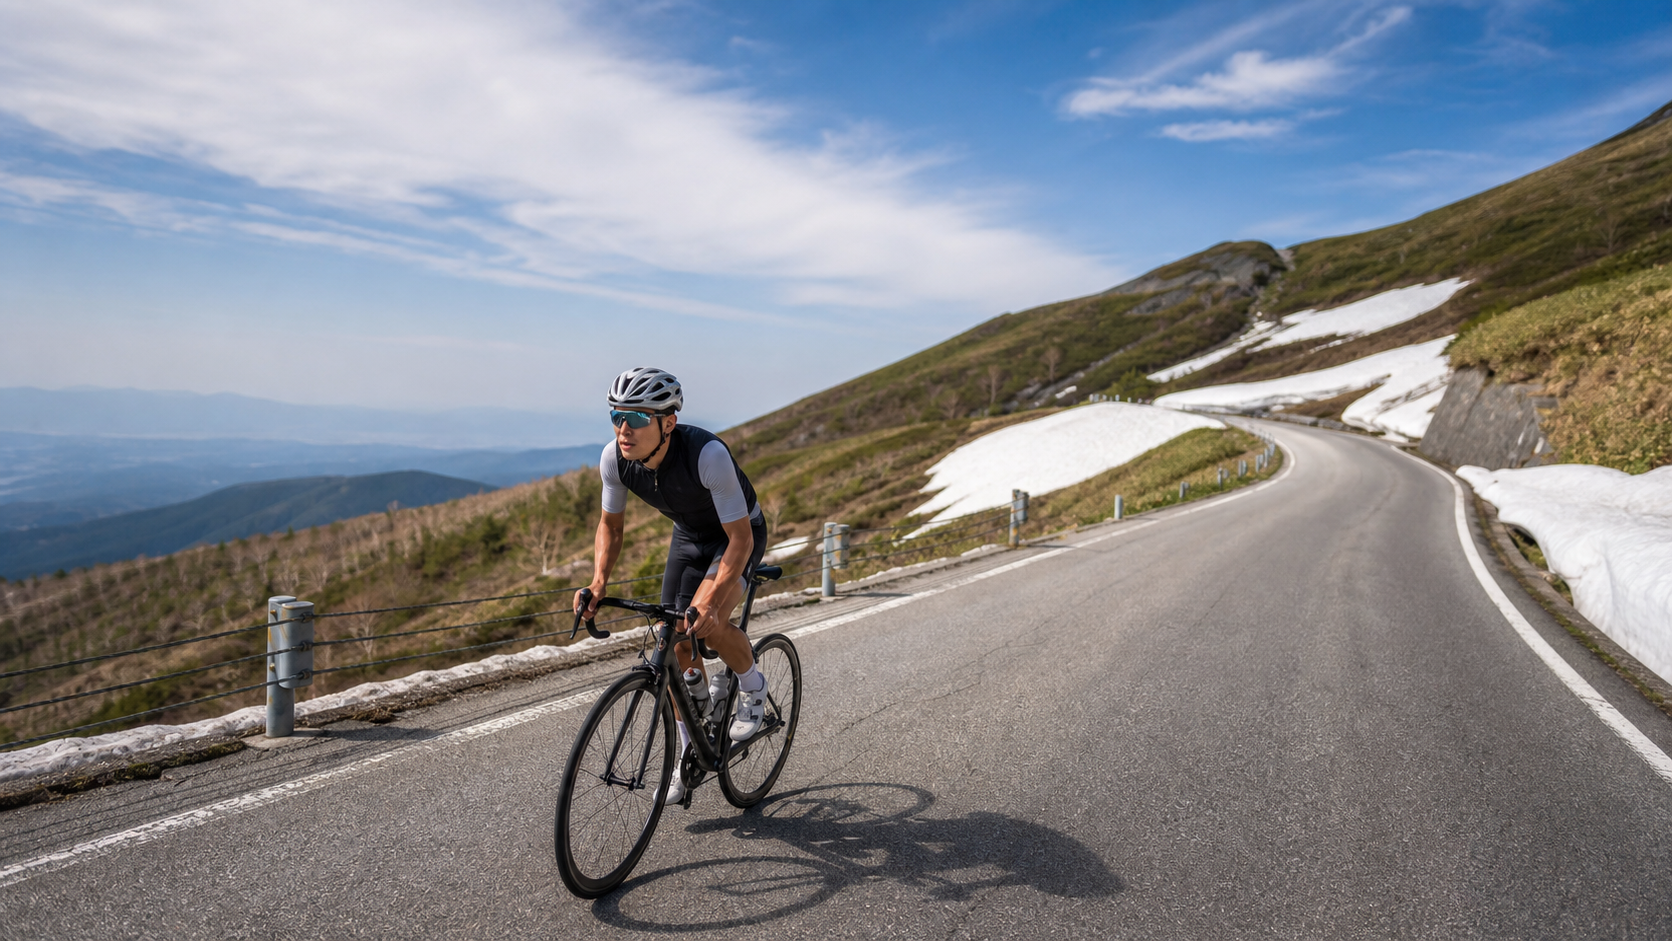
The Hachimantai Aspite Line is a mountain sky road that stretches across the border between Iwate and Akita Prefectures in northeastern Japan. For Taiwanese riders, it may not be as famous as Mount Fuji, but once you lay out the numbers, you’ll immediately understand why local cyclists call this road “the climbing mecca of the Tohoku north.” This article isn’t about scenery or sentiment—we’ll purely use the language of data and pedaling to break down every gradient, every pacing adjustment, and every gear ratio choice on this road, from the start to the Kaerimine Pass, section by section.
1. Let’s Put the Data on the Table: How Hard Is This Climb, Really?
Before planning any long climb, the most important thing isn’t adrenaline—it’s understanding the “numbers.” The core climbing data for the Hachimantai Aspite Line is as follows. I’ve cross-referenced the popular Strava segment with official data published by local race organizers, converted into metric units familiar to Taiwanese riders:
| Item | Data | Conversion/Notes |
|---|---|---|
| Popular Strava segment distance | Approx. 10.63 km | This is the most classic middle section, not the full route |
| Popular Strava segment elevation gain | Approx. 585.7 m | Average gradient approx. 5.2% |
| Full climb distance from Iwate side | Approx. 19–20 km | From the timing point at the mountain base to Kaerimine Pass |
| Full elevation gain from Iwate side | Approx. 1,083 m | Comparable in scale to the upper section of Taiwan’s Wuling |
| Full average gradient from Iwate side | Approx. 5.7% | Actual pedaling sections average approx. 6.8% |
| Kaerimine Pass (highest point) elevation | Approx. 1,541 m | The highest point of the entire route |
| Total road length (spanning Iwate ↔ Akita) | Approx. 35 km | Includes the descent and the Akita side |
| Year opened | 1970 | A classic mountain road over half a century old |
Once you understand this table, you’ve grasped the character of this road: It’s not the kind of killer climb that hits you with 12% or 15% walls right from the start, but rather a “war of attrition” long-distance moderate climb. An average gradient of 5.7% sounds gentle, but you’ll be pedaling continuously at that gradient for nearly 20 kilometers, gaining over a thousand meters in elevation. What it tests is steady power output and pacing discipline, not explosive bursts.
To sum up its character in one sentence: Hachimantai won’t knock you out with a single heavy punch—it will wear down your willpower with 90 straight minutes of jabs. The real enemies are “endurance fade” and “pacing collapse,” not the gradient itself.
This is crucial for Taiwanese riders. The “hard climbs” we’re used to—like Fengguizui, Beiyi, or Tataka—are routes with dramatic gradient changes that require frequent standing out of the saddle and surging. But Hachimantai is closer to the “sit and grind it out” endurance battle of Wuling from Cingjing to the summit. If you bring your Beiyi pacing to Hachimantai, the first 5 kilometers will feel great, but after kilometer 12, you’ll pay a heavy price.
Why Are There Two Average Gradient Numbers?
You might have noticed I listed two figures: “full average 5.7%” and “climbing sections 6.8%.” This isn’t a typo. On the Iwate side of the Hachimantai Aspite Line, there are several short flat or even slightly descending sections (especially near certain observation platforms and switchback transition zones). These “recovery sections” drag the overall average down to 5.7%, but on the actual climbing stretches, the real gradient sits around 6.8%.
This information is critical for your pacing strategy: You cannot plan the entire ride using 5.7% effort, because when you’re actually on the climb, you’re facing nearly 7% resistance. Conversely, these interspersed easier sections are golden windows to recover your heart rate, hydrate, and adjust your rhythm. Smart riders will actively shift to an easier gear and spin lightly on these sections to pay down their lactate debt, rather than foolishly maintaining high power on the easier gradients.
2. Start to Kaerimine Pass: Section-by-Section Guide
Now we get to the core of this article. I’ve divided the full Iwate-side climb into five sections. For each, I’ll give you the gradient profile, recommended heart rate zones, gear ratio choices, and specific cadence advice. The “zones” below are described as percentages of FTP (Functional Threshold Power)—the most universal language that isn’t affected by individual body weight or absolute fitness levels.
Section 1 (0–4 km): Warm-Up Zone—Control Your Excitement
The gradient near the start is relatively gentle, sitting around 3–5%. This section is the most dangerous psychological trap on the entire road—because your legs are fresh, the air is cool, and the views are open, almost everyone rides too fast here.
- Recommended intensity: 70–78% of FTP, keeping heart rate at the upper edge of the aerobic zone, at a level where you can still barely string together a full sentence.
- Gear advice: A mid-chainring paired with mid-range cassette cogs works here, e.g., a 34T front ring with 19–21T rear cogs, maintaining a cadence of 80–85 rpm.
- Pedaling rhythm: Stay seated, focusing on “smooth circular pedaling” rather than “stomping down hard.”
- Engineer’s warning: If you’re already gasping and your heart rate is pinned at the ceiling in this section, your pacing is out of control—back off immediately. The real difficulties on this road lie ahead. Every bit of energy spent in the first 4 kilometers will come back to haunt you with interest after kilometer 15.
Section 2 (4–9 km): Gradient Rises—Getting Down to Business
Past the warm-up zone, the gradient steadily climbs into the 6–7% main battleground range. This is also the core territory of that popular Strava segment of approximately 10.63 km with 585.7 m of elevation gain. This is where you establish your “cruising rhythm.”
- Recommended intensity: 78–85% of FTP—the so-called “Sweet Spot” training intensity. This intensity can be sustained for a considerable amount of time while still producing effective power.
- Gear advice: This is where you start reaching for the big cogs—32T to 28T. If your largest rear cog is only 28T, maintaining 80 rpm on a 7% gradient will require significant power; I recommend Taiwanese amateur riders have at least a 32T or 34T bailout gear ready.
- Pedaling rhythm: Stay seated, keeping cadence at 75–82 rpm. When the gradient briefly steepens, prioritize shifting down to maintain cadence rather than muscling through with brute force on a big gear.
- Fueling timing: The latter part of this section is a good time for your first feed. Take your first energy gel or snack before your body enters fatigue—don’t wait until you’re hungry (see the fueling section below for details).
Section 3 (9–14 km): Views Open Up—Also the Bonking Hot Zone
One of the most captivating features of the Hachimantai Aspite Line is that after the middle section, the forest gradually recedes and the views open up dramatically, giving you a floating sensation of “flying into the sky”—because the road’s highest point, Kaerimine Pass (1,541m), is only about 100 meters below the summit of Mount Hachimantai (approx. 1,613m). You’re essentially riding along the ridgeline.
But the more beautiful the scenery, the more this section is also the physiological bonking hot zone. After cumulative elevation gain approaches 700–800 meters, most amateur riders’ glycogen stores start running low, and pacing unconsciously begins to slip.
- Recommended intensity: This is where you learn to “hold back.” Keep power steady at 76–82% of FTP—don’t get carried away by the scenery and surge.
- Gear and cadence: If cadence drops below 70 rpm, your gear is too heavy—decisively shift down another gear. At altitude combined with fatigue, your knees are more prone to injury under low-cadence, high-torque loads.
- Mental strategy: Break this section into smaller goals by “counting switchbacks” or “counting kilometer markers,” focusing on riding just the next corner at a time. Mentally chopping the mountain into smaller pieces is the most effective way to push through the wall.
Segment 4 (14–18 km): Altitude Effects Emerge, Power Naturally Declines
Above 1,300 meters, air density drops and oxygen availability decreases. Taiwanese riders who normally train at low altitude will find their VO₂ max affected when suddenly arriving at this height—this isn’t you getting weaker, it’s simply the physical environment.
- Suggested Intensity: Accept reality and proactively lower your target power by 5–8%. The 250W you could normally sustain may only be sustainable at 230–240W here, and your heart rate will be higher. This is normal.
- Gear Ratio Advice: This is where you’ll need your bailout gears the most on the entire route. A 34T chainring paired with a 32T or even 34T rear cog will be your best companion here.
- Cadence: Alternating between seated and standing positions in small increments can distribute muscle load and relieve soreness in any single area. But keep standing climbs in check—staying out of the saddle too long will spike your heart rate.
- Hydration Reminder: High altitude combined with exertion means dehydration happens faster than you think. Be sure to take small, frequent sips of water throughout this section.
Segment 5 (18–20 km): Sprint to the Hien Pass Summit, Save Something for the Descent
The final push to the Hien Pass summit (1,541m) features rolling gradients. If you’ve paced yourself well up to this point, you’ll have enough left to add a bit more and enjoy the thrill of crossing the line.
- Suggested Intensity: If your condition allows, you can push to 88–95% of FTP for the final 1–2 km and pour out your remaining reserves. But only if—you’ve truly held back earlier.
- Important Reminder: Reaching the Hien Pass summit doesn’t mean it’s over. The other side of this road is a long descent toward Akita, or the descent back the way you came. Temperature differences in the mountains are extreme—the summit can be 8–12°C colder than the base—so make sure you have your windbreaker ready before crossing the line. Don’t descend immediately while drenched in sweat; the risk of hypothermia and cramping is very real.
III. Gear Ratio and Equipment Setup: Don’t Let Your Equipment Be Your Ceiling
The most common mistake Taiwanese riders make when tackling long climbs abroad is “not bringing enough gear.” Although Hachimantai averages only 5.7%, the long distance and high altitude make it feel significantly harder than a shorter climb of the same gradient. Here’s my recommended gear setup:
| Rider Level | Chainring | Largest Rear Cog | Notes |
|---|---|---|---|
| Advanced/Racing | 50/34T | 30–32T | Has a solid FTP base, can sustain high power |
| General Amateur | 50/34T or compact crank | 32–34T | The most recommended safe setup |
| Beginner/First-time | Compact crank or triple chainring | 34T and above | Better to have gears too light than to be stuck unable to turn the pedals |
Core Principle: Cadence is king. On this kind of long, moderate climb, maintaining 75–85 rpm is far more important than grinding a big gear. Low-cadence, high-torque pedaling rapidly accumulates muscle fatigue, damages knees, and will cause you to blow up when altitude effects kick in later. Having a set of “bailout gears that can still turn even when you’re desperate” is the most practical insurance for completing this route.
Other equipment checklist:
- Wheels: Medium-to-low profile climbing wheels are preferable for weight savings; but if it’s windy that day, medium rims offer better stability—weigh the trade-offs based on weather.
- Tire Pressure: Mountain roads may have volcanic gravel and patched surfaces. Don’t inflate tires to max pressure; slightly lower pressure improves grip and comfort.
- Clothing: Use the “onion layering” method without fail. A windbreaker for descents, arm warmers, and a packable thin vest are essential. The temperature difference between summit and base is the most underestimated killer on this route.
IV. Nutrition and Hydration: Manage Your Body Like an Engine
For a climb of nearly 20 kilometers that may take over 90 minutes, your fueling strategy often determines your result more than your leg strength.
Calorie Intake
During high-intensity climbing, the body burns approximately 60–90 grams of carbohydrates per hour. The principle is:
- Refuel every 20–30 minutes—don’t wait until you’re hungry. Once hunger sets in, your blood sugar is already dropping, and it’s too late to catch up.
- Your first fueling should happen in Segment 2 (around km 6–7), while your stomach can still digest comfortably.
- Energy gels, bananas, and yokan (easily found at Japanese convenience stores) are all good options.
Fluids and Electrolytes
- Aim for 500–750 ml of fluid per hour, paired with electrolyte tablets or sports drinks to replenish sodium lost through sweat.
- The dry, cold air at altitude causes you to lose more fluid through respiration without realizing it. Even if you don’t feel thirsty, sip water regularly.
- Remember: Fill your bottles before you start. Supply points are scarce on mountain roads—don’t count on buying water along the way.
V. Weather and Seasons: The Mountains of Tohoku Change Their Mood in an Instant
Hachimantai is located in northern Tohoku, with high latitude and high altitude, and its weather variability far exceeds what Taiwanese riders experience in daily life.
- Open Season: This mountain road is closed in winter due to snow accumulation, typically reopening in late spring (around mid-to-late April). In the early days after opening, the famous snow walls line both sides. Actual opening and closing dates vary each year based on snow conditions—always check the latest official announcements before departure, and don’t set dates in stone.
- Best Riding Season: Summer (July–August) offers relatively stable weather and lush greenery; autumn (roughly late September to early October) is one of Tohoku’s premier spots for fall foliage, but temperatures begin to drop, with cold mornings and evenings.
- Temperature Management: Even in summer, the temperature difference between the base in the early morning and the summit at noon can be significant. In the mountains, fog, sudden weather changes, and even rain are common in the afternoon—slow down when visibility drops sharply.
- Wind: The area around the Hien Pass is open terrain, and winds can be strong. Headwinds on the climb significantly increase perceived difficulty, while tailwinds on the descent require extra attention to handling stability.
A saying from the Tohoku mountains is worth remembering: mountain weather can have four seasons in a single day. Always carry one extra windproof, insulating layer—that’s the iron rule here.
VI. Common Mistakes and DNF Risks: Don’t Step on the Landmines Others Have Hit
Based on general long-climb principles and the characteristics of this route, here are the most common mistakes Taiwanese riders make, along with their corresponding DNF (Did Not Finish) risks:
- Losing control of pacing early (the biggest killer): Riding too fast in the first 5 km because your legs feel fresh and the air is cool, burning through glycogen prematurely and hitting the wall later. This is the #1 cause of DNF. Solution: Deliberately hold back in the early section, keeping your heart rate in the aerobic zone.
- Not bringing enough gear: With only a 25T or 28T largest rear cog, when altitude effects and fatigue set in later, you’re forced to grind at extremely low cadence, eventually your knees protest or you simply can’t turn the pedals. Solution: Confirm your gearing before departure—better too light than too heavy.
- Fueling too late: Waiting until you’re hungry or thirsty to refuel means blood sugar and fluids are already depleted. Solution: Fuel proactively on a fixed schedule and quantity.
- Underestimating temperature differences, insufficient clothing: Descending into cold wind while drenched in sweat after reaching the summit leads to hypothermia, muscle tightness, and even cramping. Solution: Get dressed before the summit; confirm insulation before descending.
- Ignoring altitude effects: Trying to maintain sea-level power above 1,300 meters results in a heart rate that blows through the roof and an immediate collapse. Solution: Accept that altitude will slow you down and proactively lower your target power.
- Unchecked equipment: Failing to check brakes, shifting, and tire pressure before departure leads to mechanical issues in remote mountain areas where help is hard to find. Solution: Complete a full bike service and test ride one week before departure.
7. Target Timeframes for Riders of Different Levels
Finally, for Taiwanese riders of different levels, here is a practical target time reference for the full climb on the Iwate side, approximately 19–20 km with about 1,083 meters of elevation gain. Please note that these are only rough ranges; actual times can vary significantly depending on the day’s weather, wind direction, physical condition, and altitude acclimatization:
| Rider Level | Approximate Finish Time | Average Speed Reference | Corresponding Mindset |
|---|---|---|---|
| Competitive/Expert | About 75–95 minutes | Chasing results, near threshold the entire way | Challenge personal best |
| Advanced Amateur | About 95–120 minutes | Steady cruising, sweet-spot intensity | Finish smoothly, leave some in reserve |
| General Amateur | About 120–150 minutes | Conservative pacing, focused on completion | Finishing is victory |
| Beginner/First-timer | About 150 minutes or more | Stop-and-go is fine | Descend safely, enjoy the experience |
Regardless of which level you belong to, I want to emphasize the same thing again: the key to completing this climb is pacing discipline and endurance management, not maximum power. Hold back your excitement in the early section, do your fueling on a regular schedule, bring gears light enough, and have your clothing sorted—when you take care of these practical details, the Hachimantai Aspite Line, this volcanic sky corridor along the backbone of Tohoku, will reward every pedal stroke with its magnificent views and that floating sensation of “riding into the sky.”
8. Pre-Trip Training Plan: From Taiwan’s Climbs to Hachimantai’s Climb
Many Taiwanese riders sign up for overseas climbing trips and only realize “I haven’t trained enough” right before departure. Although Hachimantai has a gentle gradient, a continuous climb of nearly 20 kilometers that may take over 90 minutes demands far more endurance than most people imagine. Below is a training framework spanning roughly eight to twelve weeks, so you can use Taiwan’s local climbs to build the fitness needed for Hachimantai.
Building Your Aerobic Base (First Four Weeks)
The key to finishing Hachimantai is “sustained aerobic output,” so the first phase of training focuses on extending aerobic endurance rather than hammering high-intensity efforts.
- Schedule one to two long, low-intensity aerobic rides per week, gradually extending each ride to two to three hours or more, so your body adapts to the rhythm of prolonged continuous exercise.
- Taiwan’s riverside bike paths and gentle suburban roads are excellent venues for building an aerobic base. The key is “long enough duration, low enough intensity,” teaching your body to use fat for fuel and conserve precious glycogen.
- During this phase you may feel it’s “not satisfying enough,” but hold back—the aerobic base is like a building’s foundation. If the foundation is unstable, all the high-intensity training afterward is just a castle in the air.
Adding Climbing-Specific Work (Middle Four Weeks)
With your aerobic base in place, the next step is sport-specific training for “continuous climbing.” Taiwan has plenty of excellent climbs to simulate Hachimantai’s sustained moderate-gradient characteristics.
- Schedule one to two climbing sessions per week, choosing climbs like Fengguizui, Beiyi, Yangjin Highway, or long climbs in central or southern Taiwan, practicing holding a steady “sweet spot” intensity (84–90% of FTP) on the climb.
- The training focus is “pacing stability”—practice maintaining smooth power and cadence throughout the entire climb rather than surging and fading. This is exactly the ability Hachimantai demands most.
- If you have a sufficiently long climb near home, try a “single long climb” session to simulate the sustained feeling of gaining over a thousand meters in one push, just like Hachimantai.
Simulation and Tapering (Final Two to Four Weeks)
In the final phase before departure, do a simulation close to race conditions, then taper appropriately so you arrive at the start in peak form.
- Schedule one to two long rides with “total elevation gain approaching 1,000 meters,” fully rehearsing your fueling strategy, clothing choices, and gear selection. Treat it as a final exam and identify every potential problem.
- Begin tapering one week before departure: reduce training volume while keeping a small amount of intensity stimulus, allowing your body to fully recover and store energy. Whatever you do, don’t add extra training right before leaving—that will only put you on the start line fatigued.
- Don’t forget to simulate the fact that “altitude will slow you down.” Most training venues in Taiwan are at low elevation; the power you produce at sea level will be discounted above 1,300 meters at Hachimantai, so prepare yourself mentally in advance.
The golden rule of training: train like you race, race like you train. Every drop of sweat you shed on Taiwan’s climbs and every fueling rehearsal you perform will translate into that extra composure you carry on Hachimantai’s sky corridor.
9. Race-Day Walkthrough: A Timeline from Waking Up to Crossing the Finish
Finally, let’s lay out the complete flow of challenge day so you won’t be caught off guard.
The Night Before: Check the entire bike (brakes, shifting, tire pressure, chain), prepare all nutrition and clothing, check tomorrow’s weather and road opening status, and go to bed early. Inventory your bottles, fuel, windbreaker, phone, and emergency contact information, and place them in fixed positions.
Early Morning: Get up early, eat a carbohydrate-focused breakfast that’s easy to digest, finishing it one to two hours before departure so your stomach has time to settle. Hydrate well before starting, but don’t overdo it to avoid frequent restroom stops along the way.
Arriving at the Start: Make sure bottles are topped up, nutrition is in place, and your GPS computer is set up. Do ten to fifteen minutes of easy warm-up to wake the body up, but don’t expend too much energy. Check your clothing layers and keep your descent windbreaker somewhere easily accessible.
During the Climb: Strictly follow the segment pacing described earlier—deliberately hold back in the early section, establish a cruising rhythm in the middle, actively lower your expectations in the later section as altitude takes its toll, and finally push to the line within your limits. Fuel and hydrate on a fixed schedule throughout, and stay alert to your body’s signals.
After Reaching Miharashi Pass: Don’t immediately dive into the descent. First put on your windbreaker, stay warm, rest briefly, take in energy and fluids, and let your heart rate come down. Confirm that your hands aren’t too cold and stiff to affect handling, then begin the descent calmly, staying focused and controlling your speed the entire way.
After Finishing: Cool down properly, stretch, and take in carbohydrates and protein to aid recovery. Then—go soak in a hot spring and enjoy a bowl of Morioka cold noodles to properly reward yourself for a day of hard pedaling.
Work through this checklist once, and you’ll find that the Hachimantai Aspite Line, this seemingly distant ridge of Tohoku, is actually a road where “the better prepared you are, the more you can enjoy it.” It doesn’t make things difficult for those who come prepared; it only eliminates those who are careless.
10. Advanced Data Analysis: Predicting Your Performance with Power-to-Weight Ratio
If you’re a rider who manages training with data, there’s one key metric worth calculating before taking on Hachimantai: power-to-weight ratio (W/kg). This is the most fundamental physical quantity determining climbing performance, because climbing is essentially “doing work against gravity,” and the gravity you’re fighting is proportional to your total weight (rider plus bike).
Using the full climb on the Iwate side of Hachimantai—approximately 1,083 meters of elevation gain over 19–20 km—you can use a simplified logic to predict your finish time: in a climbing scenario, your rate of ascent (vertical meters per hour) is roughly proportional to your power-to-weight ratio. The higher your W/kg, the faster your vertical climbing speed, and the shorter your finish time naturally.
- For competitive riders with a high power-to-weight ratio who can sustain a higher W/kg for extended periods, vertical climbing speed is fast, placing them in the “about 75–95 minutes” range from the target time table above.
- For general amateur riders with a moderate power-to-weight ratio, more conservative pacing is needed, and finish times will fall in the “about 120–150 minutes” range.
The practical value of this calculation is this: it gives you a realistic expectation of your performance before you even start, preventing unrealistic goals from causing pacing blowups. Rather than blindly thinking “I want to finish in under an hour,” honestly assess your power-to-weight ratio and set a goal that is both achievable and challenging.
At the same time, this highlights two paths to getting stronger: increasing power (through training) or reducing weight (through sensible weight management). Both will improve your power-to-weight ratio and enhance climbing performance. But a word of caution: weight loss must be pursued with health as the priority. Obsessively chasing lightness at the expense of strength and fitness will backfire.
The cruelty and the fairness of climbing both lie here: gravity treats everyone equally. You can’t fool gravity; the only things you can do are train honestly, pace intelligently, and set goals realistically.
11. Quantifying the Altitude Effect: Why You Slow Down at the Summit
Earlier sections have repeatedly mentioned that “high altitude will slow you down.” In this section, I want to explain more concretely the physical and physiological reasons behind this phenomenon, so you can be better prepared mentally.
As altitude increases, air density decreases, meaning the same volume of air contains less oxygen. When you climb from sea level to elevations above 1,300 meters on Hachimantai, every breath you take delivers less oxygen than it would at lower elevations. The essence of aerobic exercise is “burning energy with oxygen”—once oxygen supply is limited, the maximum power you can sustain (your aerobic capacity) naturally declines.
This effect is especially pronounced for Taiwanese riders, because the vast majority of our training is done at low altitude, leaving our bodies unacclimatized. When you suddenly reach the high-altitude sections of Hachimantai, you’ll notice:
- The same power output comes with a higher heart rate: To obtain enough oxygen in a hypoxic environment, your body can only compensate by speeding up your heart rate.
- Your sustainable maximum power drops: Power you can easily hold at sea level becomes noticeably more difficult here.
- Recovery slows down: After high-intensity efforts, your heart rate takes longer to come back down than at lower elevations.
Understanding this, you won’t mistake the summit sections for “suddenly getting weaker” and spiral into anxiety. This isn’t your fault—it’s an inevitability of the physical environment. The right approach is to proactively accept and lower your target power, trading a more conservative pace for a steady, successful ride. Forcing sea-level output in an oxygen-deprived environment will only make you crack sooner.
If conditions allow, arriving a few days early and doing some light high-altitude acclimatization activities can slightly mitigate this effect. But for most riders on short trips, the most practical approach is still “accept it mentally first, and build in a buffer in your pacing.”
Wishing you a safe and beautiful ride, and that at Mikeri Pass, you’ll see that vast sky that belongs to those who persevere.
Related Reading
- Riding Toward the Sky on a Shield Volcano: The Grand Corridors, Dragon’s Eye, and Hot Spring Forest of Hachimantai Aspite Line
- Kirishima Ebino Highland Climb Practical Guide: Full Analysis of a 12km, 861m Climb on a Volcanic Highland
- Bandai Azuma Skyline (Takayu Onsen Side) Practical Guide: Segment Pacing and Gear Ratio Breakdown for a 13.9km, 824m Climb
- Shikoku Karst Sky Road Practical Guide: 13.6km of Spectacular Highland Scenery, Top-Tier Views at Moderate Difficulty
台北闊瀨陡坡 騎旅 / 日本單車雜誌編輯車友臨時加入!/ 髮香才是最強的 / feat. 北迴歸線小隊 / 公路車 CT Yeh
6 個月前
新竹羅平 x 天湖部落 大禹嶺級變態陡坡! 4K超高畫質 空拍 | 公路車
5 年前
爬坡ITT實境)台中 魔王 松鼠坡 首航 6:12 大肚山 大三元 科福路
8 年前
半日 小台灣 極限單車路線挑戰實錄
7 年前
#北橫 + #北進武嶺 最硬的員工旅遊 EP1 | #公路車 #拉拉山 | 明池 | 武嶺 | 武陵農場 | 雲海 | Taiwan Cycling Route Wulin
6 年前
秘境雪場 日本 八甲田 冰樹探險與滑雪體驗 ft. Q老師 & 運動生活
7 年前
大武山20%魔王陡坡【JJSC南台灣遊騎Day2】!屁股真的要裂開了...凡士林抹滿也沒用?神秘金教堂還有超便宜夜市
3 個月前
騎單車去大屯山賞雪! 助航台滑冰 全記錄 | 台北R友大集合 | 下雪打雪仗囉 | 4K超高畫質
5 年前