Haruna Hill Climb Strategy: Full Analysis of Pacing, Gear Ratios, and DNF on the 4.7 km Average 10% Steep Section
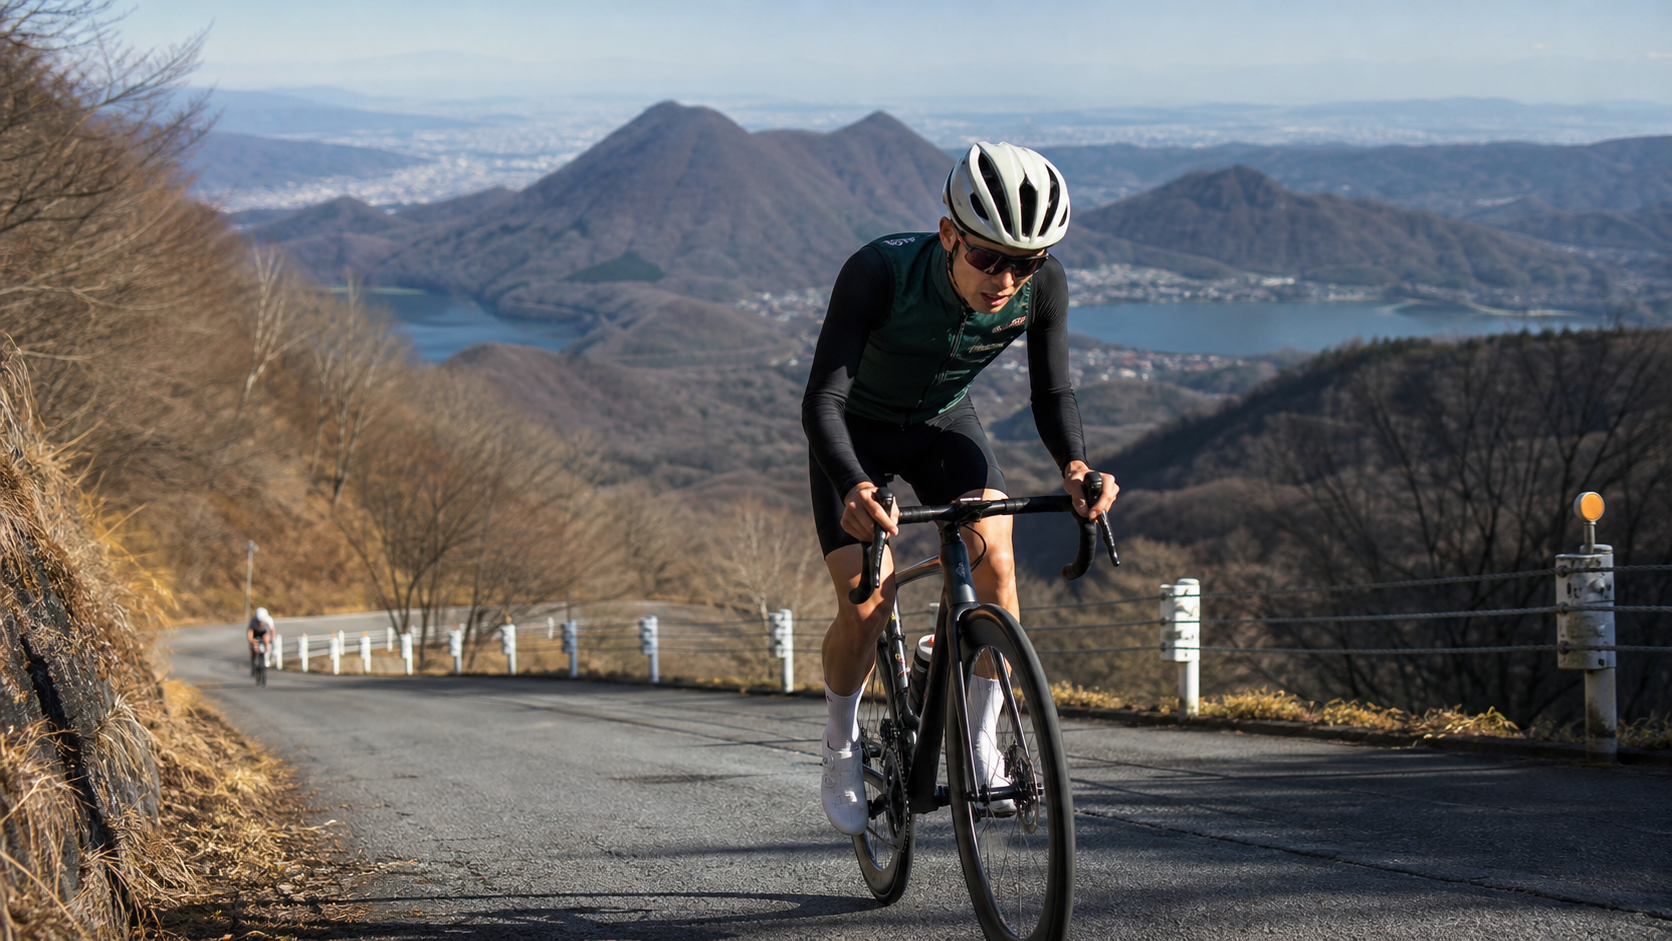
The Haruna Hillclimb (Haruna Hillclimb) is located in Takasaki City, Gunma Prefecture, and is a climbing pilgrimage site that Kanto cyclists consider a “must-do at least once.” This article breaks down the hardest core section of the route—a brutal ramp spanning 4.7 km with an average gradient of 10.0%. To put that number in a Taiwanese context, it’s roughly equivalent to stretching the steepest section of Fengguizui continuously for 4.7 km, with almost no flat sections in between to catch your breath. Looking at the entire Haruna Hillclimb Haruna Lake course, the total length is approximately 14.7 to 16.1 km with about 907 meters of total elevation gain, an average gradient of 6.0%, and a maximum gradient of 14%. The start is at the Takasaki City Haruna Branch Office, and the finish is at Lake Haruna, at an elevation of about 1,100 meters. The 4.7 km we’re discussing today is the culprit that drags the entire course’s average gradient upward.
This is a strategy guide, explaining the data clearly from an engineer’s perspective: how to pace each segment, how to choose gear ratios, how to plan nutrition, where the common pitfalls for blowing up and DNF (Did Not Finish) lie, and what target times cyclists of different levels should set. We’ll save the stories, scenery, and food for another article.
1. Understanding the Numbers: What 4.7 km / 10.0% Really Means
An average gradient of 10.0% is a number that immediately puts experienced climbers on alert. Let’s run through the basic physics intuition first.
On a 10% grade, for every 100 meters of horizontal distance traveled, you gain about 10 meters of vertical elevation. Over a 4.7 km section, if the entire grade held at 10%, the cumulative elevation gain would approach 470 meters. This means your engine—your legs—will be devoting almost all of its output to fighting gravity on this stretch, rather than to acceleration.
Here’s a more tangible calculation: a rider weighing 70 kg, with a combined bike-and-rider weight of about 80 kg, would need roughly 220 watts just to overcome gravity while maintaining 10 km/h on a 10% grade (not yet accounting for rolling resistance and drivetrain losses). In other words, a 10% grade doesn’t allow you to “trade speed for efficiency”—no matter how slow you ride, gravity keeps taxing you the entire time. There’s no descent, no coasting, no room to slack off.
On steep climbs, speed is not your friend—pacing is. A 10% grade will honestly expose your FTP (Functional Threshold Power) to the sunlight, and any moment of overexertion will have to be repaid with a later collapse.
Here’s a data comparison between this core ramp and the entire Haruna Hillclimb Haruna Lake course, to establish the overall picture first:
| Item | Core Ramp (Subject of This Article) | Full Haruna Hillclimb Haruna Lake Course |
|---|---|---|
| Distance | Approx. 4.7 km | Approx. 14.7–16.1 km |
| Average Gradient | 10.0% | Approx. 6.0% |
| Maximum Gradient | Approaches 14% locally | 14% |
| Start | Start of the steep ramp in the mid-to-late course | Takasaki City Haruna Branch Office |
| Finish | End of the ramp, just before the lake area | Lake Haruna (approx. 1,100 m elevation) |
| Character | Hard, sustained steep ramp | Gentle start, steep finish, varied rhythm |
Once you understand this table, you’ll see that the 6.0% average gradient of the full course is a “diluted” and forgiving number. What truly determines your success or failure is this 10% hard core that’s been pulled out.
2. Segment-by-Segment Strategy: Breaking the 4.7 km into Four Parts
When facing a long, steep climb, the worst thing you can do is treat it as one single stretch and try to power through. The engineering approach is segment management—breaking a large, unwieldy problem into several controllable smaller pieces, each with its own heart rate and cadence strategy.
Segment 1 (0 – 1.2 km): The Restraint Phase—Don’t Let Starting Adrenaline Ruin You
The first kilometer of the steep ramp is the most dangerous place. The reason is counterintuitive: your legs are still fresh and your lungs haven’t been pushed to their limits, making it easy to crank out power far beyond your sustainable intensity, driven by adrenaline.
Pacing principle: Deliberately hold back below what feels easy in the first segment. If you have a power meter, target 80–85% of FTP; if you only have heart rate, stay within 80% of max heart rate; if you have nothing, use “can still breathe through your nose and barely utter short sentences” as your standard. In this first kilometer, you need to convince yourself “today feels easy,” because the next three kilometers will demand every bit of that restraint back.
Segment 2 (1.2 – 2.8 km): The Core Sustained Phase—Settle into a Rhythm
After the first kilometer of buffer, the gradient begins to show its true 10% colors. This is the longest and most demanding core section, where you need to enter a nearly mechanical rhythm: fixed gear ratio, fixed cadence, fixed breathing pattern.
The key here is cadence management. On steep climbs, most people unconsciously let their cadence drop to 50 rpm or even lower, shifting into a “stand up and grind” mode that rapidly accumulates lactate and burns out leg strength. Ideally, even on a 10% grade, try to keep cadence at 60–70 rpm. If your cadence drops too low, it’s a signal that your gear ratio isn’t light enough—which is why gear selection (next section) is a matter of life and death on this road.
Segment 3 (2.8 – 4.0 km): The Willpower Grind Phase—Alternate Sitting and Standing
By the third segment, you’ve been working near your threshold for a while, and the pain is accumulating. This is the main battleground of the “mental war.” Strategically, I recommend sit-stand rotation: whenever one muscle group starts burning in protest, briefly stand up and power for 10–20 pedal strokes to shift the load to a different muscle group and your body weight, then sit back down.
Note that standing power on a 10% grade spikes your instantaneous wattage, so don’t stand for too long, or you’ll prematurely deplete your glycogen. Treat standing as “switching hands to rest,” not as “accelerating for a sprint.”
Segment 4 (4.0 – 4.7 km): The Finish Phase—Check What You Have Left
In the final kilometer, you need to make an honest self-assessment: if you paced correctly up front, you should still have a little reserve here, allowing you to nudge the intensity up slightly; if you blew up earlier, this is pure survival—keeping the pedals turning and staying on the bike is victory.
The judgment criteria are simple: If you can still maintain a steady cadence and your heart rate isn’t spiraling out of control, you can add a bit; if your cadence collapses, breathing becomes uncontrollable gasping, or your vision starts to waver, immediately fall back to survival pace. Plenty of people have blown up in the final 500 meters by overreaching at the finish.
3. Gear Ratios and Equipment: This Road Belongs to “Light Gears”
If I could give only one equipment recommendation for this road, it would be: think one gear lighter than your current lightest gear. A sustained 4.7 km at 10% is the terrain most likely to force you off the bike due to gears that are too heavy.
How to Calculate if Your Gears Are Sufficient
To determine if your gears are adequate, look at this: “With your lightest gear, can you maintain a cadence above 60 rpm without your power going through the roof?” Here’s a practical reference framework:
| Rider Type | Recommended Front/Rear Combo | Notes |
|---|---|---|
| Advanced, lightweight, strong climber | Front 34T × Rear 30T or 32T | Has the capacity to hold rhythm with relatively heavier gears |
| General amateur, moderate fitness | Front 34T × Rear 32T to 34T | Mainstream safe choice, retains cadence flexibility |
| Heavier rider, climbing novice | Front 34T × Rear 34T or even lighter MTB-level chainring | Better to spin slowly than to be unable to sit and turn |
The principle is: when in doubt, go lighter. On this kind of climb, the cost of gears that are too heavy is premature exhaustion and being forced off the bike; the cost of gears that are too light is at worst spinning a bit faster and looking less “cool”—which is a completely worthwhile trade.
Other Equipment Points (Checklist)
- Tire pressure: Climbing doesn’t require extremely high tire pressure. Moderately lowering pressure increases grip and comfort, especially if the road surface is damp or covered in leaves.
- Wheels: For pure climbing like this, don’t obsess over deep-section aero wheels. Lightweight climbing wheels or standard aluminum rims are actually more efficient.
- Brake check: There’s a descent after the summit. Before setting off, make sure your front and rear brakes and tire condition are good. Don’t put all your effort into the climb and neglect descent safety.
- Layered clothing: The temperature difference between the summit and the base is significant. After cresting, with sweat-soaked clothing and the wind chill of the descent, a packable windbreaker is essential.
4. Nutrition and Hydration: Don’t Go Naked Even on a Short Steep Ramp
Some might say, “It’s only 4.7 km—do I really need nutrition?” If you’re counting just this section, maybe you could tough it out; but remember, this is part of a roughly 15 km course with 900 meters of climbing. By the time you reach this ramp, your legs have already burned through a significant amount of glycogen.
Nutrition strategy recommendations:
- Eat before the climb: Nutrition has a delayed effect. If you wait until you’re hungry, it’s already too late. Before entering the steep ramp, take in some easily digestible carbohydrates (energy gels, bananas, rice balls, etc.).
- Small sips of water frequently: It’s hard to take big gulps on a steep climb. Switch to small, frequent sips to avoid choking or losing your rhythm because your drinking pattern is disrupted.
- Electrolytes: In warm seasons, bring electrolytes with your water. On a long climb with heavy sweating, replacing fluids with plain water alone can lead to hyponatremia and cramping.
- Refuel after the summit: After cresting at Lake Haruna, don’t rush down immediately. Take in some solid food and water first to let your body recover a bit before the descent, reducing the risk of hypothermia and loss of focus on the way down.
5. Weather and Seasons: When to Come and What to Guard Against
The Haruna mountain area has a typical Kanto mountain climate, climbing from the Takasaki city area to Lake Haruna at about 1,100 meters. The temperature difference is a variable you must factor into your gear choices.
- Spring (fresh greenery, race season): Around May each year is the Haruna Hillclimb race season, with relatively pleasant weather and fresh mountain greenery—the most popular time for challengers. Note that mornings and evenings are still cool, and it feels colder at the summit.
- Summer: Hot at the base, but relatively cool at higher elevations—a great choice for a summer escape climb. Be wary of afternoon thunderstorms and slippery conditions on the descent.
- Autumn: The fall foliage is stunning, but temperatures drop quickly, and the risk of hypothermia on the descent after the summit increases. Don’t skimp on insulation layers.
- Winter: The mountains may have snow and ice. Those unfamiliar with local conditions are advised not to push their luck.
Climbing is a sport of “sweating on the way up, freezing on the way down.” The temperature swings on Mount Haruna will honestly punish anyone who heads up wearing only a single jersey. A small windbreaker is often the key to getting home safely with a smile.
6. Common Mistakes and DNF Traps
These pitfalls are the most common and most avoidable sources of failure on steep climbs. Checking each one can significantly increase your chances of finishing.
- Starting too hard: As mentioned, overexerting in the first kilometer of a steep ramp is the classic suicidal pacing mistake. The people you pass at the start are very likely to catch and pass you halfway up the mountain.
- Gears too heavy: Refusing to give up that “looks professional” gear setup results in cadence dropping to 40 rpm, with both knees and thighs protesting, eventually forcing you off the bike. Gear ratio is where you should most bow to reality on this road.
- Excessive standing: Treating standing power as acceleration rather than a rest switch feels great for a short time, but the cost is prematurely burning through your glycogen.
- Going without nutrition: Relying on the short distance to skip fueling, forgetting this is part of a longer course, and arriving at the ramp with a half-empty tank.
- Ignoring descent risk: Putting all your attention on the climb, then relaxing after the summit, combined with hypothermia and fatigue, makes the descent a high-accident zone. Reaching the summit isn’t the finish line—getting safely back to the bottom is.
- Mental collapse: Telling yourself “I can’t do this” in the most painful third segment, and then actually getting off. In reality, if you shrink your goal from “reach the summit” to “just turn over the next 100 meters in front of you,” most people can push through that critical point.
7. Target Times for Riders of Different Levels
One of the great joys of climbing is that it quantifies your effort into a number you can improve year over year. Below are reference target ranges for the full Haruna Hillclimb Haruna Lake course (approx. 15 km, ~900 m elevation gain). These are rough self-comparison benchmarks, not hard standards—adjust according to your own condition:
| Level | Reference Finish Time for Full Course | Corresponding Training Status |
|---|---|---|
| Novice aiming to finish | Approx. 75–90+ minutes | Goal is “don’t get off, reach the summit with a smile” |
| Amateur with regular training | Approx. 60–75 minutes | Can pace steadily, gear ratio chosen correctly |
| Advanced climbing enthusiast | Approx. 50–60 minutes | Good FTP, can stay near threshold throughout |
| Competitive-level rider | Under approx. 50 minutes | Excellent power-to-weight ratio, experienced |
If this is your first attempt, make “finishing without getting off” your only goal—time is completely irrelevant. The 4.7 km at 10% on this road is itself a threshold worth being proud of; once you’ve conquered it, you’ve earned the right to talk about shaving off minutes next time.
8. For First-Timers: A Pre-Departure Checklist
Finally, let’s wrap up with a concise pre-ride checklist. Running through it before you set off will help you avoid most low-level mistakes:
- Gear ratio check: Can your lightest gear maintain 60 rpm on a 10% grade? If unsure, go lighter.
- Tire pressure and condition: Lower pressure moderately, check for cuts or debris.
- Brake system: Think about the descent after the summit—confirm brake feel is normal first.
- Nutrition ready: At least one easily digestible carbohydrate source, enough water, and electrolytes in warm seasons.
- Insulation layer: A packable windbreaker to prepare for hypothermia on the descent after the summit.
- Pacing plan: Mentally divide the climb into four segments and decide the heart rate/power ceiling for each.
- Mental preset: Tell yourself the third segment will hurt, and when it does, shrink your goal to the next 100 meters ahead.
The 4.7 km of the Haruna Hillclimb isn’t conquered by brute force, but by discipline. Understand the data, leave enough gear, hold your pace—and this dreaded 10% ramp will reward all your restraint and calculation with a clean, beautiful summit time. May you press the stop button with a smile on the shores of Lake Haruna.
9. Understanding Gradient in Depth: Why 10% Is a Watershed
Many people have a vague sense of gradient—they only know “steep” and “not steep.” But if you want to ride smart on steep climbs, you need to internalize the physical meaning of gradient. In this section, we’ll thoroughly unpack the number 10%.
In the world of cycling climbs, gradients can be roughly divided into several psychological levels. Below 3%, most people can maintain a near-flat cruising feel; 3% to 6%, you start to feel noticeable resistance but can still push with larger gears; 6% to 8% is the “serious climbing” zone, requiring lighter gears and focused pacing; and once you exceed 8%, especially into double digits at 10% and above, the rules of the game change completely.
What changes? It’s the “gravity share.” On flat roads, your main opponents are air resistance and rolling resistance—the faster you go, the greater the wind drag. But on steep climbs, the situation is completely reversed: the vast majority of your power goes to fighting gravity, while air resistance becomes negligible because of your slow speed. This is why on a 10% grade, aero frames, deep-section wheels, and tucked aero positions—those flat-road weapons—are almost useless. What you need isn’t “cutting through the wind,” but “lightness” and “sustainability.”
This also explains a common misconception: many people think that charging harder on a steep climb will “end the suffering sooner.” But physically, no matter how fast you ride, gravity does work on you for the entire duration. The only difference is whether you pay off the debt slowly with a sustainable rhythm, or go bankrupt early with explosive overspending. A 10% grade is a watershed that forces you to switch from “speed thinking” to “power thinking.”
10. Heart Rate, Power, and Feel: Choosing Among Three Pacing Tools
The segment pacing above repeatedly mentions heart rate, power, and feel (RPE). This section clarifies the pros and cons of each, so you can make the best choice based on the equipment you have.
A power meter is the most precise tool. Power is “real-time” output with no delay, unaffected by mood, caffeine, or sleep. On a steep climb, you can directly watch the power number and keep it locked in your target zone. The downside is the higher equipment cost, and you need to know your FTP through testing beforehand to set a reasonable target percentage.
Heart rate is the next best option, but it has lag. Heart rate reflects your body’s “response” to load, and responses are always a beat behind—after you push hard, it takes a moment for your heart rate to spike; by the time it spikes, you may already be overdrawn. So the key to pacing with heart rate is anticipation—actively backing off before your heart rate gets out of control. Additionally, heart rate drifts with temperature, dehydration, fatigue, and psychological stress, so factor those into your interpretation.
Feel (RPE, Rating of Perceived Exertion) is the most primitive and honest tool. For riders without any equipment, it relies on direct bodily feedback: can you still breathe through your nose, can you still utter short sentences, how strong is the burning in your legs. The advantages of feel are zero cost, zero lag, and it never runs out of battery; the downside is that it’s subjective and easily influenced by willpower—when your fighting spirit is high, you’ll underestimate exertion, and when you’re feeling off, you’ll overestimate it.
My recommendation: if you have a power meter, use power as the primary and feel as secondary; if you don’t, use feel as primary and heart rate as verification. Regardless of which you use, the core principle remains the same—before the most painful mid-to-late section, hold your intensity in check and save your reserve for the finish.
11. Training Recommendations: How to Prepare for 4.7 km / 10%
If you decide to take on this ramp without a corresponding training base, you’ll most likely end up walking. This section provides an outline of preparation directions to help tune your body to handle this ramp.
- Threshold Intervals: This is the core engine of climbing performance. Find a climb or use a trainer, do 3 to 4 sets of 8 to 12 minutes each at near-threshold intensity, with full recovery in between. This training directly improves your ability to “sustain effort at the edge of pain.”
- Low-Cadence Strength: Deliberately use heavier gears and hold cadence at 50 to 60 rpm while climbing, simulating the low-cadence, high-torque situation you inevitably face on steep grades, strengthening leg power. However, this type of training places more stress on the knees, so progress gradually and know your limits.
- Endurance Rides: Regularly do longer, moderate-to-low intensity rides to build your aerobic base, improve fat metabolism and glycogen utilization efficiency, so you don’t empty the tank too quickly before the real climb.
- Weight management: Climbing performance is highly dependent on “power-to-weight ratio.” Without sacrificing muscle or health, moderately optimizing your weight often improves climbing speed more than upgrading equipment. In the world of climbing, losing one kilogram from your body is often more noticeable than swapping in an expensive set of wheels.
Systematically incorporate these into your plan in the weeks before the event, and when you finally stand at the start of that 10% ramp on Mount Haruna, your body will tell you: you’re ready.
12. Conclusion: An Honest Conversation Between You and Gravity
Back to the original numbers: 4.7 km, 10.0%. By now, you should understand that behind these numbers isn’t fear, but a challenge that can be understood, deconstructed, and calculated.
The essence of climbing is the most honest conversation you’ll have with gravity. Gravity doesn’t cheat, doesn’t play favorites—it faithfully charges you a “power toll” based on your weight and the gradient. And what you can do is use disciplined pacing, correct gear ratios, and thorough preparation to pay that toll beautifully and composedly. Any overexertion will be recorded in the ledger, and any restraint will be rewarded—this is what makes this road so captivating and so fair. When you finally stop your bike on the shores of Lake Haruna and look back at that ramp you gritted through, you’ll understand: you didn’t just conquer a climb—you conquered the version of yourself that once wanted to get off halfway.
13. Descent Technique: Don’t Let Your Guard Down After the Summit
After cresting at Lake Haruna, you still have to descend—and the descent is often where accidents are most likely. The climb has drained your energy, your attention drops with fatigue, and high-speed wind chill sets in. If you’re not careful, all your earlier effort can be undone. Here are a few key points.
- Confirm brakes and tires before departure: This should be done before you even start the climb. A long descent is a severe test for your braking system—make sure front and rear brake feel is normal and tires have no debris or cuts.
- Shift weight back, lower your body: On the descent, move your center of gravity slightly back and lower your body to significantly improve stability and cornering grip.
- Brake early, no hard braking in corners: Reduce speed on the straight section before entering a corner, and avoid sudden braking mid-corner to prevent skidding. Use intermittent “feathering” to control speed, which is much safer than grabbing a handful of brake.
- Outside foot down, eyes on the exit: When cornering, push the outside pedal down and weight the outside foot to increase grip; look toward the corner exit, and the bike will naturally follow your line of sight.
- Put on insulation before descending: After the summit, your body is sweat-soaked, and combined with high-speed wind chill on the descent, hypothermia is a real risk, leading to stiff fingers and sluggish handling. A packable windbreaker is essential gear for a safe descent.
Remember: reaching the summit isn’t the finish line—getting safely back to the bottom is. Treating the descent as a challenge equal to the climb is the mark of complete climbing literacy.
14. Frequently Asked Questions (Q&A)
Q: I’m a climbing novice. Can I handle this 10% ramp?
A: As long as your gears are light enough and you can hold your pace in the early sections, most people with basic fitness can finish without getting off. The key is to set your goal as “finishing” rather than “speed,” and to do the threshold training and gear preparation mentioned earlier.
Q: Do I absolutely need a power meter?
A: Not necessarily. A power meter is the most precise, but you can pace safely with heart rate or pure feel just as well. The core principle remains the same—before the most painful mid-to-late section, actively hold your intensity in check.
Q: How light should my gears be?
A: The criterion is “with your lightest gear, can you maintain above 60 rpm on a 10% grade.” If unsure, err on the lighter side. On this road, gears that are too light almost never cause problems, but gears that are too heavy can force you off the bike.
Q: Do I need nutrition for just this 4.7 km?
A: If you treat it as part of the full ~15 km course, the answer is yes. By the time you reach the ramp, your legs have already burned through a fair amount of glycogen. Taking in easily digestible carbohydrates before the climb significantly reduces the chance of a late-stage collapse.
Q: What’s the best season to come?
A: Spring (around race season) and autumn both offer pleasant scenery and weather, but in both cases, be mindful of the temperature difference between the summit and the base, and bring insulation layers. In winter, the mountains may have snow and ice; those unfamiliar with local conditions are advised not to push their luck.
Related Reading
- Riding into the Embrace of the Jomo Sanzan: The Story of Haruna Hillclimb, Lake Haruna, and That Bowl of Mizusawa Udon
- Takachiho Kawara Hardcore Ramp Guide: 5.43 km at 9.5% Average—A Short Steep Wall, Life-Saving Gears, and Full Pacing Analysis
- Hyogo Rokko Driveway Complete Guide: 4.7 km at 8.8% Average—Segment Pacing, Gear Ratios, and Steep Wall Strategy
- Koyasan Guide: 17.4 km at 4.4%—Endurance Pacing, Gear Ratios, and a Full Nutrition Guide for Long Climbs
台北闊瀨陡坡 騎旅 / 日本單車雜誌編輯車友臨時加入!/ 髮香才是最強的 / feat. 北迴歸線小隊 / 公路車 CT Yeh
6 個月前
半日 小台灣 極限單車路線挑戰實錄
7 年前
2025 乘鞍岳登山賽 比賽全紀錄篇 / 完整路線攻略介紹 / 日本版武嶺 公路最高點 / 高山空拍絕景 / 明年會開團! / 公路車 / CT Yeh
10 個月前
#公路車 #西進武嶺 配速配瓦實驗 坡度分析 四小時內攻略 建大盃 NeverStop #西進武嶺攻略
6 年前
萬年峽谷! 30% 超激陡坡 里佳部落DAY2 還是很硬! | 公路車 | CT Yeh
3 年前
2025 乘鞍 KOM 登山賽挑戰實錄 / 日本公路最高 ! 賽前探路篇 / 比富士山厲害,無敵絕景!/ 40週年 / 中文YT首發 / 公路車 / CT Yeh #乘鞍ヒルクライム
11 個月前
富士山KOM 賽事篇 VLOG!/ 小野田出沒!/ 完整路段分析 / 武嶺要騎多快才能拿環?/ 台灣選手 第20回Mt.富士ヒルクライム 参加!/ 公路車 / CT Yeh
2 年前
司馬庫斯 | 單車員工旅遊 | 比武嶺還接近上帝的路 | 2021 全面實況 路況解析 | 空拍 櫻花炸開超濃密 | 財伯觀光果園 | CT Yeh
5 年前