Akagi-san East Face・Rihei Chaya Hill Climb Guide: 9.1 km at 7.7% Average Grade — A Quiet Steep Climb in Kiryu Kurohone-cho
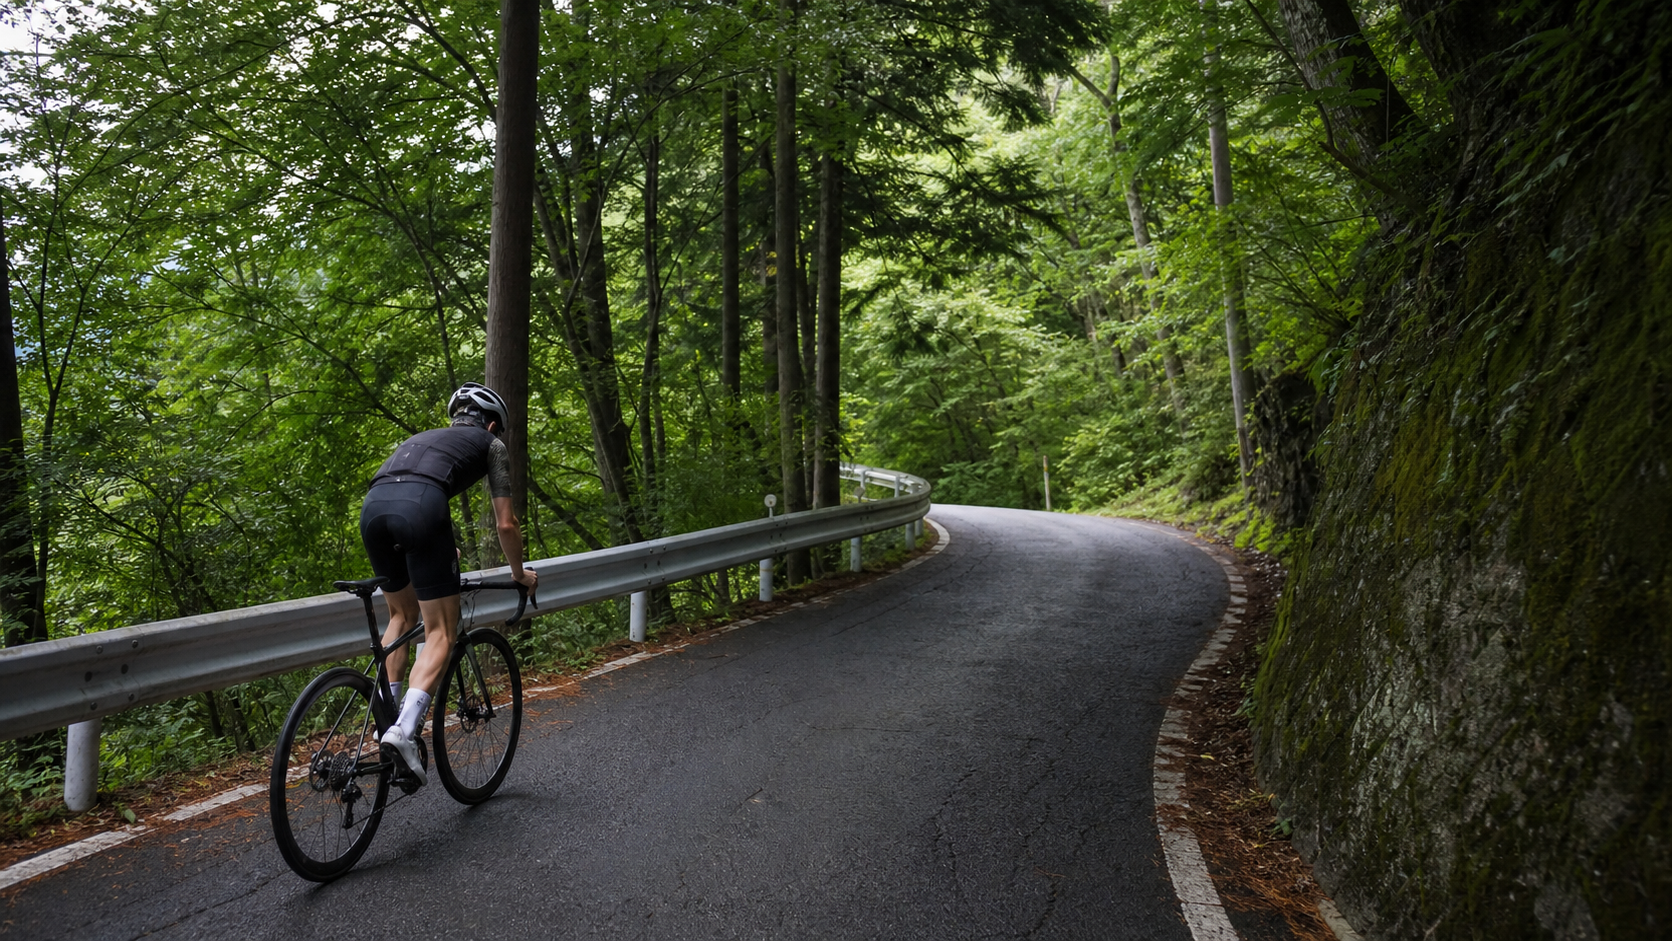
“The west side has tourists; the east side has only you and the climb.” — That phrase is probably the most fitting description of the Rihei Chaya route on Akagi’s eastern face.
Mount Akagi is one of the “Jomo Sanzan” (Three Mountains of Kozuke), and most cyclists are familiar with the Maebashi-side official race course. But flip over to the mountain’s eastern face, on the Kiryu City Kurohone-cho side, and you’ll find a climb with harder numbers and far fewer people: 9.1 km in distance, 714 m of total elevation gain, 7.7% average grade, ending near Rihei Chaya Forest Park. This guide focuses on the data, segment breakdown, gearing, and execution details, so you can “solve” this climb the way an engineer would.
First, the Numbers: Just How Hard Is This Climb?
Let’s put the core specs on the table first, so you have a quantified sense of the difficulty.
| Item | Value | Notes |
|---|---|---|
| Measured Distance | 9.1 km | Kiryu Kurohone-cho side toward Rihei Chaya |
| Total Elevation Gain | 714 m | High elevation density relative to the short distance |
| Average Grade | 7.7% | Sustained moderate-to-steep category |
| Mountain Side | Akagi East Face | Not the Maebashi tourist main line |
| Route Character | Quiet, low traffic, steep | Leads toward the forest park trailhead |
A 7.7% average grade is a key signal. Compared to other popular climbs in the Kanto region — the Maebashi-side official course averages about 6.6%, and the Haruna Lake line about 6.0% — this eastern Rihei Chaya route at 7.7% is clearly more “hardcore.” More importantly, the word “average” often deceives: a 7.7% average means the road inevitably includes plenty of 9% and 10%+ sections to pull the number up, rather than a steady 7.7% the whole way. This is critical for pacing strategy.
Let’s do the math: 9.1 km with 714 m of climbing means an average of about 78 m of elevation gain per kilometer. That climbing density is already near the threshold many people consider a “hard climb.” By contrast, the distance is only 9.1 km — half the length of the 18.6 km official course on the Maebashi side — so the suffering here is “concentrated, short, and high-intensity,” not “long-drawn and endurance-based.” Think of it as a high-power interval session rather than a long tempo ride.
Segment Strategy: Breaking 9.1 km into Four Parts
Without real-time per-kilometer data, the most practical approach is to divide the total distance by “terrain feel” and manage it with power and cadence logic. Below, the 9.1 km is roughly split into four segments with actionable advice.
Segment 1 (approx. 0–2 km): Warm-up into the hills — don’t be fooled by fresh legs
Starting from the Kiryu Kurohone-cho side, the road cuts from the suburbs into the mountains, and the opening stretch usually carries some buffer from the approach road, so the grade feels relatively mild. The biggest trap here is “legs still fresh, can’t resist pushing hard.” With low traffic and a quiet view on the eastern route, it’s easy to get carried away and spike your power. Deliberately hold back: keep your heart rate at the upper aerobic edge and maintain a cadence of 70–80 rpm, letting your body ease into the climbing rhythm.
- Target: Keep power in the 80–88% range of your FTP.
- Cadence: 70–80 rpm, primarily seated.
- Reminder: The energy saved in the first 2 km is what saves you on the steep sections later.
Segment 2 (approx. 2–5 km): Grade ramps up — entering the main body
Past the warm-up stretch, the grade gradually rises above the average, and this is the “main body” of the route. A 7.7% average means you’ll likely be hovering between 8% and 9% here. Maintaining a steady output is the only rule for this segment.
- Power: Close to but not exceeding 88–92% of FTP.
- Cadence: Try to hold 65–75 rpm; if you drop below 55 rpm, it means your gearing is insufficient or you’re overloaded.
- Position: Primarily seated; stand briefly on short steep pitches, but remember to shift down when standing to avoid a cadence crash.
Segment 3 (approx. 5–8 km): Steep pitches mixed in — gearing proves its worth
This is the decisive segment that determines whether you “finish” or “surrender” today. On a route with a 7.7% average, short steep walls of 10% or more are usually hidden in the middle-to-late section. With energy already largely spent and lactate building in the muscles, this is where the chain reaction of “cadence collapse → torque spike → cramping” most easily occurs.
What scares you most on a steep climb isn’t the hill itself — it’s that one second of despair when you have “no gear left” on the slope.
The principle is simple: shift down early rather than grinding on the slope until your cadence hits zero. When you see the road steepen ahead, drop 1–2 gears in advance to leave margin, trading cadence for torque headroom.
Segment 4 (approx. 8–9.1 km): Closing in to the forest park
Approaching the Rihei Chaya Forest Park area, the route enters a mountain forest environment with the road shaded by trees. If you paced the earlier segments well, you should still have a little left to “close the line” here. But don’t misjudge — many routes save a “sucker punch” steep section for the final kilometer. Saving 5% of your energy and spending it on this last stretch is far smarter than going all-out the whole way and running out of steam before the finish.
Gearing and Equipment: The Hard Requirements of the Eastern Steep
On a route with a 7.7% average and 10%+ sections mixed in, your gearing setup directly determines success or failure. Use a simple “climbing gear ratio” approach: calculate your easiest gear (front ÷ rear), and the smaller the number, the lighter it is.
| Rider Level | Recommended Chainring | Recommended Cassette | Notes |
|---|---|---|---|
| Advanced/Racing | 34T (compact) | 11-30T or 11-32T | Has training base, can hold cadence |
| General Enthusiast | 34T | 11-34T | The safe bet for the eastern steep |
| Beginner/Conservative | 34T or smaller | 11-36T (requires long-cage derailleur) | Prioritize “being able to spin up seated” |
Core concept: for 10% steep sections, err on the light side, never the heavy side. A 34×34 gear ratio at 60 rpm provides a very forgiving climbing speed buffer, letting you make “maintaining cadence” your primary strategy rather than “mashing torque.” Knees are consumable parts — the joint life you save with proper gearing is worth far more than the few seconds gained by stubbornly grinding a heavy gear.
A few equipment notes:
- Slightly lower tire pressure: Mountain roads aren’t always smooth; dropping tire pressure a bit (adjusted for body weight and tire width) improves grip and comfort, reducing the energy lost to fine vibrations.
- Check cleat condition: If you need to dismount and remount on a steep section, failing to clip in is miserable — check your cleats before heading out.
- Weight weenie-ism isn’t necessary: A frame 200 g lighter won’t save you on this route; leg strength and pacing are the real protagonists.
Nutrition and Hydration: Don’t Underestimate a Short Distance
9.1 km sounds short, and a full effort typically lands between 30–50 minutes (depending on ability), so many people neglect fueling. But climbing is high-intensity, sustained output — the rate of calorie and fluid consumption is far higher than cruising on flat roads.
- Before the climb: Eat a proper meal 1–2 hours before departure, and top up with a gel or a banana 15 minutes before starting.
- On the road: Even though it’s short, carry at least one bottle (500–750 ml); bring two in summer. A 7.7% grade leaves no room for distraction, so position your bottle where you can reach it easily.
- Sparse supply points on the east side: This side is less populated, and shops aren’t as dense as on the tourist main line — don’t expect convenience store rescue along the way. Stock up on water and fuel at the bottom.
Seasonally, Gunma’s mountain areas are hot and humid in summer, so guard against dehydration and heatstroke; spring and autumn are the prime riding seasons, with large temperature swings between day and night — it’s cool at the summit and cold on the descent. Put on a windbreaker before descending to avoid losing body heat at high speed, which compromises your handling.
Common Mistakes and DNF Traps
Let’s lay out the pitfalls others have stepped into, so you don’t have to step into them yourself.
- Blowing up early: The east side is quiet and the road conditions are simple, making it all too easy to push your power too hard at the start, only to completely collapse on the steep 5–8 km section. Disciplined pacing is the number one rule for finishing.
- Gearing too heavy: Climbing with the mindset of “I still have energy to spare,” only to hit a 10% wall and find you have no easier gear left—cadence drops to zero, cramps set in, and you’re forced to put a foot down.
- Miscalculating nutrition: Mistaking 9.1 km for “a quick hop,” not carrying enough water, then suffering dehydration in the latter half, leading to cramps and impaired judgment.
- Underestimating the descent: Getting up doesn’t mean you can get down safely. The east side’s narrow roads, many corners, and sparse traffic actually lull you into complacency—hypothermia on the descent or cornering errors are the real risks.
- Misjudging the weather: Mountain weather is unpredictable. Wet roads after rain and poor visibility in fog are hazards. Check the forecast before you set out, and if conditions look wrong, decisively abandon and try another day.
Target Times for Riders of Different Levels
Here’s a reference framework for comparison. Actual results are heavily influenced by body weight, power-to-weight ratio (W/kg), daily condition, and weather—the following is only for self-positioning.
| Rider Level | Approximate Power-to-Weight Ratio | Reference Finish Time | Strategic Focus |
|---|---|---|---|
| Racer/Strong | 4.0 W/kg and above | Approx. 30–35 min | Stay close to FTP throughout, stand to power through steep sections |
| Advanced Enthusiast | 3.0–4.0 W/kg | Approx. 35–45 min | Steady tempo, hold your cadence |
| General Enthusiast | 2.5–3.0 W/kg | Approx. 45–55 min | Use lighter gearing, manage in segments, finishing is the priority |
| Beginner Challenge | Below 2.5 W/kg | Over 55 min | Don’t chase time; if you can spin your way up seated, that’s a win |
The true value of this route isn’t about posting the fastest time—it’s a clean, quiet climb where you can face yourself purely. No tourist traffic, no noise—just your breathing, your cadence, and that 7.7% grade. Read the data, manage your rhythm, and bring the right gearing, and the east side of Rippei Chaya on Mount Akagi will reward you with a solid climbing achievement in the quietest way possible.
A Quantitative Model for Power Pacing: Turning Feel into Numbers
If you have a power meter, this route is perfect for a “pacing experiment.” The energy dynamics of climbing aren’t complicated: on a fixed grade, the main force you’re fighting is gravity, and power demand is approximately proportional to “total weight × grade × speed.” This leads to a brutal but practical conclusion—on a steep climb, going slightly slower saves a lot of power; but you also spend longer on the climb. So the essence of pacing is finding the balance between “a power ceiling that doesn’t blow you up” and “minimizing the time spent suffering.”
I recommend setting a “target average power” for the entire route, typically at 85%–90% of your FTP (the stronger you are and the shorter the route, the closer to the upper end you can go). Then use “Normalized Power (NP)” and “Variability Index (VI)” to review the quality of your execution:
- The closer VI is to 1.0, the better. VI = NP ÷ Average Power, representing how steady your output is. If VI climbs above 1.10 on a climb, it usually means you’re surging and easing—exploding on steep sections and slacking on easier ones, which is very inefficient energy use.
- Because the east side of Rippei Chaya has steep walls interspersed, VI will naturally run a bit higher than on a purely steady long climb, but your goal is still to keep it as low as possible—when you hit a steep section, shift down to maintain cadence rather than muscling through with explosive power.
A simple self-check: after the ride, look at your head unit. If your power curve shows “high early, collapsing late,” that’s a classic pacing failure; the ideal curve should be “steady throughout, with even a slight uptick at the end.” This 9.1 km climb is perfect for repeated practice until you can draw a beautiful, steady curve.
Heart Rate and Breathing: Alternative Metrics Without a Power Meter
Not everyone has a power meter, and in that case, heart rate and breathing are your best dashboard.
- Heart rate zones: Throughout the climb, try to stay just below your “threshold heart rate” (approximately 85%–90% of max HR). Once your heart rate is pinned near the ceiling and still drifting upward, it means you’re already in overdraft—you must back off immediately, or the latter half will collapse.
- Breathing rhythm (Talk Test): This is the most primitive and most reliable perceived-effort metric. The ideal climbing intensity is “able to speak short sentences in fragments, but not hold a casual conversation.” If you can’t even get out single words, you’re in the red zone and won’t last long; if you can chat leisurely, the intensity is too low—add a bit more.
- Rating of Perceived Exertion (RPE): Rate yourself on a 1–10 scale. Keep the first 2 km at 6–7, the middle section at 7–8, and briefly allow 9 on the steep walls—but never stay at 9 for the entire ride—that’s a precursor to a DNF.
Not having a power meter isn’t a disadvantage; it forces you to pay closer attention to your body’s real signals. The east side’s quiet, simple climb is the perfect venue for practicing “pacing by breath.”
Descending Technique: The Hidden Test of a Quiet Mountain Road
Most guides only talk about the climb, but on the east side of Rippei Chaya, the descent is the truly underestimated risk. The reason is simple: this side has little traffic, narrow roads, and many corners—so quiet that it lulls you into complacency, and the cost of a mistake on a mountain descent is extremely high.
Key points for executing the descent:
- Brake in pulses, don’t hold: Holding the brakes continuously can overheat the rims or rotors, especially on a long descent. Use a “pulse” approach instead—brake before the corner, release through the turn, and accelerate out. It’s both safer and kinder to your equipment.
- Look far ahead, use outside-inside-outside cornering: Enter wide, clip the apex, and exit wide again, using the maximum radius to reduce the lean angle and braking required.
- Keep your center of gravity low and relax your upper body: Slightly bent elbows, relaxed body—let the bike absorb the bumps naturally; a stiff body actually makes handling worse.
- Watch for oncoming traffic, leaves, and slippery surfaces: A quiet mountain road doesn’t mean no cars—on blind corners, stay on your side. Autumn leaves and moss after rain are invisible killers.
Climbing takes leg power; descending takes brain power. Treat the descent as a technical skill as important as the climb, and your trip to the east side will be truly safe and complete.
Training Advice: How to Prepare for This Climb
If the east side of Rippei Chaya is your goal, here’s how you can structure the 6–8 weeks before:
| Training Type | Purpose | Recommended Frequency |
|---|---|---|
| Threshold Intervals (2×20 min @ FTP) | Improve sustainable output | 1–2 times per week |
| Climbing Specifics (find an 8–10% grade and repeat) | Adapt to high torque and low cadence on steep sections | Once per week |
| Long Endurance Rides | Build the aerobic base | Once per week |
| Low-Cadence Strength Work (big gear, slow pedaling) | Strengthen climbing muscles | Once every other week |
For this specific route, “climbing specifics” are especially critical. Because the 7.7% average grade and 10% steep walls test how long you can sustain “low cadence, high torque.” No matter how strong you are on the flats, if you haven’t trained on steep grades, you’ll still cramp on the way up. Find a climb with a similar grade and do repeated climbing intervals, letting your body memorize that feeling of “continuous pressure”—that’s the most direct preparation.
Debunking Three Common Myths
Before you set off, clearing up a few common misconceptions about this type of short, steep climb will save you from wasted effort.
Myth One: It’s short, so you can go all-out.
Wrong. Going all-out for 9.1 km usually means blowing up by kilometer 5, then barely grinding through the rest at walking pace. The “short” in short climb is relative—at a 7.7% average gradient, even going full gas takes over 30 minutes. That’s a long enough, painful enough stretch of high-intensity output. Pacing discipline matters just as much on short, steep climbs—and is even easier to overlook.
Myth Two: Standing and stomping is faster on steep sections.
Not necessarily. Standing delivers high instantaneous power, but it also burns more oxygen and energy; staying on your feet for long stretches will empty the tank fast. The right approach is “sit as the default, stand only for short, steep surges”—stay seated and hold a steady output most of the time, and only stand when the gradient briefly kicks up, or when you need to engage different muscle groups for relief. And when you do stand, remember to shift down simultaneously to avoid your cadence plummeting.
Myth Three: As long as your legs are strong enough, gearing doesn’t matter.
Completely wrong. If your gearing isn’t light enough, you’ll hit a 10% wall with “no gear left to drop,” forcing you to grind at ultra-low cadence and ultra-high torque—a direct recipe for cramps and knee strain. Your gearing is your insurance—go lighter rather than heavier. A 34×34 is the safe bet for this route; don’t haul a too-heavy gear up the mountain just to save face.
Road Surface and Condition Details
The east-side Rippei Tea House route is a mountain prefectural road, with conditions slightly different from the main tourist route. Worth noting before you depart:
- Surface evenness: Mountain roads aren’t necessarily smooth the whole way—there may be localized cracks, patched repairs, or scattered gravel. Slightly lowering tire pressure improves comfort and grip, and reduces the energy sapped by constant small vibrations.
- Shade and slippery conditions: The east side is densely forested, so the road is often shaded. In autumn and winter, fallen leaves and post-rain moss can make the surface slick—be extra careful on corners and descents.
- Visibility and blind bends: Quiet doesn’t mean car-free. There are many blind corners in the mountains—always stay on your own side and leave room to react.
- Phone signal: Signal can be weak on some mountain sections, which is another reason to carry your own supplies and let someone know your route.
East Side vs. Maebashi Side: A Data-Driven Comparison of Character
Same Mount Akagi, but the east-side Rippei Tea House and the Maebashi official course are two completely different training stimuli. Putting the numbers side by side makes it clearer what mindset to bring to the east side.
| Item | East Side (Rippei Tea House) | Maebashi Official Course |
|---|---|---|
| Distance | 9.1 km | 18.6 km |
| Elevation gain | 714 m | 1,238 m |
| Average gradient | 7.7% | 6.6% |
| Climbing density | ~78 m/km | ~67 m/km |
| Character | Short, steep, high-intensity | Long, steady, endurance-oriented |
| Crowds | Sparse, quiet | Developed tourism, popular race venue |
| Training focus | Threshold/anaerobic stimulus | Endurance/sustained pacing |
The conclusion is clear: if you want to train “short-duration, high-intensity climbing tolerance,” the east-side Rippei Tea House is the better classroom; if you want to train “long-duration, even pacing,” head to the Maebashi side. The two routes complement each other, and smart riders ride both. And because the east side is shorter, steeper, and less crowded, it’s especially well-suited for “climbing intervals”—ride up once as one hard effort, recover on the descent, then go up again. Extremely efficient.
The 30-Minute Pre-Start Execution SOP
The worst thing on a steep climb is “hitting it with cold legs.” For the 30 minutes after you reach the base and before you start the climb, follow this SOP:
- -30 min: Check your gear (tire pressure, shifting, cleats, bottles and nutrition in place), and stow a windbreaker in your back pocket as backup.
- -25 min: Spin easy to warm up—very light gear, high cadence (90+ rpm) to get blood flowing. Don’t rush to add power.
- -15 min: Do a few short accelerations (20–30 seconds each, gradually building intensity) to wake up muscles and cardio, but don’t burn your matches.
- -10 min: Take in an easily digestible energy source (a gel or half a banana) and sip water.
- -5 min: Settle your mind and rehearse your segment strategy—“hold back early, stay steady mid-climb, shift on the steep pitches, close it out at the end.”
- 0 min: Start climbing. Deliberately hold intensity down for the first 500 meters so your body eases smoothly into the climbing rhythm—don’t charge out of the gate.
Whether you warm up properly or not directly determines whether your heart rate spikes in the first 2 km from cold legs. These 30 minutes may seem trivial, but they’re the critical preparation that makes the next 9.1 km ride smoothly.
Quick Q&A
Q: Is the east-side Rippei Tea House easier than the Maebashi official course?
A: It’s half the distance, but the average gradient is steeper (7.7% vs. 6.6%), and it’s punctuated by 10% walls. It “hurts shorter and harder”; Maebashi “hurts longer and more evenly.” They’re different types of difficulty—neither is simply easier.
Q: Is this route suitable for a beginner’s first long climb?
A: For a complete beginner, a 7.7% average is on the tough side. I’d suggest building experience on gentler slopes first, putting your gearing on the lightest setting, then attempting it with a “finish first, just keep spinning while seated” mindset. Don’t chase time.
Q: Is there resupply along the east side?
A: This side is sparsely populated—don’t expect convenience stores to bail you out along the way. Bring all your water and nutrition from the bottom. That’s the safety baseline.
Q: Is it safe to ride alone?
A: The east side has little traffic and is quiet—that’s both an advantage and a risk. If you have a mechanical failure or feel unwell, help is slower to arrive. Bring repair tools and your phone, tell friends or family your route, and strictly follow descent safety principles.
Q: To get faster, should I lighten the bike or lighten myself?
A: For climbing, losing body weight has far more impact than losing bike weight. Climbing power demand is roughly proportional to total weight, and your body typically weighs several times more than your bike. For the same weight saved, losing body weight (without sacrificing power) improves your power-to-weight ratio most directly. Rather than spending big money on lightweight parts, focus on training and nutrition to push your W/kg up—that’s the real path to climbing progress.
Q: How long until I noticeably feel stronger?
A: With consistent threshold intervals and climbing-specific work, most people feel improved sustainable output and less early blow-up on steep grades within 6–8 weeks. There’s no shortcut to climbing progress—it’s “consistent accumulation.” In that way, it’s just like the weavers of Kiryu—thread by thread, loom by loom.
Conclusion: Conquer the East Side with Rationality
These 9.1 km up the east-side Rippei Tea House on Mount Akagi are a clean engineering problem: given a distance of 9.1 km, elevation gain of 714 m, and average gradient of 7.7%, find the solution that finishes most efficiently without blowing up. The answer isn’t brute force—it’s pacing discipline, gearing margin, anticipating your nutrition, and respecting the weather.
Break it into four segments: hold back early, stay steady mid-climb, shift on the steep pitches instead of muscling through, and close it out with something left in reserve. Go lighter on gearing rather than heavier, and over-pack supplies rather than under-pack. When you stop your bike at the trailhead of the quiet forest park and look back down the silent steep road you just climbed, you’ll understand—the best climbing experiences are sometimes on the road with no audience.
One final takeaway: the difficulty of this route isn’t about how long it is—it’s about how “concentrated” the steepness is. 9.1 km, 714 meters of climbing, 7.7% average gradient, plus the 10% walls in between—it compresses the suffering into a relatively short distance, forcing you to sustain high-intensity output for a condensed period. This kind of “short and dense” challenge is extremely valuable for training threshold capacity, but it’s also exactly what makes overconfident riders crack mid-climb.
So treat it as a formal power project: warm up thoroughly, bring the right gearing, hold back early, hold the line mid-climb, shift on the steep pitches, stay on top of hydration, and descend with care. Break it down and execute it with an engineer’s rationality, and this quiet steep road up the east side of Mount Akagi will transform from “a daunting problem” into “a solvable, solid achievement.” Rationality is the sharpest weapon for conquering steep climbs.
Related Reading
- The Untrodden Side of Mount Akagi: Riding from Kiryu Textile City to Rihei Tea House, a Soliloquy from the East Hidden in the Forest
- Tour de Kusatsu-Shirane Practical Guide: 12.1 km / 957 m Elevation Gain / 6.2% Average Gradient — Late-Snow-Season Climb Data Breakdown
- Nasu-Tōge no Chaya Guide: Full Breakdown of Pacing and Gear Ratios on the 20.5 km Volcanic Road
- Ōdaigahara (Route 309) Guide: Pacing, Life-Saving Gear Ratios, and Deep-Mountain Resupply on the 9.9 km Narrow Forest Road That Starts Gentle and Turns Steep
台北闊瀨陡坡 騎旅 / 日本單車雜誌編輯車友臨時加入!/ 髮香才是最強的 / feat. 北迴歸線小隊 / 公路車 CT Yeh
6 個月前
小野田真的存在!日本赤城山爬坡公路賽 台灣首發團完全實錄 | 頭文字D真實賽道! | 看完東奧自行車賽後好想再去騎一次啊! | 公路車 | CT Yeh
4 年前
新竹羅平 x 天湖部落 大禹嶺級變態陡坡! 4K超高畫質 空拍 | 公路車
5 年前
爬坡ITT實境)台中 魔王 松鼠坡 首航 6:12 大肚山 大三元 科福路
8 年前
大武山後門26%歡樂陡坡!JJSC南台灣單車行Day2 / 被颱風追著跑 / 公路車 / CT Yeh
2 年前
大武山20%魔王陡坡【JJSC南台灣遊騎Day2】!屁股真的要裂開了...凡士林抹滿也沒用?神秘金教堂還有超便宜夜市
3 個月前
水金九不厭五分 10度寒流冷到不願停!feat. 卡卡 / 公路車 / CT Yeh
6 個月前
萬年峽谷! 30% 超激陡坡 里佳部落DAY2 還是很硬! | 公路車 | CT Yeh
3 年前