Yabitsu Pass (矢櫃峠) Practical Guide: Segment-by-Segment Pacing and Gear Ratio Breakdown for 11.5 km with 642 m of Climbing
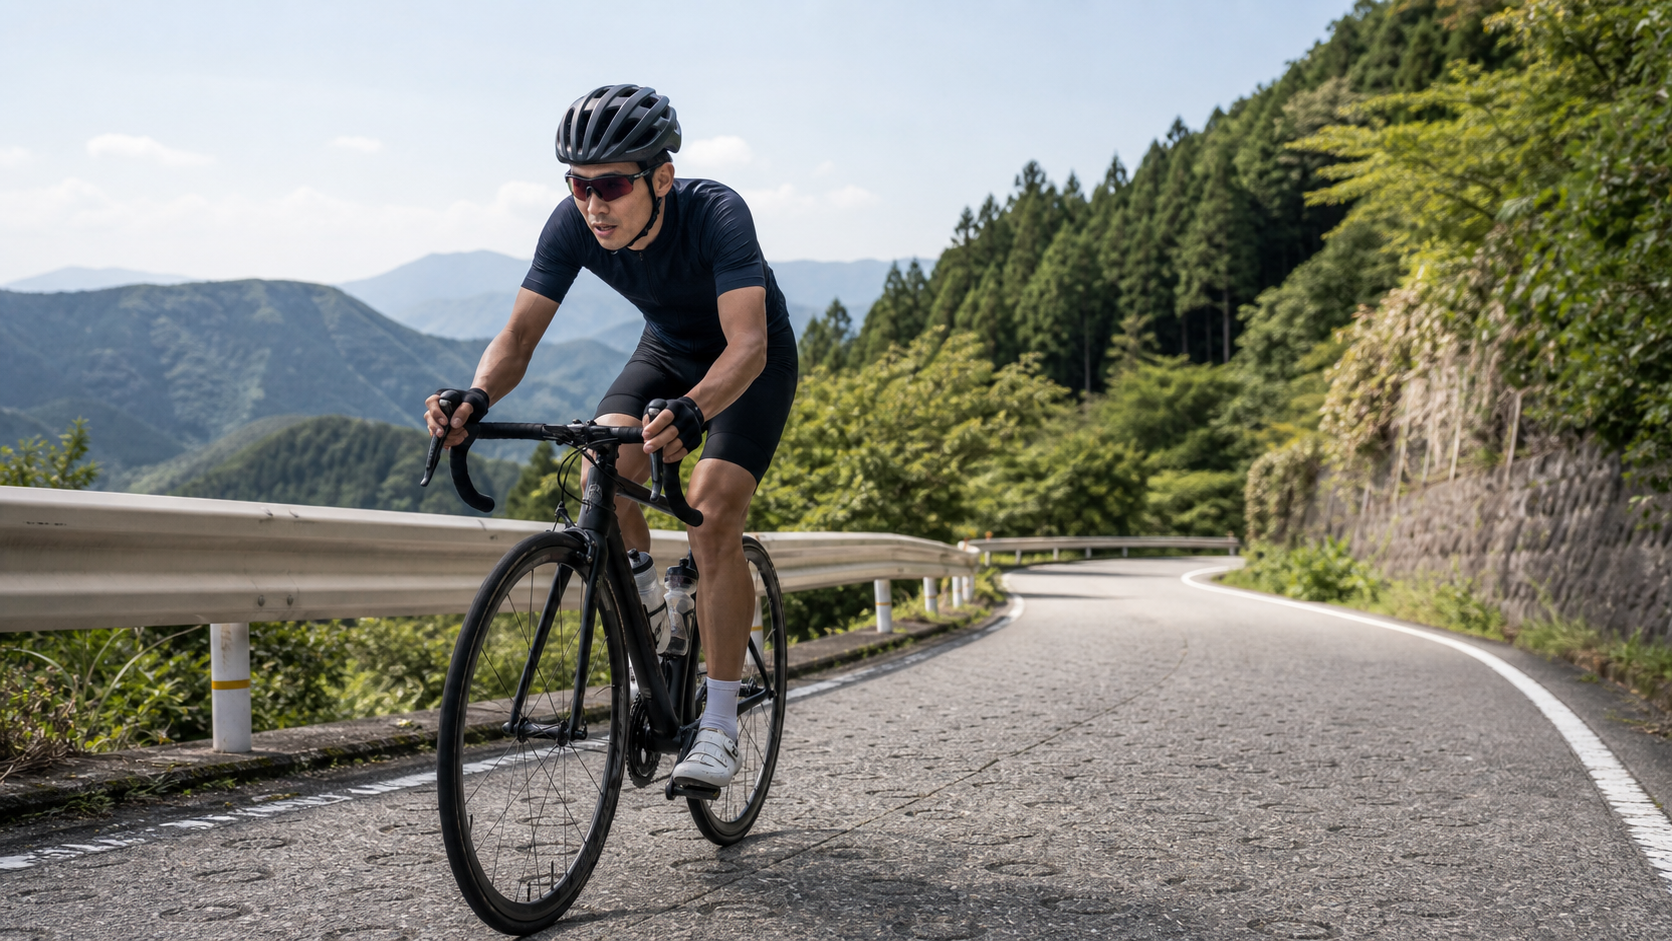
Yabitsu Pass (Yabitsu) Practical Guide: Data Breakdown and Segment Pacing for 11.5 km with 642 m of Climbing
Route Snapshot: Distance 11.5 km, Total Climbing 642 m, Average Gradient 5.5%, located in Hadano City, Kanagawa Prefecture (Japanese name: ヤビツ峠). This article takes an engineer’s perspective, breaking this climb down into an executable pacing and gear ratio plan.
Before you start pedaling, get the numbers straight first. Yabitsu Pass (Yabitsu) is 11.5 km long, with 642 m of cumulative climbing and an average gradient of 5.5%. Looking only at the average can easily lead you to underestimate it—the real difficulty is never in the average, but in the distribution and variation of the gradient. A road with a 5.5% average could be “uniform throughout,” or it could be “gentle at the start, steep in the middle, and settling back down at the end.” The pacing strategies for these two scenarios are worlds apart. The purpose of this article is to lay out the rhythm of this road clearly, so you have confidence in your approach when you hit the road.
1. Route Overview and Real Data Analysis
Yabitsu Pass (Yabitsu) (ヤビツ峠) is located in Hadano City, Kanagawa Prefecture, and is one of the most iconic climbing routes in the area. Below are the core data points, which also serve as the foundation for all pacing calculations:
| Item | Data |
|---|---|
| Total Distance | 11.5 km |
| Total Climbing | 642 m |
| Average Gradient | 5.5% |
| Average Climbing per Kilometer | Approx. 55 m |
| Location | Hadano City, Kanagawa Prefecture |
The figure “average climbing of about 55 meters per kilometer” is very practical: it allows you to use the distance on your bike computer during the ride to back-calculate how much elevation you “should” have gained, helping you judge whether you’re ahead of or behind your planned pace.
One concept worth establishing first: an average of 5.5% is a “sustained” gradient for most amateur riders. There won’t be a wall that makes you get off your bike instantly, but it will slowly wear down your willpower and your legs over time. The biggest mistake on this type of climb is pushing too hard in the early section—the real battle is decided in the second half.
2. The Physics of Climbing and Gear Setup
The Physics of Climbing: Why “Weight” Is Your Biggest Enemy
On flat roads, aerodynamic drag is your biggest opponent; but once the gradient exceeds 3–4%, the battlefield changes completely—gravity replaces air as the primary force you must fight against. This is why professional climbers tend to be lean: in the war against gravity, every kilogram is a burden.
The most core metric for measuring climbing ability is watts per kilogram of body weight (W/kg). Producing the same 250 watts, a 60 kg rider is at 4.17 W/kg, while an 80 kg rider is only at 3.13 W/kg—the gap is mercilessly amplified on long climbs. This also reminds every rider who wants to get stronger: rather than spending big money on lightweight components, first examine your body weight and power-to-weight ratio. That’s the most cost-effective investment for climbing.
Based on this segment’s 5.5% average gradient and 642 m of total climbing, a rider weighing 70 kg, with bike and gear bringing the total to about 80 kg, would need to overcome approximately 503 kilojoules of gravitational potential energy just to “lift themselves 642 meters”—and this doesn’t even account for rolling resistance and aerodynamic drag. Understanding this number, you’ll realize: there are no shortcuts in climbing. Conservation of energy is an iron law; you can only honestly pedal out every joule.
The good news is that this also means climbing is the fairest and most visible form of progress in training. On flat roads, wind direction, the peloton, and positioning can interfere with your results, but climbing depends almost entirely on your engine. This 11.5 km climb will faithfully record your efforts from this season.
Gear Ratio and Equipment Recommendations
Given this segment’s 5.5% average gradient, 642 m of total climbing, and 11.5 km distance, gear ratio selection is key to finishing comfortably.
| Rider Level | Recommended Compact Crank | Recommended Cassette | Notes |
|---|---|---|---|
| Advanced / Racing | 52-36T | 11-30T or 11-32T | Capable of maintaining high cadence, chasing results |
| General Recreational | 50-34T | 11-32T or 11-34T | Keep some margin, avoid knee strain in the later stages |
| Beginner / Endurance | 50-34T | 11-34T or even gravel gearing | Prioritize “being able to turn the pedals,” lighter is better than heavier |
- Cadence First: Facing a sustained climb, maintaining a cadence of 70–85 rpm is far more important than muscling a big gear. Grinding at a low cadence will quickly accumulate lactate and damage your knees.
- Tires: 25c to 28c balances rolling resistance and comfort; if the descent has broken pavement, slightly wider tires with a touch lower pressure can boost confidence.
- Brakes: On long descents, be sure to brake intermittently to avoid overheating rim brakes (which can cause blowouts) or disc brakes (which can fade). Use “alternating front and rear, short and firm braking” rather than prolonged dragging.
- Carry Supplies: Two bottles are the baseline. When mountain supply points are scarce, bring enough energy gels and salt tablets.
- Layered Clothing: Use the “onion” method in the mountains. While climbing, your body heats up, so a short-sleeve jersey may suffice; at the summit and on long descents, you’ll need a packable wind vest or windbreaker. Remember, a soaked jersey is the biggest cause of hypothermia on descents.
- Support Equipment: For long climbs, a bike computer displaying real-time gradient and heart rate is recommended to give your pacing a data basis; if riding at night or early morning, be sure to have front and rear lights.
The Myth and Truth of Cadence
Many beginners mistakenly believe that “pedaling harder means going faster,” so they choose too heavy a gear and grind at a low cadence. This is the most knee-damaging and least efficient way to ride.
- Grinding at Low Cadence (50–60 rpm): Each pedal stroke carries enormous torque, and the stress on your knee joints spikes accordingly. Over time, this is a breeding ground for chronic overuse injuries; your muscles also work “anaerobically,” causing lactate to accumulate rapidly.
- Spinning at High Cadence (80–95 rpm): This shifts the burden from “muscular strength” to the “cardiopulmonary system.” Although you’ll breathe harder, your muscles last longer and your knees are safer. This is why professional riders tend to maintain a high cadence when climbing.
Practical advice: Facing this 5.5% climb, set your target cadence at 70–85 rpm. If you drop below 60 rpm and are still struggling, it’s not that you’re not strong enough—it’s that your gear isn’t light enough. Changing your gear isn’t shameful.
3. Segment-by-Segment Guide from Start to Finish
Yabitsu Pass (ヤビツ峠) is a nationally recognized “climbing mecca” in the Kanto region, located on Prefectural Route 70 at an elevation of 761 m. This article breaks down the most classic “Omote-Yabitsu” route: starting from the Nagunuki intersection on National Route 246, approximately 11.5 km with about 643 m of climbing at an average of 5.5%.
(Fun fact: the starting point “名古木” is read as nagunuki, not nakogi—don’t mispronounce it when talking to the locals.)
Segment 1: City to the Mountain Base (Gentle Warm-up)
Starting from Nagunuki, the early gradient is relatively gentle, passing through residential areas and fields. This section is an excellent warm-up zone—gradually bring your heart rate up, and don’t rush to chase time. The standard way to ride Omote-Yabitsu is as a “time trial,” and many people blow up their heart rate right from the start. That’s a cardinal sin.
Segment 2: Minoge Steep Section (Hardest Part of the Route, 9–11% Gradient)
The area near the Minoge bus stop is the steepest section of the entire route, with an average gradient of about 9% and a maximum of about 11%. This is where your time trial result is decided—too many people fall apart here. The strategy is: deliberately hold back before entering Minoge, shift to a lighter gear in advance, and “roll” through it with a high cadence rather than muscling a big gear.
Segment 3: Hananodai to the Summit (Gradient Settles)
After the steepest section, around the two-thirds mark, you’ll encounter the Hananodai observation deck, which offers views toward Hadano and Oiso—also an excellent spot for supplies and a breather. After that, the gradient settles down. Bring your rhythm back and finish off the final few kilometers with a steady cadence.
Advanced: Ura-Yabitsu
If you want to extend the ride, the “Ura-Yabitsu” on the other side of the summit leads toward Miyagase Lake. At about 18 km, it’s longer and more secluded than the 11 km Omote-Yabitsu, making it a great extension route for advanced riders.
4. Climbing Technique: Posture, Breathing, and Sitting vs. Standing
Climbing isn’t just about “pedaling hard”—it’s a skill that combines posture, breathing, and rhythm. With the same fitness level, someone with good technique can save a considerable amount of energy.
Upper Body: Relax, Don’t Waste Energy
When climbing, many people unconsciously tense up their entire body, shrug their shoulders, and grip the handlebars deathly tight. All this excess tension is quietly draining your energy. The correct approach: relax and lower your shoulders, keep your elbows slightly bent, and rest your hands lightly on the handlebars (usually on the tops or the top of the brake hoods). Keep your upper body as quiet as possible and channel your energy into your legs.
Sitting vs. Standing
- Seated Pedaling: This is the primary climbing posture—the most efficient and energy-saving. For a sustained climb like 5.5%, over 90% of your time should be spent seated, delivering steady power.
- Standing (Out of the Saddle): Suitable for brief surges on steeper sections, or to give a different muscle group a rest after sitting for a long time. However, standing consumes more oxygen and spikes your heart rate quickly—it’s a “short-term weapon,” not a “long-term strategy.” Remember not to stand and grind the entire way up a long climb; that’s the most common cause of blowing up for beginners.
- When to Switch: When the gradient suddenly steepens, or when you need to get through a tough spot, you can briefly stand and power for a few dozen seconds, then immediately sit back down to bring your heart rate down.
Breathing: Deep and Rhythmic
Breathing while climbing should be “deep, slow, and rhythmic.” Use diaphragmatic breathing to truly draw oxygen into the bottom of your lungs, rather than rapid, shallow breaths. You can try syncing your breathing to your pedal stroke (e.g., inhale for two beats, exhale for two beats). This helps stabilize your rhythm and distracts your mind from the discomfort.
Pacing Psychology: Break the Big Climb into Small Sections
Facing a long climb, if you keep thinking “there’s still so far to go,” it’s easy to be defeated before you even start. The trick of experienced riders is segmented thinking: break the entire climb into several small targets (the next corner, the next utility pole, the next road sign), and focus only on conquering the small section right in front of you. When you shift your attention from “how far is the finish” to “the next 100 meters,” the pain becomes manageable, and time passes faster.
Descending Technique and Safety
Climbing 642 m means descending the same 642 m (if you return the same way). Descending may look easy, but it’s actually a high-risk zone for accidents—take it seriously.
- Shift Your Center of Gravity Back and Lower: On descents, shift your center of gravity slightly back and lower. Keep both hands firmly on the brake levers, ready to brake at any moment. When cornering, push the outside pedal down and lean your body toward the inside of the turn to maximize tire grip.
- Brake with “Squeezes,” Not “Dragging”: On long descents, the worst thing you can do is drag your brakes the whole way down. This overheats rim brake rims or disc rotors—overheated rims can cause inner tube blowouts, and overheated discs can cause brake fade. The correct approach is “alternating front and rear, short and firm braking”—slow down on the straights, release before the corners, giving the braking system a chance to cool.
- Look Ahead: Keep your eyes on the corner exit, not the pavement right in front of you. Your eyes guide your body; look far ahead to corner smoothly.
- Leave a Safety Margin: On mountain descents, you may encounter oncoming traffic, falling rocks, gravel, or wet sections. Always keep your speed within a range where you can “stop safely at any moment.” Results are for the living; safety always comes first.
5. Nutrition, Hydration, and Energy Management
Nutrition and Hydration Strategy
For a route with 642 m of climbing, the fueling rhythm should be “early, small amounts, frequent.” Don’t wait until you’re hungry or thirsty to refuel.
- Carbohydrates: 40–60 grams of carbs per hour (about 1–1.5 energy gels or equivalent). This is especially important for rides longer than 90 minutes.
- Fluids: 500–750 ml per hour, adjusted upward in summer heat or high humidity. Take “small sips” rather than big gulps.
- Electrolytes: When you sweat heavily, plain water dilutes blood sodium. Be sure to pair it with salt tablets or an electrolyte sports drink to prevent cramps and hyponatremia.
- Before Starting: 30 minutes before you start, take in some carbs and fluids to put your body in a steady energy-supply state, avoiding an “empty tank” as soon as you hit the climb.
- Caffeine: Moderate caffeine (30–45 minutes before starting) can improve focus and delay fatigue, but if you have a sensitive stomach, test your tolerance during training first—don’t try it for the first time on the actual challenge day.
The Physiology of “Bonking” and How to Prevent It
The thing climbers fear most on a long climb is the dreaded “bonk”—sudden full-body weakness, dizziness, legs feeling like lead, completely unable to turn the pedals. This isn’t a willpower issue; it’s a physiological phenomenon of glycogen depletion and a sudden drop in blood sugar.
The body’s stored glycogen is limited; at high intensity, it runs out in about 90 minutes. Once glycogen is used up and you haven’t replenished with exogenous carbs, your body is forced to burn fat, which is far less efficient at supplying energy—and you “bonk.”
The only way to prevent it is one word: early.
- Don’t wait until you’re hungry to eat. Start regular fueling 30–40 minutes after you begin climbing, keeping blood sugar steady rather than letting it spike and then crash.
- Fuel “little and often.” Stuffing too much at once burdens your digestive system and diverts blood to the GI tract, making your climbing performance worse.
- If you already feel the warning signs of dizziness or shaky hands, immediately take in fast-absorbing sugar (fruit gel, cola, candy), and lower your intensity. Don’t push through.
6. Weather and Seasons
Yabitsu Pass is close to the Tokyo metropolitan area and isn’t at high altitude (761 m), making it accessible year-round—one of the reasons it’s considered a “mecca.”
- Spring/Autumn: Pleasant temperatures, ideal for time trial attempts and setting personal records.
- Summer: The mountains are cooler than the city, but you still need to guard against heatstroke and stay hydrated. The Minoge steep section is especially punishing in extreme heat.
- Winter: At low altitude, it’s rideable most of the time, but during cold snaps or after rain, the road can be slippery with fallen leaves. Be conservative on corners and descents.
Because it’s close to the city, weekends bring many cyclists and hikers. Starting early helps you avoid the crowds and the heat.
7. Pre-Race Training and Pre-Departure Checks
Training and Preparation
To ride this 642 m climb with a 5.5% average well, on-the-day technique matters, but the real foundation comes from consistent training.
- Aerobic Base (Zone 2): Endurance on long climbs comes from your aerobic engine. Spend plenty of time doing long, low-intensity (heart rate Zone 2) rides to build a bigger “fuel tank.” This is the most solid fundamental work.
- Threshold Intervals (FTP Intervals): To improve climbing power, schedule 1–2 threshold interval sessions per week, such as 4×8 minutes or 8×4 minutes of Zone 4 work, which effectively raises your power-to-weight ratio.
- Simulated Climbing: If you live on flat terrain, use a smart trainer’s gradient simulation, or find any local hill and ride it repeatedly to get your body used to “sustained effort.”
- Core Training: A strong core allows you to transfer power effectively to the pedals when climbing out of the saddle, rather than letting it dissipate. Bodyweight exercises like planks and bridges are very effective.
- Tapering: In the 3–5 days before the challenge, reduce training volume while maintaining intensity, allowing your body to fully recover and top off glycogen stores so you arrive at the start in peak condition.
Pre-Departure Checklist
- [ ] Tire pressure, brakes, shifting, and chain lubrication checked
- [ ] Spare tube kit (inner tube, tire levers, pump/CO2, quick link) complete
- [ ] Two bottles of water + sufficient energy gels/supplies + salt tablets
- [ ] Windbreaker/vest (for warmth on descents)
- [ ] Phone, ID, small amount of cash, emergency contact information
- [ ] Bike computer fully charged, lights ready (for early morning/dusk)
- [ ] Checked weather, daylight hours, and (if applicable) road opening status
8. Risk Management and Target Times for Different Levels
Common Mistakes and DNF Risks
- Starting Too Hard: The excitement at the base of the mountain leads to a sprint, your heart rate maxes out immediately, and you blow up in the middle section. This is the most classic failure mode. Hold back in the early section.
- Gear Too Heavy: You think you can turn it, but the sustained climb slowly destroys your knees. When in doubt, go lighter.
- Fueling Too Late: You wait until you’re dizzy and your legs are weak to eat, but by then your blood sugar has already dropped and won’t come back.
- Hypothermia/Overheating on the Descent: Mountain temperature differences between day and night and with altitude are large. A soaked jersey at the summit can cause rapid hypothermia on a long descent; conversely, dragging rim brakes in summer can cause blowouts. Carrying a lightweight windbreaker is life-saving gear.
- Underestimating Road Conditions and Traffic: This tourist route has many large buses and tour coaches. Don’t cut across lanes on corners or fight for position. Safety always trumps results.
- No Preparation for Mechanical Issues: On a long mountain road, if you get a flat or drop your chain, you’re in the middle of nowhere. Check tire pressure, brakes, and shifting before departure, and carry an inner tube, tire levers, pump or CO2, and a chain quick link. This is basic self-sufficiency for mountain riding.
- Ignoring the Return Leg: Many people calculate their energy to just barely reach the summit, forgetting they have to ride back. If you’re returning the same way or have more distance ahead, be sure to save energy and supplies. Don’t empty yourself at the summit.
Three Classic DNF Scenarios
From the experience of countless riders, “DNFs” on this climb typically follow one of three scripts:
- The Early Blow-Up: Excitement at the base leads to a sprint, heart rate maxes out, and by the middle you have nothing left, forced to stop by the roadside gasping. Solution—deliberately hold back at the start and lock that excitement away.
- The Fueling Collapse: You’re reluctant to stop and eat, or you forgot to bring enough supplies. Halfway up, your blood sugar crashes and your legs turn to jelly. Solution—early, small amounts, frequent. Treat fueling as part of your pacing.
- The Equipment Mistake: Your gear is too heavy, and your knees protest under the sustained gradient until the pain makes it impossible to continue. Solution—lighter is better than heavier. Leave the “ego gear” at home.
Understand these three scripts, and you’ve avoided 90% of failures.
Target Times for Riders of Different Levels
The following are reference completion times for 11.5 km / 5.5% average (for pacing planning only; actual times are heavily influenced by body weight, wind, and temperature):
| Rider Level | Average Speed Reference | Completion Time (Estimate) | Pacing Key Points |
|---|---|---|---|
| Racing Level | 15–18 km/h uphill | Aggressive pacing, heart rate near threshold | Control the start, go all out at the end |
| Advanced Level | 11–14 km/h uphill | Steady rhythm, avoid blowing up | Primarily power or heart rate Zone 3 |
| General Level | 8–10 km/h uphill | Aim for a steady finish, manage fueling well | Heart rate Zone 2–3, better slow than blown |
| Beginner Level | 6–8 km/h uphill | Allowed to stop and rest, complete in segments | First goal: “don’t put a foot down” |
The purpose of this table isn’t to make you chase someone else’s numbers, but to help you understand where you currently stand and set a goal that’s “just out of reach but attainable with a jump.” The growth curve for climbing is very clear: as long as your method is right and you train enough, your completion time on this climb will improve season after season. That visible sense of accomplishment is the most captivating part of climbing.
9. FAQ
Q: I’m a climbing beginner. Is this route suitable for me?
A: Yabitsu Pass (Yabitsu) has an average gradient of 5.5% and 642 m of climbing. As long as you have basic riding experience, a light enough gear ratio (recommended 34T front chainring with a 32T or larger cassette), and the mindset of “not chasing speed, aiming to finish,” most motivated beginners can complete it. The key is to pace slowly, allow yourself to stop and rest at the viewpoints, and don’t compare yourself to others.
Q: How light a gear ratio do I need?
A: Facing a sustained climb, “lighter is better than heavier” is always correct. If you’re unsure of your ability, go straight to a 34T front chainring with an 11-34T cassette, or even consider gravel gearing. The extra light gears are just insurance—if you don’t use them, no harm done; but if your gear isn’t light enough, the damage to your knees is real.
Q: How much food and drink should I bring?
A: Estimate based on your completion time. If you expect to ride over 90 minutes, bring at least two bottles (one with electrolytes), 2–3 energy gels or equivalent, and salt tablets. Supply points are scarce in the mountains—better to overpack.
Q: Is it safe to ride alone?
A: When riding solo in the mountains, be sure to tell friends or family your route and estimated time. Carry your phone (confirm which sections have signal), ID, a small amount of cash, and a complete repair kit. If you’re unfamiliar with the road, riding with a companion is safer.
Q: How do I know if I’m improving?
A: Compare completion time or average power on the same stretch of road under similar weather and equipment conditions. Climbing is the most honest mirror—as long as your method is right and you train enough, the numbers will look better season after season. Use a bike computer or power meter to record your data so your progress is visible.
Q: What if I can’t ride anymore and want to give up?
A: Don’t rush to DNF. Stop, take a bite of sugar, drink some water, and take a few deep breaths for a few minutes. Many cases of “I can’t ride anymore” are actually low blood sugar or pacing gone wrong—after resting, you can often continue. And if you truly can’t go on, that’s okay too—the mountain will always be there. Getting down safely and coming back another day is what a smart rider does.
10. Three Keys to Riding This Route Well
When it comes down to it, riding Yabitsu Pass (Yabitsu) well comes down to three things—simple, yet hard to execute consistently:
- Pacing Discipline: Deliberately hold back 10–15% in the early section, saving your strength for the second half. The people you pass at the base will usually be caught again before the summit. Climbing is a psychological battle against your own urge to “go hard.” If you can hold back in the early stages, you’ll be smiling at the end.
- Gear Honesty: Don’t choose your gear ratio based on “ego.” On a sustained 5.5% climb, one extra tooth is better, keeping your cadence above 75 rpm. Your knees and your late-ride endurance will thank you. No one asks what cassette you used at the summit, but your knees will remember.
- Fueling in Advance: Make “early, small amounts, frequent” a muscle memory. If you wait until you’re hungry to eat, this 11.5 km climb will turn into a long punishment. Treat fueling as part of your pacing, not an optional side note.
Read the data, hold the rhythm, and manage your fueling—and Yabitsu Pass (Yabitsu) transforms from a daunting challenge into a high-quality training session you can enjoy. This famous climb in Hadano City, Kanagawa Prefecture, deserves your most honest preparation. Ride strong, ride safe, and enjoy the view at the summit that belongs to those who put in the effort.
Related Reading
- Hakone Pass (National Route 1) Practical Guide: Segment Pacing and Gear Ratio Breakdown for 15.6 km with 846 m of Climbing
- Nikko Irohazaka Practical Guide: Segment Pacing and Gear Ratio Breakdown for 7.1 km with 394 m of Climbing
- The Coming-of-Age Ritual for Kanto Riders: Yabitsu Pass, a Sacred Ground That Measures Your Fighting Strength
- Mount Ibuki South Side Practical Guide: Segment Pacing and Gear Ratio Breakdown for 6.2 km with 612 m of Climbing
台北闊瀨陡坡 騎旅 / 日本單車雜誌編輯車友臨時加入!/ 髮香才是最強的 / feat. 北迴歸線小隊 / 公路車 CT Yeh
6 個月前
風櫃嘴時間 預測西進武嶺時間?13000名車友統計數據分析告訴你 !
5 年前
半日 小台灣 極限單車路線挑戰實錄
7 年前
西進武嶺 8000名單車友數據分析 PART1 | 從新手到高手數量/瓦數/推力比/FTP推力比/功率計使用率 大解析 | 公路車 | CTYeh
5 年前
2025 乘鞍岳登山賽 比賽全紀錄篇 / 完整路線攻略介紹 / 日本版武嶺 公路最高點 / 高山空拍絕景 / 明年會開團! / 公路車 / CT Yeh
10 個月前
#公路車 #西進武嶺 配速配瓦實驗 坡度分析 四小時內攻略 建大盃 NeverStop #西進武嶺攻略
6 年前
新竹羅平 x 天湖部落 大禹嶺級變態陡坡! 4K超高畫質 空拍 | 公路車
5 年前
ThinkRider 智騎 XXPRO 訓練台,高階機種功能 只要 1/3價格!? 實測功率對比、噪音實測 / 公路車 / CT Yeh
1 年前