Lushan Yunlong Bridge to Provincial Highway 14 Finish 12.23K Race Strategy: Pacing Discipline and Gear Ratio Breakdown on a 4.4% Average Grade
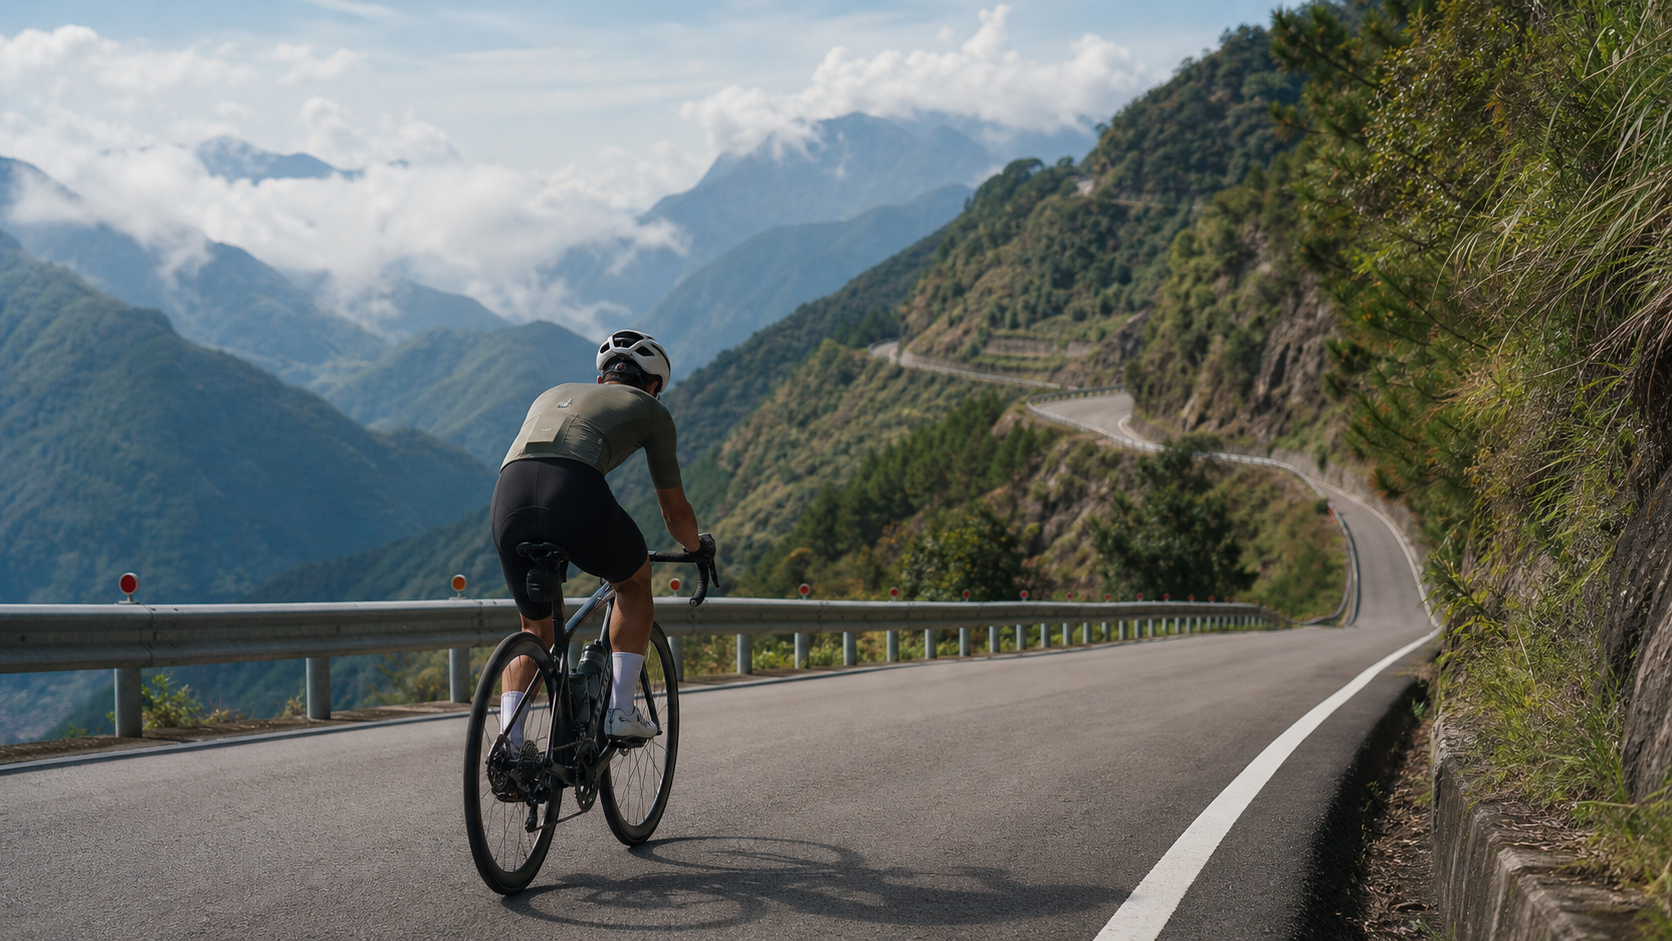
Route Overview: An Underrated Mid-Altitude Long Climb
In Taiwan’s cycling community, when it comes to Ren’ai Township in Nantou, most people immediately think of “Hehuan Mountain” and “Wuling.” But on the road leading to that high-mountain sanctuary, there’s a segment often dismissed by riders as a “warm-up” or “transition” — the climb from Lushan Hot Spring’s Yunlong Bridge toward the end of Provincial Highway 14, stretching 12,230 meters (approximately 12.23 km).
Let’s lay out the numbers first:
| Item | Value | Description |
|---|---|---|
| Total Distance | 12,230 meters (12.23 km) | Mid-distance long climb |
| Total Elevation Gain | 535 meters | Cumulative positive elevation |
| Average Grade | 4.4% | Moderate to gentle, but sustained |
| Strava Category | Category 3 | A formal climb requiring pacing management |
| Location | Ren’ai Township, Nantou County | Western side of the Central Mountain Range |
A 4.4% average grade is an honest number. It’s not like Wuling’s brutal 8%~12% walls that blow you up within a few hundred meters, nor is it a flat-road cruise where you can completely relax. 4.4% is a grade that “feels easy at first, but after ten kilometers of pedaling, you start questioning your life choices.” It falls in the “aerobic to threshold edge” zone for most amateur riders — ride too conservatively and you’ll be dragging into darkness; ride too aggressively and you’ll hit empty in the second half.
My engineer’s instinct tells me: average grade is a lie. 535 meters of climbing divided by 12.23 kilometers is mathematically 4.37%, but the real road is always a combination of “some sections at 2%, others at 7%.” The challenge of this route isn’t any single steep wall — it’s whether you can keep your power output stable at a sustainable number across the entire climb.
The goal of this article is to break down these 12.23 kilometers, segment by segment, telling you how to pedal, which gear ratios to use, where your heart rate should sit, how to plan your nutrition, and where the traps that most often lead to DNF (Did Not Finish) are hiding.
Why a 4.4% Average Grade Is Harder to Manage Than You Think
Let’s start with a physical fact many overlook. When climbing, the power required to overcome gravity is roughly proportional to “body weight × climbing speed.” When the grade falls in the 4%~5% range, your speed typically sits at 12~18 km/h — an awkward speed zone:
- Not fast enough for aerodynamic drag to help (wind resistance is nearly negligible below 15 km/h)
- Not slow enough to “stand up and push with body weight” like on a 10% steep pitch
- You’re forced to maintain a seated pedaling position for extended periods, with the same muscle groups working continuously, and lactate accumulation rising linearly
In other words, this kind of grade tests “aerobic endurance” and “pacing discipline,” not explosive power. That’s why many riders who are strong on flats and fierce in sprints often underperform on these moderate, sustained climbs — they’re used to intermittent bursts but aren’t skilled at “flattening out” their power across ten kilometers.
Segment-by-Segment Strategy: Breaking 12.23 km into Five Sections
Below, I’ve divided the entire route into five functional segments based on terrain characteristics and psychological milestones. Distances are approximate; please rely on actual mile markers and GPS.
Segment 1 (0~2.5 km): Starting at Yunlong Bridge — Don’t Let Adrenaline Fool You
Starting from the Yunlong Bridge area, this is the route’s “psychological trap segment.” Just off the line, your legs are fresh, your cardiovascular system hasn’t fully kicked in, and combined with the excitement of departure, nine out of ten riders push too hard here.
- Target heart rate: Keep it at 70%~78% of max heart rate (if your max is 185, stay at 130~144)
- Suggested gear ratio: 34T front (compact crank) × 19~21T rear, maintaining cadence at 80~90 rpm
- Key reminder: There may be one or two steeper short pitches (6%~7%) here — don’t stand up and muscle through them. Shift to an easier gear and spin seated
I’ve seen too many riders burn half their day’s matches in the first three kilometers. Remember this: every “feels easy” acceleration in the early part of a climb is borrowing from the you at the end — and the interest rate is brutal.
Segment 2 (2.5~5.5 km): Finding Your Rhythm — Locate Your “Cruise Power”
Past the starting excitement, your body begins to settle in. This is the golden zone for establishing rhythm. Your goal is to find an intensity where you can talk but can’t complete full sentences — roughly the lower edge of your aerobic threshold.
- Target heart rate: 78%~83% of max heart rate
- Suggested gear ratio: 34T × 17~19T, maintaining cadence at 75~85 rpm
- Pedaling technique: Focus on “circling” rather than “stomping down.” Imagine each pedal stroke pushing forward at the 3 o’clock position and scraping back at 6 o’clock, letting your glutes and hamstrings share the load with your quadriceps
The keyword for this segment is “conserve.” You need to bank your energy, because the real test is still ahead.
Segment 3 (5.5~8 km): The Mid-Climb Grind — Where the Mind Breaks Most Easily
The middle of any long climb is always the most grueling. The initial novelty is gone, and the finish is still too far to see — this is the segment where willpower most easily collapses. Physiologically, glycogen stores begin to deplete noticeably here, and if nutrition hasn’t kept up, blood sugar will start to drop.
| Monitoring Metric | Ideal State | Warning Sign |
|---|---|---|
| Heart Rate | Steady or slowly rising | Sudden spike of 5~10 bpm → hyperventilation or dehydration |
| Cadence | Maintain 75+ | Drops below 60 → gear too heavy or energy depleted |
| Perceived Exertion | Hard but manageable | Want to get off the bike → take sugar immediately and reduce intensity |
- Suggested gear ratio: Shift to 34T × 21~25T depending on grade
- Strategy: This segment allows you to “downshift slightly and catch your breath” — better to go a bit slower than to blow up
Segment 4 (8~10.5 km): The False Summit Trap and the Second Push
High-mountain roads often play a cruel visual trick: you see a turn ahead, think you’re almost there, only to round it and find an even longer climb beyond. On this route, as you approach the main line of Provincial Highway 14 heading toward Cingjing / Hehuan Mountain, you may well encounter this kind of “false summit.”
Psychologically, set your expectations in advance: until you actually see the finish sign, don’t trust any feeling of “almost there.” If you’ve paced the first three segments well, this is where you can start “adding a little more,” bringing your heart rate up to 83%~88%.
Segment 5 (10.5~12.23 km): The Finish — Pour Out Everything You Have Left
For the final 1.7 kilometers, if you still have anything in reserve, this is the time to empty the tank. The finish is close enough now that even a slight overdraw is recoverable once you cross the line.
- Target heart rate: Can push to 88%~92% of max (anaerobic edge)
- Strategy: Brief standing surges are acceptable, engaging larger muscle groups for a push, but watch for cramping risk
Gear Ratio and Equipment Recommendations
Given the 4.4% average grade and 535 meters of climbing, this route doesn’t require extreme climbing gears, but the right drivetrain setup will make you far more comfortable.
| Rider Type | Suggested Chainring | Suggested Cassette | Notes |
|---|---|---|---|
| General Amateur | 50/34 compact | 11-32T or 11-34T | Safest option; plenty of easy gears available in the middle section |
| Advanced Rider | 52/36 semi-compact | 11-30T | Requires solid leg strength; less pacing flexibility |
| Race-Oriented | 53/39 standard | 11-28T | Only recommended for riders with FTP/weight ratio > 4 |
Tires: Mountain roads occasionally have gravel and wet patches. A 25c~28c width is recommended, with tire pressure not too high (approximately 75~90 psi depending on body weight) to balance grip and comfort. Brakes: If you’re on disc brakes, you’ll have better stopping power and heat dissipation on the descent back. Rim brakes require attention to wheel rim heat buildup and brake pad wear on long descents.
Nutrition and Hydration Strategy
Twelve kilometers with 535 meters of climbing might only be a 40~60 minute effort for a well-trained rider, but the mid-altitude mountain climate and dehydration rate shouldn’t be underestimated.
- Water: Make sure you start with at least one full bottle (500~750ml). If temperatures are high, direct mountain sun causes rapid fluid loss — take 2~3 sips every 15 minutes
- Energy: If this segment is part of a longer day (e.g., continuing to Cingjing or Hehuan Mountain), be sure to start eating before you feel hungry. Supplement 20~30 grams of carbohydrates every 30~40 minutes (one energy gel or half an energy bar)
- Electrolytes: The mid-climb grind zone is where cramping is most likely; sodium, magnesium, and potassium supplementation can effectively prevent it
The iron rule of fueling: by the time you’re thirsty or hungry, it’s already too late. When your body sends those signals, your performance is already declining.
Weather and Seasons: The Shape-Shifting Nature of Mid-Altitude Mountains
The Lushan area is surrounded by peaks and often shrouded in mist year-round. The moisture from the Taluowan River valley makes the weather here especially changeable.
| Season | Characteristics | Precautions |
|---|---|---|
| Spring (Mar–May) | Mild and comfortable, occasional spring rain | Best riding season; bring a light windbreaker |
| Summer (Jun–Aug) | Frequent afternoon thunderstorms | Start early without fail; finish before noon |
| Autumn (Sep–Nov) | Clear skies, excellent visibility | Large temperature swings between day and night; bring a warm layer |
| Winter (Dec–Feb) | Cold and damp; possible frost at elevation | If continuing to high altitude, guard against hypothermia; watch road conditions |
Mountain temperatures decrease with altitude, roughly 0.6°C per 100 meters gained. With 535 meters of climbing, the finish will be about 3°C cooler than the start. Combined with strong winds at elevation and wind chill on the descent, the return trip can feel far colder than you expect. Carrying a packable windbreaker is basic discipline for mountain riding.
Common Mistakes and DNF Risks
- Going too fast early: The most common and most fatal error. Nine out of ten “blow-ups halfway up” trace back to overspeeding in the first three kilometers.
- Rigid gear selection: Refusing to shift into the easiest gear and grinding heavy gears results in knee injuries and premature exhaustion.
- Delayed fueling: Waiting until you’re hungry or thirsty means your performance is already beyond recovery.
- Ignoring mountain weather: Not carrying warm/waterproof layers leads to hypothermia in afternoon thunderstorms or wind chill on descents.
- No mental preparation for “false summits”: Thinking you’re almost there only to find a long stretch remaining can shatter your mindset.
Target Time References by Rider Level
The following times are rough references for the “pure climbing segment” only; actual results vary significantly with wind, road conditions, and daily form:
| Rider Level | FTP/Weight Ratio | Reference Finish Time | Average Speed |
|---|---|---|---|
| Entry-Level Fitness | 2.0~2.5 | 55~70 min | Approximately 11~13 km/h |
| Intermediate Enthusiast | 2.5~3.5 | 42~55 min | Approximately 13~17 km/h |
| Advanced Rider | 3.5~4.5 | 33~42 min | Approximately 17~22 km/h |
| Competitive Level | 4.5+ | Under 30 min | Above 22 km/h |
Don’t compare yourself to others — compare yourself to your last ride. The value of this route lies in being an excellent “aerobic endurance yardstick”: by repeatedly testing yourself against a fixed power ceiling, you can clearly see your improvement curve.
One more reminder: the “reference finish times” above are estimates under ideal conditions. In the real world, headwinds, wet roads, sleep and diet status on the day, or even fatigue from the previous night can cause significant variation. Rather than obsessing over a specific number, focus on whether your pacing was stable and whether you faded noticeably in the second half. A ride where you can maintain or even accelerate in the latter half is far more valuable than a “pretty number” from a ride that started with a surge and ended in collapse — and it’s a far better reflection of your true aerobic capacity.
FAQ: The Questions Beginners Most Want to Ask
Q: I’ve never ridden mountain roads. Is this 12 km climb too hard for a beginner?
Not too hard, but not to be taken lightly either. A 4.4% average grade is a warm-up for well-trained riders, but a genuine challenge for complete beginners. The key is pacing and gear selection. As long as you have a 34T compact crank paired with an 11-32T or larger cassette, maintain your cadence, and ride the entire way at an easy Z2~Z3 rhythm, most people with basic riding habits can complete it. What truly breaks beginners isn’t the climb — it’s “pedaling too hard in the early section.”
Q: Do I absolutely need a power meter? Can I pace without one?
No, you don’t. A power meter is a nice-to-have tool, not a necessity. A heart rate monitor is more than sufficient, and you can even pace well using just the “talk test” and “cadence feel.” Equipment is a supplement; pacing discipline is the core.
Q: Can I ride this segment on its own, or do I have to continue to Hehuan Mountain?
Both work. It can be a standalone training ride (approximately 24.5 km round trip including climb and descent), or it can be the first segment of a longer journey to Cingjing or Hehuan Mountain. If you plan to continue to higher elevations, don’t push hard here — save your strength for the more oxygen-deprived roads ahead.
Q: Are there easy places to refuel? How much should I bring?
Mountain refueling isn’t as convenient as in urban areas — prepare with a “self-sufficient” mindset. Bring at least one full bottle of water, two energy supplies, and electrolytes. If you’re planning a longer ride, stock up completely in the towns or settlements before departure; don’t gamble on finding a shop along the way.
Q: What time of year is most comfortable to ride?
Spring (March–May) and autumn (September–November) are the most recommended seasons — mild temperatures and good visibility. In summer, start early without fail to avoid afternoon thunderstorms. In winter, guard against hypothermia and watch for wet or frost-covered roads.
Pre-Ride Checklist
Before departure, take five minutes to go through this list:
- [ ] Tires: Correct pressure, no significant wear or cuts
- [ ] Brakes: Front and rear braking function properly; brake pads/rotor pads have sufficient thickness (your life depends on them on descents)
- [ ] Shifting: Smooth shifting across all gears; specifically confirm the easiest gear engages properly
- [ ] Drivetrain: Chain clean and lubricated, no unusual noises
- [ ] Nutrition: At least one bottle of water, two energy supplies, electrolytes
- [ ] Clothing: One packable windbreaker (for mountain warmth/rain protection)
- [ ] Tools: Spare tube/patch kit, tire levers, pump or CO2, hex wrenches
- [ ] ID and phone: Mountain cell signal is unreliable; inform family of your route in advance
- [ ] Lights: Front and rear lights must be on for mountain tunnels and shaded sections
Pedaling Technique: The “Energy-Saving Equation” for Moderate Sustained Climbs
Many people think climbing is simply “pedal hard,” but on a 4.4% grade that demands ten kilometers of sustained effort, the efficiency difference from technique often matters more than brute force. The following technical details can make you several minutes faster on the same fitness level — or save you a great deal of energy.
First, cadence takes priority over gear ratio. The most common mistake amateur riders make is “hanging too heavy a gear and grinding at too slow a cadence.” Low cadence (below 60 rpm) means every pedal stroke requires enormous torque, rapidly accumulating anaerobic waste products in the muscles and causing your legs to fail before your cardiovascular system. The correct approach is to shift one gear easier and maintain a cadence of 75~85 rpm, letting your cardiovascular system share the load with your muscles. Your heart and lungs recover far better than localized muscle groups.
Second, transitions between seated and standing should be purposeful. Seated pedaling is the most energy-efficient and suits long cruising; standing (getting out of the saddle) engages body weight and more large muscle groups, suitable for briefly powering over steep sections or relieving numb hips. The principle: sit and spin on gentler sections, stand briefly for steep pitches, then sit back down immediately. Don’t stand for extended periods to look cool — that’s burning money fast.
Third, relax your upper body. When climbing, many people unconsciously shrug their shoulders, grip the bars tightly, and grit their teeth. All that excess tension is quietly draining your energy. Try to let your shoulders drop, keep your elbows slightly bent, and rest your hands lightly on the bars. Your power should be entirely concentrated in your lower body — the more relaxed your upper body, the better.
| Common Mistake | Correct Approach | Difference It Makes |
|---|---|---|
| Heavy gear, low cadence grinding | Lighter gear, maintain 75+ rpm | Delays muscle failure |
| Standing and grinding for long periods | Brief standing surges, then sit back | Saves significant energy |
| Shrugged shoulders, tight grip, stiff upper body | Shoulders down, elbows bent, upper body relaxed | Reduces wasted energy |
| Only pushing down with quads | Circling, engaging glutes and hamstrings | Distributes load across muscle groups |
Power, Heart Rate, and Cadence: Three Instruments You Should Watch Simultaneously
If you have a power meter, this route is an excellent venue for calibrating your training zones. Given the 535 meters of climbing and 4.4% average grade, most riders will spend the majority of their time in the “Sweet Spot to Threshold” range — that is, 88%~100% of FTP.
| Power Zone | Percentage of FTP | Suggested Use on This Route |
|---|---|---|
| Endurance Z2 | 56%~75% | Starting warm-up; as a transition on longer rides |
| Tempo Z3 | 76%~87% | Full-route cruising; when you want an easier completion |
| Sweet Spot | 88%~94% | Best zone for a good time without blowing up |
| Threshold Z4 | 95%~105% | Time-trial surges; for testing FTP |
No power meter? No problem. Heart rate and cadence are your substitute instruments. The principle: don’t let your heart rate spike above 90% of max in the first half, and keep cadence above 75 rpm whenever possible. When you notice “heart rate climbing while cadence keeps dropping,” that’s your body telling you — you’re overdrawing; it’s time to downshift.
A highly practical self-check is the “talk test.” During cruising in segments 2 and 3, try speaking a complete sentence:
- Can easily speak a full sentence → Too conservative; you can add a bit more
- Speaking haltingly, needing to catch breath → Just right; this is your sweet spot
- Can’t speak at all → Too aggressive; reduce intensity immediately
The Hidden Effect of Altitude on Performance
Many overlook that the finish direction of this route already approaches the mid-altitude zone toward Cingjing and Hehuan Mountain. Although the start at Lushan is only around 400+ meters, if you’re using this as the first segment of a high-mountain push, altitude will rise rapidly from here. As altitude increases, the partial pressure of oxygen in the air decreases, and your aerobic output will be silently discounted.
Below 1,500 meters the effect isn’t obvious, but once you continue to Cingjing (approximately 1,700~2,000 meters) or higher, the power you can output at the same heart rate will drop. So emptying your tank on the Lushan section is unwise. The smart approach is to treat it as a “planned warm-up segment” — use a steady Z3 rhythm to bring your body into condition, preserving strength for the higher, more oxygen-deprived roads ahead.
The Descent Back: Don’t Let Your Climbing Effort Be Undone on the Way Down
Many people only talk about “how to climb up” on this route, forgetting that the descent back is often where accidents are most likely. With 535 meters of elevation difference, the return is a continuous downhill.
- Braking rhythm: Use “intermittent pulsing” rather than “constant dragging.” Continuously dragging the brakes causes heat buildup in the rims (rim brakes) or rotors (disc brakes); in severe cases with rim brakes, the heat can even cause inner tube blowouts
- Cornering lines: Mountain corners often have sightlines blocked by rock faces. Always use an outside-inside-outside line and leave room for oncoming traffic and falling rocks
- Reading the road: Mountain roads often have slippery moss patches, gravel, and water stains. Brake before corners, and never brake hard mid-corner
- Staying warm: On descents, speed is high and wind chill is strong. Combined with the sweat from climbing, hypothermia is a real risk. Put on your windbreaker before descending — this is basic practice for experienced riders
I know quite a few riders with excellent climbing skills who’ve been injured in crashes on descents. Remember: the climb tests your fitness; the descent tests your judgment and discipline. Getting home safely is the real finish.
Building This Route into Your Training Cycle
If you live in central Taiwan or have the opportunity to visit repeatedly, this 12.23 km climb can be a highly versatile “training tool.” Here are three ways to use it:
- Sweet Spot Endurance Session: Hold FTP at 88%~93% the entire way up, recover on a slow descent, and repeat 2~3 times. This is the most efficient way to build aerobic endurance.
- Threshold Time-Trial Test: Once a month, pick a day when you’re feeling good, time yourself all-out on a single ascent, and record your time and average power. This is the most honest yardstick of your improvement curve.
- Long-Distance Base: Use it as the first segment of a longer ride to Cingjing or Hehuan Mountain, riding the entire way at an easy Z2. The focus is accumulating ride time, not intensity.
The same road, ridden at different intensities, delivers completely different training stimuli. That’s the beauty of a moderate sustained climb — its “resolution” is high. Whatever effort you put in, it honestly returns to you in time.
Conclusion: Treat It as a Practice in Pacing
The 12.23 km climb from Lushan’s Yunlong Bridge to Provincial Highway 14, with 535 meters of elevation gain and a 4.4% average grade, may never appear on your bragging list — it’s not a “sacred mountain” like Wuling that you can boast about. But precisely because it’s “not extreme,” it’s the most honest training ground: there’s no steep wall to use as an excuse — only your own pacing discipline determines success or failure.
Flatten out your power, get your fueling right, steady your mindset, and then pour out everything you have left in the final 1.7 kilometers. When you look back at that road winding through the clouds and mist, you’ll understand — true climbing ability is never built on a single burst, but accumulated through ten kilometers of steady consistency. Before your next encounter with Wuling, come here first to calibrate your “cruising engine.”
Related Reading
- Riding Where the Clouds Rise: Sea of Clouds, Sacred Springs, and Wushe Memories from Lushan Hot Spring to Provincial Highway 14
- Sanxia North 113 Dongyan Bridge Battle Guide: Don’t Be Fooled by the “6.7% Average Grade” — This Road Hides a 12%-Grade Killer Move
- Wulai Fushan Tribe Full Analysis: 14.4 km Riverside Forest Trail — What Terrain Traps Lie Behind the 1.4% Average Grade
- Xuejian Sima Limit Forest Road Guide: Full Analysis of the 24.94 km Forest Road Climb — Data, Gear Ratios, and Nutrition Strategy
單車 梅山36灣 坡度介紹 路段介紹 空拍 (相關遊記影片,請參考說明或我的頻道喔,歡迎訂閱)
6 年前
#公路車 #西進武嶺 配速配瓦實驗 坡度分析 四小時內攻略 建大盃 NeverStop #西進武嶺攻略
6 年前
台北闊瀨陡坡 騎旅 / 日本單車雜誌編輯車友臨時加入!/ 髮香才是最強的 / feat. 北迴歸線小隊 / 公路車 CT Yeh
6 個月前
半日 小台灣 極限單車路線挑戰實錄
7 年前
4K單車實境) 舊陽金P字道 第1P 仰德大道至小油坑 誤跟武嶺神人們 被拉爆爽飛天 Taiwan Cycling Climb Route Recommend
7 年前
大禹嶺 到 武嶺牌樓 全程前後實況錄影 | 北進武嶺 | 東進武嶺 | KOM | 訓練台 | 坡度分析 | Taiwan KOM Last 10 km HARD | 公路車
6 年前
大武山後門26%歡樂陡坡!JJSC南台灣單車行Day2 / 被颱風追著跑 / 公路車 / CT Yeh
2 年前
新竹羅平 x 天湖部落 大禹嶺級變態陡坡! 4K超高畫質 空拍 | 公路車
5 年前