Xitou to Sunlinksea High-Altitude Guide: The Hidden 5% Difficulty at 1,600 Meters Above Sea Level
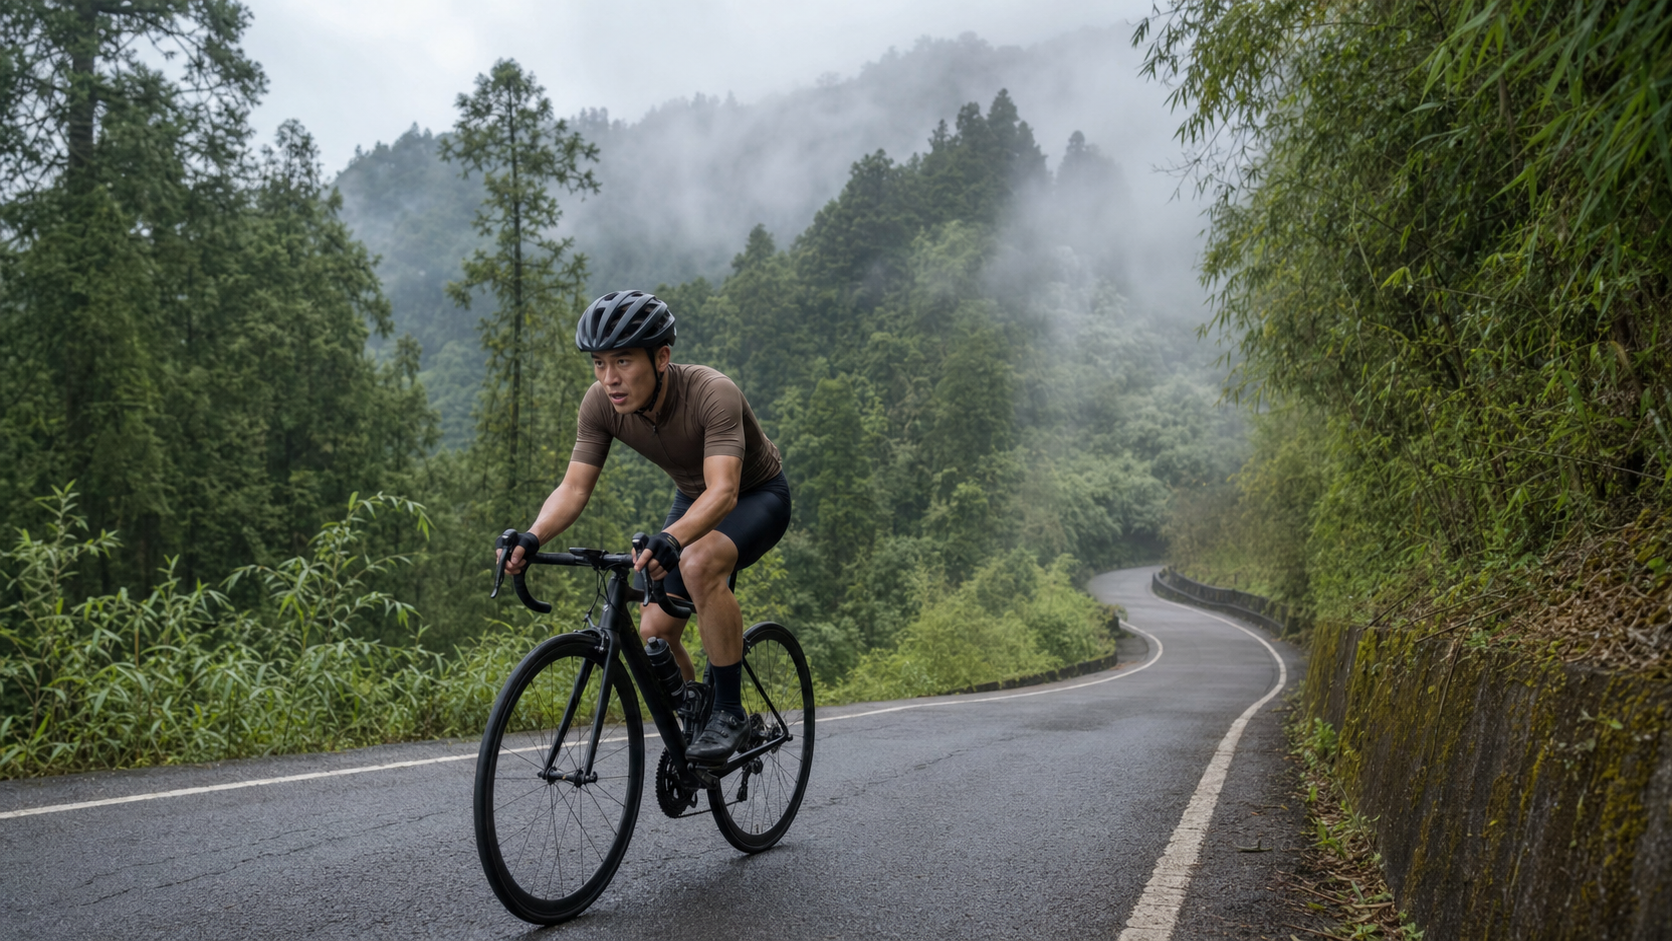
The stretch from Xitou to Sunlinksea is a classic mountain climb on the border of Lugu and Zhushan in Nantou, spanning approximately 12.3 kilometers with about 1,168 meters of cumulative elevation gain and an average gradient of 5.0%, rated Category 3 on Strava. It is essentially the upper section of the longer “Zhushan–Sunlinksea” route: Xitou Nature Education Area sits at about 1,150 meters above sea level, Sunlinksea Forest Ecological Resort at about 1,600 meters, and the highest point along the way, “Liulongtou,” reaches roughly 1,650 meters.
A 5.0% average gradient sounds moderate, but don’t forget this is a mountain road that starts above 1,150 meters and climbs all the way to over 1,600 meters. High altitude will discount your power output and send your heart rate soaring more easily—that’s the biggest difference from a route with the same gradient at sea level. This practical guide breaks down this misty mountain road for you in detail.
Route Overview: What 5% Means at High Altitude
| Item | Data |
|---|---|
| Distance | Approximately 12.3 km |
| Cumulative Elevation Gain | Approximately 1,168 m |
| Average Gradient | 5.0% |
| Strava Category | Category 3 |
| Xitou Elevation | Approximately 1,150 m |
| Sunlinksea Elevation | Approximately 1,600 m |
| Liulongtou Highest Point | Approximately 1,650 m |
On flat ground, 5% is a gradient where you’re “a bit breathless but can still chat.” But this entire road sits above 1,150 meters, and as you approach 1,600–1,650 meters, the oxygen content in the air drops, and you’ll notice: at the same gradient and the same pedaling effort, your heart rate runs higher and recovery takes longer than at sea level. That’s the hidden difficulty of mountain routes—the gradient number doesn’t look intimidating, but the altitude is quietly adding to the load.
Quantifying Altitude’s Impact on Aerobic Output
From an engineering perspective, altitude affects riders through “decreased partial pressure of oxygen.” Atmospheric pressure decreases with elevation, and while the proportion of oxygen remains the same (still about 21%), there are fewer oxygen molecules per unit volume of air, reducing the blood’s oxygen-carrying efficiency, which in turn discounts VO₂max and sustainable power output. Generally speaking, for every 1,000 meters of elevation gain, aerobic output drops by about 6–10% (more pronounced in those not acclimatized). This road climbs from 1,150 to 1,650 meters, meaning in the most exhausting final stretch, you’re also paying an extra “thin air tax.”
Translated into practical terms: if you can sustain a certain threshold power at sea level, near 1,600 meters your actual sustainable power at the same perceived effort may have quietly dropped. This is why the pacing principle for mountain routes is “let heart rate and perceived effort lead, treat power numbers as a reference”—because the power zones you calibrated at sea level become unreliable at altitude.
Segment Guide 1: Departing from Xitou Area (Warm-Up in the Early Section)
Starting from the Xitou area, the early section features relatively steady climbing. Here the tree canopy is dense and temperatures are cool, making it an excellent warm-up environment—but because of the high humidity, the road surface is often slick after rain or in the early morning.
- Gearing: Middle chainring paired with a larger rear cog, spinning easily at around 80 rpm.
- Heart rate: Be conservative at the start of high-altitude riding, keeping it at 72–75% of max heart rate to give your body time to adapt to the thin air.
- Reminder: The Xitou area is packed with famous sights (University Pond, the Sky Walk, etc.). If you’re also sightseeing, don’t mix the stop-and-go of tourism with your riding rhythm—make sure your warm-up is thorough.
The biggest mistake at the start of a high-altitude ride is “charging the early section with sea-level confidence.” Your body needs time to adapt to the thin air. If you push your heart rate too high in the first 10 minutes, losing speed from oxygen debt in the later section is almost inevitable. The ideal approach is to treat the early section as a deliberately restrained warm-up: light cadence, low heart rate, deep and slow breathing, letting your circulatory and respiratory systems first enter high-altitude working mode before gradually adding pressure. This discipline of “holding back” often determines whether you can finish the second half intact.
Segment Guide 2: Sustained Climbing Toward Sunlinksea (Core Section)
Leaving the Xitou area toward Sunlinksea, the climbing is continuous and steady. There aren’t many terrifyingly steep pitches in this section, but “continuity” is exactly its killer—over 12 kilometers, most of the time you’re grinding gently upward, testing your endurance and pacing stability.
- Gearing: Shift to larger rear cogs (26–30 teeth), keeping cadence at 70–75 rpm.
- Pacing: This is a route suited for “steady power/steady heart rate” cruising. Find a climbing cruise heart rate you can sustain for the entire stretch (about 78–82% of max heart rate), grind steadily, and avoid surging and backing off.
- High-altitude hydration: Mountain air is dry and breathing is faster, so fluid loss happens quicker than you feel. Take small sips every 15–20 minutes.
Power and Heart Rate Zone Reference Table (Core Section Targets)
| Zone | %FTP (Sea-Level Calibrated) | %Max Heart Rate | Cadence | How to Use on This Route |
|---|---|---|---|---|
| Zone 2 Aerobic | 60–75% | 70–78% | 78–85 rpm | Early-section warm-up, altitude adaptation |
| Zone 3 Tempo | 76–90% | 78–83% | 70–76 rpm | Primary cruising pace for the core section |
| Zone 4 Threshold | 91–105% | 83–88% | 65–72 rpm | Brief pushes on the few steeper pitches |
| Zone 5 | >105% | >88% | Depends | Almost never recommended for extended use at altitude |
The 12-kilometer length combined with high altitude makes this route an “aerobic endurance problem,” not an “anaerobic power problem.” Spend the vast majority of your time between Zone 2 and Zone 3, using the sensation of “barely maintaining a breathing rhythm through your nose” as your ceiling. Once you frequently venture into Zone 4 and above, you won’t recover in an oxygen-deprived environment—hitting the wall is just a matter of time.
Segment Guide 3: Around Liulongtou (Highest Point and Finish)
Near the route’s highest point, “Liulongtou” (about 1,650 meters), you’re at maximum elevation and most prone to losing speed. The name has an interesting origin—in the early days, a cableway (liúlóng) transported timber from Sunlinksea to Xitou about 13 kilometers away, and “Liulongtou” (cableway head) got its name from that.
- Strategy: The closer you get to the highest point, the more you need to stay composed. Allow your cadence to drop slightly, but don’t let it fall below 55 rpm. Counter the thin air with steady, deep breathing.
- Finish: After arriving at the Sunlinksea resort area, remember to refuel and rehydrate, and note that temperatures are low at altitude—put on an extra layer of warm clothing when resting.
In-Depth Look at High-Altitude Physiological Effects
Beyond discounted power output, high altitude brings several physiological responses you should anticipate:
- Elevated resting and exercise heart rate: To compensate for insufficient oxygen, your heart beats faster. You’ll notice your heart rate runs 5–10 beats or more higher than at sea level at the same intensity.
- Increased breathing rate and accelerated fluid loss: Mountain air is dry, and with faster, deeper breathing, you lose significant fluid just through respiration—dehydration risk is higher than at sea level.
- Slower recovery: After sprinting on steep pitches, the oxygen-deprived environment slows lactate clearance and energy resynthesis. This is why “don’t sprint” matters so much in the mountains.
- Mild altitude sickness: A small minority of sensitive individuals may experience mild headache or fatigue at 1,600 meters. Slowing down, hydrating, and deep breathing usually alleviate it; if it worsens, descend immediately.
Understanding these, you won’t mistake “breathing harder than at sea level” for “having a bad day,” but will correctly attribute it to altitude and make conservative, sound pacing decisions.
Gearing and Equipment Recommendations
| Equipment Item | Recommendation |
|---|---|
| Chainrings | Sub-compact 48/32 or Compact 50/34 |
| Rear Cassette | Largest cog 30–32T; the lighter the better for long climbs |
| Tires | 28c or wider, balancing grip on slick forest roads |
| Brakes | Disc brakes preferred; safer heat dissipation on the long descent back |
| Warmth | Windbreaker/light jacket is a must; mountain temperature swings and descent wind chill are significant |
| Supplies | At least two bottles of water, ample energy supplies |
Warmth is the most underestimated piece of gear on this route. Xitou and Sunlinksea sit at high elevation with dense tree cover—even in summer, mountain temperatures are far lower than at sea level. You sweat on the climb, and once you reach the highest point or start descending, that sweat turns cold and combines with wind chill, making hypothermia a real risk. A windbreaker that fits in your jersey pocket is a necessity on this route, not an option.
Gear Ratio Quick Reference Table
The golden rule for long climbs is “lighter is better than heavier.” Here’s a comparison of the lightest gear ratios for different setups (front teeth ÷ rear teeth; smaller is lighter):
| Chainring × Cassette | Lightest Gear Ratio | Suitable For |
|---|---|---|
| 50/34 × 11-30T | 1.13 | Strong riders who want to maintain speed |
| 50/34 × 11-34T | 1.00 | General recreational riders |
| 48/32 × 11-34T | 0.94 | Advanced beginners, long climbs |
| 46/30 × 10-36T | 0.83 | Those who want to cruise the whole section comfortably |
On this 12-kilometer mountain climb, most riders will find a gear ratio below 1.00 lets them “protect their cadence and save their knees.” Rather than grinding heavy gears at 1,600 meters in oxygen debt and blowing yourself up, swap in a lighter cassette before you leave so your body can maintain a smooth pedaling rhythm for the entire route.
Braking and Long-Descent Technique (Return Trip)
The descent from Sunlinksea and Liulongtou back to Xitou and Zhushan is long and demands full focus. Mastering these points will greatly improve safety:
- Pulse the brakes; avoid prolonged braking: Holding the brakes continuously builds up heat in the rotors and pads, causing brake fade or even brake fluid vapor lock. Use a “short squeeze, release, short squeeze” rhythm to dissipate heat.
- Front-rear distribution of 70/30: The front brake provides most of your stopping power; the rear stabilizes the tail. On wet surfaces or in corners, be more conservative overall.
- Finish braking before entering corners: Do all braking before the turn; avoid hard braking mid-corner to prevent the front wheel from washing out on slick forest roads.
- Watch for wet surfaces and fallen leaves: Mountain forest roads often have moss, leaves, and water streaks with far less grip than dry asphalt—slow down for corners.
- Stay warm against wind chill: On descents, speed is high and body temperature drops rapidly. Put your windbreaker on before starting the descent so hypothermia doesn’t dull your handling reflexes.
Supplies, Hydration, and Seasons
Along the route, Xitou, Monster Village (Songlin Village), and the Sunlinksea resort area all have commercial areas and supply points. Lugu is a famous production area for Dongding oolong tea, and Sunlinksea high-mountain tea is also well known—when refueling, local specialties like tea, bamboo shoots, and mountain produce are good choices (specific shops are best selected on-site, without preset assumptions).
Seasonally, this mountain route offers different scenery year-round—flowers in spring, cool escapes in summer, crisp autumn air, and cold, damp winters requiring extra attention to warmth and road conditions. In any season, keep in mind: mountain afternoons are prone to fog and thunderstorms. When fog rolls in and visibility drops sharply, turn on your lights and slow down.
Hydration and Nutrition Schedule
| Time Point | Action |
|---|---|
| 30 minutes before departure | Consume carbohydrates, drink about 300–500 ml of water, and pre-hydrate for altitude |
| Early Xitou section | Take small sips every 15–20 minutes to maintain steady hydration |
| Mid-core section | Refuel once before hitting the wall (gel/energy food); don’t wait until you’re hungry |
| Liulongtou highest point | Drink plenty of water, take electrolytes, add warm layers before continuing |
| Before the descent back | Refuel once more to ensure focus on the long descent isn’t compromised by low blood sugar |
Weather Risk Classification
| Risk Level | Conditions | Recommendation |
|---|---|---|
| Green (Rideable) | Sunny or partly cloudy, dry roads, clear visibility | Proceed normally, but still carry a windbreaker and lights |
| Yellow (Caution) | Patchy dense fog, brief showers, slightly wet roads | Turn on lights, slow descents, shorten the ride |
| Red (Do Not Ride) | Persistent rain, thunderstorm warnings, fog locking in the mountains, cold snap | Reschedule outright; hypothermia and poor visibility at altitude are a deadly combination |
Mountain weather changes far faster than at sea level—“sunny on the way up, foggy on the way down” is the norm. Always maintain the flexibility to “stop at any time,” putting safety ahead of mileage and records.
Three Iron Rules for High-Altitude Pacing
Distilling the entire article into three actionable iron rules you can follow even without a power meter:
- Be deliberately conservative in the early section: Treat the first third of the route as a warm-up, keeping heart rate in Zone 2. Better to feel “too easy” than to surge. The altitude bill will be collected in full in the later section.
- Cadence over speed: Hold your cadence around 70 rpm for the entire route. Losing speed is fine; once your cadence collapses and you start grinding, your knees and energy will burn out faster.
- Hydrate earlier than you feel you need to: Not feeling thirsty at altitude doesn’t mean you’re not dehydrated. Sip on a timer (every 15–20 minutes); don’t wait until you’re thirsty—by then you’re already a step behind.
Common Mistakes and DNF Risks
- Ignoring the altitude: Expecting sea-level power on the mountain, surging too hard early, then hitting oxygen debt and losing speed at elevation.
- Insufficient warmth: Hypothermia at the highest point or on the descent, causing physical collapse or even safety hazards.
- Insufficient hydration: Mountain dryness plus faster breathing makes dehydration quick and sneaky.
- Pushing through fog: Maintaining full speed in poor visibility, drastically increasing the risk of cornering and oncoming-traffic incidents.
Training Advice: What to Build with Xitou–Sunlinksea
This “long-distance, moderate-gradient, high-altitude” route is an excellent aerobic endurance and long-interval training ground:
- Aerobic base phase: Grind the entire route in Zone 2, focusing on “steady heart rate throughout and stable cadence”—a golden workout for building long-climb endurance.
- Threshold strengthening phase: Break the core section into 2–3 segments of 10–15 minutes of Zone 3–4 cruising, recovering on gentle grades between segments, to train your “ability to sustain threshold power.”
- Altitude acclimatization: If you’re preparing for higher-altitude events like Wuling, this route is a great place to adapt progressively—first get comfortable with your body’s responses at 1,600 meters, then challenge elevations above 3,000 meters.
Two to three weeks before race day, doing one full long-climb rehearsal on this route lets you calibrate your pacing, nutrition, and warmth routines in a single pass.
Common Mechanical Issues and Pre-Ride Checks
A long climb plus a long descent is a double test for your bike. Check the following before departure:
- Can the drivetrain reach the largest cog: The worst thing on a long climb is not being able to shift into your easiest gear. Actually shift all the way down before you leave to confirm.
- Brake pad thickness and rotor condition: The long descent relies heavily on your braking system; worn pads or warped rotors are major red flags.
- Tire pressure and condition: Mountain forest roads are slick; slightly lower tire pressure aids grip, but balance that against pinch-flat risk.
- Chain lubrication: Use a chain lube suited for humid conditions; a dry chain on a long climb accelerates wear and increases shifting errors.
- Light battery levels: Visibility is low in fog and under tree cover; make sure front and rear lights are fully charged.
Target Times by Rider Level (12.3 km Reference)
| Rider Level | Gearing Strategy | Reference Finish Time |
|---|---|---|
| Goal: Just Finish | Low gear grinding throughout, rest as needed | 100+ minutes |
| General Recreational | Steady heart rate cruising, stable cadence | 70–85 minutes |
| Advanced Enthusiast | Steady power cruising, composed at the highest point | 55–65 minutes |
| Intensity-Focused | Pushing threshold power for the entire stretch | 45–55 minutes |
Data-Driven Review: Did You Ride Well
Back at the bottom, don’t just record total time. Use these metrics to evaluate your high-altitude performance:
- Heart rate drift: With power or perceived effort held constant, if your heart rate in the later section is noticeably higher than the early section, it indicates insufficient hydration, thermal imbalance, or an overly fast early pace—especially common at altitude, and the most important metric to watch.
- Pace decay: Compare average speed between the first 6 km and the last 6 km. The smaller the decay, the more you respected the altitude and knew how to conserve energy.
- Minimum cadence: Check whether your cadence dropped below 55 rpm near the highest point. If so, your gearing was too heavy—switch to a lighter setup next time.
- Total fluid intake: Estimate how much water you actually drank against ride time. A common problem at altitude is “drinking less than you think you did.”
Record these numbers and you’ll find that progress in mountain riding isn’t about “being a few minutes faster than last time,” but about “a steadier heart rate, less speed loss, and faster recovery.” At altitude, steady is fast.
Detailed Segment Pacing Table: Riding the 12.3 km in Five Sections
Rather than just thinking in “early/middle/late” thirds, a more refined approach is to split the route into five 2–3 km blocks, setting heart rate and strategy for each. That way, even if your condition fluctuates mid-ride, you know exactly where you are and how to adjust, instead of grinding through on feel alone.
| Distance Range | Terrain Characteristics | Target Heart Rate (%Max HR) | Riding Strategy |
|---|---|---|---|
| 0–2.5 km | Around Xitou area, gentle gradient | 70–75% | Deliberately hold back; let the body adapt to the altitude starting point |
| 2.5–5 km | Entering forest road, gradient settles into steady 5% | 75–80% | Find a cruise heart rate you can sustain for the whole stretch |
| 5–7.5 km | Core climbing section, relentless grade | 78–82% | Steady grind; avoid surging and backing off to conserve glycogen |
| 7.5–10 km | Approaching Liulongtou, altitude effects most pronounced | 80–85% | Allow heart rate to rise slightly, but cadence must not collapse |
| 10–12.3 km | Liulongtou to Sunlinksea, gradient eases | 75–80% | Heart rate should come back down; if it doesn’t, the early section was too aggressive |
The most critical observation point in this table is the final segment: if your heart rate won’t come down on the easing grades of the 10–12.3 km stretch, it’s almost certain you rode the 5–7.5 km core section too hard, and the cost of that overreach is being collected in the final stretch. Conversely, if you still feel you have “reserve” in the last segment, your pacing was well managed—a simple indicator of whether you’re improving.
Debunking Common Myths: Three Things You Might Misunderstand About This Route
Myth 1: “With only a 5% average gradient, this should be much easier than Alishan or Wuling.”
The average gradient is indeed gentle, but “average” masks two variables: first, the entire route starts above 1,150 meters at altitude, and second, there are almost no recovery sections—12 kilometers of continuous upward climbing has a completely different physical burden than a route with the same 5% average but interspersed with flat or descending stretches. Judging this route’s difficulty by its gradient number will underestimate its true cost.
Myth 2: “At only 1,600 meters, there’s no altitude sickness to worry about.”
Clinically, high altitude is typically defined as starting at 2,500 meters, and severe altitude sickness is indeed extremely rare at 1,600 meters. But “mild aerobic output reduction” occurs at much lower elevations, and that’s a different thing from classic altitude sickness—you won’t have a splitting headache, but you’ll notice that at the same effort level, your output is discounted compared to sea level. Ignoring this and pacing according to sea-level expectations is the beginning of losing speed and hitting the wall.
Myth 3: “This route is short, so no special nutrition planning is needed.”
12.3 kilometers may not seem long to many long-climb enthusiasts, but “sustained climbing time” is what determines nutrition needs, not the distance number. At a general recreational rider’s finish time of 70–85 minutes, you’re already past the threshold where mid-ride energy intake is recommended, and with faster fluid loss at altitude, this is absolutely a route that needs a nutrition plan—not a “short ride, no need to bring anything” situation.
PR Challenge Levels for Advanced Riders
If you’ve ridden this route a few times and want to chase a personal best, consider these progressive goals to avoid setting targets too aggressively and risking injury or speed loss:
| Challenge Stage | Goal | Training Focus |
|---|---|---|
| Stage 1 | Complete the ride without dismounting or stopping | Build foundational aerobic endurance and altitude adaptation experience |
| Stage 2 | Finish with average heart rate held within Zone 3 | Practice pacing stability, avoid surging and backing off |
| Stage 3 | Challenge the 55–65 minute range | Cruise the core section in Zone 4, train threshold sustainability |
| Stage 4 | Challenge an intensity-focused 45–55 minute result | Threshold power output for the entire stretch, requiring a structured training cycle |
Between each stage, allow at least 3–4 weeks of training adaptation rather than repeatedly charging with the same intensity. Progress on high-altitude routes is naturally slower than at sea level; rushing it can leave your body with a “painful memory” of the route and kill your long-term motivation.
Temperature Lapse and Layered Clothing Recommendations
One of the most underestimated variables on mountain routes is the magnitude of “temperature lapse with elevation.” Generally, for every 1,000 meters of elevation gain, temperature drops by about 6 degrees (actual values vary with humidity, wind speed, and other factors). This route climbs from Xitou to Liulongtou with an elevation difference of about 500 meters, meaning the summit temperature can be several degrees lower than the start, and combined with the dual effects of sweating on the climb and wind chill on the descent, the perceived temperature swing is often more severe than the numbers suggest.
In practice, a “layered clothing” strategy is recommended rather than relying on one thick jacket for the entire trip:
| Layer | Function | Recommended Material/Approach |
|---|---|---|
| Base layer | Wicks sweat, keeps skin dry | Moisture-wicking, quick-dry jersey; avoid cotton, which absorbs moisture without releasing it |
| Mid layer | Retains body heat | Light long-sleeve or vest; can be removed and stowed in jersey pockets on climbs |
| Outer layer | Wind and rain protection | Compressible, packable windbreaker; worn on descents and during rest stops |
On climbs, your body temperature naturally rises, and overdressing can cause excessive sweating and increase hypothermia risk on the descent. The ideal approach is to wear as little as possible while climbing, maintaining a slightly cool but not cold state, then add the mid and outer layers upon reaching the highest point or before starting the descent. This “dynamic adjustment” clothing logic balances efficiency and safety better than wearing the same outfit from start to finish.
Solo vs. Group Riding Rhythm Differences
This route works well for both solo and group riding, but the pacing logic differs slightly—decide in advance which way you want to challenge it:
- Solo: You have complete control over your rhythm, making it ideal for precisely executing the heart rate zone table mentioned earlier. The downside is no riding partners to remind you to hydrate and stay warm; it’s easy to get so focused on pacing that you ignore your body’s signals.
- Group: Having partners to look out for each other improves safety, especially on descents where riders ahead and behind can warn of road conditions. But beware of “being dragged along by the group’s pace”—if the group is riding faster overall, you can get blown up in the core section, disrupting the rhythm you’d planned.
For group rides, it’s recommended to agree beforehand on a “ride your own pace, regroup at the summit” understanding. Especially on this route, where sustained climbing leaves few recovery points, stubbornly matching someone else’s pace can cost you dearly in the later section.
Conclusion
These 12.3 kilometers from Xitou to Sunlinksea are a mountain cruising route that “looks gentle on the surface but hides altitude difficulty underneath.” It lacks the drama of consecutive hairpin turns; instead, it relies on sustained, elegant climbing to carry you from 1,150 meters all the way to Liulongtou’s 1,650 meters. As long as you respect the altitude, manage warmth and hydration, and grind steadily with a steady-heart-rate rhythm—this road, embraced by clouds, bamboo, and cedar, will reward every stable pedal stroke with a stretch of cool forest and the scent of tea. It’s a classic gateway to Taiwan’s mountain climbs, and a segment every mountain-loving rider should have in their collection.
Related Reading
- Xitou to Sunlinksea: A Misty Journey Through Japanese Cedar, Monster Village, and Songlong Waterfall
- Zhushan Sunlinksea Twelve Zodiac Bend Guide: Pacing Discipline on a 26.9 km Long Climb
- Lugu Route 101 Guide: A 4.3% Beginner-Friendly Workout, Gateway to the Dalunshan Secret Realm
- Caoling Road Practical Guide: How to Ride Yunlin’s 6.4 km, 429 m Climb Training Slope
台北闊瀨陡坡 騎旅 / 日本單車雜誌編輯車友臨時加入!/ 髮香才是最強的 / feat. 北迴歸線小隊 / 公路車 CT Yeh
6 個月前
半日 小台灣 極限單車路線挑戰實錄
7 年前
萬年峽谷! 30% 超激陡坡 里佳部落DAY2 還是很硬! | 公路車 | CT Yeh
3 年前
新竹羅平 x 天湖部落 大禹嶺級變態陡坡! 4K超高畫質 空拍 | 公路車
5 年前
梅山36彎 奮起湖 #公路車 之旅 2400m
6 年前
觀霧 變好騎了! | 北高車友爆笑大會師 | 公路車 | 單車旅遊 Taiwan Cycling Route GuanWu
6 年前
大武山後門26%歡樂陡坡!JJSC南台灣單車行Day2 / 被颱風追著跑 / 公路車 / CT Yeh
2 年前
雨戰! 西進武嶺員工旅遊 加料 各路段大數據分析 | 同事端出5公斤的公路車來挑戰!? EP1
4 年前