Datun Mountain Aids Navigation Station Practical Guide: 17 km, 1,465 m of Climbing, Full Breakdown of Northern Taiwan's Toughest Demon Climb
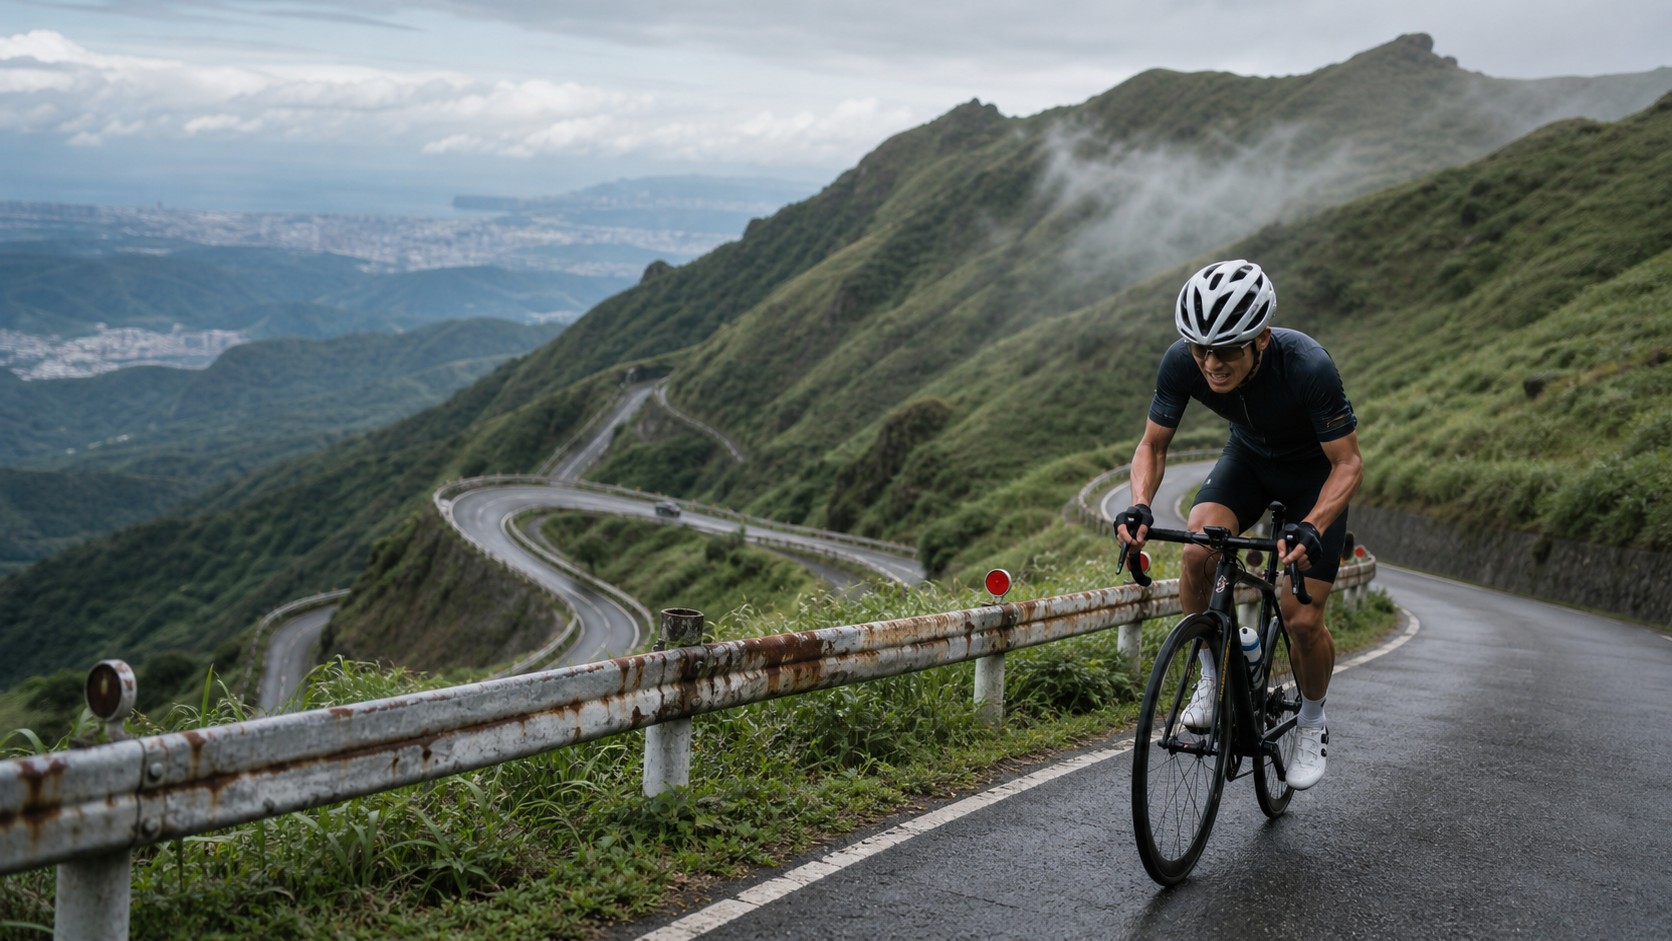
In the Northern Taiwan road cycling community, just mentioning “Navigation Station” tends to cause a subtle shift in riders’ expressions—a look blending awe with muscle-memory pain. Daitun Mountain Navigation Station, along with Fengguizui and Yangjin Highway, is listed among Northern Taiwan’s three major monster climbs, and it’s a reputation well earned.
Route Overview and Real Data Analysis
Let’s lay the numbers out first. The Daitun Mountain Navigation Station route spans 17.21 km in total length, with 1,465 m of cumulative elevation gain, an average gradient of 6.0%, and a difficulty rating of Category 5—in most route databases, this is already the highest classification, meaning this road isn’t just “long,” but a combination of “long and hard.”
If you only look at the 6.0% average gradient, you might think, “That’s not so bad—6% isn’t too extreme; even the city-side start of Fengguizui is steeper than that.” But here’s the first thing this article wants to honestly lay out: the average gradient is the mean across the entire route, not the route’s true character.
Let’s verify with simple arithmetic: if the entire 17,211.7 m were a uniform 6.0% climb, the theoretical elevation gain would be 17,211.7 × 0.06 ≈ 1,033 m. But this route’s actual total gain is 1,465.18 m—a gap of over 430 m between the two. This discrepancy isn’t a data error; it’s a faithful reflection of the route’s real terrain—it tells you this road is absolutely not a steady “constant-gradient climb,” but rather a composite terrain with dramatic mid-section undulations, where steep pitches and brief descents alternate.
In other words, the actual on-bike experience will be: on certain sections you’ll be grinding on brutal slopes of 10%, even momentarily approaching 15%, gasping for air, only to be followed by a short descent or a nearly flat recovery zone that lets your heart rate drop just before you’re forced to push it back into the red. This kind of “fake rest” terrain drains your lactate tolerance and mental resilience far more than a steady 6% long climb—because your body can never predict whether the next corner hides relief or hell.
This is also why many veterans who’ve ridden Yangjin Highway and Fengguizui still get “ambushed” on their first attempt at Daitun Mountain Navigation Station: you think the average gradient number tells you the route’s difficulty, but the total elevation gain is the key metric that reveals how much real work your body will have to put in. A total gain of 1,465 m is equivalent to climbing more than one-third the height of Taipei 101 from sea level in one go—and doing it within less than 18 km.
Administratively, the route crosses Taipei City’s Shilin District, situated within the Daitun Mountain range of Yangmingshan National Park. The generally recognized way to ride this route is along the mountain roads near the Taipei–New Taipei border, continuously climbing in the direction of Erziping and Daitunping, eventually reaching the area around the navigation station facility near Daitun Mountain’s main peak. The navigation station itself is an unmanned facility operated by the Civil Aeronautics Administration of the Ministry of Transportation and Communications for flight guidance—it’s not a tourist attraction, and general vehicles and pedestrians are restricted as they approach the facility itself. However, road cyclists commonly treat “riding to the navigation station archway or the control point” as the summit landmark and photo-check-in spot, which is also the customary certification method within the local cycling community.
Specific paved road connections, control point starting locations, and on-site closed sections are subject to announcements from Yangmingshan National Park Headquarters. Before riding, please always refer to the latest official announcements and on-site signage.
Section-by-Section Strategy: Reading the Rhythm of the 17 km
The biggest taboo on a long climb is “riding by feel.” A volume of 17 km with 1,465 m of climbing is enough to completely break anyone who mismanages their pacing in the later stages. Below, the full route is broken down into psychological and physiological phases based on terrain characteristics, providing a framework for pacing and cadence strategy.
Phase 1: Warm-up Climb
At the start of the climb, your body hasn’t fully entered an aerobic climbing state, and both muscles and cardiovascular system need time to adapt to sustained effort. The most common mistake in this phase is being driven by adrenaline—opening with near-maximal output to “test” the gradient, only to pay a heavy price later. It’s recommended to deliberately keep output low in this section, letting your heart rate slowly rise into a zone you can sustain for a long time (typically suggested to stay between Zone 2 and Zone 3), rather than charging straight into the anaerobic zone from the start.
Phase 2: Entering the Mountain Undulation Belt
As altitude rises, the road begins to show pronounced curves and gradient changes—this is where the earlier-mentioned “total gain far exceeding the average-gradient estimate” starts to flex its muscles. In this section, gradients fluctuate sharply between steep and gentle, with even occasional short descents offering brief relief. Remember: short descents are not opportunities to accelerate, but windows to adjust breathing rhythm, take in fluids, and let lactate metabolize slightly. Many riders can’t resist sprinting on descents, only to find their legs completely locked up when the next steep pitch arrives.
Phase 3: Balaka Highway Mountain Section
This route’s core mountain road is known for its many curves, steep gradients, and relatively narrow width. Historically built as a military road, it wasn’t designed with gentle gradients in mind like a scenic tourist highway, so its elevation profile more closely resembles mountain trail characteristics than suburban climbing roads. This section is one of the most psychologically demanding stretches of the entire route—continuous switchbacks prevent you from seeing the next gradient transition. It’s recommended to keep your gaze on the road’s turning points further ahead rather than staring at the asphalt directly in front, to avoid unnecessary mental drain from anticipatory anxiety.
Phase 4: Erziping Area Gentle-Gradient Recovery Zone
Around 800 m of elevation, the route passes near the Erziping area, where the terrain opens up and flattens—one of the few stretches where you can truly relax your shoulders and neck and straighten your upper body to breathe. It’s strongly recommended to do a full refueling stop here (see next section) rather than chewing energy gels while riding, because the hardest section of the entire route is coming next.
Phase 5: Daitunping to Navigation Station Assault Segment
This is the section with the highest climbing density on the entire route and where the most people crack. Elevation keeps rising, clouds and fog frequently shroud this area, visibility and temperature shift noticeably, and the perceived gradient feels even more oppressive than the numbers suggest due to continuous hairpin turns. By now you’ve ridden over ten kilometers, and accumulated fatigue is starting to show in pedaling efficiency—this is exactly why pacing control in the early stages matters so much: if you’ve already depleted your glycogen stores in Phases 1 and 2, this section will almost certainly deliver the painful experience of “dead legs.”
Phase 6: Final Summit Push to the Navigation Station
In the final stretch before the navigation station archway and control point, there’s usually one last closing ramp that squeezes out whatever strength remains. It’s recommended to switch to a lighter gear with a higher cadence here, rather than muscling a heavy gear in a sprint—a heavy-gear sprint causes lactic acid to pile up in the thigh muscles instantly, which actually slows down your final summit time.
Gearing and Equipment: The Double Challenge of Long Climbs and High Altitude
The equipment demands of this route essentially stem from the overlap of two dimensions: the physical toll of distance and the dramatic temperature shifts from altitude.
Gearing Setup
With 1,465 meters of total climbing and a concentration of steep sections in the middle of the route, a cassette with a wide gear range is strongly recommended. A standard road cyclist using a 53/39 chainset paired with an 11-25T cassette will likely be forced to “grind out of the saddle” on sustained 10%+ gradients, needlessly increasing energy expenditure and the risk of a soaring heart rate. It is advisable to equip at least a 34T or larger inner chainring, paired with a 28T or even 32T large cassette cog, allowing you to remain seated and maintain a steady cadence on the steepest sections. In recent years, many riders have opted for climbing-specific road bikes or drivetrains with ultra-wide ratio cassettes for routes like this. This isn’t overkill; it’s a sensible equipment strategy that genuinely reduces the risk of injury and cramping.
Warmth and Weather Preparedness
This is an aspect that many flatland riders tend to underestimate. The navigation station is near the main peak of Mt. Datun, exceeding 1,000 meters in elevation. Combined with the high likelihood of mountain cloud cover and significant winds, temperatures at the summit are often 5 to 10 degrees Celsius or more lower than at lower elevations. The wind chill factor after sweating can cause the perceived temperature to plummet rapidly. Without proper insulation after summiting, the risk of hypothermia during the descent is significant. It is recommended that even in summer, you carry a lightweight windproof vest or arm warmers, and put them on immediately after reaching the top before starting your descent, to avoid a sudden drop in body temperature causing muscle stiffness, slowed reactions, or even triggering cramps or hypothermia symptoms.
Wheelset and Braking System
The continuous descent puts severe stress on the braking system, especially on winding, steep mountain roads. Prolonged, intermittent braking can cause brake pads to overheat and rotors to warp. If you use rim brakes on aluminum rims, pay extra attention to the risk of rim overheating from sustained braking on long descents. Before departing, be sure to check brake pad wear and the condition of the brake fluid circuit (for hydraulic disc brake users) or cable tension (for mechanical brake users). This isn’t optional maintenance; it’s a necessary safety check.
Nutrition and Hydration Strategy
Covering 17 kilometers with 1,465 meters of climbing at a moderate pace will take most amateur riders at least 1.5 to 3 hours or more to reach the summit (depending on individual ability and rest stops). At this intensity and duration, the fluid and electrolyte loss is far greater than riding on flat terrain.
Before Departure: It’s recommended to complete a full round of hydration and carbohydrate loading at least 30 minutes prior, avoiding starting the steep climb on an empty stomach or dehydrated.
On the Route: Supply points are scarce throughout the mountain, so be sure to carry at least one bottle of water or more, and bring energy gels or portable snacks to fuel the prolonged calorie burn. The Erziping area mentioned earlier, with its gentler slopes, is one of the few ideal spots on the entire route to stop for a proper refuel rather than eating while riding.
Electrolytes: With large temperature swings in the mountains, sweat rate and evaporation are heavily influenced by the wind. Simply drinking water while neglecting electrolytes can easily lead to cramping in the latter stages. It’s advisable to use sports drinks or supplement tablets containing sodium, potassium, and other electrolytes, especially on hot, humid summer days.
Weather and Seasonal Considerations: Foggy, Rainy Mountains with Sharp Temperature Swings
The overall climate of Yangmingshan National Park is “humid and foggy.” Due to orographic lift and the influence of the northeast monsoon, the Datun Mountain area is frequently shrouded in clouds and fog, and visibility can drop dramatically in a short period. This isn’t just a problem for photo opportunities; it directly impacts riding safety—wet roads significantly reduce cornering grip, and blind spots in foggy conditions can distort your perception of speed on descents.
Rainy and Typhoon Seasons: Afternoon thunderstorms during Taiwan’s summer and autumn, along with the outer bands of typhoons, often bring sudden, intense rainfall to the mountains. After heavy downpours, mountain roads may experience rockfalls, landslides, or flooding. It’s advisable to check the weather forecast before riding and pay attention to any road closure announcements from the national park.
Winter: The Datun mountain range is relatively high, and with the direct blast of the northeast monsoon, low temperatures and even occasional snowfall have been recorded in winter. If tackling this route in winter, be sure to strengthen your cold-weather gear and watch out for icy or slippery road conditions.
Best Seasons to Ride: Spring and autumn typically offer the most stable weather windows, with moderate temperatures and relatively lower rainfall. These seasons also offer the best chance of clear views, allowing you to enjoy the panorama of the Taipei Basin and coastline along the way. However, mountain weather is inherently unpredictable, so it’s wise to re-check the real-time forecast on the day of your ride.
Common Mistakes and DNF Risks
The reason this route causes even experienced riders to fall short often comes down to strategic errors as much as the terrain itself:
-
Pacing Failure in the Early Stages: As mentioned earlier, going out too hard in the initial climb, driven by adrenaline, is the most common cause of blowing up. The golden rule for long climbs is always: “Better to be conservative early than to collapse late.”
-
Neglecting Refueling Timing: Many people are used to “refueling only when they can’t bear it anymore.” But on this route with its relentless climbing, once your glycogen stores are truly depleted, the effectiveness of refueling diminishes significantly, and you may even reach the cramping threshold before you can recover.
-
Insufficient Gearing: If you haven’t confirmed beforehand that your gearing can handle the sustained steep pitches, you can easily be forced to dismount and push your bike on the steepest sections. This not only slows you down but also takes a heavy toll on your morale.
-
Underestimating Weather Changes: Neglecting to bring warm clothing and starting the long descent directly into strong, cold, damp winds after summiting is a breeding ground for hypothermia and cramps.
-
Unaddressed Mechanical Issues: Long climbs are a severe test for the drivetrain and braking systems. Failing to perform basic checks before departure means issues like chain drops or rough shifting mid-ride can seriously disrupt your rhythm.
Target Time References for Different Rider Levels
Due to the high climbing density and complex terrain of this route, estimating completion time based solely on average speed is inaccurate. Below are approximate target time ranges for different rider levels (actual times will vary significantly based on fitness, weather, and rest stops):
| Rider Level | Reference Completion Time | Notes |
|---|---|---|
| Advanced/Competitive Rider | Approximately within 1.5 hours | Requires a solid base of long-climb training and good power management skills |
| Intermediate Rider | Approximately 1.5–2.5 hours | Should have some climbing experience; recommended to combine with a nutrition strategy |
| General Recreational Rider | Approximately 2.5–3.5 hours or more | Recommended to take breaks in sections; no need to push for speed, prioritize finishing safely |
| First-Time Challenger | Flexible cut-off time depending on individual condition | Recommended to ride with companions and confirm your fitness and equipment are up to the task beforehand |
Regardless of which category you fall into, the core spirit of this route isn’t about being “fast,” but about whether you can “consume the full 1,465 meters of climbing with a steady rhythm.” For most amateur riders, being able to ride the entire way to the navigation station without putting a foot down is an achievement in itself to be proud of.
Training Advice: How to Prepare for This Route
If you’re not a natural climber but want to increase your chances of success through systematic training, here are a few training directions worth incorporating into your plan:
Long-Distance Endurance Base: Before tackling the Datun Mountain Navigation Station, it’s advisable to ensure you have an endurance base of at least 2 hours of continuous aerobic riding. The total climbing and duration of this route are a prolonged test of your cardiovascular system and muscular endurance. If your regular training mileage and hours are insufficient, you’re likely to hit the “wall” from glycogen depletion in the later stages.
Interval Climbing Training: Since the middle section of the route features dramatic, fluctuating gradients, steady-state pacing alone isn’t enough to simulate this real-world terrain. It’s recommended to add interval climbing workouts to your training plan—for example, repeating cycles of high-intensity climbing and recovery on shorter hills to train your body’s ability to rapidly adjust output and recover when gradients change sharply.
Core and Lower Body Strength Training: The alternating use of prolonged out-of-saddle grinding and seated pedaling places high demands on core stability and lower body strength. Incorporating some weight training (such as squats and step-ups) can effectively reduce the risk of being forced to dismount due to muscle fatigue during the long climb.
Simulated Route Testing: If there’s a similar-difficulty but shorter climb near your home, it can serve as a pre-event test venue. Use it to gauge your heart rate response and perceived fatigue on sustained steep gradients, helping you calibrate your pacing strategy for the actual challenge.
Mental Fortitude: The Invisible Gear More Important Than Leg Strength
On long climbing challenges, physical fitness is only half of the equation. The other half, often underestimated, is the ability to manage your mental state. Because the terrain of the Datun Mountain Aids Navigation Station follows no predictable pattern, it places an especially high demand on mental resilience—you can never comfort yourself with the thought that “it will ease up if I push a little further,” because around the next bend, there could easily be another stretch of continuous steep climbing.
It is recommended to prepare on several mental fronts. First, segment goal setting: rather than treating the entire 17 kilometers as one vague objective, break it down into the terrain phases described earlier, and give yourself a small psychological reward each time you complete a segment, preventing the thought of “there’s still such a long way to go” from crushing your will too early. Second, accept that your rhythm will be disrupted: this route simply does not allow you to maintain a steady cadence. Instead of resisting this irregularity, treat it as the route’s inherent personality and learn to adapt your output to the terrain as it comes. Finally, allow yourself to rest: dismounting and walking, or pausing briefly to catch your breath, is not a sign of failure. Knowing when to set aside your pride, protect your knees and cardiovascular system at critical moments, is the mark of truly mature riding wisdom.
Equipment Checklist: The Final Gate Before Departure
In addition to the gear ratios and braking systems mentioned earlier, here is a checklist of equipment to verify item by item before taking on the challenge:
- Tire pressure and condition: Mountain roads occasionally have gravel and potholes. It is recommended to choose appropriate tire pressure based on your body weight and tire width, and to confirm there are no obvious cracks or wear on the tires.
- Drivetrain calibration: Continuous steep climbs demand highly responsive shifting. Before departure, make sure both the front and rear derailleurs shift smoothly, to avoid skipped gears or chain jams disrupting your rhythm mid-ride.
- Lighting and reflective gear: If your challenge time may extend into dusk or periods of mountain fog, it is recommended to carry front and rear lights along with reflective accessories to improve riding safety in low-visibility conditions.
- Communication and navigation: Signal may be unstable on some mountain sections. It is recommended to inform family or friends of your planned itinerary and route before departure, and to carry a power bank to ensure your phone has sufficient battery for emergencies.
- Emergency repair tools: Spare inner tubes, patch kits, a mini pump or CO2 inflator, and a basic set of hex wrenches are all indispensable items to carry on long-distance mountain rides.
Conclusion: The Real Challenge Beyond the Numbers
Back to the numbers at the start: 17.21 kilometers, 1,465 meters of climbing, 6.0% average gradient. These figures alone are enough to place this route in the difficulty Level 5 category, but riders who truly understand this route know that the average gradient is only the beginning of the story—the dramatic mid-section with its rolling, compound terrain is the decisive variable between success and failure.
If you are planning to take on the Datun Mountain Aids Navigation Station, it is recommended to first confirm that you have stable, completed experience on other mid-to-long distance climbing routes (such as Fengguizui or the Yangjin Highway) before tackling this northern Taiwan boss climb that combines the triple test of distance, elevation gain, and terrain complexity. Make thorough preparations with gear ratios, nutrition, and warmth, and replace impulsive urges with a rational pacing strategy—that is the true key to conquering this legendary route.
Whether it takes you 90 minutes or three and a half hours to reach the summit, being able to fully absorb 1,465 meters of climbing under your own power is an achievement worth recording in your personal riding history. May every challenger, with adequate preparation, enjoy the uniquely painful-yet-pleasurable experience this route has to offer.
Related Reading
- Summiting Through Clouds and Silvergrass: Datun Mountain Aids Navigation Station, the Pilgrimage Route for Northern Taiwan Riders
- Guoxing Demon Slope Guide: A Complete Breakdown of Taiwan’s Coffee Hometown 8.1% Brutal Climb
- Beidawu Gate Combat Guide: A Full Data Analysis of Pingtung’s 10.56K, 677m Climb—Southern Taiwan’s Tough-Guy Slope
- Taiwan’s Top Ten Classic Climbing Routes: A Complete Guide from Beginner to Demon Level
台北闊瀨陡坡 騎旅 / 日本單車雜誌編輯車友臨時加入!/ 髮香才是最強的 / feat. 北迴歸線小隊 / 公路車 CT Yeh
6 個月前
騎單車去大屯山賞雪! 助航台滑冰 全記錄 | 台北R友大集合 | 下雪打雪仗囉 | 4K超高畫質
5 年前
爬坡ITT實境)台中 魔王 松鼠坡 首航 6:12 大肚山 大三元 科福路
8 年前
台中大雪山 膏王領騎 震到都沒畫面了 公路車
5 年前
大禹嶺 到 武嶺牌樓 全程前後實況錄影 | 北進武嶺 | 東進武嶺 | KOM | 訓練台 | 坡度分析 | Taiwan KOM Last 10 km HARD | 公路車
6 年前
大武山20%魔王陡坡【JJSC南台灣遊騎Day2】!屁股真的要裂開了...凡士林抹滿也沒用?神秘金教堂還有超便宜夜市
3 個月前
大武山後門26%歡樂陡坡!JJSC南台灣單車行Day2 / 被颱風追著跑 / 公路車 / CT Yeh
2 年前
新竹羅平 x 天湖部落 大禹嶺級變態陡坡! 4K超高畫質 空拍 | 公路車
5 年前