Donna Route Practical Guide: Under the Category 0 Gentle Classification, the Truth Behind the 508 Meters of Elevation Gain
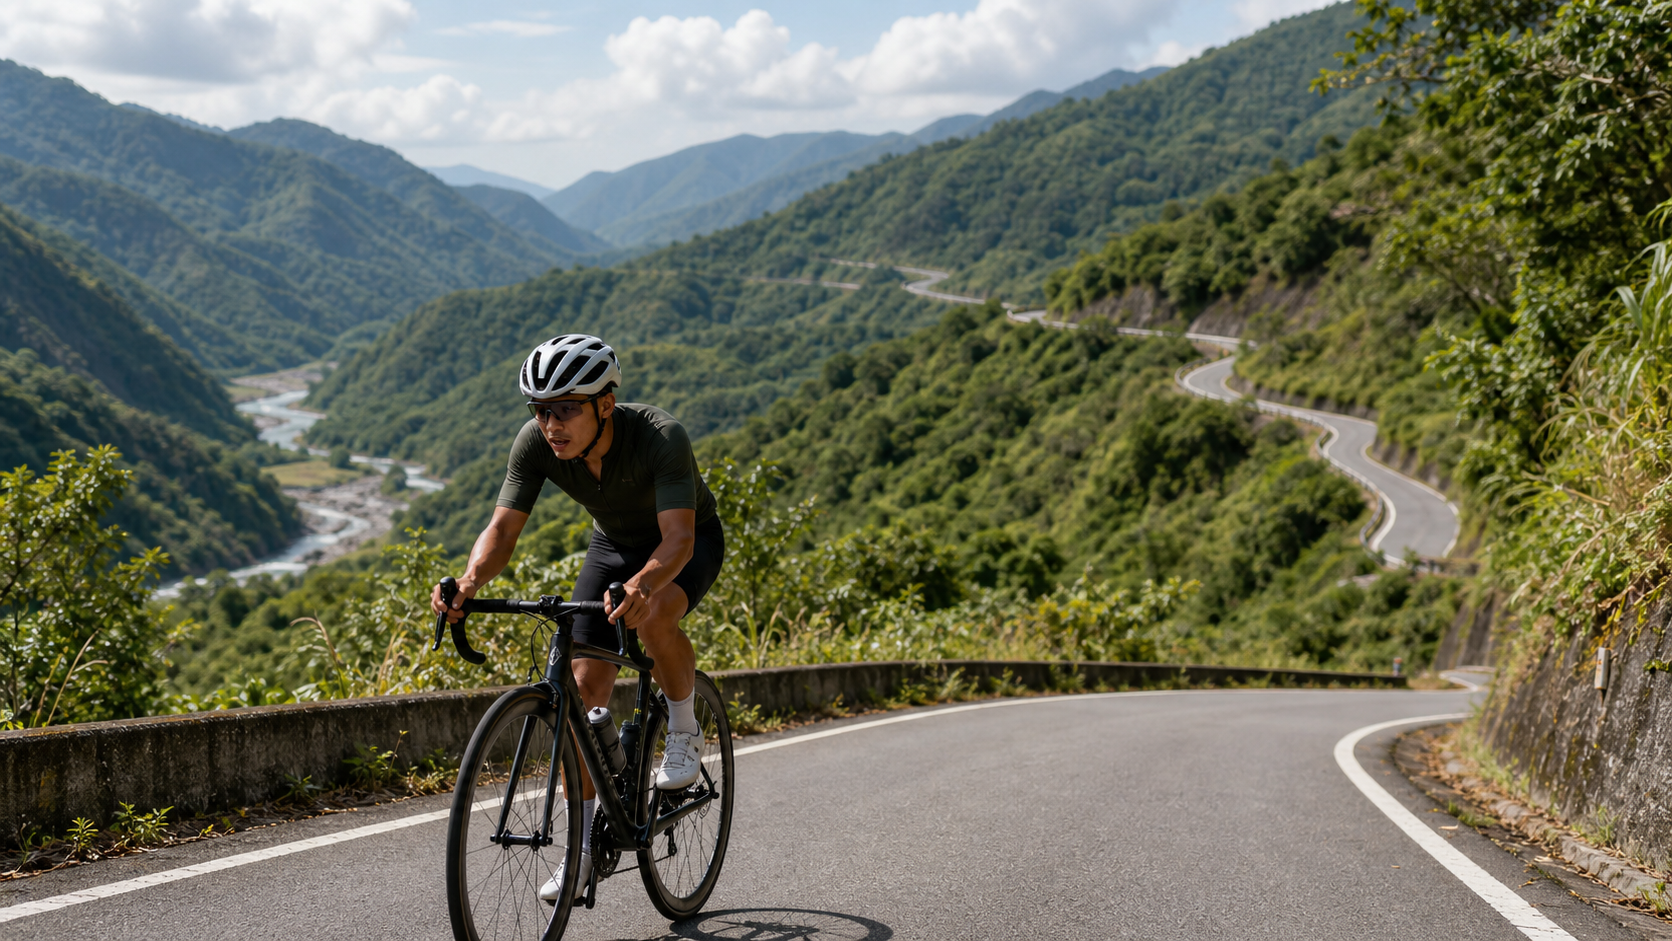
Maolin, Kaohsiung, Donna is a route that looks very “affordable” in numbers, but actually riding it makes you feel alert. This guide breaks down the official data point by point and provides suggestions on equipment, supplies, weather, and schedules, allowing riders of all levels to mentally ride this route before setting off.
Route Overview: Numbers look gentle, but don’t be deceived by the average
The Donna route is located in Maolin District, Kaohsiung City, with a total length of 13114.3 meters (approximately 13.11 km), total climbing of 508.0 meters, and an officially marked average gradient of only 2.5%. Strava classifies it as Category 0—the lowest level in the difficulty classification, theoretically representing a relatively gentle route that any level of rider can handle easily.
But if you do a little math verification, you’ll find something interesting (and a bit scary). Assuming this road maintains a stable 2.5% gradient from start to finish, 13.11 km multiplied by 2.5% should theoretically result in a climbing of around 328 meters. However, the total climbing recorded by Strava is 508.0 meters, a difference of nearly 180 meters, with a disparity ratio as high as about 55%.
This is not a data error, but a classic case of the “average trap.” The average gradient is just a single number obtained by dividing total climbing by total distance, and it completely fails to reflect the distribution of gradients within the route. In other words, the number 2.5% is likely the result of averaging “long stretches of flat or slightly downhill sections” with “localized relatively steep climbing sections.” When actually riding, you will likely experience a gentle climb cruise where you feel almost no climbing, followed by a sudden encounter with a section where the gradient is significantly higher, causing your heart rate and cadence to spike simultaneously, before returning to flat or slightly undulating pavement.
Here, I want to honestly tell all riders preparing to challenge Donna: Although the officially marked average gradient is only 2.5%, which seems gentle, the total climbing of 508 meters for a distance of 13.11 km is not small, indicating that this route is likely not a uniform gradual climb, but rather a mix of gentle sections and localized steeper climbs. Riders should not judge the difficulty solely based on the literal number of 2.5%, but should pay attention to changes in gradient in localized sections. The Category 0 classification tells you “this road won’t kill you,” but it does not mean “this road has no undulating challenges.” In an engineer’s words: the average tells you the trend, but the standard deviation tells you where the risk lies—and the risk in this Donna route is hidden in those localized steep slopes that are smoothed out by the average in the middle and latter sections.
From the overall route attributes, riding Donna feels more like a “suburban mountain gentle climb route” rather than a “hardcore demon climbing route.” This means it is very suitable as the first “perceptible climbing route” for advanced beginners, and also suitable for experienced riders to use for easy day cruising or as one segment in a long-distance touring itinerary. But precisely because its threshold is low and its external image is gentle, it easily causes riders to take it lightly and ignore the gradient surprises that may appear in the middle and latter sections, which is also why this guide specially breaks down the data in the first section.
Segment Guide: Break the 13 km into digestible blocks
The Donna route is approximately 13.11 km long with a total climbing of 508 meters. It is recommended that riders mentally divide it into three to four sections to understand, rather than riding it as a “homogeneous” route without any rhythm adjustments. The following are segment riding strategies estimated based on overall gradient characteristics; actual terrain undulations should still be based on on-site road conditions and personal GPS records.
First Section: Starting Point Warm-up Zone. This section is usually when the rider’s heart rate and cadence are still warming up. Combined with the terrain characteristics of the front section which may be relatively flat or even have small downhill sections, it is recommended not to rush speed at the beginning, but to use medium-low intensity (heart rate zone Z2 or so) to gradually get the body and respiratory system into shape. A common ailment among many riders is seeing numbers like Category 0 and average gradient 2.5% which are “gentle,” and then rushing wildly at the starting point, resulting in lack of strength in the latter steep sections—the rhythm management of this route, the starting point is actually the easiest place to step wrong.
Second Section: Gradient Transition Zone. According to the elevation difference analysis of the front section, this is the section of the entire route that requires the highest alertness. When the road surface starts to show a continuous upward trend and the cadence noticeably drops, it means you are entering a localized steep section masked by the average. Here, it is recommended that riders actively downshift and maintain a cadence that can be sustained without causing the heart rate to explode (recommended between 70-85 rpm). Rather than using a heavy gear ratio to force it and causing lactic acid to accumulate too quickly, it is better to grind slowly with a lighter gear ratio. The mental preparation for this section is important: since you know that the total climbing of this route is far higher than the climbing that “on the surface” 2.5% should have, you should expect a section that is “more panting than imagined,” and adjust your breathing rhythm in advance.
Third Section: Gentle and Finishing Zone. After passing through the gradient transition in the middle section, the route usually returns to a relatively gentle gradient, giving riders the opportunity to recover heart rate, replenish water and energy gels. This is a good time to reassess your physical condition—if you find that you consumed too much in the second section, this is the point to adjust your goal, put aside the idea of “rushing time,” and switch to a “safe finish” strategy.
Fourth Section: Final Stretch. As a Category 0 level route, the final section of Donna usually does not have too exaggerated final sprint-type steep slopes, but it is still recommended to reserve some physical energy reserve to avoid exhausting glycogen reserves before reaching the finish line. After reaching the finish line, it is recommended to immediately perform cool-down exercises and rehydrate, because even with a gentle gradient, the riding intensity of 13 km and 500 meters of climbing is still a perceptible load on the heart and lungs and thigh muscle groups.
Overall, the core spirit of the Donna segment guide is: do not be misled by the two “gentle labels” of Category 0 and 2.5% average gradient, treat it as a route with real undulations that requires pacing strategy, so that you can respond calmly when localized steep slopes appear in the middle and latter sections, rather than being caught off guard.
Gear and Gear Ratio Recommendations: Suitable for Beginners and Long-Distance Cruising
The ratio of total elevation gain to distance on the Duona route makes it an excellent choice for practicing “climbing rhythm control” without intimidating beginners. Due to its Category 0 classification and the characteristics of alternating steep sections, gear and gear ratio selection should adopt a “conservative strategy with room to spare,” rather than minimizing weight to the extreme as one would for a “Great Demon” level route.
Road Bike Riders: If your bike uses a traditional double-chainring system (e.g., front 50/34T compact crankset), it is recommended to pair it with a rear cassette of at least 11-28T, or even 11-32T. This ensures that when encountering localized steep sections masked by the average gradient, you still have sufficiently light gears to maintain a stable cadence without having to stand and pedal hard. For novice riders with less riding experience or insufficient confidence in climbing, it is strongly recommended to choose a compact crankset paired with a large cassette. This configuration is very practical on routes like Duona, which are “moderately average overall but noticeable in localized sections.”
Disc Brakes and Tire Width: Located in mountainous areas, road conditions on the Duona route are affected by weather and surrounding vegetation. It is recommended to choose tires with a width of 25C or greater (28C is better), and select disc brake models according to personal preference. Disc brakes offer greater stability and control when braking on downhill sections, which is particularly important when encountering slippery surfaces in mountainous areas.
Long-Distance Cruising and Beginner Configuration: If you plan to use Duona as one segment of a long-distance route, or if your riding experience is still shallow and your goal is to “finish the race without injury,” it is recommended to choose a flat-bar road bike or an endurance road bike with a more comfortable riding position, paired with a triple-chainring or compact crankset system. These configurations provide a more relaxed pedaling angle during climbs. Additionally, endurance bike geometry typically features a longer wheelbase and higher handlebar position, reducing strain on the lower back and neck during long rides. This makes Duona very suitable for inclusion in one-day multi-route touring or leisurely weekend cruising trips.
Electronic Shifting and Power Meters: Although Duona has a low difficulty rating, it is an excellent opportunity to hone pacing skills. If your equipment includes a power meter, it is recommended to deliberately control power output in the second section’s gradient transition zone to avoid surging and causing a speed drop in the latter section. Electronic shifting systems allow you to quickly and accurately shift to the appropriate gear when the gradient suddenly becomes steeper, reducing cadence interruptions caused by hesitation in manual shifting.
Other Gear Reminders: Since the route is located in mountainous areas and is not short in distance, it is recommended to carry a basic puncture repair kit (inner tubes, CO2 inflator or mini pump, tire levers), as well as at least two water bottles. This ensures adequate hydration and support.
Hydration and Nutrition Strategy
The Duona route is 13.11 km long with 508 meters of elevation gain. At the speed of a general leisure rider, completing the entire route takes approximately 40 minutes to 1 hour (depending on individual fitness and whether rest stops are taken). For most riders, this is not a long-distance route requiring a “relay station” level of support. However, mountainous climate and gradient fluctuations still warrant careful preparation.
Before Departure: It is recommended to complete a main meal or at least a good source of easily digestible carbohydrates (e.g., bananas, energy bars) 1-2 hours before riding, and ensure the body is in a state of adequate hydration rather than waiting until thirsty to drink water.
During the Ride: Due to Duona’s total elevation gain of 508 meters, localized steep sections may appear in the middle section, making the perceived exertion higher than what one might imagine based solely on the “13 km” figure. It is recommended to take small sips of water every 15-20 minutes, especially on hot summer days or when humidity is high. The stuffy heat in mountainous areas can cause sweating rates far exceeding those of flatland riding. If the total riding time exceeds 45 minutes, it is recommended to carry an energy gel or sports drink and replenish before entering the second section’s gradient transition zone to avoid the “hitting the wall” condition where blood sugar drops sharply on steep sections, causing leg weakness.
Electrolyte Replenishment: Riding in mountainous areas combined with climbing consumption leads to faster electrolyte loss compared to flatland riding. It is recommended that at least one of the water bottles contains sports drinks or water with added electrolyte powder, which is especially important during hot and humid summer months.
After the Ride: Upon reaching the finish line or completing the route, it is recommended to immediately replenish water and protein, and use local sightseeing spots (e.g., Duona Hot Springs, see below for terrain and seasonal recommendations) as a good place for body recovery and stretching.
Weather and Seasonal Recommendations
The Maolin Duona area is mountainous terrain, where climate changes are inherently more variable than in flat areas. Combined with the route’s total elevation gain of 508 meters and localized steep sections, riders should incorporate weather and seasonal factors into their departure date planning decisions, rather than simply departing based on holiday availability.
Dry Season (Approximately Autumn and Winter): Generally, the southern mountainous regions of Taiwan have a relatively low probability of rainfall during autumn and winter. Roads are dry and visibility is clear, making this the ideal season for riding mountain routes like Duona. Temperatures are also cooler, helping to reduce the perceived load during climbs and allowing riders to focus more on rhythm control in gradient transition zones rather than being distracted by extreme heat.
Summer and Rainy Season: Southern mountainous areas are prone to afternoon thunderstorms in the summer, plus the typhoon season (especially in the Maolin and Duona areas, which have previously suffered severe damage to connecting roads due to the Morakot typhoon disaster, see the cultural section). It is recommended to check real-time weather forecasts and road condition announcements before departing in summer to avoid ascending during thunderstorm warnings. Slippery mountain roads combined with localized steep sections present an additional challenge to braking and cornering stability; safety always takes priority over the itinerary.
High Heat and Sun Protection: Even during autumn and winter, the intensity of sunlight in southern Taiwan should not be underestimated. It is recommended to take sun protection measures (sunscreen, arm sleeves, sunglasses) and pay special attention in the hydration strategy to increase the frequency of water replenishment during high summer temperatures.
Early Morning or Afternoon Time Slots: If riding is scheduled during the summer, it is recommended to depart in the early morning. This avoids the peak heat and UV radiation of midday. Additionally, early morning mountain areas typically have better visibility and air quality, and there is an opportunity to enjoy the misty scenery of the Zhuokou River basin.
Common Mistakes and Rider Mental Preparation
Based on the data characteristics of the Duona route—“moderate average gradient but high total elevation gain”—the following are several common mistakes riders are most likely to make, with reminders to avoid them in advance.
Mistake One: Taking the Category 0 Rating for Granted. The Strava rating system’s Category 0 does indeed represent the lowest difficulty level, but “low difficulty” does not mean “no challenge.” As explained in the previous data analysis, a total elevation gain of 508 meters over a distance of 13.11 km is actually not small. The existence of localized steep sections means this route still requires basic climbing skills and pacing awareness, and it is not advisable to depart without any preparation.
Mistake Two: Rushing Too Fast at the Start and Lacking Power Later. This is a common ailment seen in almost all low-difficulty rated routes—riders use high-intensity sprints in the initial stage because they see an “average gradient of 2.5%,” only to find themselves without the remaining strength to handle localized steep sections when entering the middle section’s gradient transition zone. This results in cadence drops and speed loss, or even being forced to dismount and push the bike. It is recommended to be conservative in the first section and save energy for the middle and latter sections.
Mistake Three: Gear Configuration Too Heavy. Some riders, because the route rating indicates a moderate difficulty, choose to depart with a heavier gear configuration (e.g., large chainring 53/39T paired with a smaller cassette). As a result, when encountering localized steep sections, they find the pedaling resistance too high, placing unnecessary additional burden on the knees and thigh muscle groups. As mentioned in the previous gear recommendations, even for Category 0 level routes, retaining a certain amount of light gear flexibility is a wise choice.
Mistake Four: Ignoring Hydration and Electrolytes. Because the route is not long (only 13.11 km), many riders tend to underestimate the importance of replenishment, believing “such a short distance does not require special preparation.” However, mountain climbing combined with the humid and hot climate of southern Taiwan often results in actual consumption exceeding expectations. It is recommended to prepare sufficient water and electrolytes according to the replenishment strategy outlined in the previous section.
Mistake Five: Ascending Without Checking Weather and Road Conditions. Mountain roads in the Maolin and Duona areas are easily affected by weather conditions and have previously been interrupted by typhoon disasters. It is recommended to confirm real-time weather and road condition information before departure to avoid attempting a challenge under adverse weather conditions.
Mistake Six: Ascending Alone Without Informing Others. Although Duona belongs to a route with a lower difficulty rating, it is still located in mountainous areas. It is recommended to inform family and friends or cycling team partners of the planned departure and return times before riding, and to carry a mobile phone and power bank. If possible, it is also recommended to ride with a group. For first-time challengers or riders with shallow experience, riding with a group allows for mutual assistance in energy distribution or handling temporary situations. This is a basic safety principle applicable to any mountain route and is not an exception even for routes with moderate difficulty ratings.
Target Time Tables for Riders of Different Levels
The following time table is for reference only. Actual completion times will be influenced by individual fitness, weather conditions on the day, road conditions, and whether you stop to take photos or rest midway. It is recommended that riders prioritize their own physical sensations and should not force themselves to chase specific numbers.
| Rider Level | Estimated Completion Time | Recommended Riding Strategy |
|---|---|---|
| Beginner (Occasional riding, no regular training) | About 55-70 minutes | Use a lighter gear ratio throughout; stop to hydrate and rest as needed; do not chase speed; aim for safe completion and experiencing the terrain undulations |
| Casual Rider (Rides 1-2 times per week) | About 40-55 minutes | Be conservative in the first section; actively downshift to maintain a stable cadence in the middle section where the gradient changes; in the final section, decide whether to accelerate towards the finish based on your physical condition |
| Advanced Rider (Regular training, has climbing experience) | About 30-40 minutes | Can attempt to maintain high-to-moderate intensity output throughout; use this route to practice power control and rhythm switching techniques during gradient changes |
| Competitive Level Rider | About 25-30 minutes or faster | Can be used as an interval training or climbing ability test section; recommended to use a power meter to record data as a reference baseline for long-term training tracking |
Regardless of your level, the greatest value of the Donua route lies in: it packages a seemingly gentle Category 0 classification and 2.5% average gradient, but actually hides a real terrain with a total ascent of 508 meters and local gradients that should not be underestimated. Instead of worrying about whether you finish fast or slow, treat this route as a practical exercise in “data interpretation” and “pace strategy”—learning not to be misled by averages and knowing to reserve energy for unknown steep sections. This riding mindset has far greater long-term value than simply chasing completion seconds.
It is worth mentioning that the time intervals in the table above are not absolute standards, but rather reasonable ranges estimated based on the route’s total distance, total ascent, and the power-to-weight ratio of average riders. If you are in particularly good condition on the day, or choose to start outside of hot hours, your completion time may naturally fall on the faster end of the interval; conversely, if the weather is stuffy and humid, the road surface is slippery, or you choose to dismount and push the bike to rest in the gradient change sections, it is completely reasonable for the time to extend to the slower end of the interval, and you should not feel frustrated because of it. Riding is not simply a numbers competition. Especially for routes like Donua that combine terrain educational significance with cultural landscapes, slowing down and paying more attention to the scenery of the Zhuokou River along the roadside and the indigenous stone house settlements is often more worthwhile than lowering your completion time.
Conclusion: A “Gentle” Route Worth Taking Seriously
The Donua route tells every rider preparing to challenge it in the most straightforward way: data speaks, but it can also mislead. The combination of four numbers—13.11 km distance, 508.0 meters total ascent, marked 2.5% average gradient, and Strava Category 0 classification—forms a route that appears gentle on the surface but actually hides surprises from local steep sections.
For beginner riders preparing to challenge a significant climb for the first time, Donua is an excellent training ground that is relatively safe and allows for accumulating real climbing experience; for veterans, it is a route where they can ride relaxed, enjoy the scenery of the Maolin mountain area, while still maintaining certain training value. Regardless of your level, it is recommended that you keep the segmented strategies, gear ratio suggestions, and supply planning from this guide in mind, do your homework before departure, and maintain sensitivity to terrain changes while riding to truly complete this seemingly gentle but actually substantial Donua route safely and with full enjoyment.
Finally, we also remind all riders that road conditions and traffic control on mountain routes may change with seasons, construction, or post-disaster recovery situations. Especially in the Maolin and Donua areas, which have previously experienced road closures for repairs due to typhoons, it is recommended that in addition to referring to the gradient and fitness data analysis in this guide, you also develop the habit of checking the latest road condition announcements and local community riding experiences. Prioritizing both “data interpretation” and “real-time information verification” is the most prudent preparation method when facing any route claiming to be “gentle.” Treating every departure as a complete pre-ride lesson is the key to truly converting data into safe riding capability.
Related Topics to Read
- Full Analysis of Wugong Mountain Climb: The 14% Truth Hidden Behind the Official 9.7% Gradient (Kaohsiung Maolin)
- Kaohsiung Maolin Mountain Area Cycling: Three Indigenous Tribe Routes - Donua, Wutai, and Ali
- Naxiashan Qinhe to Taoyuan Meishankou Guide: 26% Ascent Difference Hidden Under Category 0 Classification
- Baolai-Jiashian Route Guide: 5.29 km, 202.2 meters ascent, perfect data-type training hill
台北闊瀨陡坡 騎旅 / 日本單車雜誌編輯車友臨時加入!/ 髮香才是最強的 / feat. 北迴歸線小隊 / 公路車 CT Yeh
6 個月前
爬坡ITT實境)台中 魔王 松鼠坡 首航 6:12 大肚山 大三元 科福路
8 年前
半日 小台灣 極限單車路線挑戰實錄
7 年前
那瑪夏x茶山 阿里山系深山單車行 Day2 累積爬升6000M | 🥶超陡連續下坡 整路看隊友刷 | 爬升一座西進武嶺 | JJSC | 公路車 | CT Yeh
3 年前
藤枝二集團 單車行 Day1 | 南部小武嶺 | 爬坡爬到罵罵叫 | JJSC | 公路車 | CT Yeh
3 年前
單車 梅山36灣 坡度介紹 路段介紹 空拍 (相關遊記影片,請參考說明或我的頻道喔,歡迎訂閱)
6 年前
萬年峽谷! 30% 超激陡坡 里佳部落DAY2 還是很硬! | 公路車 | CT Yeh
3 年前
梅山36彎 奮起湖 #公路車 之旅 2400m
6 年前