Complete Guide to Cycling Position Fitting: How to Find Your Ideal Riding Position
Bike Fitting is one of the most effective ways to improve pedaling efficiency and reduce the risk of injury. Research shows that a professional fitting can boost power output by 3–7% while significantly reducing the incidence of knee, lower back, and neck pain.
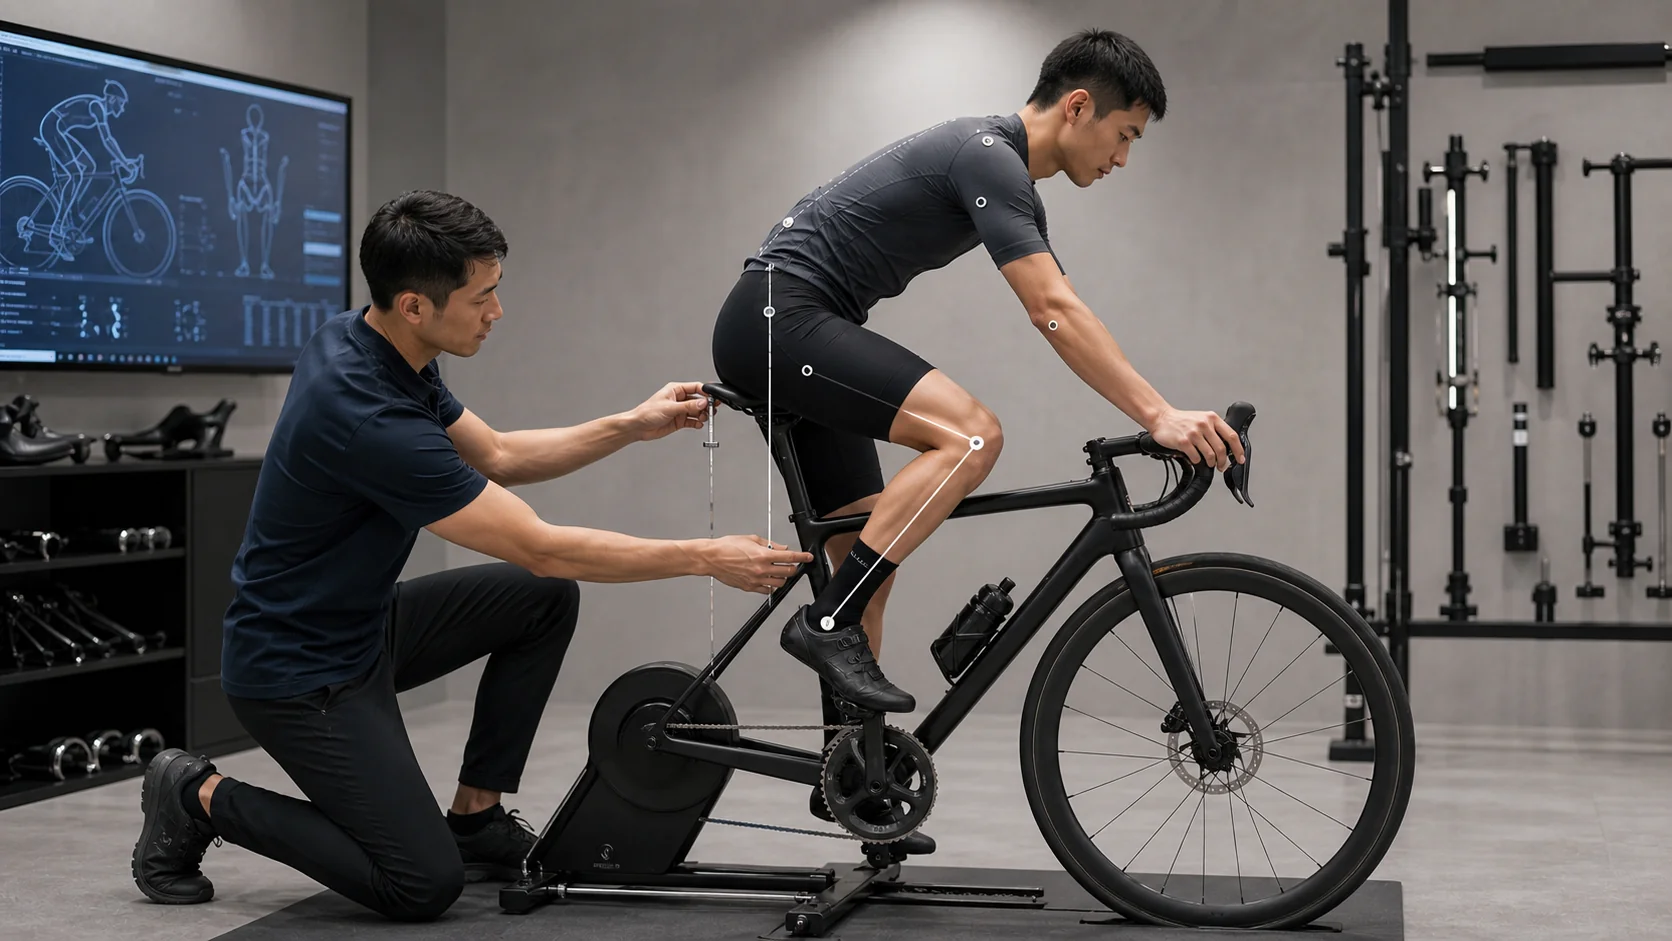
Why Is Fitting So Important?
Every pedal stroke subjects the body to forces several times its own body weight, and an hour of riding involves approximately 5,000 pedal strokes. If each stroke deviates slightly from the ideal position, the cumulative effect over time can lead to:
- Knee pain (the most common issue, especially on the front or inner side of the patella)
- Lower back pain (saddle too low or handlebars too low)
- Neck and shoulder pain (handlebars too far away or top tube too long)
- Numbness in the feet (incorrect cleat position)
- Power loss (inefficient position)
Key Adjustment Parameters
1. Saddle Height
Saddle height is the most important parameter in fitting.
LeMond Formula (most commonly used):
- Saddle height = Inseam length (cm) × 0.883
- Inseam measurement: stand barefoot with feet shoulder-width apart, measure the distance from the pelvic bone to the floor
Holmes Angle Method:
- At the bottom of the pedal stroke, the knee bend angle should be 25–35°
- Less than 25°: saddle too low (prone to anterior knee pain)
- Greater than 35°: saddle too high (prone to posterior knee pain, possible hip rocking)
Common mistake: A saddle set too low is the most common issue among Taiwanese riders, possibly stemming from the psychological need to “be able to touch the ground with your feet.”
2. Saddle Setback
Affects pedaling efficiency and knee health.
KOPS Principle (Knee Over Pedal Spindle):
- When the pedal is at the 3 o’clock position, the kneecap (patella) should be vertically aligned directly above the pedal spindle
- Moving forward: increases aggressiveness, beneficial for climbing
- Moving backward: increases stability, more comfortable for long-distance riding
3. Saddle Tilt
- Standard: level (0°)
- Nose down: relieves pressure on wrists and shoulders, but may cause sliding forward
- Nose up: increases saddle support, but may compress the perineal area
- Recommendation: start from level, then fine-tune by 1–2°
4. Handlebar Height
| Riding Purpose | Handlebar Height Relative to Saddle |
|---|---|
| Leisure/Comfort | 2–5cm above saddle |
| Training | Level with saddle or 2cm below |
| Time Trial/Racing | 3–8cm below saddle |
The lower the handlebars, the better the aerodynamics, but the greater the demands on core strength and flexibility. Beginners should not pursue excessively low handlebar heights.
5. Reach
The extension length of the arms in the riding position.
With correct reach:
- Arms are slightly bent (10–15°), not locked out
- Neck is natural, no excessive forward extension needed
- Weight is evenly distributed between hands and saddle
Adjustment methods: Swap to a different stem length (50–130mm), or change to a frame with a different top tube length.
6. Cleat Position
- Fore-aft position: The first metatarsal head (ball of the foot) should be positioned directly above the pedal spindle
- Float angle: Cleat angle affects knee tracking path; 6° float cleats are commonly used
- Lateral position: Affects knee alignment with the pedal direction
Incorrect cleat position is a common cause of foot numbness and lateral knee pain.
Steps for Self-Fitting
Tools Needed
- Soft tape measure
- Plumb line (or a smartphone level app)
- Protractor or a Fit Kit App
- Mirror or camera (to observe your own riding position)
DIY Fitting Process
- Measure inseam length, then calculate saddle height
- Adjust saddle height, get on the bike and pedal to feel for comfort
- Confirm KOPS, adjust saddle fore-aft position
- Adjust handlebar height, starting from a relatively higher position
- Confirm reach, arms naturally slightly bent
- Record a side-view video of your riding position, observe knee path and upper body stability
When to Seek Professional Fitting?
It is recommended to seek a professional fitter in the following situations:
- Persistent knee, lower back, or neck/shoulder pain after riding
- After purchasing a new bike
- After significant body weight changes (>5kg)
- After injury rehabilitation
- When pursuing a more efficient competitive position
Fitting Resources in Taiwan
Major cities in Taiwan have bike shops and sports physical therapists offering professional Bike Fitting services:
- Fees typically range from NT$3,000–8,000
- Includes a full body assessment, dynamic video analysis, and adjustments
- It is recommended to choose a fitter with IBFI or Retül certification
Fitting Solutions for Common Pain
| Pain Location | Possible Cause | Fitting Adjustment |
|---|---|---|
| Front of knee | Saddle too low | Raise the saddle |
| Back of knee | Saddle too high | Lower the saddle |
| Outer knee | Incorrect cleat angle | Adjust the cleats |
| Lower back pain | Handlebars too low and too far | Raise handlebars, shorten stem |
| Neck/shoulder pain | Excessive reach | Shorten the stem |
| Foot numbness | Cleat position too far forward | Move cleats backward |
Conclusion
Bike Fitting is not a luxury—it is a necessary investment. A good fitting not only makes riding more comfortable but also maximizes your training results and extends your cycling career. Even if you adjust on your own, you should regularly re-evaluate your riding position.
Related Reading
- Bike Fitting Complete Adjustment Guide: Why Do You Need Professional Fitting?
- The Science of Cycling Position Bike Fit: From Biomechanics to Power Maximization
- The Biomechanics of Bike Fit: Saddle Height, Fore-Aft Position, and Knee Tracking
- The Fit Science of Road Bikes: Saddle Height, Reach, and Pivot Point Adjustments
#公路車 #Fitting 靠人工智慧APP 幫你調整單車
6 年前
靠單車減肥35公斤 心得分享與整理
7 年前
單車 一日北高 ( 雙城 ) 肥宅雙人瘋狂行 紀錄片 REACTO
10 年前
武嶺配速表最佳使用方式 #bike
1 年前
2025 自行車錶排行榜 兩萬車友大數據 / Garmin Bryton 排名會大洗牌嗎? / 全新的碼表前身分析 /公路車 / CT Yeh
1 年前
單車AI教練!全新 ChatGPT4o 幫你分析訓練成果!排武嶺課表,分析騎車姿勢! 太神了! / 公路車 / CT Yeh / feat. 緯緯
2 年前
風櫃嘴 | 全台最多大砲的單車路線 | 尋寶網攝影師告訴你怎麼擺拍起來才好看 | 熱門攝影地點巡禮
6 年前
一日北高/長距離團騎 常見問題補充篇 / 組團或跟團的眉角 / 壯車友容易被瘦車友慢性拉爆 / 原來屁股痛可能是這個原因...? / 風場配速法 / 公路車 / CT Yeh
2 年前