Introduction
Clipless pedals lock a rider’s feet firmly to the pedals, efficiently transferring pedaling power and improving cadence efficiency. However, many riders in Taiwan give their cleats and pedals almost zero maintenance, only remembering this component exists once clipping in becomes difficult, clipping out becomes difficult, or an odd noise appears while pedaling.
A well-maintained clipless pedal system lets you clip in and out safely, and with precisely set float and release tension, every pedal stroke can reach maximum efficiency.
Clipless Pedal Components and Common Specs
The most common clipless pedal systems on road bikes in Taiwan:
| Brand / System | Cleat Type | Features |
|---|---|---|
| Shimano SPD-SL | Look Kéo compatible, 3-bolt | Mainstream on road bikes, large contact surface |
| Look Kéo | 3-bolt (compatible with SPD-SL) | French design, finely adjustable release tension |
| Time XPRESSO | 3-bolt design | Multi-directional float |
| Speedplay Zero | 2-bolt / 4-bolt | Dual-sided entry, largest float range |
| Shimano SPD | 2-bolt (mountain bike spec) | Used for triathlon and gravel |
Cleat Cleaning Steps
Monthly Cleaning (Basic)
- Wipe mud and dust off the pedal surface with a cloth.
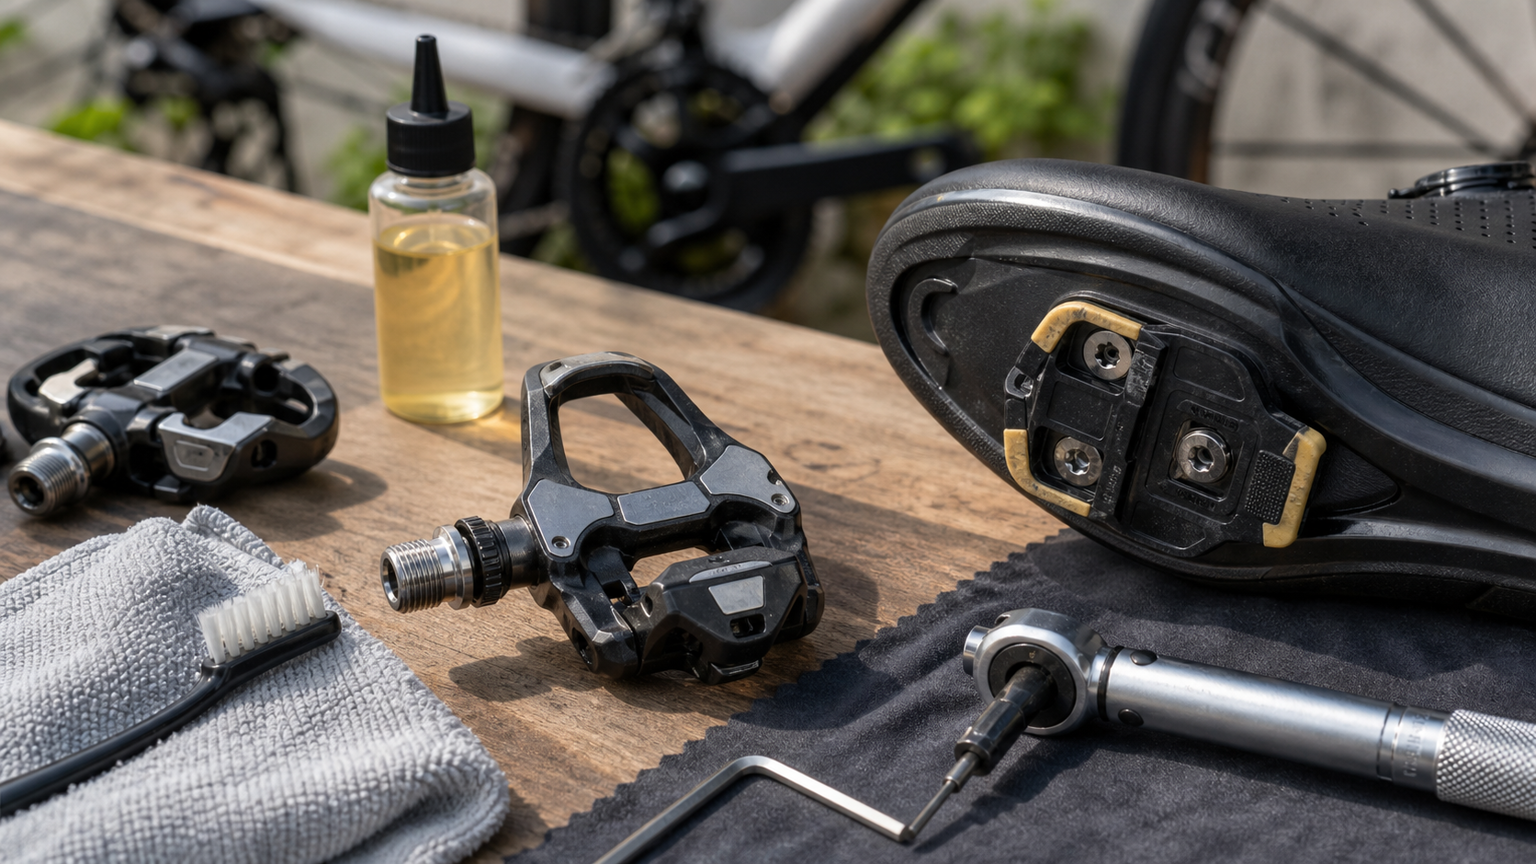
- Use a toothbrush to clean dirt from around the pedal spring and release mechanism, especially the slot where the retention clip engages.
- Apply 1-2 drops of light lubricant to the pivot point of the retention clip (avoid excess oil, which attracts grit), or use a dry Teflon lubricant instead.
- Confirm the clip springs back smoothly — flicking it with a finger should produce clear, firm spring tension.
Annual Deep Cleaning (or When Noise Appears)
- Remove the pedals from the bike (the right pedal has standard right-hand threads and loosens counterclockwise; the left pedal has reverse threads and loosens clockwise).
- Use a pedal wrench or an 8 mm hex key.
- Some clipless pedals (such as the Shimano PD-R8000) allow the pedal body to be opened to replace internal bearing grease — use the manufacturer’s service tool to remove the bearing cap, clear out the old grease, and pack in fresh grease (such as Shimano Dura-Ace bicycle grease).
Replacing Cleats
Judging Cleat Wear
Shimano SPD-SL cleats have wear indicator lines on their edges — once the rubber wears down to the indicator line, replacement is needed. A cleat in use should be replaced immediately if any of the following occur:
- Noticeable side-to-side wobble after clipping in (a feeling of instability)
- Abnormally high lateral force required to clip out
- The rubber layer on the cleat is peeling or cracked
Cleat Replacement Steps
- Loosen the cleat bolts (usually 2-3) with a 4 mm hex key.
- Record or photograph the old cleat’s position (fore-aft, side-to-side, rotation angle).
- When installing the new cleat, set an initial position (centering is recommended as a starting point) without fully tightening the bolts.
- Ride for 20-30 minutes with the cleats installed, then fine-tune the cleat angle based on your knee’s natural rotation direction before fully tightening.
- Cleat bolt torque: Shimano recommends 5-6 Nm — confirm with a torque wrench.
Adjusting Clipless Pedal Release Tension
Most clipless pedals let you adjust the torque required to release (release tension) via a Phillips-head screw:
- Turning clockwise (tightening): increases the force needed to release — suitable for riders who need a firm hold for race sprints
- Turning counterclockwise (loosening): reduces the release force — suitable for beginners, city riding, or riders with knee discomfort
Beginners should start with the loosest setting (usually marked with a “-”) and gradually tighten it as they grow accustomed to the system.
Pedal Installation Torque
| Pedal Spindle Material | Recommended Torque |
|---|---|
| Steel spindle | 35-40 Nm |
| Titanium spindle | 30-35 Nm (titanium spindles are softer — do not over-tighten) |
| Carbon fiber crank | Follow manufacturer specs, typically 35 Nm |
Pedal threads should be coated with grease (not thread-locking compound) to ensure they can be removed easily later. Pedal threads left ungreased are highly prone to rusting and seizing in Taiwan’s humid climate, at which point destructive tools may be needed to remove them.
Practical Tips
- For many riders in Taiwan, pedals are not included in the price of a new bike and must be purchased separately — it’s worth visiting a physical bike shop to try different brands before deciding. The Look Kéo series has an official distributor in Taiwan, making replacement parts relatively easy to obtain.
- Cleats are a consumable part — replace them roughly every 6 months or 5,000 km, especially for triathletes who walk extensively in their cycling shoes, as their cleats wear out faster.
- If you feel knee pain while riding, in addition to adjusting your bike fit, also check whether the cleat angle is forcing an unnatural rotation of the ankle, which is a common cause of knee pain.
Conclusion
Though small, the clipless pedal system directly affects pedaling efficiency and safety. Regular cleaning, correct cleat installation angle, and properly set release tension are fundamentals every clipless pedal user should master. A well-maintained clipless pedal system rewards you with optimal power transfer and confidence with every pedal stroke.
Related Reading
- Clipless Pedal System Maintenance: Cleaning and Adjusting SPD, SPD-SL, Look, and Time
- The Complete Guide to Cycling Shoes and Pedal Systems: Choosing Between SPD-SL, Look, and Speedplay
- 2026 Road Cycling Shoes and Clipless Pedal Systems: Understanding Red Cleats, Black Cleats, and Fixed Float
- Cycling Ankle Injuries: Ankle Joint Problems Caused by Incorrect Cleat Angle
碟煞公路車 銑面器 !? 原來銑完差這麼多! 降低蹭碟機率! | TIME 公路車 保養小記錄 | CT Yeh
3 年前
公路車 BB培林大升級! / 備戰海鷗繞圈賽 Canyon Aerod & TIME 一起改 / MIT大廠 CEMA對鎖式陶瓷培林BB & 導輪 / 公路車 / CT Yeh
2 年前
洗單車神器 吹水機! 實際洗車用用看 暴力洗鍊條大法 | 公路車 | CT Yeh
4 年前
再一組! 全碳幅條 碟煞/無內胎輪組 開箱! 到底好騎嗎? UNAAS X40 | 公路車 | CT Yeh
4 年前
#公路車 #Fitting 靠人工智慧APP 幫你調整單車
6 年前
超開放的自行車錶!可以玩遊戲裝APP!?/ SRAM合併的 Hammerhead Karoo深入開箱!/ 即時爬坡偵測 / 全球導航地圖 / Garmin Bryton / CT Yeh
1 年前
Canyon 公路車斷把手 五年老車特規還能修嗎? 維修保養全記錄 feat. 501單車監理站 | 公路車 | CT Yeh
4 年前
摔車後補裝備: 好市多新款單車安全帽& Specialized Romin 北高整路屁股都不痛的坐墊 | 一千元居然有MIPS | CT Yeh | 公路車
4 年前