Introduction
Without external objective feedback, many swimmers have been repeating the same technical errors for years without realizing it—because we “feel” like we’re doing well, yet have no idea how large the gap is between our actual movements and the ideal ones.
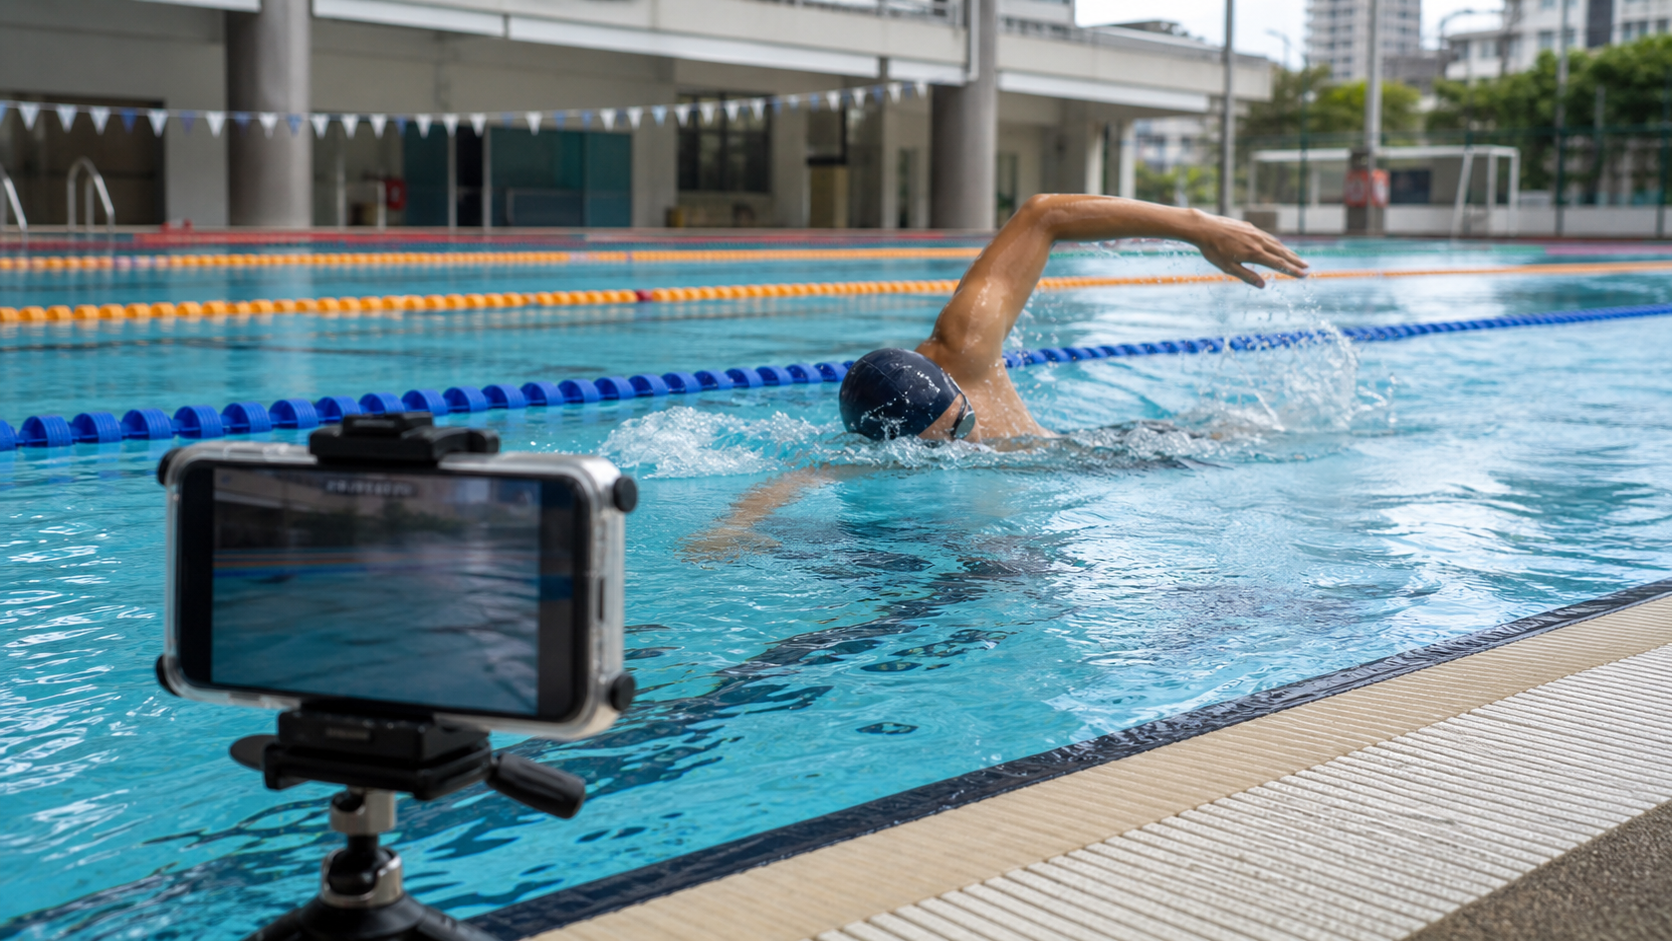
This problem is very common in Taiwan. Many people have been swimming for years but have never seen footage of their own swimming. The water resistance of modern smartphones has improved dramatically, and with the widespread availability of waterproof phone pouches and underwater camera mounts, every swimmer can now perform technical video analysis at a very low cost.
This article will teach you how to effectively set up, film, and analyze your own swimming footage to identify the technical blind spots affecting your performance.
Filming Equipment and Preparation
Equipment Selection
You don’t need expensive camera equipment. Here are options ranging from low-cost to high-cost:
| Equipment | Advantages | Disadvantages | Suitability |
|---|---|---|---|
| Phone + waterproof pouch | Low cost, familiar operation | Limited waterproof depth, inconvenient to secure | Basic use |
| Waterproof phone case + tripod clamp | More stable, allows underwater filming | Requires purchasing accessories | Recommended |
| GoPro series | Professional waterproofing, wide angle | Higher cost (NT$3,000–8,000) | Serious training |
| Poolside tablet mount | Stable positioning | Bulky, needs to be carried | Fixed training venue |
At public swimming pools in Taiwan, you should inform the staff of your filming purpose in advance, as some pools may have filming regulations that must be followed.
Pre-filming Technical Settings
- Resolution: Choose at least 1080p (Full HD); if your phone has slow-motion capability, select 120fps or 240fps slow-motion mode
- Stability: Use a tripod or poolside mount to avoid shaky handheld footage
- Angles: You need at least two filming angles to comprehensively analyze technique (see next section)
Key Filming Angles
Side View Above Water
Stand at the side of the lane (pool edge) and film with the lens level with the water surface. This angle allows you to analyze:
- Body’s horizontal position (whether the hips are sinking)
- Head rotation angle during breathing
- The arc shape of the arm recovery
- Overall swimming rhythm and body posture
Side View Underwater
Use waterproof equipment and place the lens 20–30 cm below the water surface, filming from the side. This is the most important filming angle and allows you to analyze:
- Entry angle and entry position
- Elbow height during the catch (whether performing high-elbow pull)
- Pull path (whether crossing the midline)
- Kick depth and rhythm
Front View Underwater
Film underwater action from in front of the swimmer (facing the swimmer). This allows you to analyze:
- Whether both sides of the pull are symmetrical
- Body tilt during breathing
- Whether the kick is balanced
Direct Overhead View
Stand at a high point and film downward (or use a mount fixed directly above the lane). This allows you to analyze:
- Whether the hand entry position is on the shoulder-width extension line
- Whether there is a crossing-the-midline entry problem
- Left-right body symmetry
Key Checkpoints for Footage Analysis
Freestyle Technique Checklist
Entry and Catch:
- Fingertips enter first, at approximately a 45-degree angle
- Entry position on the shoulder-width extension line (not crossing the midline)
- Elbow higher than the wrist during the catch
- Forearm gradually becomes vertical to the water surface
Pull and Exit:
- Pull extends through to beside the thigh
- Pinky side exits the water first
- Recovery arc height is moderate
Body Position:
- Body remains horizontal (hips do not sink)
- Body rotation of approximately 15–30 degrees (not over-rotating, nor completely flat)
Breathing:
- Head rotates rather than lifts
- Head returns to the water immediately after breathing
Priority Areas for Slow-Motion Analysis
Slow motion (below 0.5x speed) is particularly suitable for analyzing:
- The catch moment (elbow height is hard to see at normal speed)
- Splash at entry (splash size reflects the quality of the entry angle)
- Head rotation trajectory during breathing (whether it’s rotation or lifting)
- Flip turn details (wall touch position and depth)
Building a Technique Improvement Cycle
Effective technical video analysis isn’t just “film and take a look”—it’s about building a continuous improvement cycle:
- Film your current technique (baseline record)
- Analyze and identify the 1–2 technical issues that most affect efficiency
- Design a targeted practice plan
- Execute 2–4 weeks of improvement training
- Film again and compare the differences before and after improvement
- Repeat the cycle
Focus on improving only 1–2 technical points each time, avoiding the loss of focus that comes from trying to fix too many issues at once.
Common Analysis Findings
Among swimming enthusiasts in Taiwan, video analysis most frequently reveals the following issues:
- Most common: Sinking hips (approximately 70% of amateur swimmers have this problem)
- Second most common: Entry crossing the midline, causing a snake-like swimming path
- Third most common: Head lifting rather than rotating during breathing
- Fourth most common: Dropping elbow during the catch (low elbow)
- Advanced issue: Pull not finishing through to the thigh, shortening the effective pull distance
Practical Advice
- Don’t over-correct your stroke during the first filming session—swim “naturally” first to see your true everyday swimming state
- Film once every 1–2 months to build a visual record of technical progress
- Share footage with a coach for more professional technical advice, giving both parties a shared objective reference
- Several swimming communities exist in Taiwan (such as Facebook swimmer groups), where sharing footage can earn community feedback
- When analyzing footage, first look at the “overall impression” (whether body position is good), then move to details (such as entry angle)
Conclusion
Swim technique video analysis is an accelerator for self-improvement. It lets you see movements you can’t feel and identify problems you weren’t aware of. With smartphones being so ubiquitous today, no swimmer needs to guess about their technical problems in the dark. Give yourself one filming session—you may be surprised by the technique you “thought was fine”—but that surprise is exactly where technical progress begins.
Related Reading
- Swim Technique Video Analysis: How to Use Underwater Filming to Identify Your Flaws
- Self-Analysis Through Swim Video: Technical Diagnosis Methods for Above- and Underwater Filming
- Swim Video Analysis: Key Observation Points for Above- and Underwater Filming
- Video Training for Swimmers: Practical Applications of Underwater Video Analysis
[教學] Premiere 影片 手震 修正 教學 防抖 單眼 影像 GoPro 穩定 Video Stabilization
8 年前
教學) 如何做出專業 慢動作 影片 Slow Motion 120fps GoPro 7 ActionCam AX700 A99II
7 年前
類空拍神器 Feiyu Pocket 2s (有優惠連結)三軸穩定 運動攝影機 開箱!比GoPro 還強的滑順視角!三小時長時間錄影 行車記錄器 | 環花東365實測 | 公路車 CT Yeh
4 年前
[八甲田滑雪] 攝影器材介紹篇 DJI OSMO Mavic Pro ActionCam X3000 Insta360
7 年前
如何把 GoPro 影片 翻轉 批次 轉正?
6 年前
iPhone 13 Pro 電影級 VLOG 實拍測試!優缺點 原理分析! 夜間效果對決 GoPro10!蘋果沒有說的超強錄影體驗!? | CT Yeh
4 年前
GoPro Hero 10 畫質好但 他是個吃電怪物 過熱只是小CASE 單車錄影實測 ! 耗電 災情 過熱實測 購買前請三思 OSMO Action 2了 !? | CT Yeh
4 年前
CT 喇低賽) 單車 比賽總是沒照片? 攝影師的觀點大公開 姿勢就是力量! 請加速1.25倍收看
7 年前