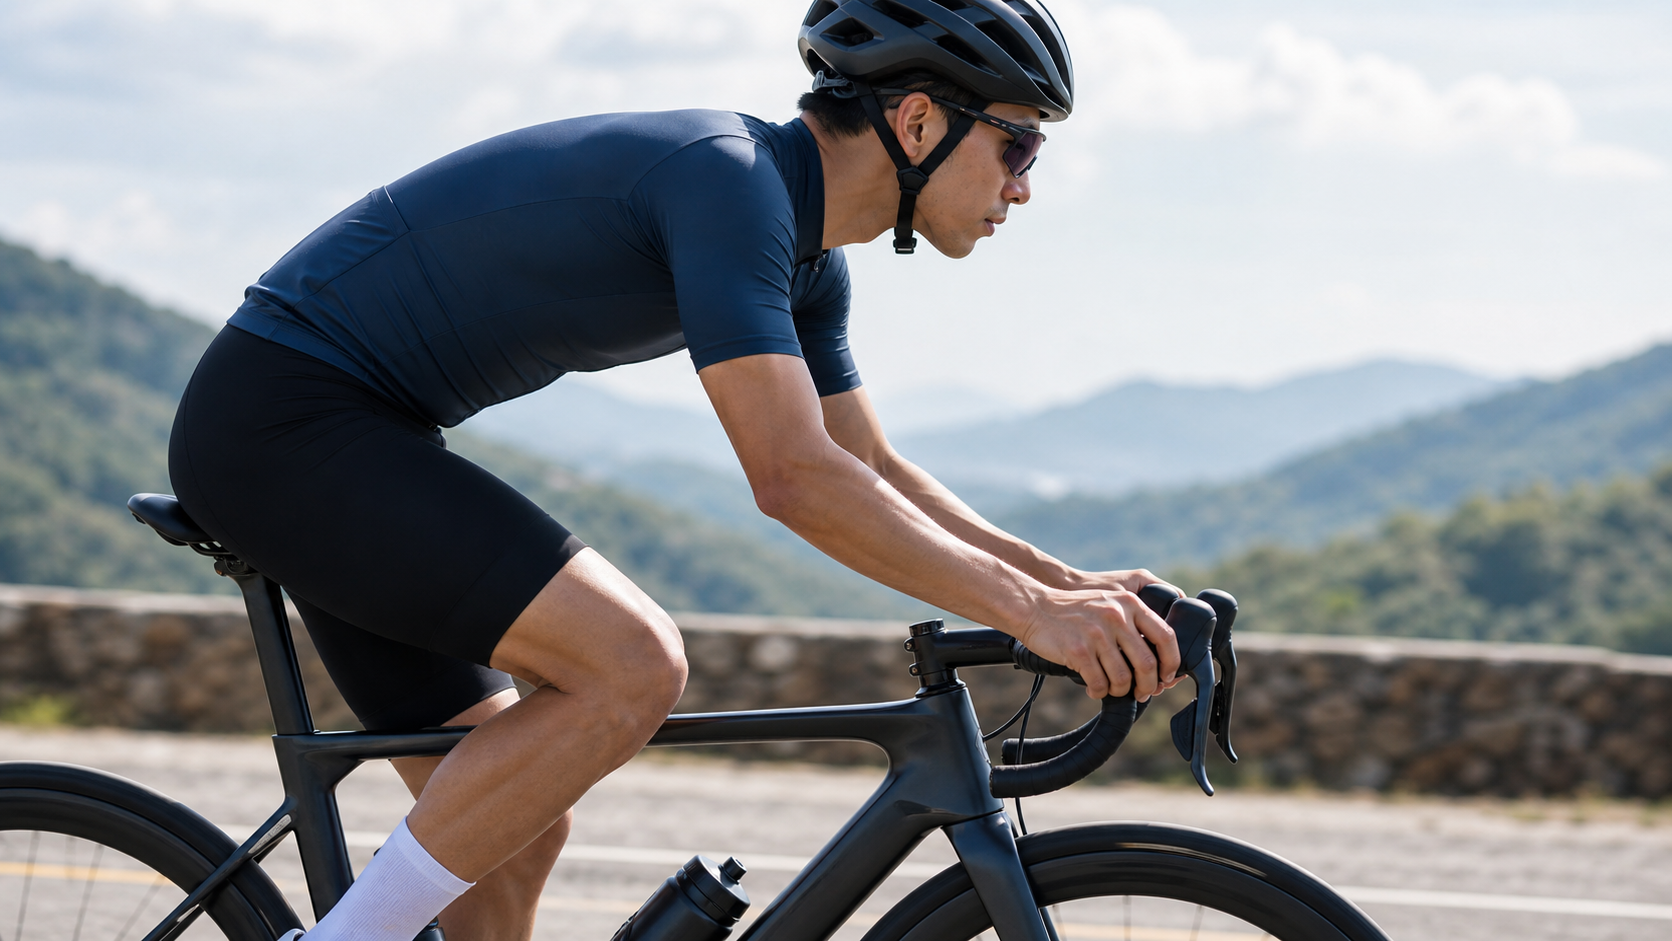
Handlebar Height and Reach Angle: Upper-Body Pressure Distribution on a Road Bike
Introduction
On a properly fitted road bike, a rider’s weight should be distributed across three contact points: saddle, pedals, and handlebar. Ideally, the hands should bear only about 20-30% of upper-body weight, with the core muscles supporting the rest. When the handlebar is set incorrectly, this ratio shifts dramatically, and the cervical spine, shoulder joints, and carpal tunnel end up paying the price.
How Handlebar Height Affects the Body
When the Handlebar Is Too Low (Below Saddle Height)
- Torso lean angle increases, reducing aerodynamic drag
- The neck must arch upward to see the road, keeping the posterior neck muscles under constant tension
- The lumbar curve changes shape, exposing the lower back to shear force
- Wrist pressure increases, which can trigger ulnar nerve compression (hand numbness)
When the Handlebar Is Too High (Near or Above Saddle Height)
- The torso stays more upright, reducing neck and back strain
- Aerodynamic drag increases, which is a disadvantage for racing
- Body weight shifts rearward, increasing pressure on the saddle
- Suits recreational riders, long-distance tourers, and older riders
Common Handlebar Height Benchmarks
| Riding Purpose | Handlebar Height Relative to Saddle | Suited For |
|---|---|---|
| Competitive road racing | 4-8 cm or more below saddle | Riders with strong core strength and good flexibility |
| Amateur long-distance riding | 0-4 cm below saddle | Most training-oriented riders |
| Recreational riding | Level with or slightly above saddle | Beginners, commuters |
| Older riders or post-injury rehab | 1-3 cm above saddle | Riders with back issues |
Stem Angle and Length
Handlebar height is primarily controlled by two factors:
1. Number of Spacers
A standard spacer is 5mm thick; adding spacers raises the handlebar height. On modern carbon-fiber bikes, it’s recommended to keep at least one spacer for future adjustability rather than removing them all.
2. Stem Angle
- Positive angle (+6°, +10°, +17°): Raises the handlebar, suited for comfortable riding
- Negative angle (-6°, -10°, -17°): Lowers the handlebar, suited for racing
- Flipping the stem (inverting a negative-angle stem) is a common no-cost adjustment technique
Understanding Reach
Stem length determines how far forward a rider must lean to grip the handlebar. The longer the stem, the more the torso must lean forward:
- Standard stem: 90-110mm (the typical starting point for most riders)
- Short stem (70-80mm): Shortens reach for a more upright upper body, suited to riders with a shorter torso or lower-back issues
- Long stem (120-130mm): Lengthens reach and adds stability, suited to riders with a longer torso
How to Tell If Your Handlebar Height Is Right
While pedaling normally, have someone photograph you from the side and check the following:
- Slight elbow bend (10-15°): Straight, locked elbows mean the reach is too long or the bar is too low
- Relaxed shoulders, not hunched: Hunched shoulders are a classic sign of upper-body tension
- Natural cervical extension: The head should be able to look forward naturally, not craned sharply upward
- A continuous arc in the spine, not a sharp “kink”: An ideal spine forms a smooth arc from neck to lower back
Common Pain Points and Adjustment Advice
- Neck pain: Raise the handlebar first (add spacers), or shorten the stem
- Wrist numbness and pain: Check whether the reach is too long (upper-body weight pressing onto the wrists) and consider shortening the stem
- Tightness around the shoulder blades: The torso is leaning too far forward — raise the handlebar or strengthen the core
- Lower back soreness: May result from an overly low handlebar causing excessive spinal flexion — raise the handlebar and reassess flexibility
Practical Advice: A Three-Step Self-Assessment
- Film a side-view video: Have a friend record a 30-second side-view video while you pedal steadily
- Capture a still frame: Find a frame where the crank arm is horizontal and observe your upper-body angle
- Compare against standard angles: The angle between your torso and the horizontal line — 40-50° is recommended for comfortable riding, while racing positions can reach 30-40°
Conclusion
There is no absolute standard for handlebar height and reach angle — only a setup that fits your current physical condition and riding goals. Many riders adopt a “race setup” as soon as they buy a new bike, without the core strength and flexibility to match, and end up suffering neck and back pain within six months. Rather than chasing a stylish low, aggressive position, make sure you can dismount comfortably after every ride first, then gradually lower the handlebar as your fitness improves.
Related Reading
- Rider Neck and Shoulder Pain: Handlebar Height, Reach Angle, and Muscle Balance
- Choosing Handlebar Width: Shoulder Width Measurement and Handlebars for Different Riding Needs
- Road Bike Handlebar Systems: Traditional Drop Bars, Aero Bars, and Integrated Cockpits
- The Physics of Cockpit Setup: How Handlebar Width, Height, Stem Length, and Saddle Position Affect Comfort, Handling, and Aerodynamics
CT 喇低賽) 武嶺牽車 才是王道 西進牽車四小時內秘訣 攝手位置 如何判斷 防抽筋小秘訣
7 年前
Canyon 公路車斷把手 五年老車特規還能修嗎? 維修保養全記錄 feat. 501單車監理站 | 公路車 | CT Yeh
4 年前
碟煞公路車 優缺點?換車一年半實際經驗分享 / 公路車 / CT Yeh
2 年前
一日北高/長距離團騎 常見問題補充篇 / 組團或跟團的眉角 / 壯車友容易被瘦車友慢性拉爆 / 原來屁股痛可能是這個原因...? / 風場配速法 / 公路車 / CT Yeh
2 年前
2024公路車車錶排行榜!2萬車友調查統計!今年黑馬是.../街頭車友民調/CT Yeh
2 年前
碟煞公路車 銑面器 !? 原來銑完差這麼多! 降低蹭碟機率! | TIME 公路車 保養小記錄 | CT Yeh
3 年前
再一組! 全碳幅條 碟煞/無內胎輪組 開箱! 到底好騎嗎? UNAAS X40 | 公路車 | CT Yeh
4 年前
公路車 BB培林大升級! / 備戰海鷗繞圈賽 Canyon Aerod & TIME 一起改 / MIT大廠 CEMA對鎖式陶瓷培林BB & 導輪 / 公路車 / CT Yeh
2 年前