Introduction
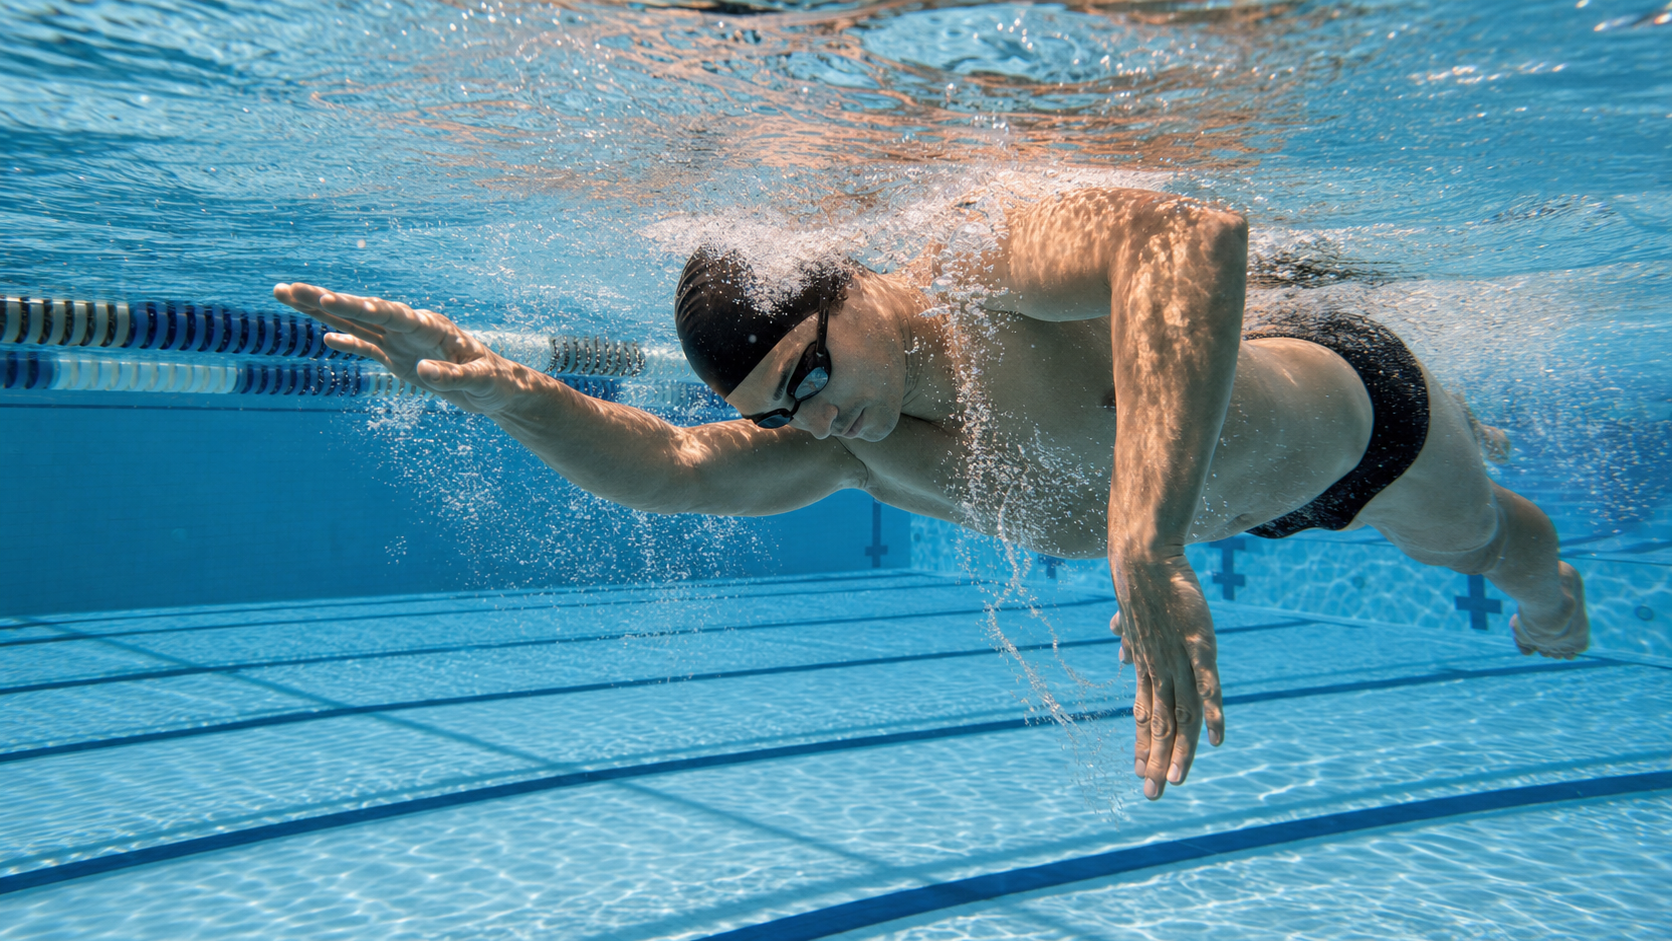
If there is one technical element in freestyle that can simultaneously improve speed and reduce energy expenditure, it is undoubtedly the “High Elbow Catch” (also known as Early Vertical Forearm, EVF). The concept of this technique is simple: after the hand enters the water, before beginning the pull, the forearm is kept perpendicular to the direction of travel, allowing the entire palm and forearm to act as the propulsive surface simultaneously. However, not many swimmers can truly execute an effective high-elbow catch, because it requires a specific muscle activation sequence and scapular control.
The Biomechanics of the High-Elbow Catch
In the traditional pulling style, after the hand enters the water, the elbow naturally drops, forming a “low-elbow catch.” The problem with this approach is that the initial propulsive surface is only the palm, making it less efficient. The core of the high-elbow catch lies in getting the forearm vertical as early as possible, expanding the propulsive surface from the palm to “palm + forearm,” increasing the effective propulsive area by approximately 40%, with a corresponding increase in propulsive force.
Correct Muscle Activation Sequence
The high-elbow catch is not accomplished by arm strength alone; it requires the following muscles to activate in sequence:
- Serratus Anterior: During the glide after hand entry, the serratus anterior contracts to protract the scapula, providing the foundation for subsequent shoulder stability
- Infraspinatus & Teres Minor: Initiate external rotation, raising the elbow
- Latissimus Dorsi: After the forearm is vertical, takes over to lead the backward pulling motion
- Pectoralis Major: Works with the latissimus dorsi to complete the propulsion from the mid-pull to the finish
Typical example of incorrect sequencing:
Many swimmers use the triceps to push the water backward immediately after entry, skipping the process of establishing the high elbow, resulting in a pull that resembles “slapping the water” rather than “catching the water.”
Technique Comparison Table
| Technical Element | Low-Elbow Catch (Incorrect) | High-Elbow Catch (Correct) |
|---|---|---|
| Propulsive Surface | Palm only (approx. 150 cm²) | Palm + forearm (approx. 280 cm²) |
| Primary Muscles Used | Triceps, deltoids | Latissimus dorsi, pectoralis major |
| Shoulder Stress | Higher (anterior impingement) | Lower (if technique is correct) |
| Pulling Efficiency | Low | High |
| Learning Difficulty | Low (intuitive movement) | High (requires targeted training) |
Common Technical Errors
Error 1: Dropping the Elbow and Then Lifting It Outward
Many swimmers try to imitate the high elbow, but they do so by first letting the elbow drop and then abducting and lifting it, which overstretches the rotator cuff muscles and delays the timing. The correct approach is to let the forearm go vertical “directly” after entry.
Error 2: Relying Only on Shoulder Strength to Hold the Elbow
The high-elbow catch requires the combination of scapular stability and water resistance support on the forearm. If you rely only on shoulder muscles to hold the position, long-term shoulder joint wear will be severe.
Error 3: Starting the Pull Too Early
Pushing backward before the forearm is fully vertical is equivalent to shortening the “effective propulsive phase.” It is recommended to silently repeat in your mind: “Catch the water → forearm vertical → then start pushing.”
Error 4: Excessive Body Rotation Causing Elbow Misalignment
Moderate body rotation helps with the high elbow, but excessive rotation (beyond 45 degrees) prevents the elbow from staying directly below the shoulder on the outside.
Training Methods and Tools
Paddle Training:
Using paddles amplifies the tactile feedback, helping you feel the water pressure difference when the forearm is vertical. It is recommended to start with small paddles when first learning the high-elbow technique to avoid excessive water resistance causing shoulder stress.
High-Elbow Single-Arm Drill:
Swim single-arm, with the non-pulling hand resting against the thigh (rather than extended forward), focusing on feeling the high-elbow setup process on the pulling side.
Slow-Motion Breakdown in Water:
Swim at 50%–60% speed, deliberately pausing after each hand entry to confirm the forearm is vertical before continuing the pull.
Land-Based Simulation (Resistance Band):
Use a resistance band to simulate the catch motion after entry. Standing with the arm extended forward, first externally rotate to raise the elbow, then use the latissimus dorsi to lead the backward pull.
Practical Advice
- Before each training session, do 10 minutes of land-based resistance band simulation to activate the latissimus dorsi and serratus anterior
- During training, have a partner film you from the side of the pool (underwater) to confirm the timing of the forearm becoming vertical
- In the early stages of the high-elbow technique, it may feel “more strenuous” than before; this is normal and indicates that you are engaging more large muscle groups
- Combine with core training to enhance the stability of body rotation, which helps maintain the high-elbow position more easily
Conclusion
The high-elbow catch is one of the most systematically trainable aspects of freestyle technique. It cannot be learned intuitively; it must be internalized through targeted muscle activation drills and continuous stroke analysis. Once you master this technique, not only does pulling efficiency improve dramatically, but the energy expended per stroke also decreases noticeably, which is especially beneficial for long-distance swimming. Patient practice and making good use of underwater video are the most effective ways to break through technical plateaus.
Related Reading
- Freestyle High-Elbow Catch Fully Deconstructed: The Mechanics Secrets from Entry to Push
- Freestyle High-Elbow Catch: The Most Important Pulling Technique
- Freestyle High-Elbow Catch (EVF) Complete Analysis: How Early Vertical Forearm Lets You Gain 15% More Distance Per Stroke
- Freestyle High-Elbow Entry Technique: The Biomechanical Advantage of Fingertip-First Entry
CT 喇低賽) 武嶺牽車 才是王道 西進牽車四小時內秘訣 攝手位置 如何判斷 防抽筋小秘訣
7 年前
西進武嶺 免費訓練分析服務 Intervals | 練不夠還是練過頭?你哪一種類型選手?AI模型告訴你! | 備戰神器 | 公路車 訓練 | CT Yeh
4 年前
西進武嶺 自製新版AI配速表產生器 x 賽前攻略 抱佛腳! 沒有功率計也可以產生配速表嗎?有什麼其他眉角賽前要注意的呢? | 西進武嶺 / 東進武嶺 KOM 攻略 | 公路車 | CT Yeh
4 年前
戰略) Zwift Race 如何咬在第一集團 如何評估自己要開多少推力 (請開1.5倍速看)
7 年前
[教學] Premiere 影片 手震 修正 教學 防抖 單眼 影像 GoPro 穩定 Video Stabilization
8 年前
一日北高/長距離團騎 常見問題補充篇 / 組團或跟團的眉角 / 壯車友容易被瘦車友慢性拉爆 / 原來屁股痛可能是這個原因...? / 風場配速法 / 公路車 / CT Yeh
2 年前
如何把 GoPro 影片 翻轉 批次 轉正?
6 年前
教學) 如何做出專業 慢動作 影片 Slow Motion 120fps GoPro 7 ActionCam AX700 A99II
7 年前