Differences Between TT Bikes and Road Bikes: The Impact of Geometry, Weight, and Aerodynamics on TT Pacing
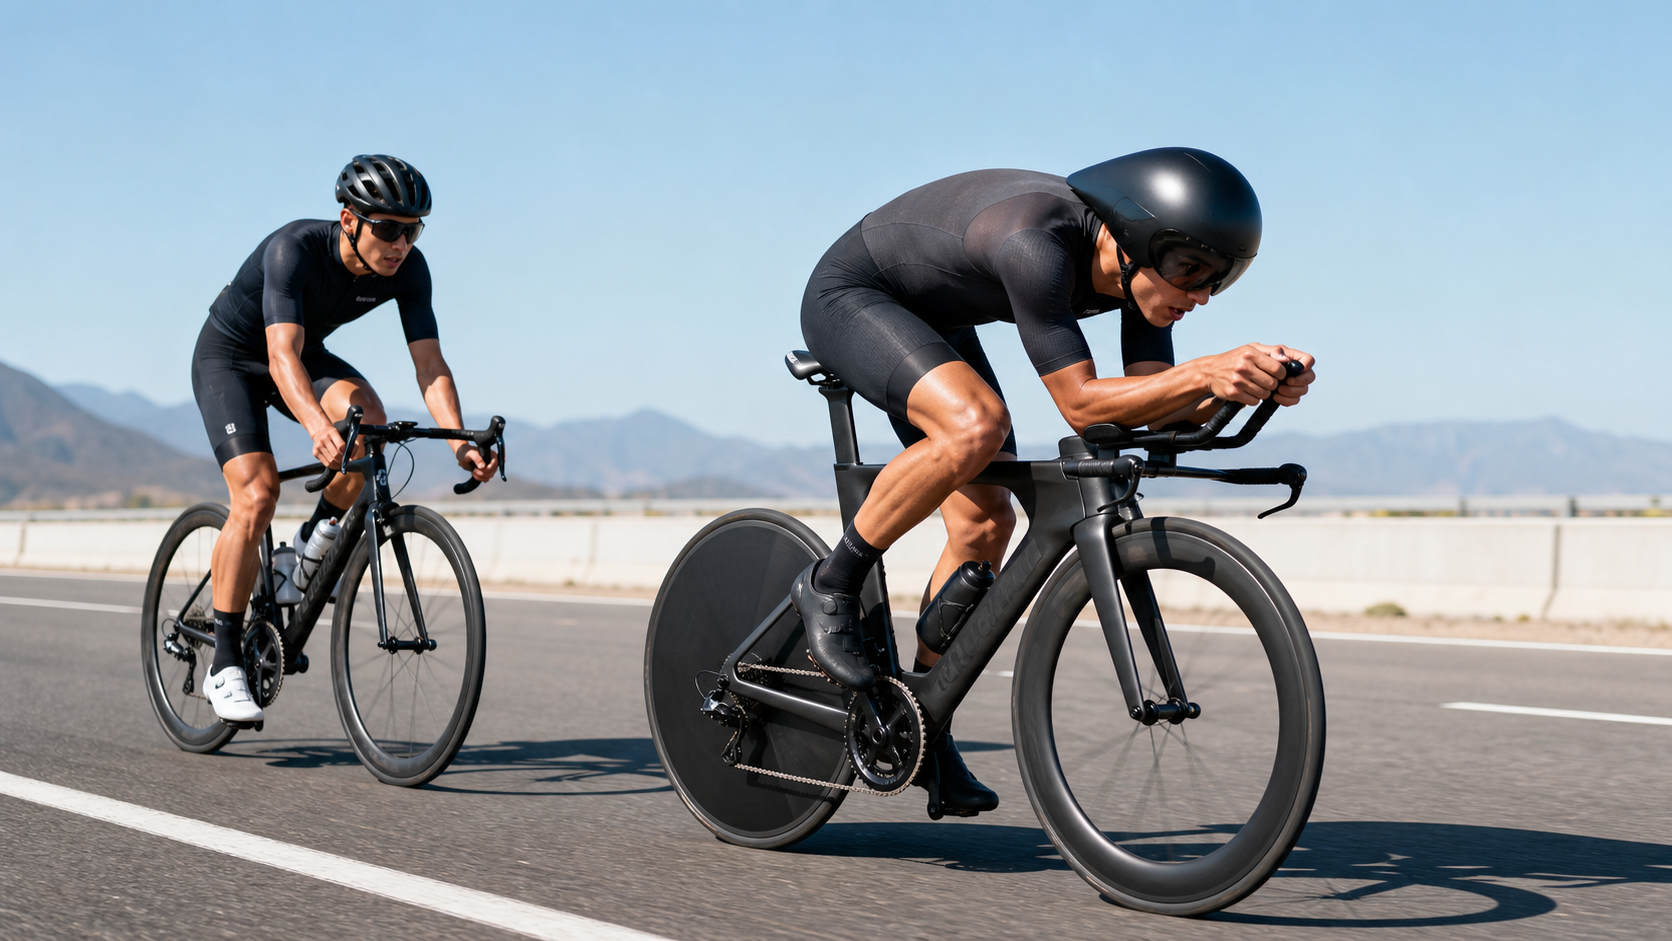
TT Bike vs. Road Bike Differences: The Impact of Geometry, Weight, and Aerodynamics on TT Pacing
The most common question from riders attending their first TT event is: “Can I just put a low-drag aero bar on my road bike?” The answer is yes, but it’s far less effective than a true TT bike. Why? Because the difference between a TT bike and a road bike isn’t just the “handlebar shape”—it’s a completely different design philosophy across the entire system.
This article breaks down the differences from four perspectives and offers practical advice on “converting a road bike for TT.”
1. Geometry Differences
Road Bike
- Head tube angle: 72–74° (steeper)
- Seat tube angle: 73–74° (neutral)
- Reach: Longer
- Stack: Higher (more upright)
- Design goals: Handling, comfort, versatility across scenarios
TT Bike
- Head tube angle: 72–73° (similar but longer)
- Seat tube angle: 76–78° (forward-leaning, this is the biggest difference)
- Reach: Shorter (seated position shifted forward)
- Stack: Lower (forward-leaning, low profile)
- Design goals: Pure aerodynamics + maximizing hip flexor engagement
2. The Key Significance of the Forward-Leaning Seat Tube
The 76–78° seat tube angle on a TT bike is the core design feature, affecting:
- Hip Flexor Engagement: Tilting the pelvis forward activates the hip flexors more actively, generating more pedaling force
- Bottom Dead Center Thrust: Changes the working angle of the quadriceps and glutes
- Aero Position Compatibility: The forward-leaning posture is necessary to match the low profile of aero bars without compressing the abdomen
Problems with putting aero bars on a road bike:
- Road bike’s 73° seat tube → seated position is too far back
- Forcing the upper body down → severe abdominal compression on the diaphragm
- Result: Restricted breathing, VO2 drops 5–8%
3. Weight Differences
| Bike Type | Typical Weight |
|---|---|
| Road bike (climbing model) | 6.8–7.5 kg |
| Road bike (aero model) | 7.5–8.5 kg |
| TT bike (mid-range) | 9.0–10.5 kg |
| TT bike (top-tier) | 8.5–9.5 kg |
A TT bike being 1–2kg heavier is disadvantageous on steep climbs, but TT courses are typically flat or gently rolling, so the weight impact is small. Actual calculations:
- Flat 40K @ 45 km/h: each extra 1kg costs 0.5W and adds 3 seconds to finish time
- Gentle climb (2%) 40K: each extra 1kg costs 1W and adds 8 seconds to finish time
4. Aerodynamic Differences
Road Bike Aerodynamics
- CdA range: 0.28–0.40 ㎡
- Even with aero bars, since the frame itself isn’t designed for aerodynamics, CdA is around 0.26–0.30 ㎡
TT Bike Aerodynamics
- CdA range: 0.20–0.28 ㎡
- Full-bike design: integrated head tube, seat tube cutout, rear triangle cutout, integrated brakes
- With deep-section wheels + skinsuit, pro riders can reach 0.18 ㎡
A CdA difference of 0.04–0.06 ㎡ = saving 25–40W at 45 km/h on flat roads
5. Differences in Power Output
Surprising fact: Power output on a TT bike is typically 3–5% lower than on a road bike.
Reasons:
- The TT position compresses the abdomen, reducing oxygen uptake efficiency
- The changed hip angle alters muscle recruitment patterns
- Extra time is needed to adapt to the position (most riders need 4–8 weeks)
Training recommendations:
- Complete TT workouts on the TT bike whenever possible—don’t train on a road bike and then race on a TT bike
- Start adapting to the TT position at least 4 weeks before race day
- Test “road bike FTP” and “TT bike FTP” separately, and pace using the latter
6. Real-World Pacing Comparison: 40K TT
Assume a rider with 280W FTP, rider + bike weight 80kg, flat target course:
| Setup | CdA | Power Output | Finish Time |
|---|---|---|---|
| Pure road bike + drops | 0.32 | 252W | 60:30 |
| Road bike + clip-on aero bars | 0.28 | 245W | 57:00 |
| Entry-level TT bike + aero helmet | 0.25 | 245W | 54:30 |
| Mid-range TT bike + deep-section wheels | 0.22 | 245W | 52:00 |
| Top-tier TT bike + disc wheel + skinsuit | 0.20 | 245W | 50:30 |
Conclusion: Upgrading from a road bike to an entry-level TT bike can save 5–6 minutes—an improvement that would be extremely difficult to achieve through training alone.
7. Compromise Solutions on a Limited Budget
If you can’t buy a TT bike, here’s the order for converting a road bike for TT:
- Add clip-on aero bars: NT$1,000–3,000, CdA -0.04 ㎡ (best cost-performance)
- Aero helmet: NT$3,000–8,000, CdA -0.01 ㎡
- Tight-fitting jersey (skinsuit): NT$3,000–6,000, CdA -0.02 ㎡
- Deep-section wheels (50mm+): NT$50,000–150,000, CdA -0.015 ㎡
- Aero shoe covers (aerobooties): NT$1,500, CdA -0.005 ㎡
Note: Clip-on aero bars require a bike fit; otherwise, an incorrect position can actually harm your power output.
8. When Should You Upgrade to a TT Bike?
Worth upgrading:
- Competing in more than 3 TT events per year
- Aiming for a top result (within the top 10%)
- Target courses are primarily flat or gently rolling
Not worth upgrading:
- Only racing 1–2 TTs a year just to test the waters
- Your main events are climbing races
- Limited budget—better to invest in road bike training
9. Conclusion
The difference between a TT bike and a road bike is “systemic”—geometry, weight, aerodynamics, and muscle recruitment are all different. While putting aero bars on a road bike does help, it only achieves 60–70% of a TT bike’s effectiveness. If you’re serious about TT racing, a TT bike isn’t a luxury but a necessary tool; if you race occasionally, a road bike conversion is sufficient. Understanding the differences is the key to making an investment that fits your needs.
Related Reading
- Triathlon-Specific Bike vs. Road Bike: Geometry, Aerodynamics, and a Buying Decision Tree
- 70.3 Cycling Gear: TT Time Trial Bike vs. Road Bike—Which Should You Choose
- Triathlon Bike vs. Road Bike Buying Decision: Which Should Be Your First
- Triathlon Time Trial (TT Bike) vs. Road Bike: Which Suits Your Race
碟煞公路車 優缺點?換車一年半實際經驗分享 / 公路車 / CT Yeh
2 年前
風櫃嘴! 現實與虛擬騎乘 會有誤差嗎? 背著iPad邊騎一趟風櫃嘴實際測試一次 | 公路車 | CT Yeh
3 年前
公路車 BB培林大升級! / 備戰海鷗繞圈賽 Canyon Aerod & TIME 一起改 / MIT大廠 CEMA對鎖式陶瓷培林BB & 導輪 / 公路車 / CT Yeh
2 年前
CT 喇低賽) 武嶺牽車 才是王道 西進牽車四小時內秘訣 攝手位置 如何判斷 防抽筋小秘訣
7 年前
再一組! 全碳幅條 碟煞/無內胎輪組 開箱! 到底好騎嗎? UNAAS X40 | 公路車 | CT Yeh
4 年前
鉅齒紋輪組!? ControlTech MEG-T50 EVO 碳纖維幅條輪組/ 功率對比實驗 / 公路車 / CT Yeh
2 年前
西進武嶺各路段 前8000名 大數據分析 配速攻略/功率/心律/推力比/維持率/踏頻/踏瓦比/牽車率 大公開 | 建大盃 NeverStop 可參考 | 公路車 | CT Yeh
5 年前
多到選擇障礙... 換個單車把帶想一個小時 / BTP / 編織&軟木特有材質超吸睛! / 公路車 / CT Yeh
1 年前