Triathlon Transition Rhythm: Why You Should Practice the "Shoes Already Clipped on the Pedals" Technique?
文章導覽
Triathlon Transition Rhythm: Why Practice the “Shoes Already Clipped on the Pedals” Technique?
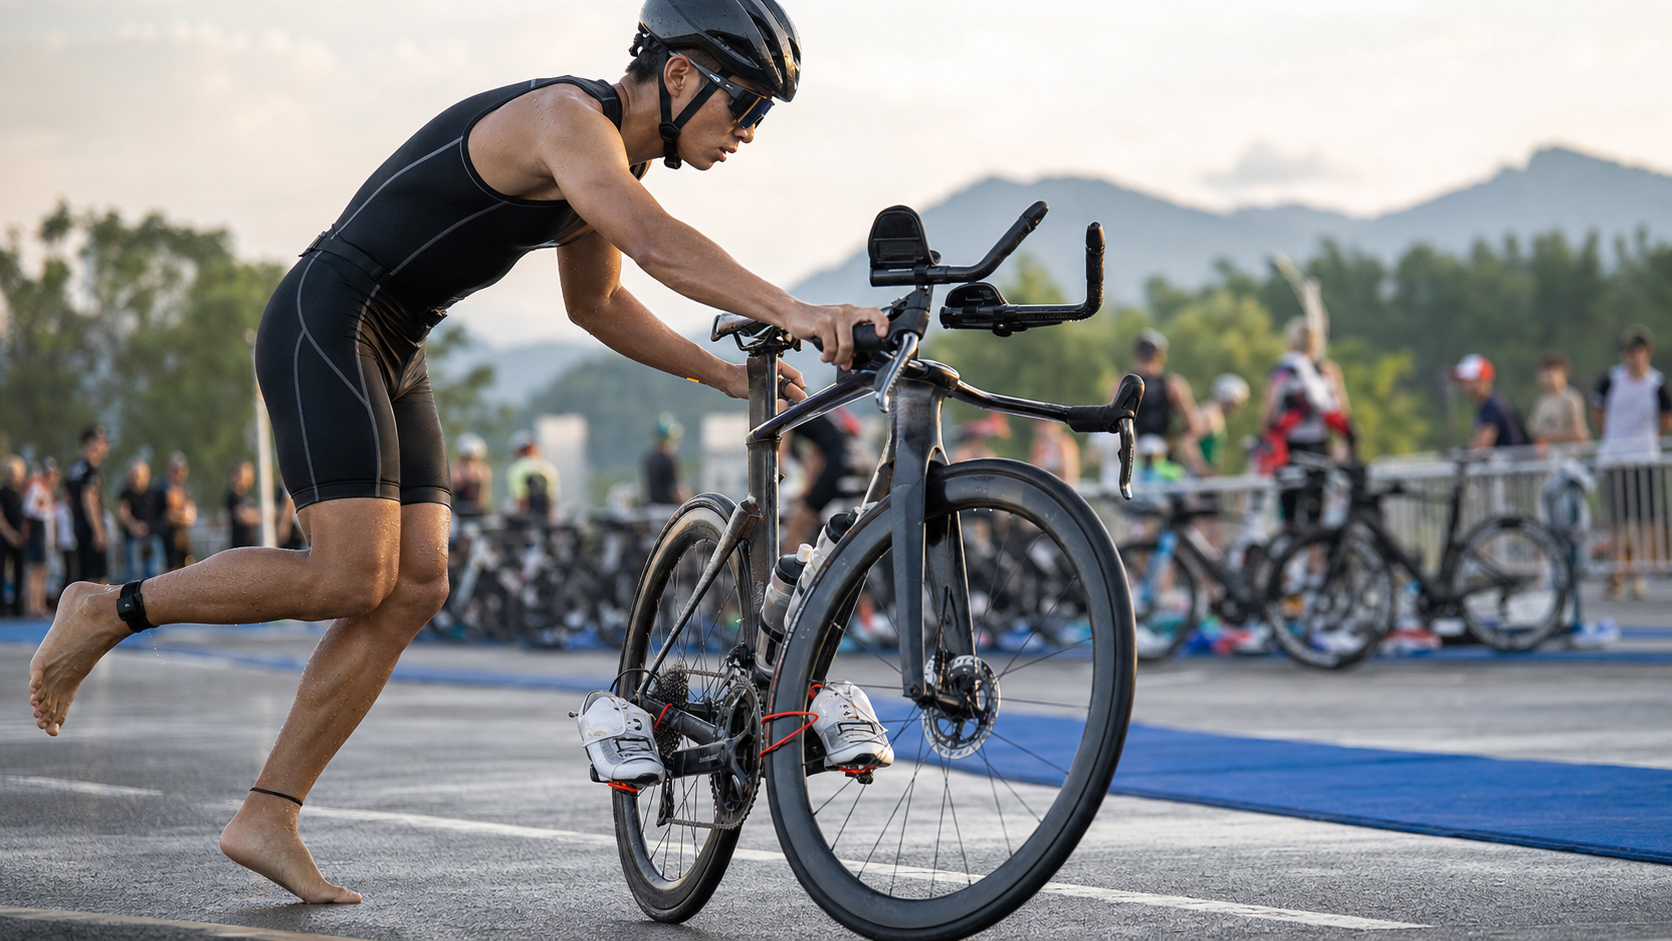
Watching professional triathlon race broadcasts, you’ll notice elite athletes come out of T1 “pushing their bike barefoot to the Mount Line.” This is the “Shoes on Bike” technique. Why do it this way? It saves 20–30 seconds and makes the T1 transition smoother.
1. Why Keep Shoes Clipped on the Pedals?
Traditional Approach (Age-Group Athletes)
- Enter transition area in T1
- Put on cycling shoes
- Walk / run to the Mount Line in cycling shoes (15–20 meters)
- Mount the bike
Problems:
- The cleats on cycling shoes slip and wear out when walking on the ground
- The cleats can catch on bumps in the ground and cause falls
- Running speed is only about 60% of normal (clunky)
Shoes on Bike (Elite Approach)
- Enter transition area in T1
- Skip the cycling shoes; push the bike barefoot to the Mount Line
- After mounting at the Mount Line, clip in while pedaling
Benefits:
- Pushing the bike while running is as fast as normal running
- No risk of falling
- Looks cool (which is also motivating)
2. Technical Principle: The Rubber Band Method
Key technique: Use rubber bands to hold the cycling shoes in a horizontal position, preventing them from dropping to the ground and dragging when you mount.
Setup Steps
- Get two elastic rubber bands (thin, about 5cm inner diameter)
- One band: shoe heel → rear triangle of the frame
- Second band (optional): shoe toe → seat tube of the frame
- Make sure the shoe is horizontal and the pedal faces up
After Mounting
- Pedal 1–2 revolutions, the rubber bands snap automatically
- The shoes drop into the normal pedaling position
- Slip your feet into the shoes
- Fasten the Velcro or Boa
3. Flying Mount
The mounting technique that pairs with Shoes on Bike.
Movement Breakdown
- Run-up phase: Right hand grips the side of the saddle, left hand holds the handlebar
- Leg-swing phase: After a 5–10 meter run-up, swing your right leg over the saddle (not the rear wheel)
- Seating phase: Your right foot lands on the shoe on the right pedal
- Acceleration phase: Your left foot simultaneously steps onto the top of the left shoe
- Balance phase: Lean forward, using acceleration to maintain balance
- Clipping phase: After 5–10 pedal strokes, reach down to adjust the shoes and fasten the Velcro
Speed Requirement
Run-up speed should be about 8–12 km/h. Too slow and the mount is unstable; too fast and it’s hard to swing the leg over.
4. Clipping Timing and Technique
When to clip in after mounting is key:
| Phase | Action | Note |
|---|---|---|
| 0–5 sec | Pedal to establish balance | Don’t look at your feet |
| 5–15 sec | Accelerate to 25 km/h | Watch the road |
| 15–30 sec | Clip in one foot | Keep pedaling with the other |
| 30–45 sec | Clip in the other foot | Done |
Remember: Build speed first, then clip in. If you look down to clip without enough speed, you’ll lose balance.
5. Training Progression (4-Week Plan)
Week 1: Static Practice
- Put the bike on a trainer
- Practice the leg-swing motion
- Practice stepping onto the top of the shoe
- 20 reps per day
Week 2: Low-Speed Practice
- Use grass or an empty parking lot
- Run up 5 meters, then mount
- Don’t clip in; just practice mounting stability
- 20 reps per session
Week 3: Clipping Practice
- Clip in immediately after mounting
- Practice adjusting with your hands while pedaling
- Don’t look down at your feet (important!)
- 15 reps per session
Week 4: Full Flow
- Simulate T1: run in + push bike + mount + accelerate + clip in
- Time the entire process
- Goal: complete within 30 seconds
6. The Corresponding Dismount Technique
The Shoes on Bike technique has a matching dismount version: Shoes off Bike (leaving shoes on the pedals).
The Movement
- 200 meters before the Dismount Line: Unfasten the Velcro on your shoes
- 100 meters out: Pull your feet out of the shoes, resting your soles on top of the shoes
- 50 meters out: Keep pedaling; speed drops only 5%
- 10 meters out: Swing your right leg over the rear wheel to the left side of the frame
- 0 meters: Left foot touches down, push the bike barefoot into the transition area
Why Leave Shoes on the Pedals?
- No need to take off shoes in T2 (already off)
- Pushing the bike barefoot in the transition area is more stable
- Go straight into running shoes
- Race staff will handle the cycling shoes afterward
Time saved: 15–25 seconds
7. Advanced: No-Touch Dismount
A technique reserved for the elite of the elite:
- 50 meters before the Dismount Line, both feet are already out of the shoes (shoes left on pedals)
- 10 meters before the Dismount Line, swing your right leg over to the left side of the frame
- After the leg swing, your right foot lands directly, with your left foot landing simultaneously (both feet touch down at once)
- Push the bike into the transition area; the entire process has no single-leg support
This requires exceptional balance and bike-handling skills. Age-group athletes are advised not to risk it.
8. Common Beginner Questions
Q1: I fell on my first practice
A: Practice on grass, not concrete. Wear knee and elbow pads.
Q2: The rubber bands keep snapping
A: Choose bands with moderate elasticity (not too thick) and keep spares on hand.
Q3: I can’t clip in after mounting
A: Practice “clipping in without looking,” relying on feel through your fingers.
Q4: The bike wobbles when I clip in
A: Keep your core stable and look 10 meters ahead, not down.
Q5: How long before I can use it in a race?
A: At least 4 weeks, 100 cumulative practice reps, and test it in at least 3 smaller races.
9. Race-Day Considerations
| Distance | Is Shoes on Bike Worth It? |
|---|---|
| Sprint | Highly recommended (high time share) |
| Olympic | Recommended |
| 70.3 | Recommended |
| Ironman | Depends on personal preference (low time share) |
10. Safety Reminders
- Using it for the first time on race day: absolutely never!
- In rainy conditions: proceed with caution, wet ground is slippery
- Mount Line on uphill/downhill: check the gradient first
- With other athletes nearby: keep your distance to avoid collisions
Shoes on Bike is a technical investment—practice for 4 weeks, use it for a lifetime. It saves 20–30 seconds in every race, making it one of the highest value-for-effort techniques.
Related Reading
- Triathlon Transition Area Fully Deconstructed: T1, T2 Course Design, Gear Placement, and Every Minute You Can Save
- Sprint Cycling Shoe Mount/Dismount Technique: The Flying Transition
- Triathlon Transition (T1/T2) Speed-Up Techniques and Course Planning: The Pro Runner’s Secret Weapon (Series 63)
- Triathlon Transition (T1/T2) Speed-Up Techniques, Course Planning, and Full Gear Selection Guide (Series 378)