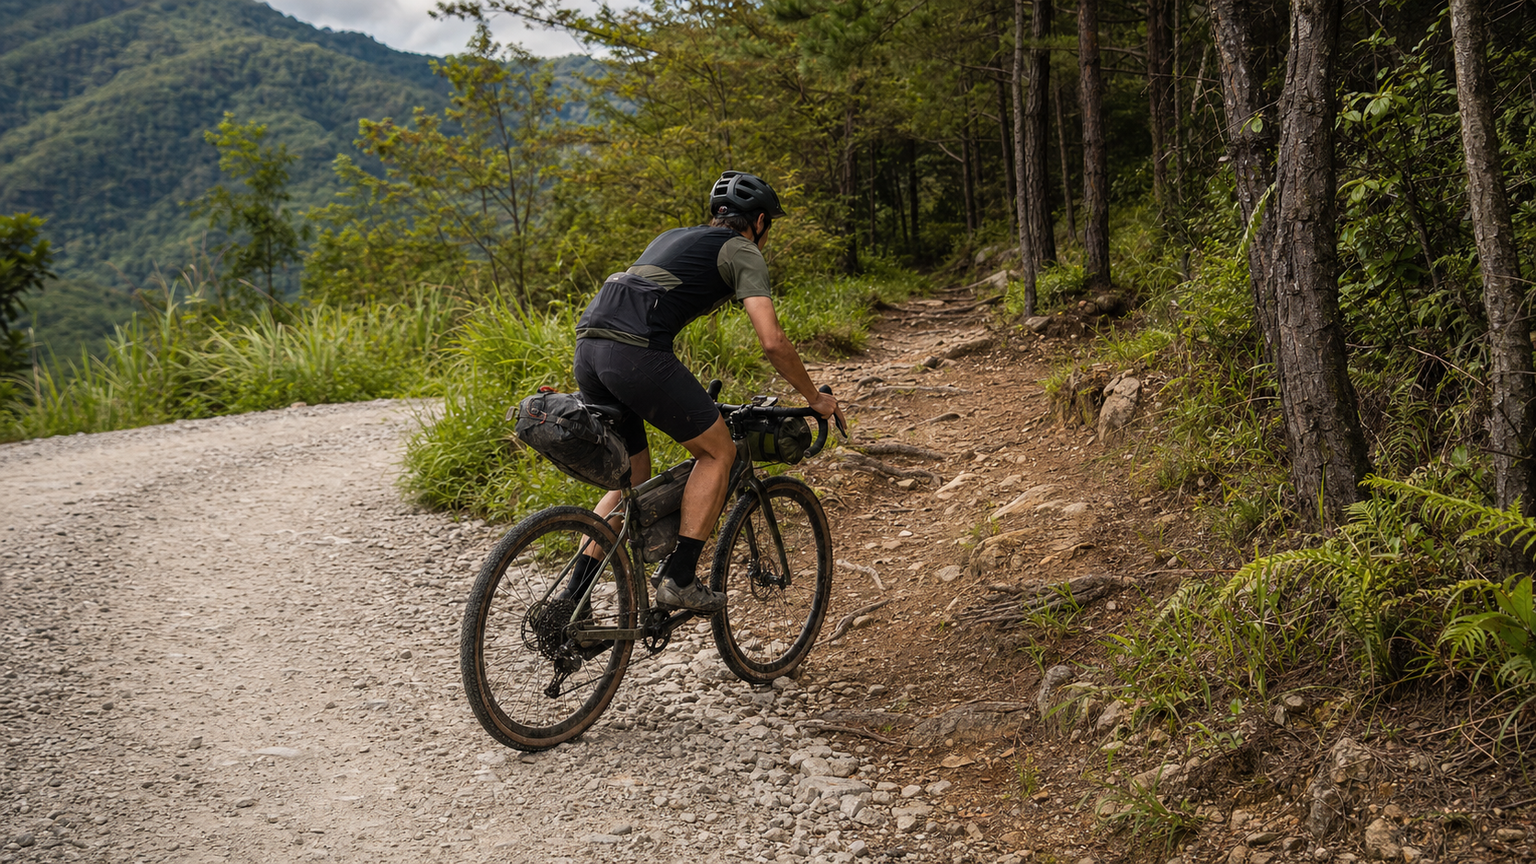
Classification of Off-Road Terrain
Bikepacking off-road riding falls into two main categories, each with completely different technical demands:
- Gravel: Wide enough for vehicles to pass, with a surface of gravel or hard-packed dirt
- Singletrack: Wide enough for only a single bike to pass, with a highly varied surface
Using road bike technique on off-road terrain can result in a minor fall at best, or broken bones at worst. This article systematically introduces the techniques for both types of terrain.
Gravel vs. Singletrack Comparison
| Item | Gravel | Singletrack |
|---|---|---|
| Width | 2-4m | 0.3-1m |
| Surface | Gravel, hard-packed dirt | Tree roots, rocks, dirt slopes, mud |
| Speed | 20-35 km/h | 8-15 km/h |
| Technical demand | Medium | High |
| Physical exertion | Medium | Extremely high |
| Risk | Falls and scrapes | Falls and fractures |
| Recommended bike | Gravel Bike | Hardtail MTB |
| Recommended tire width | 38-50c | 2.1-2.4" |
Gravel Riding Techniques
1. Tire Pressure Settings
Gravel tire pressure is much lower than road bikes:
| Rider Weight | 38c Tire | 45c Tire | 50c Tire |
|---|---|---|---|
| 60kg | 40 psi | 30 psi | 25 psi |
| 70kg | 45 psi | 35 psi | 28 psi |
| 80kg | 50 psi | 40 psi | 32 psi |
Tubeless systems can go 5-10 psi lower (without the risk of pinch flats).
2. Riding Position
Differences between pavement bikes and gravel bikes:
- Center of gravity: Shift slightly rearward (to avoid the front wheel digging in)
- Hand position: Primarily on the hoods (keep the drops in reserve)
- Elbows: Slightly bent and relaxed (to absorb vibration)
- Core: Maintain continuous light engagement (to stabilize the upper body)
3. Line Selection
Gravel roads typically have 2-3 “wheel tracks.” How to choose:
- Middle line: Fewer stones, smoothest (first choice)
- Left line: Near the shoulder, more grass but no rutted potholes
- Right line: Toward the center of the road, may have large potholes
4. Cornering Technique
Cornering on gravel differs from pavement:
- Brake on the straight: Complete braking before entering the corner
- Don’t lean the bike deliberately: Keep it upright, steer with the handlebar
- Lift the inside foot: To avoid scraping the ground
- Look at the exit: Your body follows your eyes
Forbidden: Braking hard mid-corner—the risk of the rear wheel sliding is extremely high.
5. Dealing with Loose Gravel
When the gravel on the road is deep (5cm or more):
- Reduce speed: Slow to below 15 km/h
- Slightly lift your center of gravity: To reduce pressure on the front wheel
- Maintain cadence: Don’t stop pedaling
- Relax your grip on the handlebar: Let the bike self-correct its direction
Singletrack Riding Techniques
Singletrack is the most technical aspect of Bikepacking and requires continuous learning.
1. Basic Position: The “Ready Position”
The standard singletrack stance:
- Elbows out at 90 degrees
- Knees slightly bent, not locked
- Pedals level (not at the 6/12 o’clock position)
- Hips 1-2 cm off the saddle
- Core continuously engaged
This position can handle any unexpected situation.
2. Reading the Line (Line Choice)
The difference between singletrack experts and beginners lies in “reading the line”:
- Look 3-5 meters ahead: Don’t stare at the front wheel
- Plan the next three moves: Avoid rock A, roll over rock B, cross root C
- Avoid: Protruding boulders, loose rocks, tangled root sections
Training method: First ride slowly to memorize the obstacles, then increase speed on the second pass.
3. Crossing Obstacles
Tree Roots (less than 10cm)
- Cross at a right angle (don’t cross diagonally—the tire will slide)
- Slightly lift your body as the wheel passes over
- Keep pedaling
Tree Roots (greater than 10cm)
- Lift the front wheel (Manual technique)
- Shift your hips forward as the rear wheel passes
- Avoid hard braking
Rocks (single large rock)
- Small rocks: Maintain speed and roll straight over
- Medium rocks (10-20cm): Lift the front wheel + roll the rear wheel over
- Large rocks (> 20cm): Dismount and walk (nobody will laugh at you)
Tangled Root Sections
- High risk crossing diagonally: It’s recommended to dismount and walk 5 meters
- If you must ride: Find a gap, slow down, and keep your core stable
4. Climbing Technique
Singletrack climbs are 10 times harder than gravel:
- Shift weight forward: Upper body close to the handlebar
- Keep hips on the saddle (no standing pedaling)
- Maintain a cadence of 70-80 rpm
- Shift to the easiest gear on a 1x drivetrain
When you can’t make it up: Dismount and walk immediately—don’t push until you fall.
5. Descending Technique
Singletrack descents are the most dangerous part:
- Shift weight rearward: Hips off the saddle, toward the rear wheel
- Elbows out: To absorb vibration
- Brake ratio: 60% front + 40% rear
- Avoid locking up: Pulse the brakes (Cadence Braking)
Steep slopes (> 15%): Lower the saddle to its lowest position, lean your hips back past the saddle.
6. Emergency Braking and Avoidance
When an accident happens (a rock or branch suddenly appears):
- Shift weight rearward
- Brake primarily with the rear (locking the front will flip you over the bars)
- Look at the escape route (not at the obstacle)
- If you can’t stop, fall on the softest spot
Hazard Recognition
Gravel Hazard Signals
- The road suddenly changes from dry to slippery
- Deep ruts appear (road surface washed out after standing water)
- A sudden descent (with an unknown endpoint)
- Large vehicles approaching from behind
Singletrack Hazard Signals
- A trail that suddenly disappears (possible landslide)
- Heavy leaf cover hiding the trail (concealing rocks)
- Dense spider webs (no one has passed recently—there may be fallen trees)
- Animal tracks (especially large animals)
The Correct Way to Fall
Falls are inevitable in off-road riding; falling correctly can prevent serious injury:
- Let go of the handlebar (to avoid wrist fractures)
- Tuck your elbows and protect your head
- Land on your side (not on your front)
- Roll to dissipate the impact (don’t brace rigidly)
Always wear a helmet—no matter how safe it looks.
Training to Improve Your Skills
At Home
- Balance training: Stand on one foot in place for 1 minute
- Core training: Planks, 3 sets of 60 seconds
- Squat training: Simulate the descending position
While Riding
- Balance practice: Practice lifting one foot off the pedal in a parking lot before every ride
- Slow-speed obstacle crossing: Ride slowly over small obstacles (without relying on momentum)
- Hands-off practice: Practice riding with both hands off the bar on safe pavement (to improve core stability)
Riding Off-Road with Bikepacking Gear
Off-road skills on an unloaded bike + Bikepacking gear present additional challenges:
- Bike weight + 5-15 kg: Handling response becomes sluggish
- Rearward center of gravity: Affects front-wheel traction on climbs
- Swaying saddle bag: Affects stability on descents
Countermeasures:
- Re-check that your gear is securely fastened before technical sections
- Don’t attempt challenges on difficult sections—dismount and walk
- Reserve 30% of your energy for technical sections (don’t attempt them when you’re most exhausted)
Conclusion: Respect Every Section of Trail
The core of off-road riding is not “conquering,” but “adapting.”
Both Gravel and Singletrack have their own language—knowing how to read the terrain, adjust your technique, and dismount when appropriate—that is the true off-road wisdom of Bikepacking.
A final piece of advice from the veterans: “Dismounting and walking is not failure; being carried off the mountain injured is.”
Related Reading
- Gravel Bike Beginner’s Guide: The Perfect Balance Between Road and Mountain Bikes
- Gravel Bike Basics: Riding Differences and Technical Adjustments Between Gravel and Road Bikes
- Gravel Bike vs. Road Bike: A Comprehensive Analysis of the Differences and Buying Guide
- Gravel Race-Specific Training: Dual Preparation of Fitness and Skills for Mixed Terrain
公路車 爬坡 破PR 紀錄 小技巧 分享
6 年前
單車 梅山36灣 坡度介紹 路段介紹 空拍 (相關遊記影片,請參考說明或我的頻道喔,歡迎訂閱)
6 年前
單車 一日北高 ( 雙城 ) 肥宅雙人瘋狂行 紀錄片 REACTO
10 年前
碟煞公路車 銑面器 !? 原來銑完差這麼多! 降低蹭碟機率! | TIME 公路車 保養小記錄 | CT Yeh
3 年前
安裝) 超酷! RGT Cycling 最新 訓練台 騎乘軟體 模擬一級賽經典路線 選手 Road Grand Tours 安裝教學 Zwift 替代方案
7 年前
碟煞公路車 優缺點?換車一年半實際經驗分享 / 公路車 / CT Yeh
2 年前
滑雪新手們慘摔學習全紀錄(請開字幕),滑雪好好玩 | Snowboard + Ski | 岩原 スキー場 | 滑雪APP使用 | GoPro Max
6 年前
RAMP FTP Test 直播 究竟能撐到幾瓦 訓練台 Gravat Zwift
6 年前