Gravel Riding Technique: Weight Distribution Control and Tire Pressure Settings on Loose Surfaces
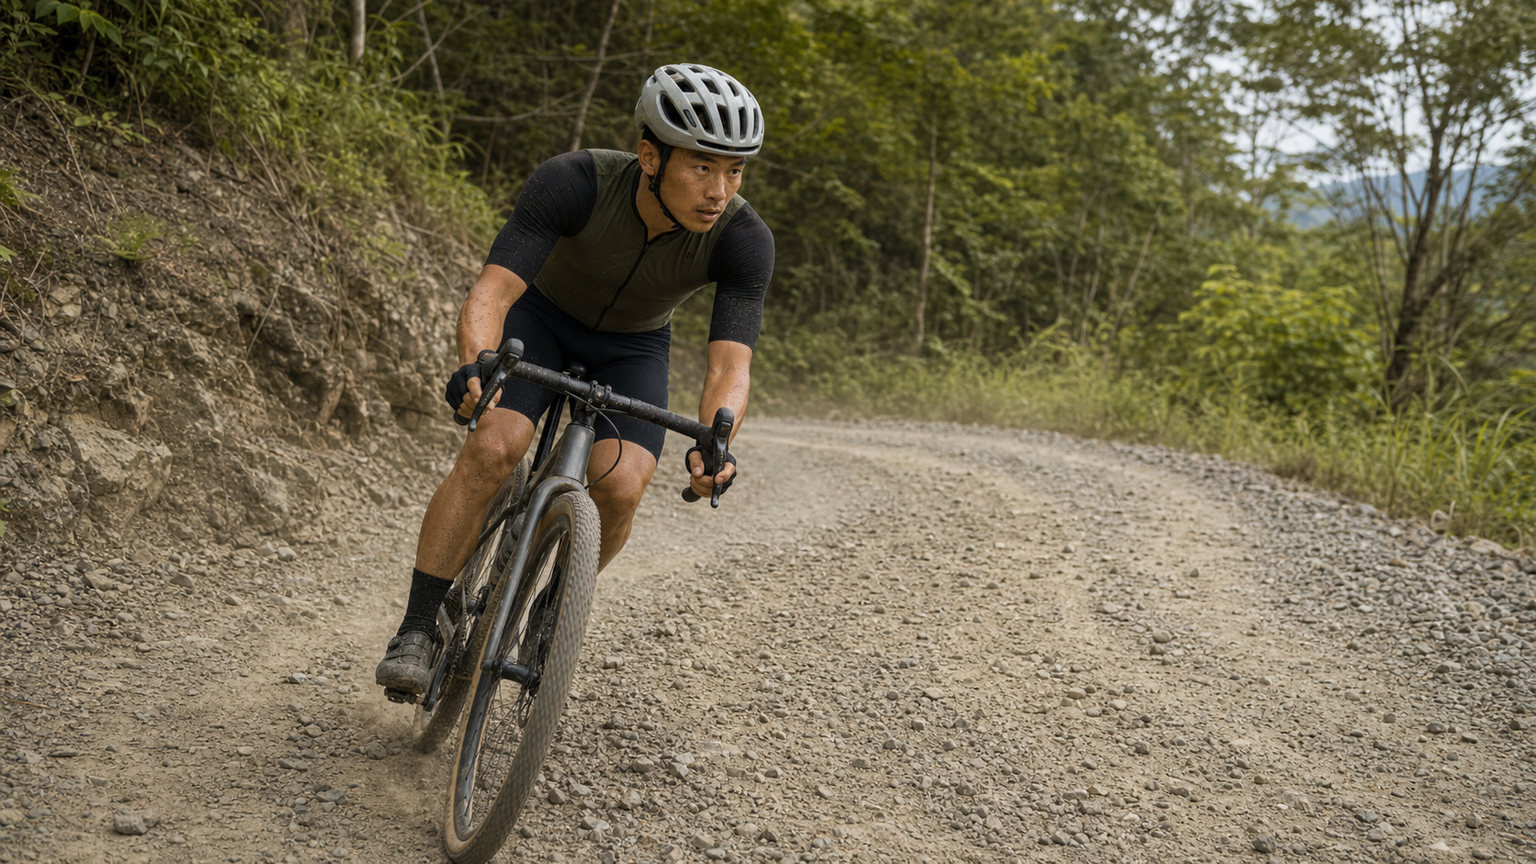
Gravel Riding Technique: Weight Control and Tire Pressure Settings on Loose Surfaces
Gravel surfaces are not a single road condition; they can be finely crushed gravel pavement, dirt roads full of ruts, mountain forest trails mixed with gravel of various sizes, or continuous sandy sections. Each surface reacts differently to tires, but two core techniques run through all situations: weight control and tire pressure. Mastering these two techniques will bring a qualitative leap in your capability on gravel surfaces.
Understanding the Physical Behavior of Loose Surfaces
Before understanding technique, first understand the physical characteristics of gravel surfaces. The friction on asphalt is relatively stable and predictable; gravel surfaces are a dynamic system: as tires roll over, stones shift, sink, or rearrange, and friction can change every second.
This means:
- You cannot rely on the surface to provide stable support
- Your body must become an active balance regulator, not a passive absorber of vibration
- Any sudden power input (hard braking, sharp turning, explosive pedaling) can trigger a chain reaction of loss of control
Weight Control: Three Key Positions
Weight control in gravel riding can be broken down into three scenarios: flat cruising, climbing, and descending. The optimal weight position differs for each scenario.
Flat Cruising Weight
When cruising on gentle gravel surfaces, your weight should shift slightly rearward, about 5cm behind your position on the road bike. This puts more pressure on the rear wheel, improving rear traction, while keeping the front wheel light for its guiding function.
Practical approach: sit lightly on the saddle (don’t press your full body weight onto it), let your inner thighs partially support your weight, engage your core to keep your upper body stable, and don’t sway with the road vibration.
Climbing Weight
Gravel climbs are the ultimate test of weight judgment. Leaning too far forward causes the rear wheel to slip and lose traction; leaning too far back lightens the front wheel, losing steering ability, and can even lift the front wheel on steep slopes.
- 0–8% grade: normal seated position, slightly forward
- 8–15% grade: upper body clearly leaning forward, nose pointing toward the front wheel axle
- 15%+ grade: standing pedaling, weight low, hips hovering in front of the saddle rather than fully standing
Descending Weight
Shifting weight rearward on descents is the most intuitive technique, but the most common mistake among Taiwanese beginners is over-shifting rearward. Excessive rearward shift removes downward pressure from the front wheel, making steering sluggish and actually dangerous in corners.
The correct approach is to shift your weight slightly rearward from the bike’s center of gravity, keep arms bent to absorb shock, and maintain 30–40% of braking input capability on the front wheel. A simple benchmark: if you feel like you’re about to flip over the front wheel, your weight isn’t far enough back; if you feel the front wheel is about to lift off the ground, you’ve shifted too far rearward.
Dynamic Weight: Using Your Body as Suspension
On gravel surfaces, static weight positioning is not enough. You need to learn dynamic weight adjustment—adjusting your weight position every second based on real-time road conditions.
| Road Condition | Weight Adjustment Direction | Adjustment Magnitude |
|---|---|---|
| Entering dense gravel sections | Shift rearward + lower | 5–8cm rearward, lower hips |
| Passing a single large rock | Rearward first, then forward | Match the rhythm of the tire clearing the obstacle |
| Entering a corner | Press down on the outside pedal | Open the outside knee toward the outside of the corner |
| Surface suddenly becomes smooth | Return to neutral weight | Recover slowly, don’t rush |
Tire Pressure: Optimal Settings for Different Surfaces
Tire pressure setting is the variable with the greatest impact and the easiest to optimize in gravel riding. Many riders use a fixed pressure, missing out on a huge amount of performance potential.
Base Formula (Tubeless System):
Based on 70kg body weight, 43mm tire width:
- Compact gravel surface: front 30 psi / rear 33 psi
- Loose gravel surface: front 26 psi / rear 29 psi
- Muddy surface: front 24 psi / rear 27 psi
- Mixed asphalt/gravel: front 32 psi / rear 35 psi
Add 1–1.5 psi for every additional 5kg of body weight; for tubed systems, add 8–10 psi to the above numbers (to avoid snakebites).
Thumb Rule for On-Site Pressure Judgment:
Press firmly on the sidewall of the tire with your thumb. If the tire feels springy but doesn’t deform excessively, that’s roughly the correct pressure range. It’s not precise, but it’s very practical in the field without a pressure gauge.
The Importance of Front-Rear Pressure Difference
Many riders set the same pressure in both front and rear tires—this is a common mistake. The rear wheel bears more of the rider’s weight (about 55–60% of the total) and is responsible for traction; the front wheel is primarily responsible for steering and needs more deformation to track the surface.
It’s recommended to run the front tire 3–5 psi lower than the rear. This setup keeps the front wheel with excellent tracking on gravel surfaces, while the rear wheel maintains efficiency and snakebite resistance at a relatively higher pressure.
Practical Drill: Pressure Perception Training
Suggested training method:
- Find a fixed 5km gravel section
- First run: ride at your usual pressure, record your feelings and time
- Second run: drop 4 psi front and rear, repeat the same section
- Third run: drop another 4 psi, repeat the same section
- Compare speed, comfort, and tire feel across the three runs
Most people will find the middle pressure performs best—that’s your optimal starting point.
Conclusion
Weight control and tire pressure settings on loose surfaces are the two areas with the fastest skill improvement and the highest return on investment in gravel riding. No component upgrades are needed—just build proper body awareness and setup habits, and your speed and confidence on gravel will improve significantly. Before your next ride, spend two minutes reassessing the road conditions and adjusting tire pressure. This small habit will bring big changes.
Related Reading
- Gravel Riding Technique Guide: Practical Tips for Climbing and Descending on Crushed Stone Roads
- Gravel Climbing Strategy: Gear Ratio Selection and Cadence Stability Techniques on Gravel Surfaces
- Gravel Bike Basics: Riding Differences and Technique Adjustments Between Gravel Bikes and Road Bikes
- The Tire Pressure Matrix for Mixed Gravel-Road Races: How One Number Simultaneously Determines Speed, Grip, and Survival
碟煞公路車 銑面器 !? 原來銑完差這麼多! 降低蹭碟機率! | TIME 公路車 保養小記錄 | CT Yeh
3 年前
大禹嶺 到 武嶺牌樓 全程前後實況錄影 | 北進武嶺 | 東進武嶺 | KOM | 訓練台 | 坡度分析 | Taiwan KOM Last 10 km HARD | 公路車
6 年前
單車胎壓觀察到的有趣現象,SRAM Quarq TyreWiz 2.0 無內胎胎壓計 / 裝了有哪些幫助? / Tubeless / 公路車 / CT Yeh
1 年前
CT 喇低賽) 武嶺牽車 才是王道 西進牽車四小時內秘訣 攝手位置 如何判斷 防抽筋小秘訣
7 年前
#公路車 #Fitting 靠人工智慧APP 幫你調整單車
6 年前
Insta 360 One 超級防手震技術實測
7 年前
單車AI教練!全新 ChatGPT4o 幫你分析訓練成果!排武嶺課表,分析騎車姿勢! 太神了! / 公路車 / CT Yeh / feat. 緯緯
2 年前
一個測試有沒有認真練車的方法😂 #公路車
10 個月前