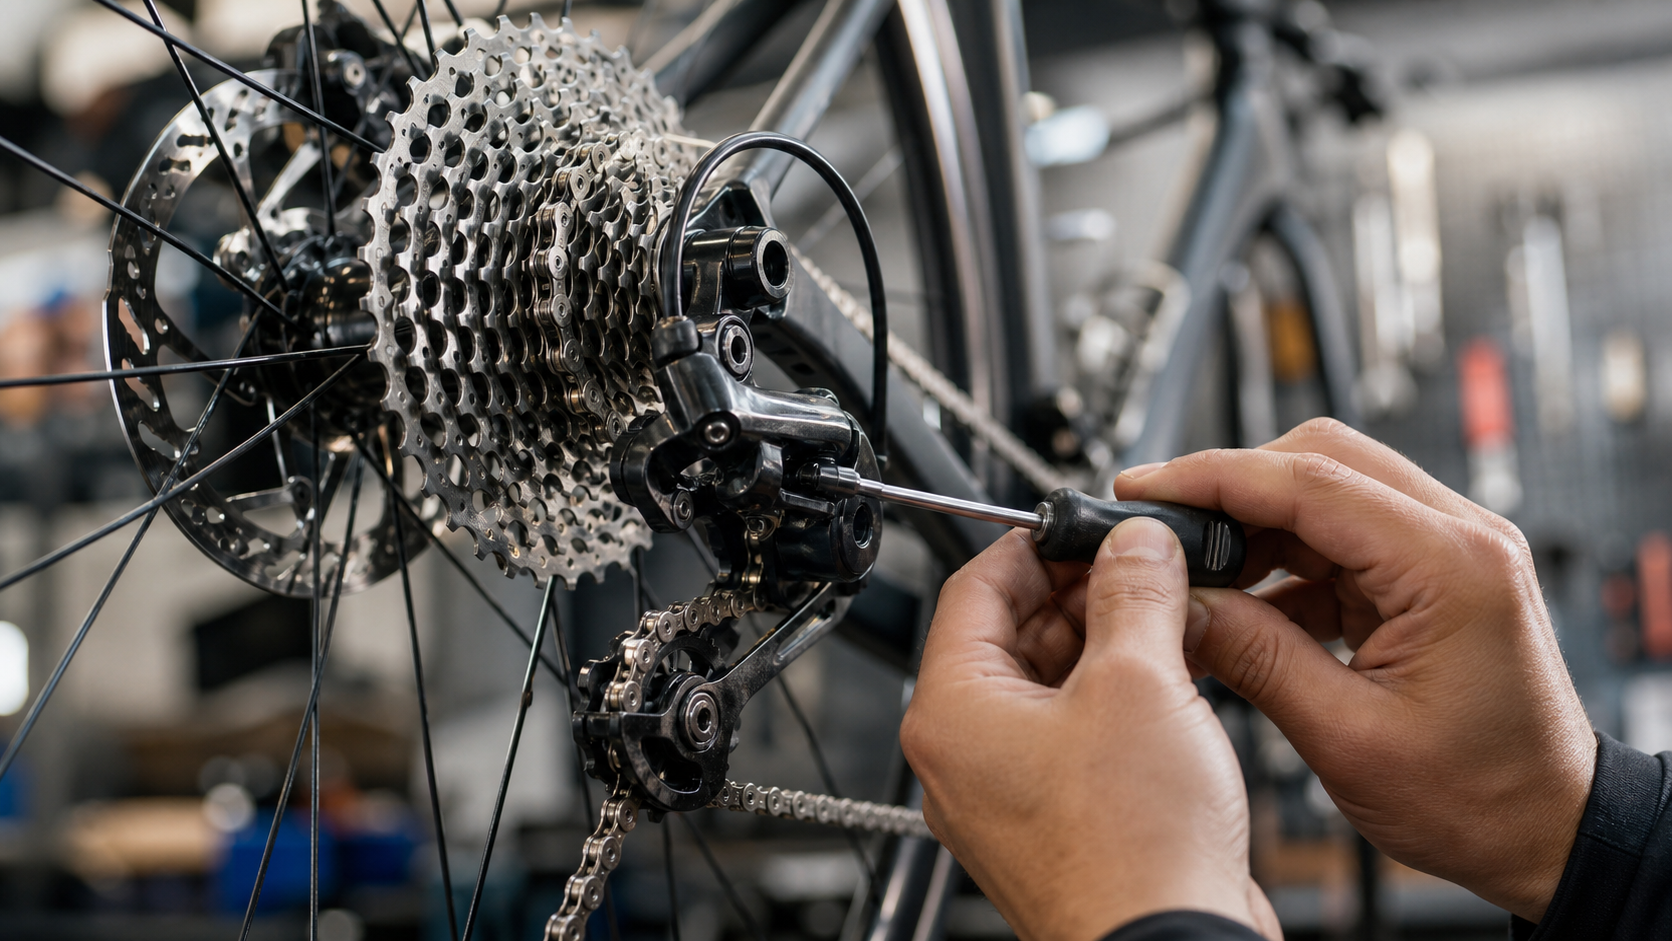
Drivetrain Tuning: Precise Adjustment of Rear Derailleur B-Tension and Limit Screws
Introduction
A perfectly tuned drivetrain shifts in about 0.1 seconds — silent, accurate, and predictable. A poorly adjusted rear derailleur, on the other hand, doesn’t just make riding frustrating; it can cause chain skip exactly when you need to shift most, such as on a climb or during a sprint, and may even damage your cassette and chain. Rear derailleur adjustment involves three main parameters: B-tension (guide pulley clearance), H/L limit screws (travel limits), and cable tension. This article walks through each one in detail.
Preparation Before Adjusting
Required Tools
- 2mm, 3mm, and 5mm hex wrenches
- Phillips screwdriver (#1)
- Cable cutters, cable end caps (ferrules)
- Derailleur adjustment tool (optional, but recommended for beginners)
- Park Tool alignment gauge (optional)
Confirm the Current State
Before adjusting, check the following items so you don’t waste effort while the root cause remains unresolved:
- Whether the chain length is correct (with the big chainring and largest cog engaged, the gap between the guide pulley and the cog should be 5–6mm)
- Whether the chain needs replacing (over 0.75% elongation)
- Whether the rear derailleur hanger is bent
- Whether the shift cable has frayed strands or rust
B-Tension Screw Adjustment
What Is B-Tension?
The B-tension screw controls the distance between the rear derailleur’s guide pulley (the upper jockey wheel) and the largest cog on the cassette. This clearance directly affects shifting precision on the largest cog.
Standard Clearance
| Drivetrain | Recommended Clearance |
|---|---|
| Shimano 105 / Ultegra / Dura-Ace | 5–6 mm (largest cog) |
| Shimano MTB 12-speed | Per model manual (typically 6–8 mm) |
| SRAM Eagle 12-speed | Use the SRAM-specific B-gap tool |
| Campagnolo | Close to the largest cog without rubbing when aligned |
Adjustment Steps
- Shift the chain onto the largest cog (lightest gear)
- Observe the gap between the guide pulley and the largest cog from behind
- Turning the B-tension screw clockwise → increases the clearance (pulley moves away)
- Turning counterclockwise → decreases the clearance (pulley moves closer)
- Once set to the standard clearance, pedal and test shift smoothness
Note: Too little B-tension causes the guide pulley to rub against the cog and delays shifting; too much B-tension slows shifting response on the smaller cogs and makes chain skip more likely.
H/L Limit Screw Adjustment
What They Do
- H Screw (High Limit): Limits the derailleur’s outward travel, preventing the chain from falling off the smallest cog
- L Screw (Low Limit): Limits the inward travel, preventing the chain from dropping past the largest cog into the frame
H Screw Adjustment Steps
- Shift the rear derailleur to the smallest cog (heaviest gear)
- Look from directly behind: the outer edge of the guide pulley should align with the outer edge of the smallest cog
- If the chain shows signs of dropping outward → tighten the H screw clockwise
- If shifting to the smallest cog is difficult → loosen the H screw counterclockwise
L Screw Adjustment Steps
- Shift the rear derailleur to the largest cog (lightest gear)
- Confirm the chain hasn’t wedged between the cog and the frame’s dropout/spoke area
- If the chain tends to drop into the frame → tighten the L screw clockwise
- If shifting to the largest cog is difficult → loosen counterclockwise
Cable Tension Adjustment
Cable tension is the most commonly used item for everyday fine-tuning, typically adjusted via the barrel adjuster on the derailleur.
| Symptom | Adjustment Direction | Action |
|---|---|---|
| Difficulty shifting to a lighter gear (rearward) | Increase tension | Turn barrel adjuster counterclockwise |
| Difficulty shifting to a heavier gear (forward) | Decrease tension | Turn barrel adjuster clockwise |
| Hesitant or uncertain shifting | Slightly increase tension | Turn counterclockwise 1/4 turn |
| Continuous chattering noise between gears | Check both tension and B-tension | Combined adjustment |
Initial Cable Tension Setup Procedure
- Turn the barrel adjuster fully clockwise (minimum tension state)
- Then turn counterclockwise 2–3 full turns to leave room for adjustment
- Place the chain on the smallest cog (H position)
- After confirming the H limit is correct, pull the cable taut and tighten the anchor bolt
- Pedal while shifting through each gear one at a time, listening for shift noise
- If rearward shifts hesitate, turn the barrel adjuster counterclockwise 1/4 turn at a time until smooth
Practical Tips
- Check the hanger alignment first: If shifting is still inaccurate after adjustment, use a hanger alignment tool to check whether the derailleur hanger is bent — this is the most commonly overlooked root cause
- Adjust one parameter at a time: Be patient and only touch one screw at a time to avoid confusion from repeated corrections
- Test while standing and pedaling: Smooth shifting while seated doesn’t guarantee stability under standing effort — always test in both positions
- Electronic drivetrain maintenance: Shimano Di2 and SRAM AXS are battery-powered and need regular charging; adjustment is relatively simple but requires a companion app
Conclusion
Rear derailleur adjustment is one of the steepest learning curves in bike maintenance — but also one of the most rewarding skills to master. Once you understand how B-tension, the limit screws, and cable tension interact, you’ll find that most shifting problems can be solved within 15 minutes. It’s recommended to redo a full adjustment every time you replace the shift cable or chain, and to do a thorough check at the start of every riding season to keep your drivetrain performing at its best.
Related Reading
- Rear Derailleur Adjustment Masterclass: Mastering Precise Shifting From Scratch
- Road Bike Drivetrain Tuning: Fine Calibration of Front and Rear Derailleurs
- The Complete Guide to Derailleur Adjustment: Precise Setup for Front and Rear Shifters
- DIY Rear Derailleur Adjustment: Say Goodbye to Chain Skip and Noise
SRAM FORCE E1 首發!/ 改成短腿了 / 煞車升級有感嗎? / TIME ADH 變速大升級 / 公路車 / CT Yeh
1 年前
來都來了!改好改滿 / CS大導輪 + BB 可以省幾瓦? / 同場加映 TIME XPRO卡踏 / #公路車 #ceramicspeed / CT Yeh
1 年前
西進武嶺 自製新版AI配速表產生器 x 賽前攻略 抱佛腳! 沒有功率計也可以產生配速表嗎?有什麼其他眉角賽前要注意的呢? | 西進武嶺 / 東進武嶺 KOM 攻略 | 公路車 | CT Yeh
4 年前
西進武嶺 免費訓練分析服務 Intervals | 練不夠還是練過頭?你哪一種類型選手?AI模型告訴你! | 備戰神器 | 公路車 訓練 | CT Yeh
4 年前
[教學] Premiere 影片 手震 修正 教學 防抖 單眼 影像 GoPro 穩定 Video Stabilization
8 年前
FTL 與 SYB 車隊專訪 西進武嶺 實用攻略分享! 2小時 如何練?!你不知道的眉角!新手準備武嶺必看 EP1 | 實力派女車友 | 精華版 | 公路車 | CTYeh
4 年前
西進武嶺配速器 3.0更新 / NEW 免功率FTP估算! / 大數據xAI體能模型 / 如何模擬人止關前集團效應 / 配速儲存功能 / AI全台自行車賽事行事曆 / 公路車 / CT Yeh
1 年前
碟煞公路車 優缺點?換車一年半實際經驗分享 / 公路車 / CT Yeh
2 年前