The Complete Practical Guide to Bicycle Chain Waxing: From Degreasing to Hot Melt Immersion
文章導覽
The Complete Practical Guide to Bicycle Chain Waxing: From Degreasing to Hot Melt Immersion
Introduction: A Revolution in Chain Lubrication
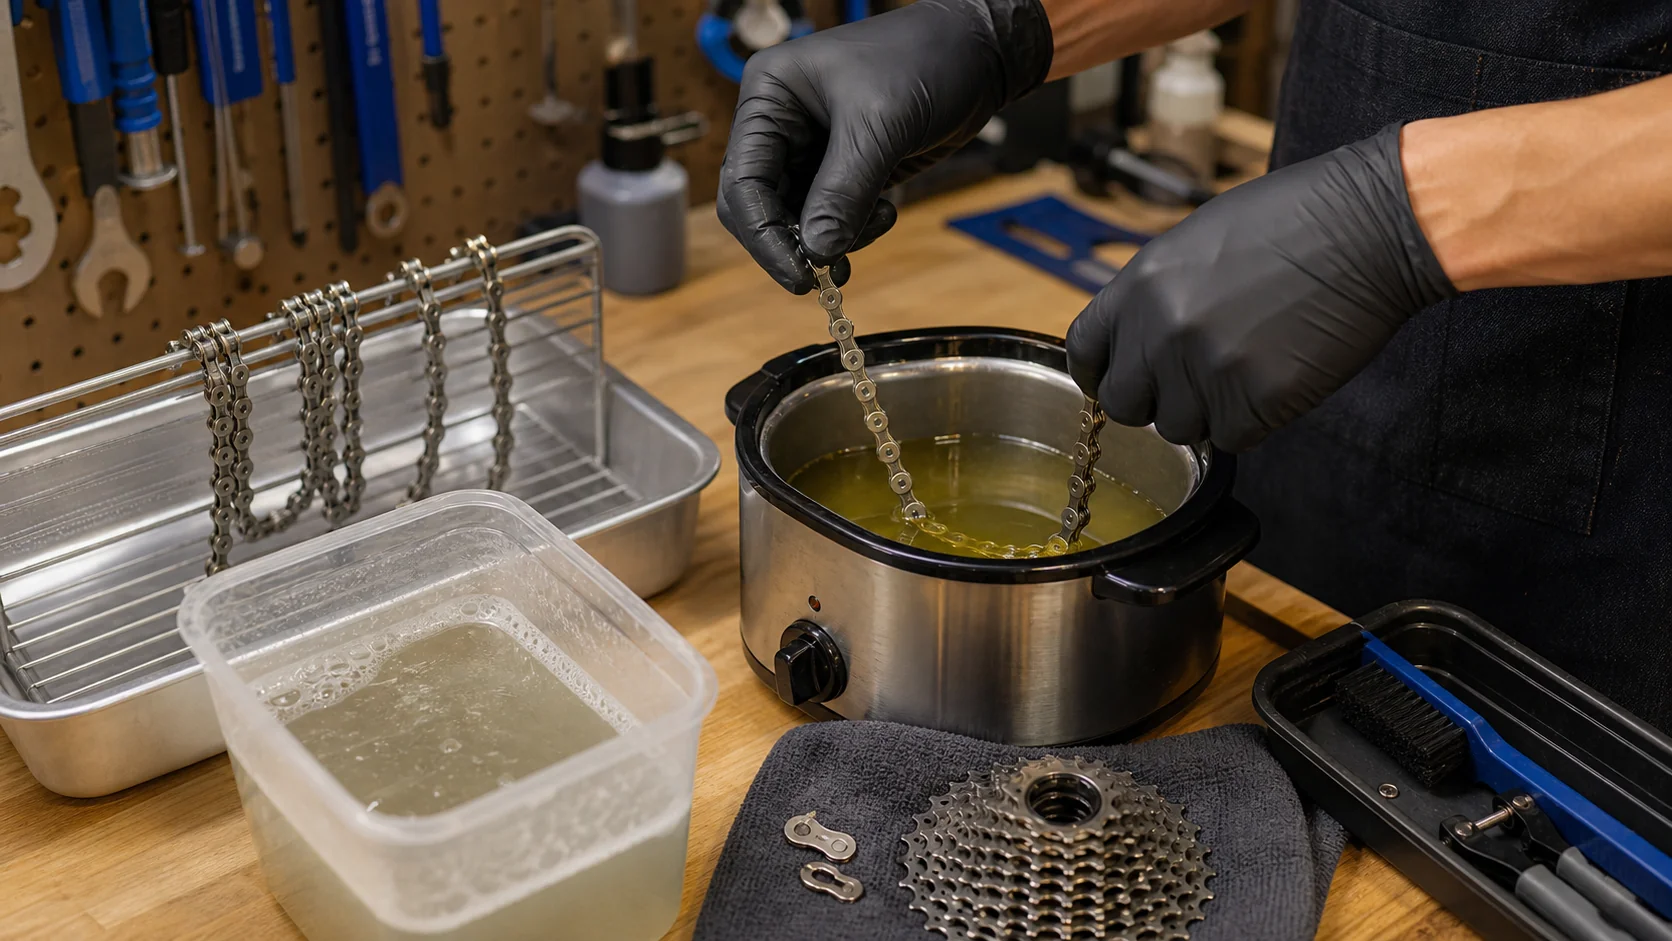
Traditional chain lube — whether dry or wet — has one recurring problem: it attracts dust. After a few rides, the chain turns into a filthy black mess that leaves smudges on your clothes and pant legs.
Chain waxing is a completely different approach — wax doesn’t attract dust, and the drivetrain stays looking almost brand new. More importantly, a waxed chain has lower friction and lasts longer.
The downside? The process feels a bit like cooking in the kitchen.
Why Choose Waxing?
Waxing vs. Traditional Chain Lube
| Comparison | Traditional Chain Lube | Chain Waxing |
|---|---|---|
| Cleanliness | Gets dirty easily | Extremely clean |
| Friction | Low | Even lower |
| Durability | 200-500km | 300-500km |
| Water resistance | Good (wet) / Poor (dry) | Moderate |
| Application time | 2 minutes | 30-60 minutes |
| Dust attraction | Severe | Almost none |
| Drivetrain lifespan | Normal | Extended 30-50% |
| Cost | Low | Moderate |
The Science Behind Waxing
Wax lubrication outperforms oil lubrication mainly because:
- Dry lubrication: Wax is solid and doesn’t attract dust
- Low coefficient of friction: Paraffin wax and PTFE (Teflon) have extremely low friction coefficients
- Penetration: In liquid form, it can penetrate deep between the chain rollers and pins
- No contamination: The residue that flakes off is white, not black
Preparing to Wax
Materials You’ll Need
| Material | Purpose | Approximate Price |
|---|---|---|
| Chain wax (e.g. Molten Speed Wax) | Primary lubricant | NT$500-1,000 |
| Mineral spirits | Degreasing | NT$100-200 |
| Isopropyl alcohol (90%+) | Final cleaning | NT$100 |
| Slow cooker or dedicated wax pot | Melting the wax | NT$300-800 |
| Thermometer | Temperature control | NT$100-200 |
| Wire or hook | Suspending the chain during immersion | NT$10 |
| 3x sealed containers | Degreasing soak | NT$100 |
| Gloves | Hand protection | NT$30 |
| Quick-link pliers | Removing/installing the chain | NT$200 |
DIY Wax Recipe vs. Ready-Made Products
Ready-made products (recommended for beginners):
- Molten Speed Wax: Industry standard, about NT$800
- Silca Hot Melt Wax: Premium option, about NT$1,200
- CeramicSpeed UFO Drip: Drip-on type (no immersion needed), about NT$600
DIY recipe (for DIY enthusiasts):
- Paraffin wax 500g
- PTFE powder 30g
- Molybdenum disulfide (MoS2) powder 5g (optional)
The results of a DIY recipe depend on the ratio and technique used. Beginners are advised to start with a ready-made product.
The Complete Hot-Melt Immersion Process
Step 1: Remove the Chain
- Use quick-link pliers to open the quick link
- Remove the chain
- Note the chain’s length (number of links)
Step 2: Thorough Degreasing (the most important step!)
A new chain, or one being converted from oil lubrication, must have all traces of oil completely removed. Wax and oil are not compatible — any leftover oil will prevent the wax from adhering properly.
Degreasing process:
- First soak: Place the chain in mineral spirits and agitate for 10 minutes
- Remove and air dry
- Second soak: Use fresh mineral spirits and repeat the soak and agitation
- Remove and air dry
- Third soak: One more time to ensure it’s thoroughly clean
- Alcohol wash: Do a final cleaning with isopropyl alcohol (90%+)
- Fully dry: Let the chain dry completely (a hair dryer can speed this up)
How do you confirm degreasing is complete?
Place the degreased chain on a white paper towel — if there’s no oil stain on the towel, you’ve succeeded.
Note: Mineral spirits are flammable. Work in a well-ventilated area, away from open flames.
Step 3: Melting the Wax
- Place the wax in a slow cooker or dedicated wax pot
- Heat to 70-90°C (recommended temperature varies by product)
- Do not exceed 100°C: The wax will break down
- Wait until the wax has completely melted into liquid form
- Stir evenly (especially for recipes containing additives)
Step 4: Immersing the Chain
- Thread a wire through the chain to make a hanging hook
- Submerge the chain in the melted wax
- Gently agitate the chain with the wire so the wax penetrates every roller
- Soak for at least 5-10 minutes
- Agitate again every 1-2 minutes during the soak
Step 5: Removal and Handling
- Slowly lift the chain out, letting excess wax drip back into the pot
- Before the wax solidifies, flex every link back and forth by hand (wear gloves)
- This step is important! It keeps every joint moving freely
- If the wax hardens too quickly, you can re-dip and reheat
Step 6: Installation
- Wait for the chain to cool completely
- Reinstall the chain with a new quick link
- Before riding, turn the cranks a few times to let the drivetrain break in the wax
- Shifting may feel a bit rough on the first ride; it will smooth out after a few kilometers
Maintenance and Re-Waxing
When Should You Re-Wax?
| Indicator | Description |
|---|---|
| Chain starts making noise | Wax layer is depleted |
| Shifting feels rough | Needs lubrication |
| 300-500km of riding | Typical cycle |
| After riding in heavy rain | Wax has washed off |
| Chain surface looks dry | Visual check |
Simplified Re-Waxing Process
If you’ve already waxed the chain before (not converting from oil lubrication):
- Remove the chain
- Rinse off surface dust and old wax with hot water
- Let it air dry
- Dip it directly into the melted wax
- Follow the same flexing and installation steps
No need to degrease again! Since there’s no oil on the chain.
Drip Waxing (the Lazy Method)
If you don’t want to remove and boil the chain every time:
- Use a drip wax product (e.g. CeramicSpeed UFO Drip, Squirt Lube)
- Clean the chain surface
- Apply drop by drop onto each chain roller
- Wait for it to dry
- Wipe off excess wax from the outside
Drip waxing isn’t as effective as hot-melt immersion, but it’s much cleaner than traditional chain lube and far more convenient.
Frequently Asked Questions
Q: Can a waxed chain get rained on?
A: Yes, but wax isn’t as water-resistant as wet chain lube. After heavy rain, it’s a good idea to re-wax.
Q: What if shifting feels rough after waxing?
A: That’s normal. After a few kilometers, the excess wax will shed and shifting will smooth out.
Q: Can I share the slow cooker with my family?
A: Technically it can be cleaned thoroughly, but for household harmony, it’s best to use a dedicated pot.
Q: How long does one batch of wax last?
A: It can be reused many times. Replace it once the wax gets too dirty (too much black residue).
Q: Is waxing suitable for Taiwan’s climate?
A: It’s great for riding on dry days. But Taiwan sees a lot of rain, so if you frequently ride in the rain, you’ll need to re-wax more often. You can supplement with drip waxing in between.
Conclusion
Chain waxing requires some upfront investment and patience, but once you’ve tried it, you may never want to go back to oil lubrication. A clean drivetrain, lower friction, and longer part life — these benefits are very real.
The first waxing is the most tedious (degreasing takes time), but after that, each re-waxing only takes 20-30 minutes. If you’re after cleanliness and efficiency, chain waxing is absolutely worth trying.
Now go get yourself a pot of wax and start your journey to a clean drivetrain. Your white handlebar tape and pant legs will thank you.
Related Reading
- Chain Waxing vs. Traditional Lube: Which Maintenance Method Suits You Better?
- Bicycle Chain Cleaning and Lubrication: Choosing Between Dry and Wet Chain Lube
- Chain Wax vs. Wet Lube: Which One Should You Actually Use? A Complete Comparison
- Road Bike Waxing and Chain Degreasers: An In-Depth Drivetrain Maintenance Guide