文章導覽
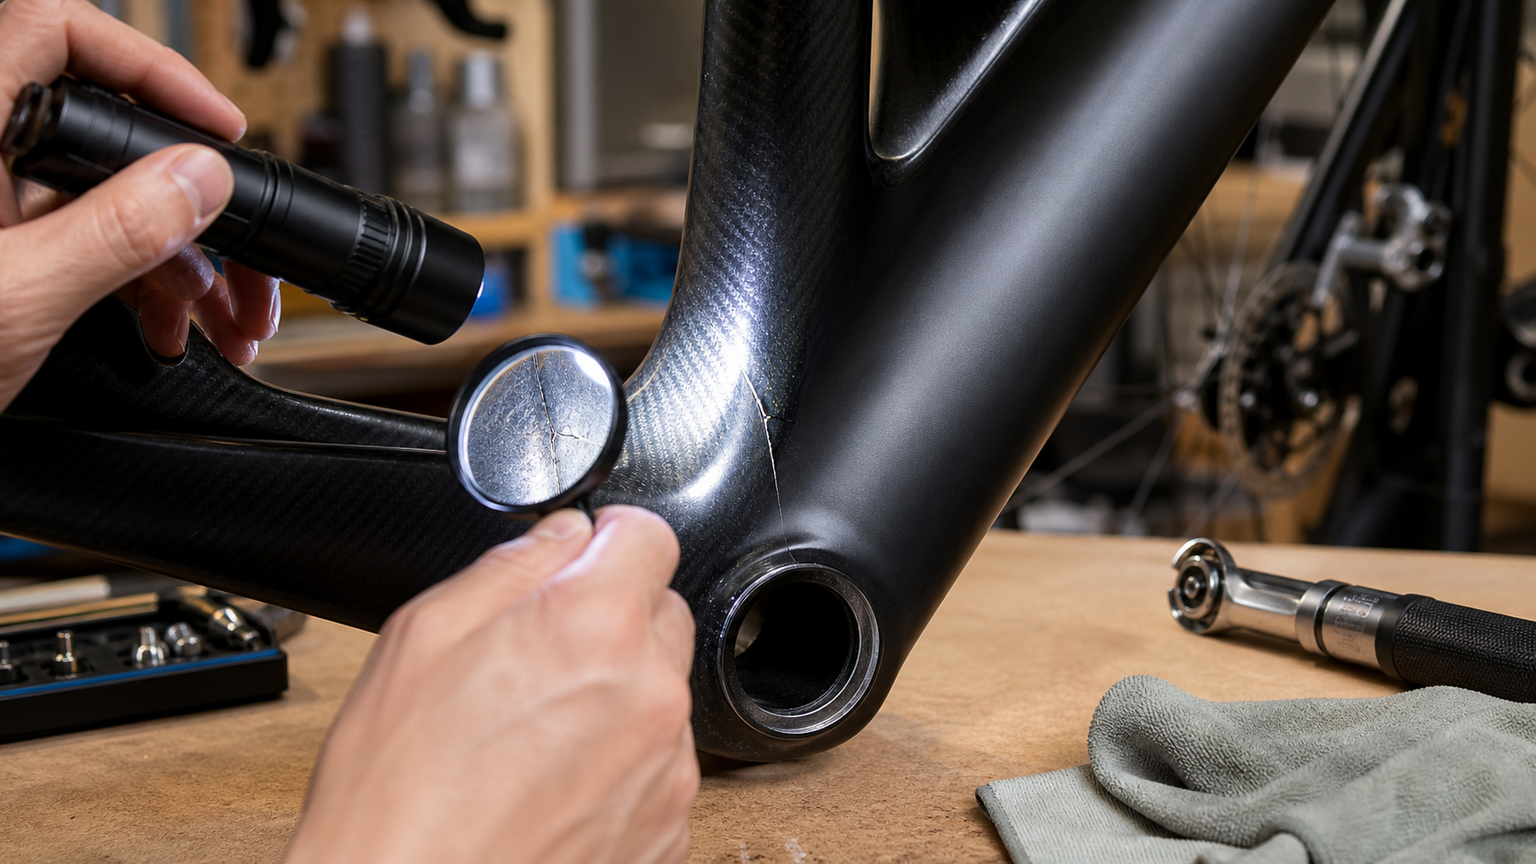
Carbon Fiber Frame Crack Inspection: Protecting Your Most Valuable Investment
Carbon fiber frames are the crystallization of modern bicycle technology, but they fail in a way that is completely different from metal frames. A metal frame will bend or dent, making the problem obvious at a glance; damage to a carbon frame can hide beneath a flawless-looking surface. An inconspicuous crack can mean a major loss of structural strength, and a sudden failure at high speed can have devastating consequences.
How Carbon Fiber Fails
Understanding how carbon fiber fails is the key to inspecting it effectively:
| Damage Type | Appearance | Severity | Visibility |
|---|---|---|---|
| Surface paint scratch | Shallow scratch, chipped paint | Low (cosmetic only) | High, easy to see |
| Surface resin crazing | Fine spiderweb-like cracks | Low to moderate | Moderate |
| Substrate damage | Cracks extending into the fiber layer | High | Low to moderate |
| Delamination | Bulging or hollow-feeling surface | Extremely high | Requires a tap test |
| Fiber breakage | Visible crack or deformation | Extremely high, do not ride | High |
| Internal damage | Surface may look normal | Extremely high | Very low, requires professional inspection |
When Should You Inspect Your Frame?
A full inspection is required after any of the following:
- A crash or collision: any degree of impact
- A frame drop: falling off a roof rack or repair stand
- After transport: after air travel checked baggage or courier shipping
- Hearing unusual noises: a strange “click” or persistent noise while riding
- Routine maintenance: at least one full-frame inspection per year is recommended
- Buying a used frame: a necessary step before purchasing a used carbon frame
Home Inspection Methods
Method 1: Visual Inspection
Tools needed: a bright flashlight, a magnifying glass (or your phone camera’s zoom)
- In a well-lit environment, remove all accessories (bottle cages, cable housing, etc.)
- Examine every part of the frame from different angles and lighting directions
- Pay special attention to the following high-risk areas:
High-risk area checklist:
- Head tube and top tube/down tube junctions: the primary impact point for frontal collisions
- Bottom bracket area: where all tubes converge, a stress concentration point
- Seatpost clamp area: where the seatpost is inserted; clamping force can cause cracks
- Chainstay and bottom bracket junction: a key node for pedaling force transfer
- Seatstay and seat tube junction: the transfer path for rear-wheel impact forces
- Rear derailleur hanger mount: the impact point for rear derailleur strikes
- Around bottle cage bolt holes: holes are stress concentration points
Method 2: Tap Test
This is the most practical home method for detecting internal damage:
- Use a coin (such as a NT$10 coin)
- Tap lightly on the frame surface and listen carefully to the sound
- Normal carbon fiber: a crisp, bright “ting” sound
- Damaged area: a dull, hollow “thud” sound
- Start from an area known to be intact to establish a reference for the “normal sound”
- Move along the frame, tapping inch by inch
- Any area where the sound suddenly changes needs further inspection
Tap test tips:
- Perform it in a quiet environment
- Keep the tapping force consistent
- Compare the sound of adjacent areas
- Areas with different tube wall thickness (such as the thicker area near the bottom bracket) will naturally sound different — don’t misjudge these
- Areas with a protective film applied will sound duller; remove the film before testing
Method 3: Touch Inspection
- Slowly run your fingers over the frame surface
- Feel for any bulging, dented, or softened areas
- Pay special attention to areas that feel “spongy” — this could indicate delamination
- Lightly scratch a suspicious crack with your fingernail to gauge its depth
Method 4: Stress Test
Applicable only to specific areas — proceed with care:
- Hold a section of the frame tubing with both hands and apply gentle torsional force
- Normal carbon fiber should feel completely rigid
- If you feel any “give” or hear a sound, stop immediately and have it inspected
Professional Inspection Methods
When a home inspection raises concerns, or you need a more definitive result:
| Inspection Method | Cost Range | Reliability | Best For |
|---|---|---|---|
| Ultrasonic testing | NT$2,000-5,000 | High | Detecting delamination and internal damage |
| X-ray inspection | NT$3,000-8,000 | Very high | Comprehensive structural inspection |
| Professional carbon repair shop inspection | NT$500-2,000 | High | Includes repair recommendations |
| Visual + tap test (by a professional technician) | NT$500-1,000 | Moderate to high | Quick preliminary assessment |
Surface Scratch vs. Structural Crack: How to Tell the Difference
This is the most difficult and most critical judgment call:
Surface Scratch (usually safe)
- Only affects the paint layer or the outermost resin layer
- The weave pattern is visible at the bottom of the scratch, but the fibers are intact
- Feels smooth with no depth when scraped with a fingernail
- Tap test sound matches the surrounding area
Structural Crack (needs attention)
- The crack has depth and can be felt as a dent
- The crack runs along or across the fiber direction
- Whitening appears around the crack (resin separating from the fibers)
- Tap test produces an abnormal sound
- The crack “opens up” when pressure is applied
Deciding What to Do After Damage
Safe to Keep Riding
- Shallow paint scratches
- Surface scratches with no depth
- It’s recommended to seal them with epoxy or frame touch-up paint to keep moisture out
Needs Professional Evaluation
- Cracks deeper than the paint layer
- Abnormal areas found during the tap test
- Areas near an impact point after a crash
- Any damage you are “not sure” about
Stop Riding Immediately
- Visible carbon fiber breakage
- Obvious frame deformation
- Large-area delamination
- Cracks at tube junctions
- Persistent unusual noise while riding
Repairing a Carbon Fiber Frame
Professional carbon fiber repair is not a gimmick — many damaged frames can be restored to close to their original strength:
- How it works: new carbon fiber cloth is laid over the damaged area and cured with epoxy resin
- Repair cost: typically NT$5,000-20,000, depending on the extent of the damage
- Post-repair strength: professional repair can restore 90-100% of the original strength
- Appearance: some repair shops can make the repair almost invisible
Preventive Measures
- Use frame protection film: apply clear protective film to high-risk areas (down tube, chainstays, head tube)
- Correct seatpost clamp torque: over-tightening is the leading cause of cracks at the seatpost area — use a torque wrench
- Protection during transport: use a hard-shell bike case, remove the rear derailleur, and place foam padding between tubes
- Avoid clamping the frame itself: when using a repair stand, clamp the seatpost rather than a frame tube
- Regular inspection: make a habit of visually inspecting your frame every time you wash it
A carbon fiber frame is a precision engineered product. Give it the attention and care it deserves, and it will reward you with tens of thousands of kilometers of safe riding. Whenever in doubt, remember this principle: it is better to be overly cautious than to risk riding a frame that may have a structural problem.