Sports Hernia and Groin Pain: From Adductors to Core, a Coach's Guide to Causes and Rehabilitation
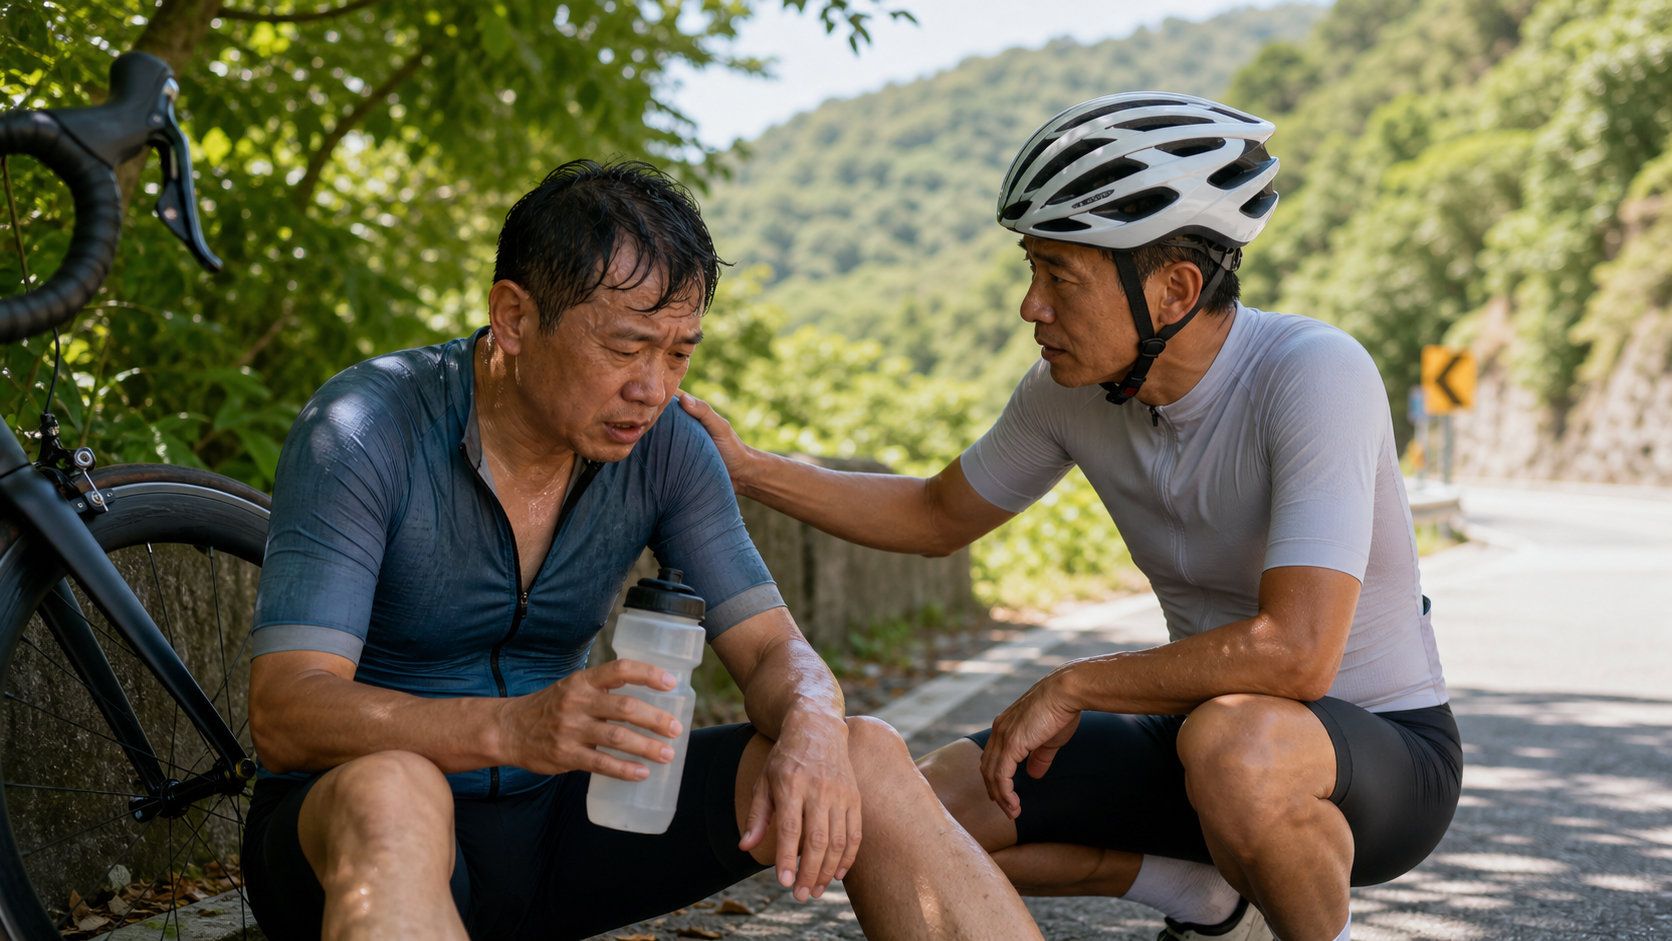
It Starts with a Rider’s Plea
I’ll never forget the road cyclist who came to me. He was in his early forties, riding a steady 300 kilometers a week—the kind of guy who could solo the entire Fengguizui climb and still be smiling. That year, he told me: “Coach, on the inner thigh near the groin, there’s a line that hurts when I sprint out of the saddle. It’s fine cruising on flats, but the moment I stand up to accelerate, it feels like an electric shock.” He went to an orthopedist, got X-rays—nothing wrong. He swapped saddles, adjusted cleats, but the pain clung to him, dragging on for over three months.
I’ve seen this scenario too many times. Groin pain (often called the “inner thigh crease” in Taiwanese) is a master of disguise—it can come from muscles, tendons, the pubic bone, the hip joint, or even a true hernia, and sometimes it’s several issues stacked together. The trickiest part is that many people assume “rest will fix it,” only to lose fitness the moment they stop and relapse the moment they ride, stuck in a gray zone of half-broken for months, wasting an entire riding season.
In this article, I want to explain “sports hernia and groin pain” clearly, the way I’d talk to my athletes: what it actually is, why the tug-of-war between adductors and core is so critical, which red-flag signs demand immediate medical attention, and a progressive rehab and strengthening strategy you can start today. I won’t give you a diagnosis, and I won’t tell you what medication to take—that’s the domain of physicians and physical therapists—but I will give you a map that’s easy to understand and practical to follow.
First, Understand: Where Exactly Is the Groin, and Why Does It Hurt So Easily?
The groin region (inguinal region) is the oblique crease where the abdomen meets the thigh, packed underneath with a host of important structures: the tendons of the adductor group, the lower edges of the rectus abdominis and oblique muscles, the hip flexors, the pubic symphysis, the inguinal canal (where the spermatic cord passes in men and the round ligament in women), plus a tangle of nerves and blood vessels. With so many structures crammed into an area the size of a palm, any one of them going wrong projects pain that looks nearly identical, which is why differential diagnosis of groin pain is especially maddening.
For athletes in cycling, running, and ball sports—activities that involve repetitive forceful effort—the most common categories of causes are roughly:
- Adductor-related pain: The most common. The tender point is at the tendon origin extending from the pubic bone toward the inner thigh; resisted adduction (squeezing the legs together) provokes it.
- Iliopsoas/hip flexor-related pain: Pain is deeper in the groin, slightly anterior and superior; lifting the leg or resisted hip flexion hurts.
- Pubic-related pain: Overload of the pubic symphysis itself and bone marrow stress response; pressing on the center of the pubic bone is tender.
- Inguinal-related pain, including sports hernia (athletic pubalgia): A problem with tension tolerance at the lower edge of the abdominal wall.
This “anatomy-based classification” clinical approach is the direction sports medicine has been pushing in recent years (such as the evidence-based management in journals like JOSPT), and its advantage is targeting treatment at the true source of pain, rather than vaguely calling it a “groin strain.”
So What Is a “Sports Hernia”? The Name Is Misleading
The name “sports hernia” is actually poorly chosen, because it usually isn’t the traditional kind of inguinal hernia—the kind you can feel as a lump that bulges out. The more precise medical term is “athletic pubalgia.”
According to the AAOS (American Academy of Orthopaedic Surgeons) and sports medicine literature, it’s an overuse injury: repetitive, forceful torso twisting and thigh adduction/abduction generate enormous shear forces around the pubic symphysis. Over time, this damages and weakens the soft tissue at the attachment of the rectus abdominis to the pubic bone and the posterior wall of the inguinal canal—but clinically, you may not be able to feel an actual hernia defect. The rectus abdominis and the adductor longus pulling against each other at this shared “anchor point” on the pubic bone are often two sides of the same story.
In other words: a traditional hernia is “a hole with something bulging out”; a sports hernia is more like the soft tissue around the pubic bone being worn down, weakened, inflamed, and micro-torn by chronic shear forces. The two are managed differently, which is exactly why you need a professional evaluation rather than self-diagnosing online.
Core and Adductors: A Tug-of-War Above the Pubic Bone
This is the concept I most want every athlete to understand, because it determines what you need to train in rehab.
Imagine the pubic symphysis as a fulcrum, with the rectus abdominis/abdominal wall core pulling upward from above, and the adductor group pulling downward from below. Normally, these two forces balance each other like a tug-of-war, keeping the pelvis stable as you pedal, sprint, and change direction. Once:
- The core (especially the lower abdomen and deep stabilizers) slacks off or has delayed activation
- The adductors are relatively too tight, too strong, or conversely too weak
- There’s left-right asymmetry or one-sided compensation
The fulcrum of this tug-of-war rope—the pubic bone—has to absorb disproportionate shear forces, and over time that becomes a breeding ground for osteitis pubis, adductor tendinopathy, and even athletic pubalgia.
There’s an easily overlooked detail for cyclists: the road bike position keeps the hips flexed and leaning forward for long periods, leaving the hip flexors and adductors chronically shortened and tight, while the deep core and glutes often aren’t properly recruited. This imbalance of “tight on top, loose below; strong in front, weak behind” is the perfect recipe for slowly grinding down the area around the pubic bone. Rocking the pelvis side to side during sprint efforts and using brute-force adduction to stabilize the bike are the final straws that break the camel’s back.
Strength Ratios: Adduction vs. Abduction
There’s a frequently cited concept in research: the strength ratio of adductors relative to abductors (especially the eccentric EHAD:EHAB ratio) is associated with groin injury risk, with a range of roughly 1.25 to 1.6 generally considered more ideal; and athletes with relatively weak adductor strength, where adduction is clearly deficient compared to abduction, have a higher rate of groin injuries.
But I have to be honest with you: this evidence isn’t set in stone. There are also prospective studies finding no consistent significant difference in abduction strength or adduction/abduction ratios between athletes who later got injured and those who didn’t. So my practical stance is—don’t chase some magic number as gospel, but treat “adductors shouldn’t be too weak, left-right symmetry matters, and eccentric control should be good” as the guiding principles. Getting the direction right matters far more than the digits after the decimal point.
Danger Signs: See a Doctor First for These, Don’t Self-Train
Before rehab, let’s talk safety. Educational self-care has its limits—in the following situations, seek medical attention first. In Taiwan, seeing an orthopedist, rehab physician, or family doctor is relatively convenient, and the threshold for a National Health Insurance visit is low, so don’t tough it out:
| Red Flag Signs | Why to Be Concerned |
|---|---|
| A visible/palpable bulge in the groin or scrotum, more pronounced when standing or straining | Could be a true inguinal hernia requiring surgical evaluation |
| Pain accompanied by fever, localized redness/swelling/heat, or severe pain in one testicle | Could be an infection or testicular torsion—a medical emergency requiring immediate care |
| Night pain, pain at rest, or unexplained weight loss | Need to rule out non-exercise-related causes |
| A groin lump suddenly becomes stuck and can’t be pushed back, with severe pain, nausea, or vomiting | Incarcerated hernia is a surgical emergency—go straight to the ER |
| Pain radiating to the lower back or buttocks with leg numbness or weakness | May involve nerve or hip joint issues |
I often tell my athletes: “Feeling a lump” and “feeling nothing but pain when sprinting” are two completely different things. The former calls for a surgical workup; the latter is more in the realm of athletic pubalgia and adductor/core imbalance. If you truly can’t tell the difference, let the professionals sort it out—this isn’t the place to be stubborn.
Practical Approach: Staged Rehabilitation—Don’t Rush Back to Sprinting Out of the Saddle
Here’s the crux. Literature and clinical consensus both indicate: rest alone will not cure athletic pubalgia and adductor-related pain; exercise-based, progressive strengthening is the mainstay, and the long-term prognosis for adductor-related groin pain with exercise rehabilitation is actually quite good. International statistics also show that even in cases requiring surgery, the majority (over 90%) return to sport after conservative treatment plus surgery—but that’s the last resort; let’s first do conservative rehabilitation thoroughly.
I break rehabilitation into four stages. The progression criterion for each stage is “no significant or worsening pain during the current exercises and daily activities”, using “pain no more than mild, no worsening the next day” as the traffic light, rather than rigidly following the calendar.
Stage 1: Pain Relief and Reactivation (Approximately Weeks 1–2)
The goal is to bring intense pain down while waking up the “sleeping” deep core and gluteal muscles.
- Relative rest: Pause sprinting out of the saddle, jumping, and change-of-direction movements; easy flat-road riding (below the pain threshold) is usually acceptable, but only if it does not provoke pain.
- Isometric adductor activation: Lying on your back with knees bent, place a soft ball or rolled towel between your knees and squeeze with light to moderate force (about 30–50% of maximum) for 5–10 seconds, feeling the groin engage without sharp pain.
- Deep core recruitment: Breath-linked transversus abdominis and pelvic floor activation; slow dead bug variations.
- Gluteal awakening: Bridges and clamshells to rebuild posterior support for pelvic stability.
Taiwan’s environment suits this stage well: it can be done indoors, and on days with summer afternoon thunderstorms or poor air quality (purple alert), it’s the perfect time to catch up on these activation drills at home without forcing yourself to go out.
Stage 2: Progressive Loading and Eccentric Strengthening (Approximately Weeks 3–6)
Once pain has stably decreased, start adding load and eccentric work. This is the core engine of the entire rehabilitation.
The star of this stage is the renowned Copenhagen Adduction Exercise (CAE)—an eccentric-dominant side-plank variation that strengthens the hip adductors. Systematic reviews and meta-analyses generally show that CAE can significantly increase adductor strength, and increased adductor strength is associated with reduced groin injury risk; some studies indicate that athletes who complete a CAE program can reduce groin problems by up to roughly 40%. Interestingly, CAE doesn’t just train adduction—abduction strength also improves, effectively addressing both ends of that tug-of-war rope at once.
However, to be equally honest: the overall evidence specifically for “preventing” groin injuries remains limited, so don’t treat CAE as a talisman guaranteeing you won’t get injured. It’s an excellent tool, but it should be viewed within a complete training and recovery context.
I’ve organized the three-stage progression of the Copenhagen Adduction Exercise into a table:
| Progression Level | Exercise Description | Support Point | Suitable For |
|---|---|---|---|
| Beginner (short lever) | Side plank, with the knee of the top leg placed on a partner’s arm or a bench; use adduction force to lift the pelvis | Knee | Those just out of the acute phase, with lower strength |
| Intermediate (transition) | The support point of the top leg moves down to the mid-shin | Shin | Those who can complete 8–10 pain-free reps at the beginner level |
| Advanced (long lever) | The top leg’s ankle is placed on the support surface; longest lever arm, highest load | Ankle | Those with sufficient strength aiming to return to high-intensity activity |
Other accompanying exercises:
- Side plank with adduction movement, controlled adduction slides on a slide board or towel.
- Progressively heavier isometric adduction, pushing from 50% effort gradually toward 70–80%.
- Hip flexors, glutes, and anti-rotation core work (e.g., Pallof press) trained together to address imbalances across the entire kinetic chain, rather than only focusing on the adductors.
The literature also repeatedly emphasizes: don’t just train the painful area—identify and address gaps in other hip and abdominal muscles as well, so you’re not just treating the symptom rather than the root cause.
Stage 3: Functional and Sport-Specific Transition (Approximately Weeks 6–10)
Begin converting strength into capabilities usable for “cycling, running, and changing direction.”
- Weighted squats, single-leg squats, and split squats to strengthen overall lower limb and pelvic stability.
- Anti-rotation and anti-lateral-flexion core training to simulate the need for the pelvis not to sway side-to-side when sprinting out of the saddle.
- Progressive return to riding intensity: first extend flat-road cruising, then gradually add low-cadence high-torque efforts (simulating climbing), and only finally standing sprints and full-out sprinting.
- Consider re-evaluating your Bike Fit: whether saddle height, fore-aft position, and handlebar drop are causing chronic excessive hip flexion or lateral pelvic compensation.
Stage 4: Return and Relapse Prevention (After Week 10, Long-Term Maintenance)
Pain disappearing does not mean the problem is eradicated. Adductor and core strengthening must become a permanent fixture in your weekly routine—twice a week, about ten-plus minutes each session, is enough to maintain the balance of that tug-of-war rope. The most common mistake at this stage is “stopping everything once it stops hurting,” only to have a relapse a season later.
The table below condenses the four stages into a one-page quick reference:
| Stage | Timeframe (for reference only) | Primary Goal | Representative Exercises | Progression/Exit Criteria |
|---|---|---|---|---|
| 1 | Weeks 1–2 | Pain relief, reactivating core and glutes | Isometric ball squeeze, dead bug, bridge, clamshell | Pain-free in daily life, light activation without provoking pain |
| 2 | Weeks 3–6 | Eccentric strengthening, restoring adductor strength | Copenhagen adduction (knee → shin → ankle) | Intermediate CAE pain-free, improved strength symmetry |
| 3 | Weeks 6–10 | Functional transfer, sport-specific transition | Split squats, anti-rotation, progressive riding intensity | Sport-specific movements pain-free, unilateral strength near balance |
| 4 | After week 10 | Return and long-term maintenance | Maintenance training for all items, Bike Fit review | Pain-free at full intensity, consistent weekly maintenance routine |
Important reminder: the weeks in the table are only common ranges; individual variation is large. Some people progress quickly in four weeks, while others take three months to stabilize—both are normal. Use pain and function as your traffic light; don’t argue with the calendar.
Common Mistakes and Corrections: Pitfalls I’ve Seen in My Athletes
These are the most common mistakes I see with my athletes, and they’re also the easiest to correct:
Mistake 1: Only Resting, Complete Immobility
Many people, at the first sign of pain, lock their bike in the garage to “rest” for three months. The result: all muscle strength is lost, and they relapse immediately upon returning to riding. The core solution for athletic pubalgia and adductor pain is progressive strengthening, not lying flat. Relative rest (avoiding provocative movements) and complete immobility are two very different things.
Mistake 2: Aggressively Stretching and Massaging the Pain Point
For issues at the “tendon origin,” forcefully stretching and pressing hard on the pain point can sometimes actually stimulate further inflammation. Eccentric loading is typically far more effective than stretching and relaxation alone. Relaxation can be a supplement, but don’t make it the main course.
Mistake 3: Training Only the Adductors
When the pain is in the adductors, people just squeeze their legs obsessively, neglecting the core, glutes, hip flexors, and left-right symmetry. That tug-of-war rope is imbalanced at both ends; strengthening only one end won’t create balance.
Mistake 4: Progressing Too Quickly
Once the pain is gone at this stage, jumping straight back to sprinting out of the saddle, skipping the intermediate functional transition, is the most typical cause of relapse. Intensity should be built up step by step, not taken straight to the top floor in an elevator.
Mistake 5: Ignoring Bike Fit and Lifestyle Factors
No matter how well rehabilitation goes, if you go back to riding the same bike that forces excessive hip flexion and a tilted pelvis, it’s like patching a hole while the water keeps flowing in. Many people in Taiwan eat out frequently, often not getting enough protein and too few vegetables—tissue repair requires adequate protein, overall nutrition, and sleep support; staying up late, social drinking, and fragmented sleep all slow recovery. These lifestyle details are often where the real difference lies.
Practical Tips for the Taiwan Context
A few localized reminders to make this approach fit your daily life:
- Climate: Taiwan’s summers are hot and humid, with frequent afternoon thunderstorms, and riverside bike paths are crowded. The adductor and core training in the early-to-mid rehab stages can almost all be done indoors. When the weather is bad or air quality is poor (purple alert), train at home—don’t force yourself to ride at pain-provoking intensities just to “get a ride in.”
- Terrain: Flat riverside paths are ideal for the low-intensity return cruising in stage three. Before working on climbing intensity, make sure you’re pain-free on flat ground. Save sprinting out of the saddle for the final stage.
- Medical care: Taiwan’s National Health Insurance makes clinic visits convenient. Orthopedics, rehab medicine, and family medicine can all serve as first-line options. When you can’t tell whether it’s a hernia or an adductor/core issue, having a physician and physical therapist evaluate you saves the most time—don’t self-diagnose online and miss the golden window.
- Diet: If you eat out often, be deliberate about getting enough protein (one palm-sized serving of quality protein per meal is a simple guideline). Don’t skimp on vegetables or water either—these are the raw materials for tissue repair.
Actionable Advice for Readers at Different Levels
Beginners with Mild Symptoms
- Start with a self-check: Does sprinting out of the saddle or squeezing your legs together provoke pain along that line? Is the pain located where the pubic bone extends toward the inner thigh?
- If it’s only mild and eases with rest, start with stage-one isometric adduction plus core and glute activation, and observe for two weeks.
- If any red-flag signal from the table above appears, see a doctor immediately. Do not self-train.
Advanced Riders with a Solid Training Load
- Add Copenhagen adduction to your existing schedule twice a week, starting at the intermediate level and progressing or regressing according to your capacity.
- Simultaneously review strength symmetry between adduction and abduction, and between left and right sides. Don’t chase some magic ratio—just grasp the principle: “not too weak, symmetrical, and good eccentric strength.”
- Get a proper Bike Fit done to address the root cause of chronic hip flexion and pelvic compensation.
Those with Recurrent Pain Dragging on for Months
- What you may need isn’t another article, but professional individualized assessment. Find a sports-medicine-oriented orthopedic or rehab physician and a physical therapist for a full differential diagnosis.
- Do conservative rehab thoroughly and correctly (exercise-based); long-term prognosis is generally good. Surgery is the last option after conservative treatment fails—not the first step.
- During rehab, keep records of pain and training so professionals can adjust based on the data.
In-Depth Case Studies: Three Different Groin Pains, Three Different Paths
Principles alone are too abstract. Let me walk you through three representative cases (scenarios are fictional, numbers not exaggerated) to show you how much “groin pain” can differ in management.
Case One: The Veteran Roadie Who Got Zapped While Sprinting
This is the forty-year-old rider doing 300 km per week from the opening. His pain is at the pubic bone extending toward the inner thigh, provoked by resisted adduction, most noticeable when sprinting out of the saddle, while cruising on flats is fine—classic adductor-related pain. His problem isn’t “whether he has a hernia,” but years of only piling on mileage with almost no strength training. His core and glutes have been slacking for years, leaving the adductors to shoulder pelvic stability alone during sprinting.
Main approach: two weeks of relative rest to settle the acute pain (still doing isometric adduction and core activation during this period), then Copenhagen adduction from week three. After eight weeks, he could do the intermediate version pain-free at 3 sets of 8–10 reps, while adding glute bridges and anti-rotation work, and finally redoing his Bike Fit. He returned to full intensity in about two-plus months. The key isn’t that he found some miracle treatment—it’s that he took strength training seriously for the first time.
Case Two: A Nagging Ache That Started After a Cramp
A thirty-year-old club rider joined a hard group ride one winter without warming up, felt his adductor cramp, and then had a persistent dull ache for nearly two months. His pain is more diffuse and deep, with some sensation when flexing the hip and lifting the leg—a mix of adductor and hip flexor involvement, plus some central pubic bone tenderness. For this “mixed type,” the most important thing is not to train just one area: adductors, hip flexors, core, and glutes all need attention, plus rebuilding a warm-up habit. He progressed a bit slower than Case One, but after three disciplined months, he also returned successfully.
Case Three: The One Where You Can Feel a Lump
A fifty-year-old patient complained of a dull, swollen feeling in the groin. One day while showering, he noticed that when he bore down while standing, a small lump bulged out, and it would go away when he pressed on it lying down. I wouldn’t even teach rehab exercises first—I sent him straight to a surgeon. He was diagnosed with an inguinal hernia and had surgical repair. This is why “you can feel a lump” is a red flag: it follows a completely different surgical pathway, and forcing adductor training would only delay treatment.
I’ve summarized the comparison of these three cases in a table:
| Feature | Case One (Adductor Type) | Case Two (Mixed Type) | Case Three (True Hernia) |
|---|---|---|---|
| Pain location | Pubic bone extending medially, localized | Diffuse, deeper, involves hip flexion | Groin dullness/swelling, with bulging |
| Provoking movements | Resisted adduction, standing sprint | Both adduction and leg lifting | Bulging with standing effort |
| Palpable lump | No | No | Yes |
| First step | Exercise rehab | Exercise rehab (broader scope) | Surgical evaluation |
| Approximate prognosis | Good | Good but slower | Most return after surgery |
Self-Check: A Few Rough Tests You Can Do at Home
These are not diagnostic tools—they’re just to help you get a sense of your condition before seeing a doctor, and to help you describe things more clearly to your physician:
- Resisted adduction test: Lie on your back with knees bent, place a fist or ball between your knees, and squeeze with moderate force. If it provokes that familiar pain at the pubic bone extending medially, it leans toward adductor involvement.
- Resisted hip flexion test: Seated, press your hand on top of your knee and lift your leg against the resistance. If pain is felt deep in the groin toward the front-upper area, hip flexors may be involved.
- Central pubic bone palpation: Gently press the symphysis pubis at the midline. Significant tenderness may indicate a pubic bone component.
- Cough/strain test: Cough or bear down while standing. If there’s a visible bulge or sharp pain in the groin, this is a signal to see a doctor.
Write down the results of these four tests, how long the pain has lasted, which movements hurt, and whether you’ve felt a lump. This will help your physician and physical therapist zero in quickly and save a lot of back-and-forth.
Training Dosage and Weekly Schedule: A Workable Example
Many people get stuck on “I know I should train, but I don’t know how many sets and reps, or how many times a week.” Here’s an example weekly schedule for the transition between stages two and three, with intensity capped at “no worsening of pain during or the day after,” and adjusted up or down according to capacity:
| Exercise | Sets × Reps/Duration | Weekly Frequency | Key Points |
|---|---|---|---|
| Isometric adduction (ball squeeze) | 4 sets × 10 seconds each | 3–4 times per week | Progress effort from 50% to 70–80%, no sharp pain |
| Copenhagen adduction | 2–3 sets × 6–10 reps per side | 2 times per week | Start from knee support, slow eccentric; soreness is acceptable, pain means regress |
| Glute bridge / single-leg glute bridge | 3 sets × 10–12 reps | 3 times per week | Squeeze glutes, don’t arch with the lower back |
| Dead bug (anti-extension core) | 3 sets × 8 reps per side | 3 times per week | Lower back flat on the floor, move slowly |
| Pallof press (anti-rotation) | 3 sets × 8–10 reps per side | 2–3 times per week | Resist rotation, simulating pelvic stability during sprinting |
| Split squat / rear-foot-elevated squat | 3 sets × 8 reps per side | 2 times per week | Add in stage three only; start with bodyweight |
Keep these dosage principles in mind:
- Soreness (DOMS) is acceptable; pain (especially that familiar line) means regress. These are two different things. Copenhagen adduction naturally leaves your inner thighs sore the next day—don’t be alarmed early on, but “sore” is not “pain.”
- Progress or regress based on “completing the current sets pain-free,” not by rigidly following the chart.
- Check your next-day response before and after each session. If it’s clearly worse the next day, the dose is too high—step back one notch.
- Training well once a week beats forcing it every day. Recovery is part of training.
FAQ: The Questions Students Ask Me Most
Q1: Can I keep riding through the pain?
A: It depends on the severity. Mild discomfort that doesn’t worsen during steady, flat cruising can usually be maintained at low intensity; but stop any movements that trigger the pain, such as sprinting out of the saddle or changing direction. If the pain is worse the day after a ride, you’ve crossed the line—back off to even lower intensity.
Q2: Does stretching actually help?
A: It can serve as a supplement to relieve tightness, but don’t treat it as the primary therapy. For problems at the tendon origin, eccentric loading exercises (such as the Copenhagen adduction) are usually far more effective than simply stretching hard. Forcefully over-stretching the painful spot may actually stimulate inflammation.
Q3: Should I ice or heat?
A: During the acute phase, short periods of icing can help with pain and swelling; during the chronic tightness phase, heat feels more comfortable. But both are only symptom management—they don’t replace strengthening training as the main course.
Q4: What supplements can help me recover faster?
A: No supplement can replace training and sleep. The foundation is adequate overall nutrition, protein, and sufficient sleep to support tissue repair. The most common problems for people who eat out frequently in Taiwan are insufficient protein, too few vegetables and fruits, and fragmented sleep—fix these basics first; that’s more practical than chasing any supplement. Ask your doctor or dietitian whether any supplement is appropriate for you.
Q5: When should I consider surgery?
A: Surgery is a last resort after conservative rehabilitation has been done thoroughly and correctly without success, not a first step. Most cases of athletic pubalgia and adductor-related pain respond well to exercise-based rehabilitation. Whether surgery is needed falls within the professional judgment of a physician.
Q6: How long does rehabilitation take?
A: Individual variation is huge. Mild cases may take a few weeks; severe or long-standing cases may take three months or longer. Use pain and function as your traffic lights—don’t argue with the calendar, and don’t anxiously add volume just because “it’s not better this week.”
Q7: Can women get athletic pubalgia too?
A: Yes. Although traditional inguinal hernias are more common in men, athletic pubalgia and adductor/core imbalance are not exclusive to men. Female athletes can experience the same condition, and the treatment principles are the same.
Conclusion: Bringing the Tug-of-War Above the Pubic Bone Back into Balance
Back to the road cyclist from the beginning. He eventually stopped the “just rest” approach, began systematically training the Copenhagen adduction and core/gluteal muscles, and had his Bike Fit readjusted. After about two-plus months, that electric-wire pain when sprinting out of the saddle gradually faded, and he could stand and surge up his beloved climb again. His key turning point wasn’t finding some miracle drug—it was understanding “the tug-of-war above the pubic bone” and honestly training both ends back into balance.
Groin pain isn’t scary; what’s scary is using the wrong methods and letting it drag into a chronic, recurring problem. Remember three things: recognize red-flag signals, make progressive strengthening the main focus, and train the adductors and core together while maintaining it long-term. When the direction is right, your body will gradually give you back a season of sprinting out of the saddle to your heart’s content.
This article is educational content and does not replace individual diagnosis and treatment advice from a physician, physical therapist, or dietitian. The weeks, strength ratios, and training plans mentioned are only general principles, and individual variation is large; if pain persists, worsens, or any red-flag signals appear, seek medical attention promptly and have a professional provide individualized assessment and management.
References
- Athletic Pubalgia and Associated Rehabilitation(PMC):https://pmc.ncbi.nlm.nih.gov/articles/PMC4223287/
- Groin Injuries (Athletic Pubalgia) and Return to Play(PMC):https://pmc.ncbi.nlm.nih.gov/articles/PMC4922526/
- Sports Hernia (Athletic Pubalgia) — OrthoInfo, AAOS:https://orthoinfo.aaos.org/en/diseases--conditions/sports-hernia-athletic-pubalgia/
- Clinical Examination, Diagnostic Imaging, and Testing of Athletes With Groin Pain(JOSPT):https://www.jospt.org/doi/10.2519/jospt.2018.7850
- A Scoping Review of Exercises for Preventing Athletic Groin Pain(PMC):https://www.ncbi.nlm.nih.gov/pmc/articles/PMC12824425/
- The Copenhagen Adduction Exercise Effect on Sport Performance and Injury Prevention: A Systematic Review With Meta-Analysis(PMC):https://pmc.ncbi.nlm.nih.gov/articles/PMC12363431/
- The Neuromuscular Effects of the Copenhagen Adductor Exercise: A Systematic Review(PMC):https://pmc.ncbi.nlm.nih.gov/articles/PMC8486394/
- The Adductor Strengthening Programme prevents groin problems among male football players: a cluster-randomised controlled trial(PubMed):https://pubmed.ncbi.nlm.nih.gov/29891614/
Related Reading
- Groin Strains: The Hidden Threat to Basketball Players’ Defensive Slides
- Cycling and Low Back Pain Management: A Guide to Prevention and Physical Therapy for the Most Common Spinal Issues Among Taiwanese Riders
- Low Back Pain Is Not an Excuse to Lie in Bed: A Complete Coach’s Guide to Exercise Therapy, Core, and Activity
- The Complete Guide to Hip and Pelvic Health: Mobility, Stability, and Pain—The Core Foundation for Athletes
一日北高/長距離團騎 常見問題補充篇 / 組團或跟團的眉角 / 壯車友容易被瘦車友慢性拉爆 / 原來屁股痛可能是這個原因...? / 風場配速法 / 公路車 / CT Yeh
2 年前
Never Stop 西進武嶺 前後雙機 完整全程錄影 訓練台 實境
8 年前
再一組! 全碳幅條 碟煞/無內胎輪組 開箱! 到底好騎嗎? UNAAS X40 | 公路車 | CT Yeh
4 年前
約騎爆笑地獄梗 大腸怎麼了🤣 #公路車 #cycling
3 年前
滑雪新手們慘摔學習全紀錄(請開字幕),滑雪好好玩 | Snowboard + Ski | 岩原 スキー場 | 滑雪APP使用 | GoPro Max
6 年前
一日北高常見問題大集合 | 攻略 | 路線 | 訓練 | 補給 | 自行車 單車 | 一日雙城 | 雙塔 | TWB北高360 | 屁股痛
6 年前
CT 喇低賽) 武嶺牽車 才是王道 西進牽車四小時內秘訣 攝手位置 如何判斷 防抽筋小秘訣
7 年前
摔車後補裝備: 好市多新款單車安全帽& Specialized Romin 北高整路屁股都不痛的坐墊 | 一千元居然有MIPS | CT Yeh | 公路車
4 年前