The Athlete's Mobility Assessment and Improvement: A Coach's Complete Practical Guide from Screening to Correction
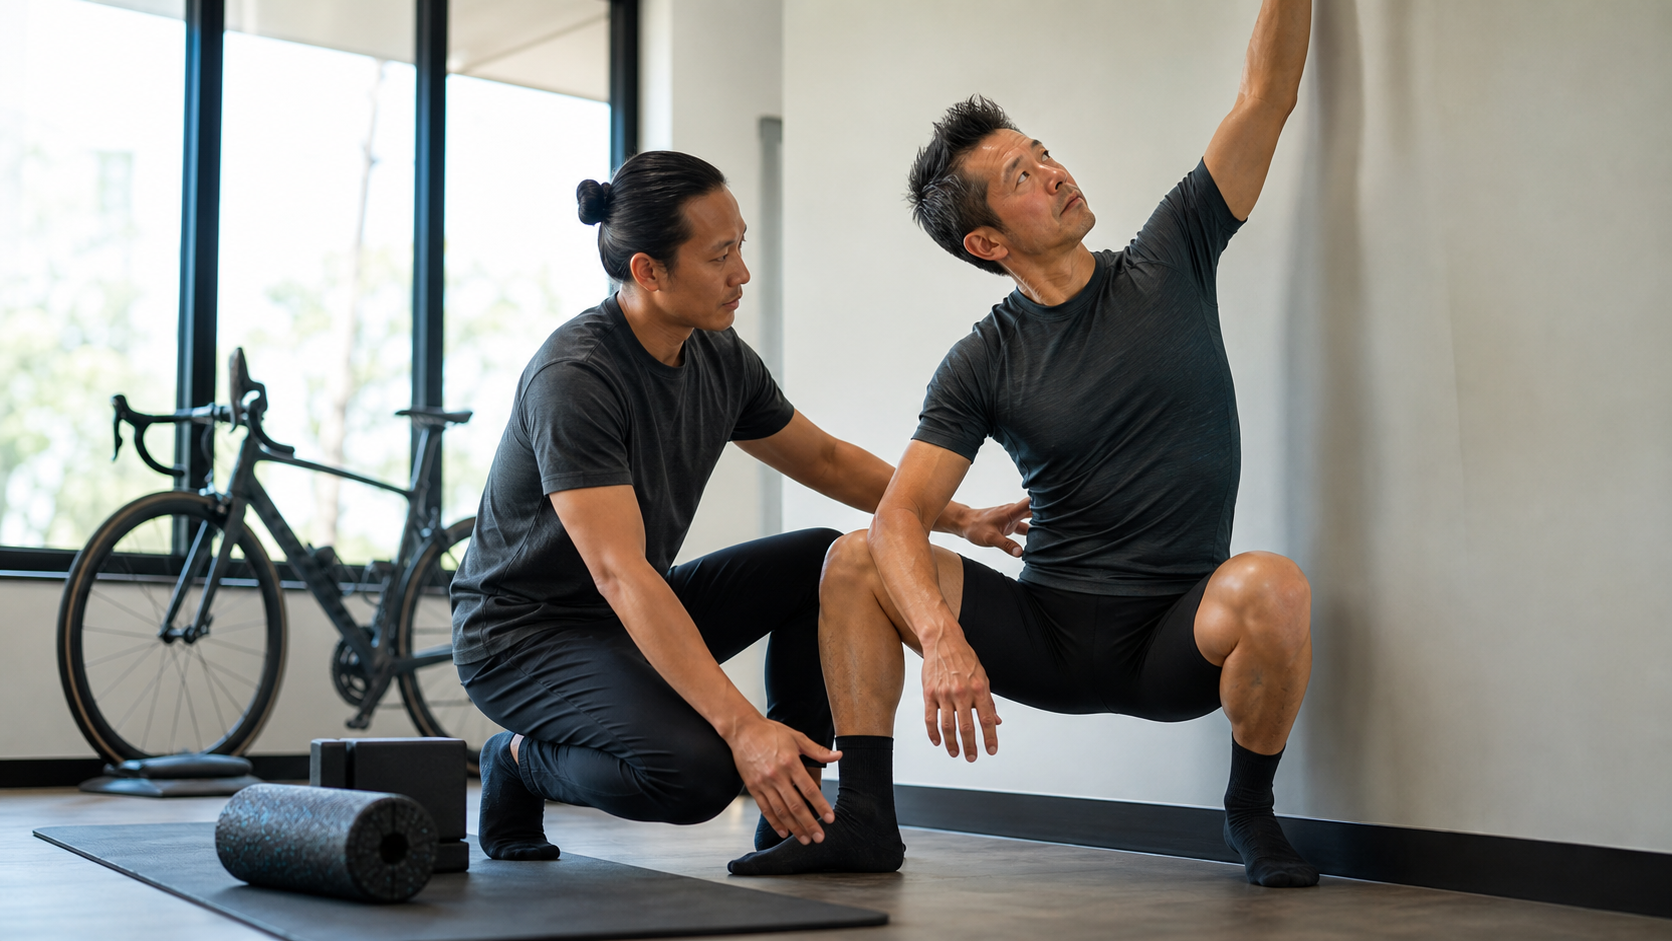
Let Me Start with the Scenario I See Most Often
Every winter, my studio gets a wave of athletes who are “training hard but stuck.” Late last year, a recreational road cyclist in his early forties named A-Kai came to see me. His power wasn’t bad—his 40-minute FTP sat around 4.2 W/kg, a respectable range—but he had two complaints: first, his lower back ached unbearably after riding more than 80 kilometers; second, no matter how he trained, his pedaling felt “clunky,” as if some force was never being transmitted.
I didn’t look at his power curve first, and I didn’t adjust his saddle first either. I asked him to do three movements: a squat, a wall ankle test, and a prone thoracic rotation. Within three minutes I roughly knew where the problem was—his ankle dorsiflexion was severely deficient, his hip flexion was compensating through his entire lower back, and his thoracic spine was as rigid as a welded steel bar. He wasn’t “not strong enough”; he was “unable to move.” No matter how much strength you have, if joint range of motion is insufficient, force can’t reach where it needs to go—and it leaks out through the weakest links, usually the lower back and knees.
In this article, I want to lay out the entire logic I’ve used over the past fifteen years coaching athletes at all levels and general fitness populations on mobility assessment: how to screen, which areas matter most, how to improve them, and the most common mistakes people make. This isn’t about turning you into a physical therapist—it’s about giving you a toolkit to “understand your own body.”
Building the Concept First: What Mobility Actually Is
Many people conflate “flexibility” with “mobility”—that’s the first misconception to clear up.
- Flexibility: The ability of a muscle to be passively lengthened. When you relax and someone lifts your leg as high as it goes, that’s flexibility.
- Mobility: The ability to “actively, with control” take a joint through a range of motion. It includes flexibility, the joint’s structure itself, and the neuromuscular control to produce force and maintain stability within that range.
This distinction matters. I’ve seen plenty of students with strong yoga backgrounds whose passive flexibility is exceptional—they can do full splits flat on the floor—but the moment they need to “actively produce force” in that range (for example, standing on one leg and actively lifting the other leg up and holding it), they completely fall apart. That means they have the space to move, but not the control over that space—this state of “flexible but unstable” actually carries a fairly high injury risk.
Three Sources of Limited Mobility
In practice, I roughly categorize the causes of restricted mobility into three types, because the improvement strategies are completely different:
- Soft tissue tightness: Excessive tension in muscles and fascia. This type responds fastest—with release work and stretching, it can improve within weeks.
- Joint structural restrictions: Joint capsules, ligaments, or even bony structures (for example, some people are born with deeper hip sockets). These require joint mobilization and long-term patience; some bony limitations can’t even be changed, only worked around.
- Neuromuscular control/stability deficits: The brain “won’t let” you enter that range because it deems it unsafe. This type relies on active control training, not endless stretching.
Many people spend their whole lives using only the first approach (stretching) to handle every problem. No wonder some sticking points never improve no matter how much they stretch—because it was never tightness; it was a control issue or a structural problem.
A Simple Rule for Identifying the Source of Restriction
I teach my athletes a crude but highly effective self-assessment method: slowly push the joint to its end range in a relaxed state and feel the “end feel.”
- If the end range feels soft, springy, like stretching a rubber band, it’s most likely a soft tissue issue—release work and stretching will help.
- If the end range feels hard, suddenly blocked, like hitting bone, it’s likely a joint structural restriction—in this case, forcing the stretch is not only useless but dangerous.
- If you can be passively pushed into a range but can’t actively reach it on your own, it’s most likely a neuromuscular control issue—what you need to train is control, not flexibility.
This assessment requires no equipment, yet it can save you months of blind training. I often say that the difference between someone who’s good at training mobility and someone who isn’t comes down not to how many fancy exercises they know, but to whether they can correctly identify “which type of restriction this sticking point is.” Get the diagnosis right, use the right approach, and you’ll see results in two weeks; get it wrong, and you can do the same exercise for six months with nothing to show for it.
Why Athletes Especially Need Mobility Screening
Sport—especially sports that cyclically repeat the same movement—essentially “sculpts” your body toward a specific pattern. Take cycling as an example: research and clinical observation both indicate that long-term cyclists commonly develop several typical mobility changes: shortened hip flexors, thoracic spine stiffness toward a hunched posture, reduced hamstring extensibility, and decreased ankle dorsiflexion.
These aren’t because you did something wrong; they’re the body’s reasonable adaptation to maintaining a “prolonged forward-leaning, hip-flexed, fixed pedaling angle” posture. The problem is that these adaptations end up limiting your performance and health in return:
- When hip flexors are too tight and can’t allow full hip extension at the bottom of the pedal stroke, the glutes can’t produce force through their full range—meaning your biggest engine isn’t running at full capacity.
- When ankle dorsiflexion is insufficient, the knee tends to cave inward during the downstroke, and the foot sits at an unnatural angle on the pedal—a long-term breeding ground for knee pain.
- When the thoracic spine is locked in flexion, simply holding the upper back upright becomes exhausting, and over time the neck, shoulders, and lower back all have to compensate.
So the purpose of screening isn’t to “find fault”—it’s to catch these imbalances quietly accumulating before injury ever happens.
Different Sports Carry Different Mobility Burdens
I want to emphasize one point: mobility imbalances are “sport-specific.” Among endurance athletes, cyclists, runners, and swimmers each have different typical sticking points, and their training priorities should differ accordingly.
| Sport Type | Most Common Mobility Limitations | Why | Priority Treatment |
|---|---|---|---|
| Cycling | Tight hip flexors, stiff thoracic spine, limited ankle dorsiflexion | Prolonged forward lean and hip flexion, fixed pedaling angle | Hip extension, thoracic extension |
| Running | Ankle dorsiflexion, hamstrings, hip extension | Repeated impact, stride requires hip extension | Ankle, anterior hip |
| Swimming | Shoulder joint, thoracic rotation, ankle plantarflexion | Overhead pulling, body rotation | Shoulder and thoracic mobility |
I bring this up to break a myth: it’s not “the more stretching the better,” but “stretch the right places.” A swimmer spending hours stretching their calves will get very limited performance benefit; but spending that same time on shoulder and thoracic mobility yields completely different returns. First figure out where your sport needs the most, then invest your limited time where it counts.
Practical Method One: Full-Body Movement Screening
The first step I take with every athlete is always a movement that “looks at the whole body in one go.” The one most commonly used clinically is the Overhead Squat, a core component of the Functional Movement Screen (FMS).
This movement looks simple—hold a long bar overhead with both hands and squat as low as you can—but it simultaneously demands stability and mobility from the pelvis, core, hips, knees, and ankles, while the shoulders and thoracic spine also need sufficient mobility to keep the bar directly overhead. If any link is stuck, it will “show” in this movement.
Overhead Squat Observation Points and Scoring
The FMS scores each movement from 0 to 3: 0 means pain during the movement, 3 means completely standard with no compensation. A commonly used overall FMS cutoff in research is a total score of ≤14 out of 21 indicating relatively higher injury risk. However, to be honest, the predictive power of this 14-point threshold is inconsistent across different sports and populations, and the academic community has yet to reach a consensus on whether it applies to all disciplines. So I treat it as a “reference,” not a “verdict.”
The table below shows the compensation signals I actually look for at each body region during the overhead squat:
| Observation Region | Compensation / Abnormal Signal | Most Likely Source of Limitation |
|---|---|---|
| Ankles | Heels lift off the ground when squatting, torso leans forward significantly | Insufficient ankle dorsiflexion |
| Knees | Knees cave inward (valgus) during the descent | Weak hip external rotators, ankle restriction |
| Hips / Lower back | Pelvis tucks under halfway through the squat, lower back rounds (commonly called “butt wink”) | Restricted hip flexion, insufficient core control |
| Thoracic spine / Shoulders | The bar drifts forward, unable to stay directly overhead | Insufficient thoracic extension or shoulder mobility |
If a person’s overhead squat visibly improves when their heels are elevated (placing a weight plate or small wooden block under the feet), the answer is almost written on their face: the ankles are the primary limiting factor. This is my favorite quick differential test.
One more practical reminder: when performing the overhead squat screen, you must record it from both the side and the front. The front view shows knee valgus and foot pronation; the side view shows torso lean, lower back rounding, and whether the bar drops forward of the head. People can’t feel themselves shifting out of alignment while performing the movement, but once the video is slowed down, all the problems reveal themselves. I often ask athletes to review their own footage—many are shocked the first time they see it: “So that’s what I look like when I squat?”—This kind of “seeing” is itself the beginning of change, because you can’t correct a problem if you don’t even know what it looks like.
Practical Method 2: Individual Tests for Three Key Regions
After the full-body screen points me in a direction, I conduct individual quantitative tests on the three regions most critical for athletes (especially endurance athletes). Quantification matters—“it feels better” can fool people, but numbers can’t.
Region 1: Ankle Dorsiflexion
The most practical and easiest to self-test at home is the Weight-Bearing Lunge Test:
- Stand facing a wall, with the test foot in front in a lunge position; the heel must not lift off the ground.
- Drive the front knee forward to touch the wall. Without letting the heel lift, gradually move the foot backward until you reach the limit position where “the knee just barely touches the wall.”
- Measure the distance from the big toe to the wall.
This distance represents your ankle dorsiflexion capacity. Generally, you compare the left and right feet against each other—a left-right difference exceeding roughly one finger-width (around 1.5 cm) is worth noting, because bilateral asymmetry often predicts problems better than absolute values. I won’t give you a falsely precise “standard centimeter number,” because reference values vary across studies. The focus should be on “your own left-right symmetry” and “progress over time”—that’s more meaningful.
Region 2: Hip Joint
The hip is the engine room for endurance athletes. I look at at least two directions:
- Flexion: Lying supine, pull one knee toward the chest and check whether the opposite leg lifts off the ground (if it does, the contralateral hip flexors are too tight).
- Rotation: Test internal and external rotation in a seated or prone position. Long-term cyclists and those who sit for extended periods often show significantly restricted internal rotation.
Region 3: Thoracic Spine Rotation and Extension
Thoracic spine stiffness is almost a universal problem for modern people, and it’s even worse for cyclists. Simple self-test: start in a quadruped position, place one hand behind your head, rotate the elbow from pointing at the floor toward the ceiling, and see how far you can rotate and whether both sides are symmetrical. If you can’t reach 45 degrees, or there’s a large left-right difference, that’s a signal the thoracic spine needs work.
Incidentally, the thoracic spine and shoulders are often “guilty by association.” If the bar keeps drifting forward during your overhead squat, don’t blame the shoulders right away—many times the thoracic spine can’t extend, forcing the shoulders to compensate. This is exactly why I always test them separately—by isolating the thoracic spine from the shoulders, you know which one actually needs training. In practice, out of ten people who say “I can’t raise my arms overhead,” six or seven are actually limited by the thoracic spine.
Recording and Tracking: Turning Your Body into Comparable Data
I strongly encourage athletes to write down their test results each time. This doesn’t require a complicated spreadsheet—a piece of paper or a phone memo is enough. The key is “the same movement, the same method, retested after an interval,” so you can objectively determine whether you’ve improved.
Subjective feelings are highly unreliable—sleep well today, feel good, and you think “wow, I feel so much looser today,” when nothing has actually changed. But the centimeter number from the weight-bearing lunge test doesn’t lie. I often tell my athletes: if you don’t measure, you’re just guessing blindly based on feeling; once you measure, you have a basis for decision-making. This is the cheapest step to upgrade your training from the “feeling school” to the “data school.”
Below is a table summarizing the self-test methods and reference directions for the three regions:
| Region | Test Movement | Observation Focus | Signals to Watch For |
|---|---|---|---|
| Ankle dorsiflexion | Weight-bearing lunge | How far the knee can push forward while the heel stays down | Left-right difference >1.5 cm, very short absolute distance |
| Hip flexion | Supine single-knee to chest | Whether the opposite leg is lifted off the ground | Opposite leg visibly rises |
| Hip rotation | Prone, lower leg falls inward/outward | Internal/external rotation angle and symmetry | Significantly restricted internal rotation, left-right asymmetry |
| Thoracic rotation | Quadruped rotation | How far the elbow can rotate toward the ceiling | Can’t reach 45 degrees, large left-right difference |
Practical Method 3: How to Structure an Improvement Program
Finding the limiting factor is only half the battle—how to improve it is the key. My logic for improving mobility follows three steps, which I call “Release → Expand → Occupy”:
- Release: Lower excessive soft tissue tension. Foam rolling, massage balls, light stretching. This step is “opening the door.”
- Expand (Stretch/Mobilize): Within the space created by release, use active or loaded methods to bring the joint through a greater range. This step is “pushing the door open wider.”
- Occupy (Control/Load): Within the newly expanded range, “produce force, hold, and control.” This step is the most commonly neglected, yet the most important—mobility without occupation will be taken back by the body the next day. This is also why many people feel tight again the day after stretching.
Sample Weekly Mobility Program (Can Run Concurrently with Training)
Below is a weekly menu I gave to a cyclist athlete with ankle and thoracic spine limitations. The intensity isn’t high—the key is “frequency” rather than “intensity per session.” Mobility accumulates through high frequency; one two-hour session per week is far less effective than ten minutes every day.
| Day | Focus | Key Content | Time |
|---|---|---|---|
| Monday | Ankles | Weight-bearing lunge mobilization + calf foam rolling + loaded lunge holds | 10 minutes |
| Tuesday | Thoracic spine | Foam roller thoracic extension + quadruped rotations + open book | 10 minutes |
| Wednesday | Hips | 90/90 hip rotations + hip flexor stretch + squat holds | 12 minutes |
| Thursday | Ankles + Integration | Overhead squat practice + ankle mobilization | 10 minutes |
| Friday | Thoracic spine + Hips | Combined flow: rotations + lunges + hip extension | 12 minutes |
| Saturday | Full-body integration | Slow overhead squats 3 sets + active control | 15 minutes |
| Sunday | Rest / Easy walk | Let the body integrate, or very light stretching | — |
Practical Dosing for Common Movements
Many people ask “how long should I do a movement for?” Here’s a practical range to use as a starting point:
| Method | Recommended Dose | Notes |
|---|---|---|
| Foam rolling | 30–60 seconds per region, can roll back and forth | Hold longer on tender points, but don’t tense up from pain |
| Static stretching | 30–45 seconds per rep, 2–3 sets | Better suited after training or before bed |
| Active mobilization (e.g., weight-bearing lunge) | 10–15 reps, 2–3 sets | Slow pace, feel the range increase each rep |
| Loaded holds (e.g., bottom-of-squat hold) | 20–30 seconds, 3 sets | This is the “occupy” step—don’t skip it |
Ah-Kai’s Eight-Week Improvement Case Study
Abstract principles are less useful than seeing a real process. For the rider Ah-Kai mentioned earlier, the eight-week plan I set up for him progressed roughly in these phases:
| Week | Focus | Specific Content | Observation Metrics |
|---|---|---|---|
| Weeks 1–2 | Open soft tissue | Focus on calf, hip flexor, and thoracic spine foam rolling; measure baseline | Record wall lunge left-right difference starting from 3 cm |
| Weeks 3–4 | Expand range | Add weighted lunge mobilization, 90/90 hip rotation | Lunge distance improves about 1 cm per side |
| Weeks 5–6 | Add control | Bottom-hold squats, active end-range force, slow overhead squats | Heels no longer lift during overhead squats |
| Weeks 7–8 | Integrate on the bike | Bring new range into pedaling, fine-tune saddle height | Long-distance lower back soreness disappears, pedaling catch sensation disappears |
Note the “integrate on the bike” phase in weeks 7–8—this step is missed by too many people. The mobility you free up on the mat won’t automatically connect to your sport-specific movement (for him, pedaling) unless you deliberately bring it back. The end goal of mobility isn’t how well you perform on the mat—it’s whether you can actually use it in your sport. That’s also why I ultimately accompanied him on the trainer, reminding him while pedaling to feel the hip extension to the end and the glutes engaging.
Practical Considerations in the Taiwanese Context
This section is something I especially want to add for readers in Taiwan, because foreign training plans often don’t translate well when directly copied over.
Climate and Venue
Taiwan’s summers are hot and humid—indoors are stuffy, outdoors are scorching. The good news is that high temperatures actually favor mobility training—when tissue temperature is higher, extensibility is naturally better. So in summer, you don’t need to spend much time warming up. But on winter mornings, or when you’ve been in air conditioning and your tissues are cold, be sure to move around and warm your body up before doing larger-range mobilization. Stretching cold and hard is an easy way to get injured.
As for venue, a yoga mat space in your living room is more than enough. If you truly don’t have a mat, a non-slip bath mat after a shower, or even a large bath towel, will do. The last excuse I want to hear is “I don’t have the space”—mobility training has the lowest venue requirements of almost any type of training.
Eating Out and Recovery
Eating out is convenient in Taiwan, but it’s also easy to fall short on vegetables and quality protein, which indirectly affects tissue repair and chronic inflammation levels. I won’t give you any magic supplement list—the principle is simple: every meal should have a clear protein source (beans, fish, eggs, meat), an extra serving of vegetables, and enough water. Tissue elasticity and repair are built gradually through daily nutrition, not from some powder in a jar. If you have specific needs (such as dietary management for chronic illness), please consult a dietitian for individualized adjustments.
Medical Care and National Health Insurance Resources
The accessibility of Taiwan’s National Health Insurance is our advantage. If your sticking point doesn’t improve no matter how you train, or if it’s accompanied by obvious pain, numbness, or weakness, don’t play doctor with yourself—you can first make an appointment at a rehabilitation medicine or sports medicine clinic. The NHI covers basic physical examination and initial assessment, and the physician can refer you to physical therapy or arrange imaging if needed. Taiwan also has a growing number of qualified physical therapy clinics offering out-of-pocket manual therapy and movement assessment—resources aren’t hard to find. The key point is: see a professional when you should—don’t let a small problem turn into a major injury.
Common Mistakes and Corrections
I think this section is the most worth reading carefully, because most people aren’t not trying hard—they’re trying hard in the wrong direction.
Mistake 1: Treating “Pain” as “Effective”
Many people stretch until they’re gritting their teeth, bruising the next day, and still think “no pain, no gain.” Wrong. Overly aggressive stretching triggers the body’s protective contraction, which actually makes the muscle tighter and can even cause strains. The correct sensation is “noticeable tension but you can breathe normally”—roughly the level of “a bit uncomfortable but manageable, and you can still talk.” If you’re holding your breath or grimacing, that’s too much.
Mistake 2: Only Stretching Without Training Control (Missing the “Occupation” Phase)
As mentioned earlier, this is the most common mistake. Doing only relaxation and stretching, without actively exerting control in the new range, makes the body treat it as an “unsafe, unfamiliar range” and revert overnight. The fix is simple: after each stretch, add an exercise that actively holds force at the end range.
Mistake 3: Training Where It Hurts
Lower back pain? Train the lower back hard. Knee pain? Keep working the knee. This is the most intuitive approach but often the wrong one. The body is a chain—the painful area is often the victim, not the culprit. When the ankle doesn’t move, the knee suffers for it; when the thoracic spine doesn’t move, the lower back compensates. What actually needs to be addressed is often the “immobile joint” upstream or downstream. That’s also why I start with a full-body screen rather than treating the symptom in isolation.
Mistake 4: Treating Structural Limitations as Soft Tissue to Force-Stretch
Some people’s limitations come from bony structure (for example, certain anatomical patterns of hip impingement). You could stretch these for a lifetime and never open them up—and forcing them can even damage the labrum. If a range shows absolutely no progress after months of training, and the end feel is “hard bone-on-bone” rather than “elastic tightness,” seek professional assessment—don’t force it on your own. In Taiwan, in this situation you can first make an appointment at a rehabilitation medicine or sports medicine clinic; the NHI covers a basic assessment, and you can pay out of pocket for further manual therapy or imaging if needed.
Mistake 5: Ignoring the Real Conditions of Taiwan’s Environment
Taiwan’s summers are humid and hot, and many people are too exhausted to move after work. People who eat out often lack vegetables and protein, which also affects tissue repair. My advice is pragmatic: schedule your mobility routine at the time when it’s easiest for you to follow through—for example, ten minutes of foam rolling in the living room after a shower (when tissue temperature is high and extensibility is good) is far more realistic than forcing yourself to go to the gym for a one-hour “mobility class.” Frequency beats intensity—sustainability is what matters.
Actionable Advice for Readers at Different Levels
Everyone starts from a different point, so I’ve divided the advice into three tiers. Just find where you fit.
Beginners / General Exercisers
You may not have obvious pain or injury yet; the goal is “build a foundation and prevent future problems.”
- Do an overhead squat self-check first—record yourself from the side and the front with your phone, and compare against the compensation table earlier.
- Pick one body part and do 10 minutes a day, starting with the one that felt “most stuck” in your screen.
- Don’t chase perfection in one session—build the habit first. Stick with it for four consecutive weeks, and you’ll progress more than someone chasing single-session extreme stretching.
Advanced Athletes / Those with Clear Sticking Points
You have a training foundation and roughly know where you’re tight; the goal is “remove limitations and improve performance.”
- Do the full three-part quantitative tests and write down the numbers (for example, wall lunge distance on each side in centimeters)—this is your baseline.
- Strictly follow the “release → expand → occupy” three-step process, and especially don’t skip the occupation phase.
- Retest every four weeks and use the numbers to verify progress. No progress means the method needs adjustment, not that you should add more volume and force it.
- Treat mobility as part of your training and schedule it into your plan, not as an optional extra “when you have time.”
Those with Injury History or Older Athletes
You may have old injuries, or age-related decline in tissue elasticity; the goal is “safely maintain function and avoid compensatory injuries.”
- Consult a professional first: if you have clear pain, a history of surgery, or joint degeneration, have a physical therapist or sports medicine physician assess you first—don’t blindly follow online training plans.
- Use “no pain” as the upper limit for range of motion; prefer smaller ranges at higher frequency.
- Pay special attention to cardiovascular and chronic disease status: if you have hypertension, heart disease, diabetes, or other chronic conditions, any new exercise plan should first be discussed with your primary care physician, and you should take an individualized approach—don’t apply the same intensity and progression as the general population.
A Quick FAQ Supplement
Q: How long until I see results from mobility work?
A: If the limitation is from soft tissue tightness, you’ll usually feel a difference within two to four weeks of high-frequency practice; if it’s structural or neural-control related, it may take eight to twelve weeks or even longer. Give yourself at least a month before judging the results.
Q: Will stretching make me weaker?
A: Long-duration static stretching before training can indeed temporarily affect explosive power, so use dynamic mobility work during your warm-up and save static stretching for after training or before bed.
Q: I’m already very flexible. Do I still need to train mobility?
A: Yes. Being flexible but unstable actually puts you in a high-risk group for injury. What you need to train is “control and force production through a large range of motion”—in other words, turning flexibility into usable mobility.
Q: Do I need to buy a bunch of foam rollers and massage balls?
A: No. One foam roller, one ball, a wall, and a broomstick to use as a bar for overhead squats can handle ninety percent of your assessment and training needs. Tools are aids; the method is the core.
Q: How should I actually divide dynamic and static stretching?
A: Simple rule of thumb—dynamic before training, static after training. Before training, use dynamic mobility (like lunge twists, leg swings, jumping jacks) to wake up the nervous system and raise body temperature; don’t hold long static stretches. After training or before bed, do static stretching to relax and lengthen. Get it backwards, and holding static stretches too long before training can temporarily reduce your power output.
Q: I’m really busy and genuinely can’t find ten minutes. What then?
A: Then do three minutes. Better three minutes every day than thirty minutes once a week. Mobility is an adaptation built through frequency. Spend three minutes on the one movement you need most (for example, cyclists can do wall-assisted lunge mobilizations), and over time the results will far exceed occasional long sessions. Lowering the barrier until you have no excuse is the key to consistency.
Q: Do children or adolescent athletes need special attention?
A: During growth spurts, kids’ bones grow faster than their muscles, which can cause temporary tightness and coordination issues—this is normal. At this stage, focus on “varied movement and building good movement quality,” and don’t use aggressive adult-style stretching to force things. If there’s pain, be sure to get a professional assessment. Adolescents’ growth plates haven’t closed yet, so treatment should be more conservative.
Fitting Mobility into Your Training Cycle
Finally, I want to touch on an advanced concept: mobility shouldn’t be an “add-on”—it should be scheduled into your training cycle just like strength and endurance.
Many people treat mobility as a decorative extra they do “when they have time and feel like it,” which results in sporadic effort and getting stuck at the same plateau forever. My advice is to build it into your existing training rhythm:
- On training days: Put targeted dynamic mobility into your warm-up, and a few minutes of static relaxation after training. That way you don’t need to find extra time—it’s already built into your session.
- On rest days: You can schedule a slightly more complete mobility routine (10 to 15 minutes) as “active recovery,” giving your body a chance to integrate.
- During taper weeks: When training volume drops, it’s the perfect time to invest more effort in mobility and movement quality. With lower fatigue, it’s especially effective for training control.
The table below summarizes the mobility focus for three training phases. You can adjust based on which phase you’re currently in:
| Training Phase | Mobility Focus | Recommended Frequency | Key Principle |
|---|---|---|---|
| Base / Foundation | Full screening, resolve major limitations | 10 minutes daily | Find and conquer your biggest sticking point |
| Intensity / Specific | Maintain improved range, sport-specific warm-up | Integrate into training-day warm-ups | Don’t let hard-earned mobility regress |
| Taper / Pre-competition | Movement quality fine-tuning, active recovery | Light daily work | Low fatigue, best time to train control |
The benefit of this approach is that mobility no longer “competes for time” with your training—it becomes part of the training itself. When something is systematically scheduled into your routine, it can actually be sustained. After fifteen years of watching countless people burn out after a “three-minute enthusiasm,” this is the most practical conclusion I’ve reached.
Conclusion: First Move Correctly, Then Move More
Let’s return to the rider A-Kai from the beginning. We spent about eight weeks focusing on ankle dorsiflexion and thoracic spine extension, combined with a ten-minute daily home routine and a few posture adjustments. His power didn’t skyrocket immediately, but two things changed: his lower back no longer ached enough to interrupt long rides, and that “stuck feeling” in his pedal stroke disappeared. He later said it felt like “the engine was finally mounted in the right place.”
That’s the value of mobility assessment and improvement—it won’t directly give you more watts, but it will let your existing abilities truly express themselves, and allow you to keep training for the long haul. For endurance athletes, the ability to consistently accumulate training volume without injury is itself the biggest competitive advantage.
So don’t rush to add training volume. First, spend three minutes doing an overhead squat and really look at what your body is trying to tell you. Moving correctly matters far more than moving a lot.
If you only remember three sentences from this article, I hope they are these: First, screen before you train—don’t just treat the symptom; second, after stretching, you must exert force and control in the new range, or it’s wasted effort; third, frequency beats intensity—three minutes every day beats an occasional marathon session. Put these three into your daily routine, and you’ll gradually feel your body starting to “listen”—those areas that were stuck for so long loosen up, movement becomes smoother, and training becomes more sustainable. This path isn’t flashy, but it’s steady and lasting—which is the essence of endurance sports and the most fascinating part of mobility training.
This article is educational content and cannot replace individual diagnosis and treatment advice from a physician, physical therapist, or nutritionist. If you have specific pain, a history of injury, or chronic illness, please seek professional individualized assessment.
References
- Functional Movement Screen (FMS) — Physiopedia: https://www.physio-pedia.com/Functional_Movement_Screen_(FMS)
- Overhead Deep Squat Performance Predicts Functional Movement Screen Score — PMC: https://pmc.ncbi.nlm.nih.gov/articles/PMC4595915/
- A Guide to Assessing Mobility for Strength and Conditioning Coaches — SimpliFaster: https://simplifaster.com/articles/mobility-assessment-guide-strength-coaches/
- 15-Minute Cycling Mobility Routine — Roadman Cycling: https://roadmancycling.com/blog/cycling-mobility-routine
- Restoring ankle dorsiflexion range of motion in athletes — PMC: https://www.ncbi.nlm.nih.gov/pmc/articles/PMC12585996/
Related Reading
- Flexibility and Mobility Training: When Endurance Athletes Should Use Dynamic vs. Static Stretching
- Flexibility and Mobility for Cyclists: Improving Hip Flexors, Hamstrings, and Spinal Mobility
- Mobility and Flexibility for Endurance Athletes: Turning Joint Range of Motion into Usable Power Instead of Empty Stretching
- Flexibility and Mobility: The Most Overlooked Homework for Triathletes
西進武嶺 免費訓練分析服務 Intervals | 練不夠還是練過頭?你哪一種類型選手?AI模型告訴你! | 備戰神器 | 公路車 訓練 | CT Yeh
4 年前
西進武嶺 8000名單車友數據分析 PART1 | 從新手到高手數量/瓦數/推力比/FTP推力比/功率計使用率 大解析 | 公路車 | CTYeh
5 年前
如果Pogačar騎西進武嶺可以多快?會破2嗎?各種情況深度推估探討 / 公路車 / CT Yeh
2 年前
單車AI教練!全新 ChatGPT4o 幫你分析訓練成果!排武嶺課表,分析騎車姿勢! 太神了! / 公路車 / CT Yeh / feat. 緯緯
2 年前
FTL 與 SYB 車隊專訪 西進武嶺 實用攻略分享! 2小時 如何練?!你不知道的眉角!新手準備武嶺必看 EP1 | 實力派女車友 | 精華版 | 公路車 | CTYeh
4 年前
多機位拍片神器 DJI Action 2 拍出速度張力感 | 類空拍機視角 4陣列麥克風超強降風噪 實測! | 公路車 | CT Yeh
3 年前
#公路車 #Fitting 靠人工智慧APP 幫你調整單車
6 年前
Never Stop 西進武嶺 前後雙機 完整全程錄影 訓練台 實境
8 年前