The Complete Guide to Hip and Pelvic Health: Mobility, Stability, and Pain — The Core Foundation for Athletes
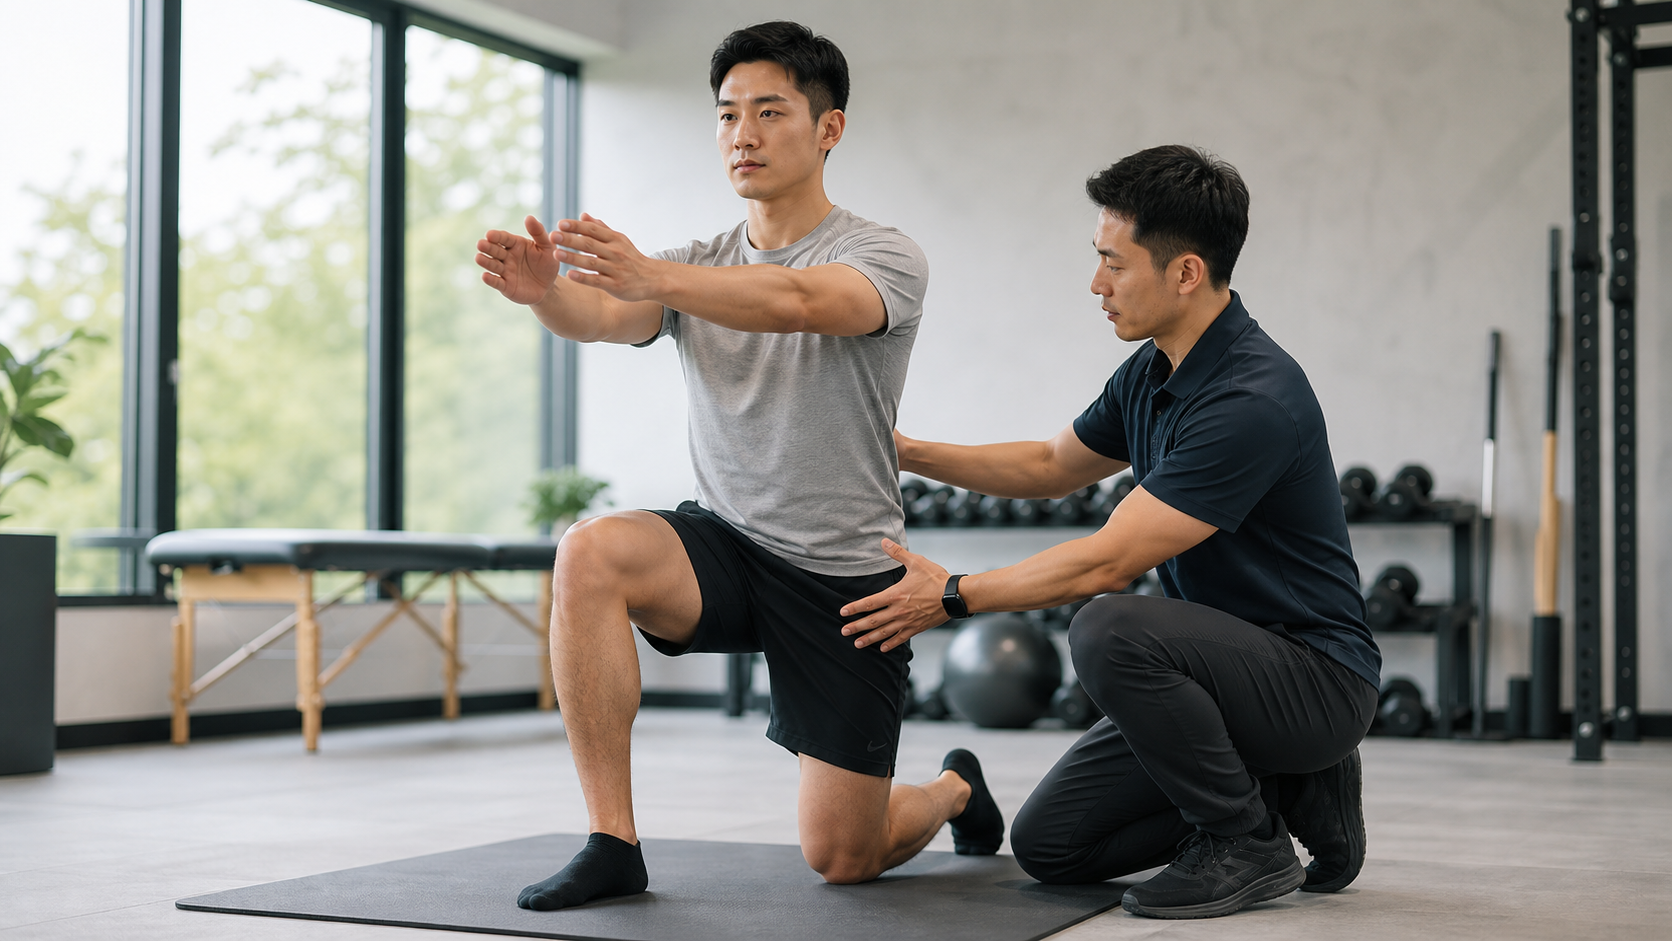
Starting with a Student Who Had Knee Pain but No Diagnosable Issue
I’ve been training athletes and general fitness enthusiasts for about fifteen years. Over that time, if I had to pick one area that is “most often overlooked, yet most often problematic,” I would say without hesitation: the hip joint and pelvis.
A few years ago, a cyclist in his early forties came to see me — let’s call him A-Zhe. His main complaint was a dull pain on the outside of his right knee after riding more than 30 kilometers. He’d seen an orthopedist, had X-rays, had an MRI — the knee joint structure was “completely normal.” The doctor said it was overuse and suggested he ride less. He was frustrated — cycling was his only outlet after work, and telling him not to ride was like taking away his lifeline.
I had him lie on the treatment table and ran a few simple movement assessments: during single-leg stance, his pelvis dropped to the opposite side; hip internal rotation was nearly locked; the gluteus medius gave out the moment pressure was applied; and the hip flexors (especially the iliopsoas) were tight as steel cables. The answer wasn’t actually in his knee — his knee was just the “most honest victim,” absorbing all the compensation from the dysfunctional hip and pelvis upstream. We spent about eight weeks rebuilding hip mobility and stability, and his knee pain disappeared. His cycling power even improved a bit.
I’ve seen this story too many times. In this long-form article, I want to walk through “hip and pelvic health” — from functional anatomy, the balance between mobility and stability, and identifying pain, all the way to practical routines you can start tonight. Whether you’re a cyclist, a runner, or just someone who wants to move healthily, this foundation deserves your serious attention.
Why the Hip and Pelvis Are the “Core Foundation”
The Crossroads of Force
The pelvis is the hub connecting the trunk and the lower limbs. The force you generate when pedaling, pushing off the ground, or jumping almost all passes through the hip joint and pelvis — this “crossroads.” If mobility here is insufficient or stability is lacking, force transmission leaks. Not only does performance suffer, but stress gets shifted upstream to the lumbar spine and downstream to the knees and ankles.
The hip joint is a classic ball-and-socket joint, theoretically capable of movement in six directions: flexion, extension, abduction, adduction, internal rotation, and external rotation. This high degree of freedom is both its advantage and its challenge — the more freedom, the more the surrounding muscles need to “intelligently” hold it steady.
The Common Ailment of Athletes: Prolonged Sitting + Repetitive Single-Plane Movement
Here’s a harsh reality that people in Taiwan especially need to pay attention to. The daily life of most fitness enthusiasts looks like this: eight hours sitting in an office (hip flexion), another hour or two sitting during the commute (hip flexion), then cycling or running after work.
For cycling, the problem is even more pronounced. According to a review in sports medicine and clinical commentary, during cycling the hip joint remains in a flexed position for nearly the entire pedal stroke. With thousands upon thousands of repetitions, the iliopsoas and rectus femoris gradually shorten, the glutes become inhibited and weak, and the pelvis gets pulled forward — over time, this creates the classic “tight hip” pattern. Clinically, this upstream dysfunction is treated as an important component of managing cycling-related hip pain. A clinical commentary published in the sports physical therapy field specifically emphasized the role of bike fit in cycling-related hip pain (PMC Clinical Commentary).
In other words: it’s not that you’re “exercising too much” that makes you tight — it’s the combination of “sitting too long + repeatedly moving in only one angle” that locks the hip into a very small range of motion.
Conceptual Foundation: Mobility, Stability, and the Balance Between Them
Many people, upon hearing “hip problems,” go straight to aggressive stretching — or conversely, aggressively squatting. Both may be missing the point. Hip health is a dynamic balance between mobility and stability — neither can be neglected.
Mobility Is Not the Same as Flexibility
First, let’s clarify three terms that are often confused:
| Term | Definition | Plain-Language Understanding |
|---|---|---|
| Flexibility | The degree to which tissue can be lengthened in a passive state | How far someone else can move you |
| Mobility | The range you can “actively control” through a joint | How far you can move yourself, steadily |
| Stability | The ability to maintain control and resist unwanted displacement within a range of motion | Whether you can hold steady at the end range |
What actually matters is mobility, not just flexibility. A person can be very flexible (good flexibility), but shake uncontrollably when asked to actively control that range (poor mobility). That’s why I rarely have students do only static stretching — I emphasize more “controlled active movement” and “isometric contractions at end range.”
The Joint-by-Joint Approach
There’s a widely circulated concept in the training world called the “joint-by-joint” approach: the body’s joints roughly alternate between “mobility joints” and “stability joints.”
- Ankle joint: needs mobility
- Knee joint: needs stability
- Hip joint: needs mobility
- Lumbar spine: needs stability
- Thoracic spine: needs mobility
When hip mobility is insufficient, the lumbar spine above it (which should be stable) is forced to compensate for that missing range of motion — this is exactly the mechanism by which many people’s “tight hips” eventually become “low back pain.” So treating low back pain often means addressing the hip; treating knee pain often means addressing the hip as well. This is also why A-Zhe’s knee pain had its answer in the hip.
Practical Assessment: First, See Where Your Hip Is
Before giving any routine, I always assess first. You can also do a few simple self-tests at home to help you find your direction. When doing them, go slowly and don’t push into pain — you’re just “seeing where you currently are.”
Three Home Self-Tests
| Test | How to Do It | What to Observe | Issues It Suggests |
|---|---|---|---|
| Squat Test | Feet shoulder-width apart, toes slightly turned out, squat down slowly to the bottom | Can you squat below parallel with heels down and knees not caving in | Difficulty squatting down often means insufficient ankle or hip mobility |
| Single-Leg Stance 30 Seconds | Stand on one leg, hands on hips, watch your pelvis | Does the pelvis drop to the opposite side, does the body sway significantly | Pelvis dropping = insufficient gluteus medius stability |
| Thomas Test (Modified) | Lie on your back at the edge of a bed, hug one knee to your chest, let the other leg hang down | Can the hanging thigh stay flat against the bed, can the shin hang naturally | Thigh lifting up = tight iliopsoas; shin kicking forward = tight rectus femoris |
These are not medical diagnoses — they’re just to help you “know roughly where you are.” If you experience obvious pain, catching with a clicking sound, or significant asymmetry on one side during the tests, that’s beyond the scope of self-training. I’ll discuss when to see a professional later.
Preliminary Identification of Pain
There are many possible sources of discomfort around the hip and pelvis. Here are a few patterns I commonly see in my students, to help you build a basic framework (again, this is not a diagnosis — it’s a reference to help you describe your symptoms to a professional):
- Deep groin pain, catching sensation when rotating: Points more toward the hip joint itself (intra-articular) — for example, impingement or labrum-related issues. Professional evaluation is needed.
- Pain on the outside of the buttock, at the bony prominence of the hip: Points toward irritation of the gluteal tendons or bursa, often related to gluteus medius weakness and poor running landing control.
- Low back and upper buttock pain, worse after prolonged sitting: Often involves sacroiliac joint and an imbalance of tension between the glutes and hip flexors.
- Deep buttock pain radiating down the back of the thigh: Be alert to possible nerve irritation. This requires extra caution and should be prioritized for medical evaluation.
Practical Methods: A Hip and Pelvis Routine You Can Follow Directly
Alright, let’s get to the part everyone wants. I break the training into four blocks: Release and Mobility, Activation, Stability and Strength, and Integration. These four blocks follow a logical sequence — I don’t recommend skipping the earlier ones to jump straight to the later ones.
Block 1: Relaxation and Mobility (5–8 minutes each session)
The goal is to “give back” the range of motion that’s been locked up. This isn’t about rolling yourself to tears with a foam roller—moderation is key.
| Exercise | How to Do It | Dosage |
|---|---|---|
| Hip Flexor Stretch (Lunge) | Back knee on the ground, slightly tuck your pelvis and engage your core, shift weight forward to feel a stretch in the front of the hip | 30–45 seconds per side × 2–3 sets |
| 90/90 Hip Rotation | Sit on the floor with front and back legs each bent at 90 degrees, rotate your torso between both sides | 8–10 reps per side, slow tempo |
| World’s Greatest Stretch | Lunge + drop the same-side elbow toward the floor + open up the chest with a rotation | 5–6 reps per side |
| Cat-Cow Pelvic Control | On all fours, coordinate pelvic tilt (anterior/posterior) with your breath | 8–10 breaths |
Key reminder: When stretching the hip flexors, always engage your core first and let the pelvis tilt slightly posterior. Otherwise, you might think you’re stretching the iliopsoas, but you’re actually compressing the lumbar spine—the more you stretch, the more your lower back aches. This is one of the most common mistakes I correct with my clients.
Block 2: Activation (3–5 minutes each session)
Wake up the “sleeping” glutes. Inhibited glutes are an extremely common issue among athletes, especially those who sit for long hours.
- Glute Bridge: Lie on your back with knees bent, press through your heels to lift your pelvis, squeeze your glutes at the top and hold for 1–2 seconds. 12–15 reps × 2–3 sets. The key sensation is “glutes doing the work,” not “hamstring cramping” or “lower back arching.”
- Clamshell: Lie on your side with knees bent and heels together, open the top knee like a clam shell. You can add a resistance band for extra load. 12–15 reps per side × 2 sets.
- Side-Lying Hip Abduction: Lie on your side and lift the top leg straight up, with toes pointing slightly downward (not toward the ceiling) to better target the gluteus medius. 12–15 reps per side.
Block 3: Stability and Strength (8–12 minutes per session, 2–3 times per week)
This is the key to real change. Once mobility is opened up, you must use strength to “hold onto” the newly regained range of motion—otherwise, it will shrink back within a few weeks.
| Exercise | Primary Goal | Recommended Dosage | Coach’s Cue |
|---|---|---|---|
| Split Squat / Rear-Foot Elevated Split Squat | Unilateral hip strength, pelvic control | 8–10 reps per side × 3 sets | Keep pelvis level, no tilting |
| Romanian Deadlift (RDL) | Glutes and hamstrings, hip hinge | 8–10 reps × 3 sets | Push hips back, keep spine neutral |
| Single-Leg Glute Bridge | Unilateral glute strength and anti-rotation of the pelvis | 8–12 reps per side × 3 sets | Keep both sides of the pelvis level, no dropping |
| Side Plank (with optional leg raise) | Lateral chain and gluteus medius stability | Hold 20–40 seconds per side × 2–3 sets | Body in a straight line, don’t sag the hips |
How to gauge load? The general population doesn’t need to chase heavy weights. Use this standard: “The last two reps feel challenging, but you can still maintain form.” If equipment is limited, a water bottle, a backpack full of books, or a resistance band all work—no need to go to the gym.
Block 4: Integrate into Your Sport
At this stage, you need to “reconnect” hip capacity to the sport you actually do:
- Cyclists: Focus on whether your pelvis stays stable without rocking side to side during the pedal stroke, and whether saddle height and fore/aft position cause excessive hip flexion. If the saddle is too high, you’ll be forced into over-extension at the bottom of the stroke, causing the pelvis to rock; if too low, you’ll be stuck in deep flexion the whole ride. This is well worth getting a professional bike fit.
- Runners: Focus on whether the pelvis drops to the opposite side when landing on one leg (that “model-walk hip sway” is the gluteus medius failing to hold), and whether the hip can fully extend during push-off.
- General athletes: Let the hip move through its full range in daily life—squatting to pick things up, climbing stairs, crouching to tie your shoes—all of these are free mobility drills.
Know Your Key Muscles: Understand What You’re Training
Many people do the movements but feel nothing, often because they “don’t know which muscle they’re targeting.” I’ve put together a table of the most critical muscles around the hip and pelvis, what they do, and what happens when they’re tight or weak. You don’t need to memorize Latin names—just use it to feel the corresponding areas on your body.
| Muscle Group | Primary Function | When Tight | When Weak |
|---|---|---|---|
| Iliopsoas (deep hip flexor) | Lifts the thigh up, stabilizes the lumbar spine | Anterior pelvic tilt, tight lower back, inhibited glutes | Weak hip flexion, poor knee drive when running |
| Rectus Femoris (front of thigh) | Hip flexion + knee extension | Increased pressure on the front of the knee, limited hip extension | Lack of push-off power |
| Gluteus Maximus | Hip extension, explosive propulsion | Rarely tight, usually weak | Weak push-off, lower back and hamstrings compensate |
| Gluteus Medius (upper outer buttock) | Stabilizes the pelvis during single-leg stance, hip abduction | Tightness and tenderness on the outer hip | Hip drop, knees caving in, lateral irritation |
| Deep External Rotators | Hip external rotation, fine-tuning joint position | Deep buttock tightness, worse with prolonged sitting | Poor landing control, unstable rotation |
The most practical use of this table: when you do an exercise but “feel nothing,” look back at which muscle you’re targeting and whether it’s currently tight or weak—you’ll often find the answer. For example, if the glute bridge doesn’t feel effective, it’s usually because the gluteus maximus is too weak and the hamstrings are taking over. In that case, spend time finding the glute contraction first, rather than just adding more reps.
Pelvic Neutral Position: The Foundation of Everything
Before talking about the hip, you have to talk about pelvic position. The pelvis can tilt anteriorly (belly pushed forward, butt sticking out), posteriorly (tailbone tucked under, lower back flattened), and there’s a relatively efficient “neutral position” in between where stress is more evenly distributed.
Sedentary people and many cycling enthusiasts often have a pelvis stuck in excessive anterior tilt: this keeps the hip flexors chronically shortened, stretches and weakens the glutes, and leaves the lower back in a tight state. Learning to find pelvic neutral before training—practicing both lying down and standing—is a prerequisite for doing many movements correctly. A simple self-cue is: “Gently draw the lower edge of your ribs toward your pelvis, like aligning your upper and lower teeth.” No need to squeeze hard—just find that middle spot that’s “neither protruding forward nor deliberately tucked.”
Second Case Study: The Female Runner with Hip Drop
Let me share another contrasting example. A female runner in her thirties who runs three times a week—let’s call her Xiaomin—came in with a dull ache on the outer side of her right hip after running more than 8 km. It would ease with rest, but return every time she ran.
I had her jog on the treadmill and recorded her from the side with a phone. The slow-motion footage made it obvious: every time her right foot landed, her left pelvis dropped noticeably, and her upper body leaned to the right to compensate—a classic “hip drop” caused by a failing gluteus medius. Her flexibility was actually fine; the problem was entirely pelvic stability during single-leg stance.
We didn’t add any mileage. We only did two things: first, build up gluteus medius activation and lateral chain stability (clamshells, side-lying hip abduction, side plank with leg raises); second, adjust her cadence so she wouldn’t overstride. About six weeks later, her hip drop had visibly decreased, and the dull ache was gone.
The key point I want to emphasize with this case is: Both are hip problems, but A-Zhe lacked mobility, while Xiaomin lacked stability. If you get the direction wrong, even hard training will yield half the results. This is why I always stress “assess first, then train.”
Training Dosage and Intensity Reference
Many people ask me, “How many sets and reps should I do, and how long until I feel results?” I’ve organized a reference table for dosage guidelines based on different goals. These are directional principles, not hard rules—adjust based on your individual response.
| Training Goal | Recommended Frequency | Sets/Time per Exercise | Sensation Standard | Expected Time to Feel Results |
|---|---|---|---|---|
| Restore mobility | Nearly every day | 2–3 sets, 30–45 seconds each | A stretch sensation, no pain | Noticeable in 2–3 weeks |
| Activation and neural awakening | Before every workout | 1–2 sets, 12–15 reps | Target muscle “warms up” | Felt immediately in the session |
| Build strength and stability | 2–3 times per week | 3 sets, 8–12 reps | Last 2 reps slightly challenging but form holds | 4–6 weeks |
| Maintenance | 1–2 times per week | 2 sets, varies by exercise | Completed with ease | Long-term upkeep |
One often-overlooked point: Mobility can be done daily, but strength training requires recovery. For the same muscle group, strength sessions should be spaced at least one day apart. Don’t train your glutes and legs to soreness every day out of eagerness—you’ll end up with poor results and accumulated fatigue.
Don’t Forget to Breathe and Your Core: The Hidden Partner of Pelvic Stability
When it comes to pelvic stability, many people only think of the glutes and abs, overlooking breathing. The diaphragm, abdominal wall, and pelvic floor form a “core cylinder,” like a breathing piston. When you inhale, the diaphragm descends and intra-abdominal pressure rises—this internal pressure is a key source of stability for the lumbar spine and pelvis.
I often see trainees completely holding their breath during stability training, with neck veins bulging. That actually turns the core into a rigid, non-breathing board. The correct approach is: maintain trunk stability while still breathing smoothly. A simple exercise is to lie down and place your hands on the sides of your ribs. On the inhale, feel the ribs expand sideways and backward (rather than just the belly pushing up or the chest rising), and gently draw in on the exhale. Once you learn this “360-degree breathing,” your pelvic stability gains a solid foundation.
This is especially practical for cyclists: when you’re hunched over the bike for long periods, if you’re only relying on your arms and lower back to hold you up without using intra-abdominal pressure for core stability, your lower back will inevitably ache after a long ride. Building the connection between breathing and the core is one of the fundamental solutions for post-ride lower back discomfort.
The Triangular Relationship Between Hip Flexors, Lower Back, and Cycling
I want to clearly explain the chain of issues cyclists most commonly encounter, because it’s so prevalent.
When riding, you maintain hip flexion for extended periods, keeping the iliopsoas in a shortened state. Day after day, it gradually “gets used to” this shortened length, becoming tight and difficult to lengthen. Part of the iliopsoas attaches to the lumbar spine—when it’s overly tight, it pulls the lumbar spine forward, causing an anterior pelvic tilt, and the lumbar spine bears more stress. This is why many people don’t get knee pain after riding, but rather “lower back so sore they can’t straighten up.”
What’s more troublesome is that a tight hip flexor “inhibits” its antagonist, the glutes, through neural mechanisms, making them harder to activate. Once the glutes weaken, the propulsive force in pedaling has to be compensated by other muscles, reducing pedaling efficiency and causing faster fatigue. So you see, one tight hip flexor simultaneously creates three problems: lower back soreness, weak glutes, and reduced efficiency.
Therefore, for cyclists, my prescription order is always: first release the hip flexors, restore pelvic neutrality, awaken the glutes, and only then talk about increasing intensity. Skipping ahead and piling on training volume will only accelerate this vicious cycle. Of course, combined with a professional bike fit to address the overly flexed posture at its source, the results will be more lasting.
Common Mistakes and Corrections
In all my years of coaching, I see the same mistakes repeated over and over. I’ve listed the most common ones to help you avoid unnecessary detours.
Mistake 1: Only Stretching, Not Training Stability
Many people with tight hips stretch relentlessly. It feels loose right after, but it’s tight again the next day. The body gets tight because it often “doesn’t trust” that range of motion—without muscular strength guarding a range, the nervous system automatically tightens it as protection. The correct approach is: after stretching, you must follow up with strength and stability training, letting the body believe “this range is safe.”
Mistake 2: Lumbar Compensation During Hip Flexor Stretches
As mentioned earlier, if you don’t tuck your belly during a lunge stretch, you end up compressing the lumbar spine. You’ll feel little sensation in the front of the hip, but instead tightness in the lower back. Correction: posteriorly tilt the pelvis, draw the ribs down, squeeze the glutes slightly, then shift forward.
Mistake 3: Glute Bridges Turning into Hamstring Cramps or Lower Back Effort
This means your glutes aren’t being activated, and surrounding muscles are compensating. Correction: first do a few pure “glute squeezes” to find the glute activation feeling, then slow the movement down, imagining using the glutes to “roll” the pelvis upward rather than arching with the lower back.
Mistake 4: Ignoring Left-Right Asymmetry
Almost everyone has a dominant side, and it’s normal for hip mobility and strength to differ between sides—but too large a gap is a hidden risk. Unilateral training (split squats, single-leg glute bridges) is especially valuable because bilateral movements let the stronger side secretly take on more of the load. During training, base your reps on what the weaker side can complete, and don’t let the strong side keep pulling ahead.
Mistake 5: Pushing Through Pain
“No pain, no gain” is dangerous when it comes to the hip joint. Mobility and stability training should be “noticeable but not painful.” If you experience sharp deep joint pain, pain that worsens with training, or pain severe enough to affect walking or sleep, stop and seek help rather than increasing the load.
Actionable Advice for Readers at Different Levels
Everyone starts from a different point, so I’ve divided the advice into three tiers. Be honest with yourself and start from the tier closest to where you are.
Sedentary Office Workers / Those Just Starting to Move
Your primary task isn’t to get stronger—it’s to “stop letting your hips stay locked up.”
- Get up and move for 2 minutes every 45–60 minutes of sitting: stand up and do a few lunges, squats, or march in place. Don’t underestimate this.
- Spend 5 minutes before bed each night doing the first block (mobility work) plus glute bridges.
- Schedule 2 sessions per week, 15 minutes each, of hip activation plus basic stability.
- This aligns with the internationally recommended guideline of “150–300 minutes of moderate-intensity activity per week for adults, plus muscle-strengthening activities involving all major muscle groups on at least 2 days per week,” which is very beneficial for hip and pelvic health (WHO Physical Activity Guidelines Summary).
Regular Cyclists / Runners
You already have an exercise habit; the issue is usually “too much repetition in one plane and too little accessory training.”
- After each ride or run, spend 8 minutes on mobility work—don’t just sit down and scroll your phone immediately after training.
- Do the third block (stability and strength) 2–3 times per week, especially unilateral movements and gluteus medius work.
- Every 4–6 weeks, retest using the three self-assessments mentioned earlier to track whether the left-right difference is narrowing.
- If you’ve had recurring knee, hip, or lower back discomfort, seriously consider getting a professional bike fit or running gait assessment.
Advanced Athletes / Those with a History of Hip or Lower Back Injury
- Training needs to be more individualized—leave the assessment to professionals (physical therapists, strength coaches with proven results).
- Place special emphasis on end-range control and anti-rotation capacity, not just adding more weight.
- When returning after injury, avoid rushing. Use “pain-free, symmetrical, and controllable” as the progression threshold, not time or bravery.
Practical Reminders for Taiwan
Finally, here are some down-to-earth points I often remind my Taiwanese trainees about.
Climate and Venues
Taiwan’s summers are hot and humid. Exercising in the early morning or evening reduces the risk of heatstroke, but don’t skip your warm-up just because it’s hot. Hip mobility warm-up is especially important after prolonged sitting in air-conditioned rooms—when you step out of an air-conditioned office, your hip flexors are “cold” and “short,” making it risky to jump straight into high intensity. Riverside bike paths, school tracks, and community parks are all great places for bodyweight hip training—you don’t need to pay for a gym to get started.
Eating Out and Body Weight
Although this article’s focus is the hips and pelvis, body weight does affect the long-term load on the hip joint. Eating out in Taiwan is convenient but often too salty and oily, with insufficient vegetables and protein. Maintaining a reasonable body weight and getting enough protein (to help you recover after strength training) supports long-term joint health. However, nutrition is highly individualized—if you have chronic conditions or special needs, please consult a dietitian.
National Health Insurance and Seeking Medical Care
Taiwan’s accessible healthcare is a blessing, but it also leads many people to “get an injection or medication for the pain, then go right back to their old lifestyle” without addressing the root cause. My advice:
- Seek medical attention first, and don’t play doctor yourself, if you experience: persistent sharp deep joint pain, pain accompanied by fever or redness/swelling/heat, severe pain after trauma with inability to bear weight, pain severe enough to disrupt sleep or walking at night, or a tingling/numb sensation radiating down the leg.
- When seeing a doctor, describe clearly “what movement triggers it, where exactly the pain is, how long it’s lasted, and whether it radiates anywhere.” These descriptions are extremely valuable to physicians and physical therapists.
- If you have chronic conditions such as diabetes, hypertension, or heart disease, be sure to discuss any new exercise plan with your medical team. Exercise prescriptions need to be individualized—don’t blindly follow any online program (including this one).
A Four-Week Beginner Schedule Reference
Here’s a concrete starting framework that you can adjust to your own situation. In the table, “Mobility” refers to the first block, “Activation” the second block, and “Strength” the third block.
| Week | Monday | Wednesday | Friday | Weekend |
|---|---|---|---|---|
| Week 1 | Mobility + Activation | Mobility + Activation | Mobility + Activation | Easy ride/run + Mobility |
| Week 2 | Mobility + Activation + Strength (light) | Rest or walk | Mobility + Activation + Strength (light) | Sport-specific + Cool-down mobility |
| Week 3 | Mobility + Strength | Activation + Strength | Mobility + Strength | Sport-specific + Cool-down mobility |
| Week 4 | Mobility + Strength | Activation + Strength | Re-test the three self-assessments | Sport-specific + Cool-down mobility |
Four weeks is not the finish line, but the minimum starting point for building habits in your body. After one round, you’ll likely notice that squats feel smoother, single-leg standing feels more stable, and your hips feel less tight after riding and running. That’s the signal that the foundation is starting to solidify.
Frequently Asked Questions (FAQ)
These are the questions students ask me most often, compiled here for you in one place.
Q: Is a “clicking” sound in the hip joint a concern?
A: If it only clicks occasionally, without pain, and doesn’t affect movement, it’s most likely a tendon sliding over a bony prominence or gas bubbles within the joint—nothing to be overly worried about. But if the “click” is accompanied by pain, catching, or pain with every specific movement, it’s worth getting a professional assessment rather than judging it yourself.
Q: I’m very tight. Will aggressively stretching every day fix it?
A: No. As mentioned earlier, if you only stretch without training stability, your body will keep pulling the range of motion back. After stretching, you must follow up with strength work so your body “trusts” the new range. What works long-term is mobility plus stability, not painful stretching.
Q: Is foam rolling useful?
A: It’s fine as a way to “reduce tension and improve movement sensation” before warming up—just roll for 1–2 minutes. But foam rolling cannot replace strength training, and I don’t recommend aggressively rolling one spot until it bruises; that’s not more effective.
Q: I don’t have a gym or equipment. Can I still do this?
A: Absolutely. The vast majority of exercises in this article are bodyweight-only or only require a resistance band or a bottle of water. Hip and pelvic foundation training happens to be the category that requires the least equipment. Getting the movement pattern right with bodyweight first is far more important than rushing to add load.
Q: I’m older and have joint degeneration. Can I still train?
A: Yes, you can—and you should. Reasonable mobility and strength training are beneficial for long-term joint health. However, the degree of degeneration and whether other conditions are present varies from person to person, so intensity and exercise selection must be individualized. I recommend discussing this with your physician or physical therapist before starting.
Q: How long until I see a difference?
A: You’ll typically feel a difference in mobility within 2–3 weeks, while strength and stability usually become noticeable in 4–6 weeks. Don’t rush it—treat it as a long-term habit, not a quick-fix program.
Q: Is there a difference between hip training for women and men?
A: The principles are the same, but because women tend to have a wider pelvis and hormonal influences on ligament laxity, pelvic stability during single-leg landing (gluteus medius) deserves particular emphasis; hip drop and knee valgus are indeed more common in female runners. This isn’t a rule, just something I pay extra attention to in practice—individual assessment still takes priority.
Q: Can I do these during pregnancy or postpartum?
A: The state of the pelvic floor and core during pregnancy and postpartum is very specific, and general programs cannot be followed directly. Be sure to consult your obstetrician-gynecologist and a specialized postpartum exercise or physical therapy professional, and let them assess you and provide an individualized progressive plan.
The Long-Term Dividends of Taking Care of Your Hips and Pelvis
Finally, I’d like to zoom out a bit. Many people train their hips to solve an immediate pain, which is certainly important—but the benefits of taking care of your hips and pelvis are actually “long-term compound interest.”
First, it allows you to keep exercising for longer. People with good hip mobility and stability have a lower risk of injury and recover faster, allowing them to maintain longer, more consistent training instead of the cycle of “train for three months, hurt for one month.” The greatest benefit of exercise has never been a single burst of effort, but decades of consistent accumulation.
Second, it’s key to quality of life in old age. Whether you can squat down to pick something up, climb stairs steadily, or stabilize on one leg when you trip—these daily abilities all rest on the mobility and stability of your hips and pelvis. Every bit you bank now is buying insurance for your future self.
Third, it helps you train everything else better. Once the foundation is solid, your squats, deadlifts, climbs, and sprints will all be more efficient with less compensation. Rather than pouring all your time into sport-specific work, giving some of it to this foundation often yields a higher overall return.
This is also why I often tell my students: don’t treat hip and pelvic training as an “optional extra when you have time”—it’s actually a “required question that determines how far you can go.”
Conclusion: Take Care of the Foundation, and Your Body Will Go Far
Let’s return to A-Zhe from the beginning. Not only did his knee pain eventually disappear, but he also told me he finally understood one thing: the body is a whole, and the place that hurts isn’t necessarily the place that’s broken. If the foundation of the hips and pelvis is loose, it’s often the neighboring structures upstream and downstream that suffer.
I often tell my students that mobility and stability are like savings—you put a little in today, a little more tomorrow, and you don’t feel it day to day. But when you reach long distances and older age, those savings are exactly what determine whether you can keep enjoying exercise. Rather than waiting until it hurts to deal with it, start with 5 minutes tonight.
You don’t need to get it all done at once, and you don’t need to train to perfection. Pick one or two exercises and do them tonight. Your hips and pelvis will repay you with smoother, less painful rides and runs in the future.
This article is educational content and cannot replace individual diagnosis and treatment advice from a physician, physical therapist, or nutritionist. If you have persistent pain, chronic conditions, or a history of injury, please consult qualified medical and exercise professionals before starting any new exercise program, and rely on individualized assessment.
References
- The Role of Bike Fitting in Hip Pain Among Cyclists (Clinical Review): https://pmc.ncbi.nlm.nih.gov/articles/PMC6818133/
- WHO Guidelines on Physical Activity and Sedentary Behaviour: Summary of Recommendations: https://www.ncbi.nlm.nih.gov/books/NBK566046/
Related Reading
- Hip Joint and Pelvic Stability: How They Affect Pedaling and Running Form, with a Full Analysis of Common Imbalance Patterns
- Hip Strengthening Exercises: The Key to Preventing Injuries in Athletes
- Hip Strengthening for Runners: Unlocking the Key to Speed and Endurance
- Cycling Pedaling Biomechanics: Coordination of the Knee, Ankle, and Hip Joints
一日北高常見問題大集合 | 攻略 | 路線 | 訓練 | 補給 | 自行車 單車 | 一日雙城 | 雙塔 | TWB北高360 | 屁股痛
6 年前
單車 一日北高 ( 雙城 ) 肥宅雙人瘋狂行 紀錄片 REACTO
10 年前
風櫃嘴 | 全台最多大砲的單車路線 | 尋寶網攝影師告訴你怎麼擺拍起來才好看 | 熱門攝影地點巡禮
6 年前
大禹嶺 到 武嶺牌樓 全程前後實況錄影 | 北進武嶺 | 東進武嶺 | KOM | 訓練台 | 坡度分析 | Taiwan KOM Last 10 km HARD | 公路車
6 年前
Never Stop 西進武嶺 前後雙機 完整全程錄影 訓練台 實境
8 年前
一日北高/長距離團騎 常見問題補充篇 / 組團或跟團的眉角 / 壯車友容易被瘦車友慢性拉爆 / 原來屁股痛可能是這個原因...? / 風場配速法 / 公路車 / CT Yeh
2 年前
靠單車減肥35公斤 心得分享與整理
7 年前
西進武嶺 免費訓練分析服務 Intervals | 練不夠還是練過頭?你哪一種類型選手?AI模型告訴你! | 備戰神器 | 公路車 訓練 | CT Yeh
4 年前