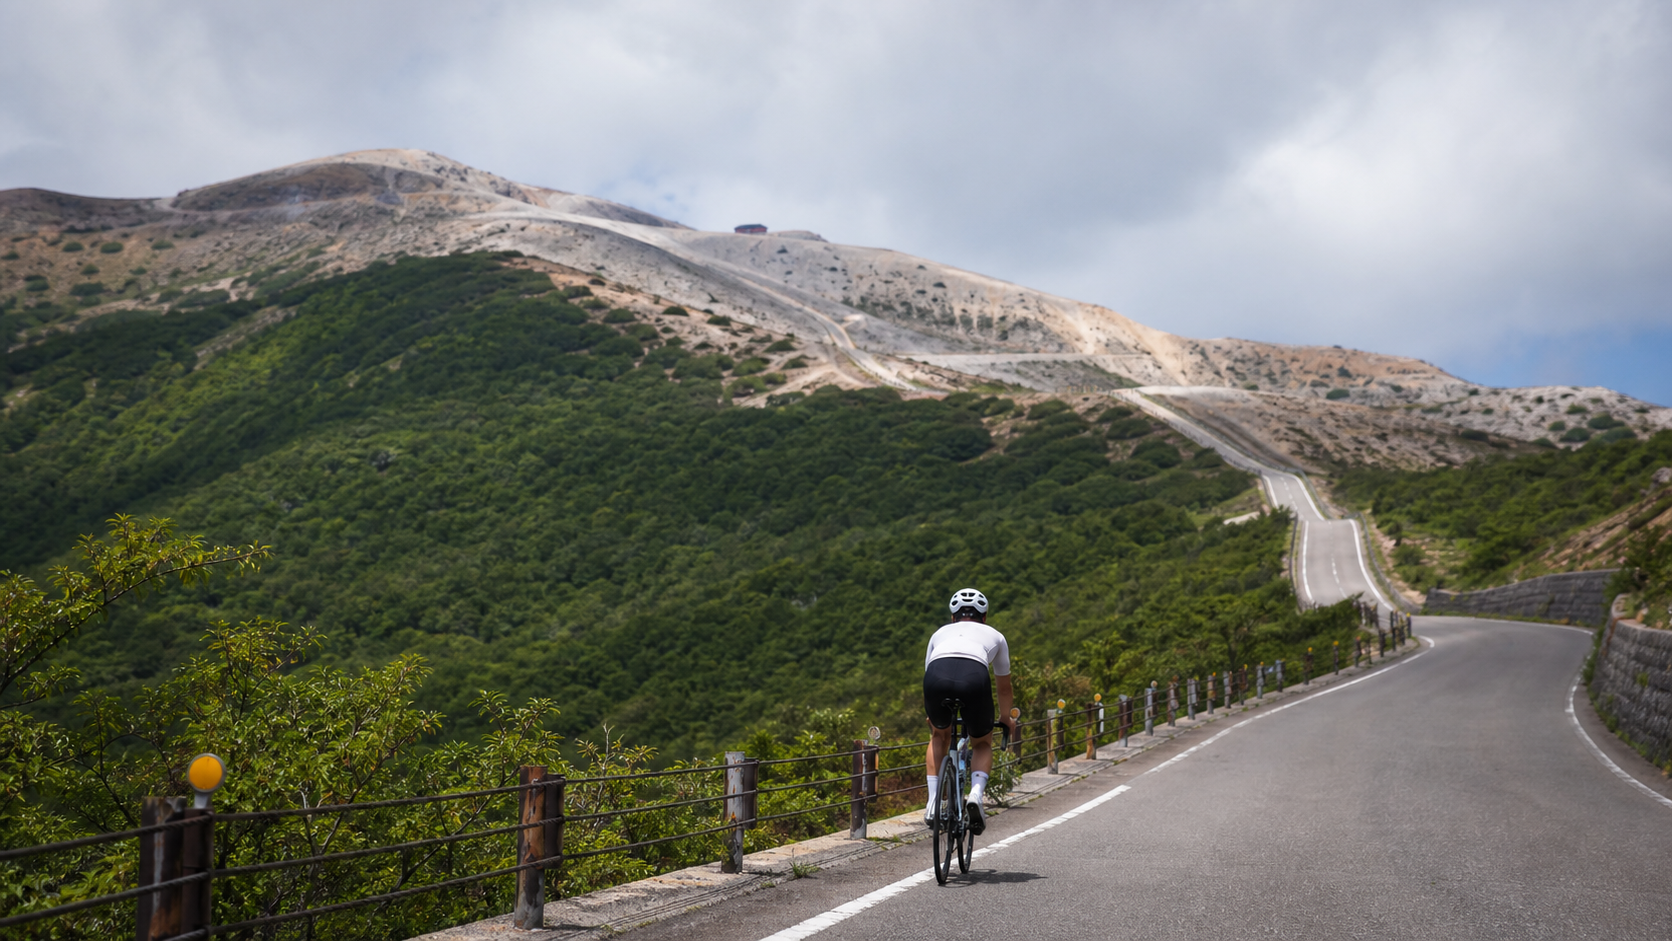
The Call of the Volcanic Road: Deconstructing the 20.5 km Climb of Nasu Highlands
If you’re tired of the brutal “steep all the way to the top” style of Taiwan’s climbs, the Nasu-Tōge no Chaya route will give you a completely different experience. It spans 20.5 km (20,536 meters) in total length, with 994.7 meters of total elevation gain and an average gradient of just 3.2%—looking at the numbers alone, you might think this is an easy scenic climb. But that average is a classic “numbers trap”: the difficulty distribution along the route is extremely uneven. The long, gentle slopes in the first half dilute the average, and the real killing happens in the steep final stretch approaching Tōge no Chaya (elevation approx. 1,462 meters).
This route follows Tochigi Prefectural Road 17, the “Nasu Highlands Line”, formerly known as the Volcano Highway (ボルケーノハイウェイ), climbing all the way to Tōge no Chaya at the trailhead of Mount Nasu (Cha-usu-dake). Transitioning from resort forests to barren volcanic landscapes, you can witness with your own eyes the tree line receding and the geological shift as the sulfur smell intensifies. This is a guide article—I’ll break down this route from an engineer’s perspective into an executable pacing plan, gear selection, fueling rhythm, and DNF risk assessment.
Remember this: Nasu-Tōge no Chaya is not a route that requires you to explode from the start; it’s a route that requires you to “make deposits.” Every bit of effort you spend in the first half will be repaid to you at usury rates in the second half.
Real Data Overview: The Story Beyond the Average
Let’s lay out the cold, hard numbers first. This Strava segment (ID 26750501) includes a fairly long, gentle approach section at the start, so the overall average is only 3.2%. But if you isolate the pure climbing section—starting from the Ikeda intersection near Nasu-Yumoto—it’s actually about 13.7 km with roughly 978 meters of climbing, and the elevation gain is concentrated in the latter half. What does this mean? It means if you ride with a “3.2% average” mindset, by the time you hit the pure climbing section of Mount Nasu, your legs will already have been drained of strength by those seemingly harmless gentle slopes earlier.
| Item | Data | Strategic Significance |
|---|---|---|
| Total Distance | 20.5 km (20,536 m) | Mid-to-long climb; requires planned fueling |
| Total Elevation Gain | 994.7 m | Close to 1,000 m of elevation difference; altitude effects become noticeable |
| Average Gradient | 3.2% | Misleading figure; difficulty distribution is highly uneven |
| Pure Climbing Section | Approx. 13.7 km / +978 m | The real battleground is in the latter half |
| Tōge no Chaya Elevation | Approx. 1,462 m | Finish point; thin air, sudden temperature drop |
| Starting Area | Nasu-Yumoto Onsen | Hot spring resort area; fueling points concentrated here |
Key Insight: Nearly all of this route’s elevation gain is packed into the second half. The gentle slopes up front are a “trap,” not a “warm-up.” True power management means deliberately holding back in the first half, preserving glycogen, and saving the best for the steep slopes in the latter half where the forest gives way to the volcanic wasteland.
Section Guide 1: Start to Nasu-Yumoto (0–5 km, Gentle Slope Warm-up Zone)
Starting from the Nasu-Shiobara direction or the lower elevations of the Nasu Highlands, the first 5 km rise gently at roughly 2–4%. This section is densely vegetated, flanked by resort villas and forest, with good road surface and smooth, sweeping curves.
Cadence Recommendations: This is the only section where you can “save money.” Stay at the lower end of your aerobic zone, keep your heart rate at 70–75% of max, and maintain a light gear with high cadence at 85–90 rpm. Many riders unconsciously speed up here because the road feels too comfortable—that’s the first common mistake. You should do the opposite: deliberately slow down and let your body settle into a steady fat-burning state.
If you’re feeling “great” in the first 5 km, you’ll likely be “miserable” in the latter half. The discipline on the gentle slopes determines how many chips you have left before that steep pitch in front of Tōge no Chaya.
Section Guide 2: Nasu-Yumoto to Sesshōseki and Kano-yu (5–9 km, Fueling and Transition)
Entering the Nasu-Yumoto hot spring area, this is the most critical fueling point on the entire route. The hot spring street is lined with shops and eateries; beyond this point, resupply options dwindle rapidly. You’ll pass the famous Sesshōseki (the site of the nine-tailed fox legend, a sulfurous wasteland with steaming vents) and the historic Kano-yu.
The gradient here begins to climb slowly to 4–5%, serving as a psychological and physiological transition zone.
Execution Points:
- Mandatory Fueling: Whether you’re thirsty or not, top up your bottles and take in a serving of energy before passing through Nasu-Yumoto. This is your last insurance before the shop-free section ahead.
- Check Your Equipment: Confirm smooth shifting and proper tire pressure. If a mechanical issue occurs on the steep slopes ahead, rescue will be difficult.
- Heart Rate Management: Still maintain the 75–80% range; it’s not yet time for full effort.
Section Guide 3: Daimaru Onsen to Tōge no Chaya (9–20.5 km, The Volcanic Steep-Slope Main Battlefield)
This is where the real race begins. Past Daimaru Onsen, the gradient starts climbing relentlessly, and the stretch approaching Tōge no Chaya is the steepest of the entire route, with localized gradients reaching 8–10% or more. At the same time, you’ll have climbed to nearly 1,400 meters of elevation, where the air is thin and your power output will naturally drop by about 5–8%—that’s the altitude effect, not you getting weaker.
The landscape undergoes a dramatic transformation here: the forest disappears, replaced by the volcanic wasteland of Mount Nasu, exposed rock, and sulfurous terrain. The views open up to a near-barren expanse, and the Nasu Ropeway station is also in this area.
Pacing Strategy:
- Shift into your easiest gear; dropping cadence to 65–75 rpm is acceptable—the focus is on maintaining power, not cadence.
- Heart rate can now be pushed to 85–90%; this is the moment to cash in on your earlier deposits.
- Use the “segment-eating method”: break the remaining distance into small targets of 1–2 km each and conquer them one by one, avoiding the psychological weight of the total remaining distance.
When the forest recedes and the sulfur smell hits your nose, you’ll know you’ve entered the heart of the volcanic road. There’s no shade, no resupply—just you and Mount Nasu. Once you’ve ridden this stretch, you’ll understand why it’s called the Volcano Highway.
Gearing and Equipment Setup: Don’t Bring Flat-Road Thinking to a Volcano
Although Nasu-Tōge no Chaya has a modest average gradient, the steep slopes in the latter half combined with the 1,000-meter altitude mean your gearing must be based on the “steepest point in the latter half,” not the average.
Recommended Gearing:
- Front Derailleur: A 50/34 compact crank is the minimum standard. If your FTP is on the lower side or you’re riding for sightseeing, consider a 46/30 sub-compact.
- Rear Derailleur: At least 11-32T; if you’re not a strong climber, an 11-34T will give you more room to maneuver on the steep slopes in the latter half.
- Cadence Logic: The key is maintaining at least 70 rpm in the latter half to avoid knee injury from low-cadence, high-torque grinding.
Other Equipment:
- Windbreaker/Vest (Essential): Tōge no Chaya sits at 1,462 meters; even in summer, temperatures at the summit can be 8–10°C lower than at the base, and combined with wind chill on the descent, riding down without insulation risks hypothermia. This is the most overlooked yet most dangerous item.
- Gloves and Glasses: The volcanic zone occasionally has blowing dust.
- Front and Rear Lights: Mountain weather is unpredictable, and visibility can drop suddenly.
Refueling and Hydration: The Back Half Is a Refueling Desert
The refueling logic on this route is simple: the first half is concentrated with refueling points, the second half is nearly a desert. The Nasu-Yumoto Onsen street is the last reliable refueling point.
Suggested Refueling Timeline:
| Mileage | Action | Notes |
|---|---|---|
| Before Departure | Fill 2 bottles + carry 2–3 energy gels | No shops in the back half |
| 5 km (Nasu-Yumoto) | Final water refill, eat one serving | Last chance before the refueling desert |
| Every 30–40 minutes | Consume 30–60 g of carbohydrates | Maintain stable blood sugar |
| Every 15–20 minutes | Take small sips of water | Higher altitude increases dehydration risk |
| At Tōge no Chaya | Immediately put on warm layers, consume recovery drink | Prepare for hypothermia protection on the descent |
Key point: At high altitude, your thirst sensation is suppressed, but the risk of dehydration is actually higher. Actively hydrate on a timer—don’t rely on thirst.
Mental Tactics: Break the Long Climb into Digestible Chunks
For the nearly 20 km of the Nasu–Tōge no Chaya climb, the biggest enemy for many isn’t their legs—it’s the mind. When you watch your computer showing over a dozen kilometers remaining while fatigue is already setting in, that psychological pressure is enough to break riders whose legs actually still have plenty left. Therefore, mental tactics are just as important as physical strategy.
I recommend the “Chunking” method. The human brain tends to feel overwhelmed when facing one massive goal, but it maintains motivation when facing a series of small ones. Here’s how to do it:
- Break the steep back half into “mini-stages” of every 1–1.5 km, focusing only on the section right in front of you, and give yourself a small mental reward upon reaching each one.
- Use landmarks along the road as milestones: “Ride to the next bend,” “Ride to that tree,” “Ride to where you can see the cable car.”
- Avoid constantly staring at your computer for the total remaining distance—that only amplifies anxiety.
Another technique is “breath anchoring”: when your willpower starts to waver, pull all your attention back to your breathing, using a steady inhale-exhale rhythm to stabilize your body and mind. This is especially effective on the oxygen-deprived high-altitude sections.
The finish of a long climb is built from countless “just a little more” moments. You don’t need to conquer 20 km at once—you only need to conquer the 100 meters in front of you, then repeat.
Weather and Seasons: The Unpredictability of the Volcanic Highlands
The weather on Nasu Highlands is notorious for being “changeable.” May through October is the main riding season, with early summer (May–June) and early autumn (September–October) offering the most ideal temperatures and visibility.
- Summer (July–August): Hot at the base, but cool at Tōge no Chaya—a great choice for escaping the heat. Watch out for afternoon thunderstorms.
- Autumn (mid-to-late October): The autumn foliage of Nasu Highlands is a famous sight—volcanic wasteland paired with crimson maples is spectacular—but it also marks the beginning of sudden temperature drops.
- Winter: The section of Prefectural Route 17 toward Mount Nasu may be closed due to snow. Winter attempts are not recommended.
- General rule: The temperature difference between the summit and the base is extreme, and weather changes rapidly. Always check the day’s mountain forecast before departing; fog and strong winds significantly increase risk.
Common Mistakes and DNF Risks
Thinking like an engineer debugging a system, here are the mistakes most likely to cause failure (DNF) or injury:
- Losing pace control in the first half: Misled by the comfort of the gentle slopes, you push too hard in the first 9 km and blow up on the steep back half. This is the most common cause of DNF.
- Gearing too heavy: Assuming an average of 3.2% doesn’t require easy gears, only to be hit by the double whammy of 8–10% gradients plus altitude on the back half, resulting in knee injury or being forced to walk.
- Ignoring warm layers: Wearing short sleeves at the summit and getting chilled on the descent impairs judgment and bike handling, increasing the risk of a crash.
- Miscalculating refueling: Assuming there are shops further up the mountain, only to realize after Nasu-Yumoto that you’ve entered a refueling desert, leading to dehydration and bonking in the back half.
- Underestimating the weather: Mountain weather changes on a dime, and descending in fog offers extremely poor visibility.
On this route, DNFs are nine times out of ten not caused by a lack of leg power, but by failures in pacing discipline and refueling planning. This is a route that tests “strategy” more than “horsepower.”
Target Times for Different Rider Levels
The following target times are based on the full 20.5 km with nearly 1,000 meters of climbing, for reference only. Actual times are affected by weather, wind direction, body weight, and altitude acclimatization:
| Rider Level | Target Time | Average Pace | Notes |
|---|---|---|---|
| Advanced Competitive (FTP > 4.5 W/kg) | 60–75 minutes | Higher intensity | Can still hold power on the back half |
| Intermediate Steady (FTP 3.0–4.0 W/kg) | 80–100 minutes | Steady aerobic | Focus on pacing distribution |
| Sightseeing Challenger (first long climb) | 110–140 minutes | Finish-oriented | Goal is to complete without walking |
Advice for sightseeing challengers: Don’t race the clock. Set your goal as completing the entire route “without dismounting, without walking.” Use your easiest gear and your steadiest heart rate, and treat the volcanic scenery at Tōge no Chaya as the reward—not your bike computer as the enemy.
Power Allocation Model: Budget Your Effort Like Money
When engineers approach a problem, they use a “resource allocation” framework. Climbing is the same—your energy for the day is a fixed budget, and the essence of tackling the route is “how to spend that money in the right places.” For power allocation on Nasu–Tōge no Chaya, I recommend a counterintuitive strategy of “tight in the front, expansive in the back.”
Assuming your Functional Threshold Power (FTP) is 100%, here’s how I’d plan target intensity for each section:
| Segment | Mileage | Target Intensity (relative to FTP) | Logic |
|---|---|---|---|
| Forest gentle slopes | 0–5 km | 65–72% | Deliberately suppressed, accumulating fat-burning |
| Onsen transition | 5–9 km | 72–80% | Gradually ramping up, refueling and eating |
| Volcanic steep slopes | 9–20.5 km | 82–92% | Cashing in the front-half savings, full output |
The key to this model is that the “wasteful feeling” in the front half is by design. Many riders’ instinct is “ride faster while the legs are fresh,” but the gradient distribution of Nasu–Tōge no Chaya dictates that this is the wrong strategy—every extra watt you spend on the 3% gentle slopes in the front is borrowing from the principal you’ll need on the 10% steep slopes in the back. The truly skilled riders are those who can resist accelerating in the front half.
How to execute in practice: If you have a power meter, control your watts directly according to the table above; if not, use heart rate and the “talk test”—in the front half you should still be able to speak full sentences easily, and only when you enter the volcanic steep section should you allow yourself to be so breathless that you can only manage single words.
Treat your energy as a budget and the route as a ledger. Nasu–Tōge no Chaya punishes spendthrifts and rewards actuaries.
Body Weight, Wind Direction, and Road Surface: Three Overlooked Variables
Beyond power and gearing, three other variables will materially affect your performance and experience, yet are often overlooked:
Body weight (W/kg is king): Climbing is fundamentally about fighting gravity, and what determines climbing speed is not absolute power, but the power-to-weight ratio (W/kg). With the same 250-watt output, a 60 kg rider will climb noticeably faster than a 75 kg rider. This is also why shedding excess gear weight before the ride—even streamlining the number of bottles (provided refueling is sufficient)—makes sense. However, on this route where the back half is a refueling desert, water always takes priority over weight savings.
Wind direction: The Nasu Highlands are open terrain, and especially on the volcanic wasteland section there is almost no shelter, amplifying the wind’s impact. Against a headwind, you may need to drop to an easier gear and lower your profile to reduce drag; a tailwind is a gift from heaven. Checking the day’s wind direction before departure will help you prepare mentally.
Road surface: Prefectural Route 17 is generally in good condition overall, but the volcanic area occasionally has fine sand or loose rocks—stay alert when cornering and descending. After rain, wet roads combined with volcanic sand will noticeably reduce grip.
Quantifying the Altitude Effect: Why You Get “Weaker” at the Summit
Many riders feel a sense of frustration on the steep section before Tōge no Chaya: you were cruising comfortably just moments ago, so why does every pedal stroke feel like a struggle by the latter part? Beyond glycogen depletion and the increasing gradient, the altitude effect is a severely underestimated variable. Tōge no Chaya sits at approximately 1,462 meters—not yet at the threshold for altitude sickness, but its impact on aerobic output is already clearly measurable.
From a physiological standpoint, for every roughly 300 meters of elevation gain, atmospheric oxygen partial pressure drops, and maximal oxygen uptake (VO2max) along with sustainable power output decline accordingly. At around 1,400 meters, an unacclimatized rider can expect aerobic power to drop by approximately 5–8%. This means the wattage you can sustain steadily on flat ground may need to be discounted before you can keep turning the pedals on the steep slopes before Tōge no Chaya.
How to manage the altitude effect:
- Manage expectations mentally: Accept that “I will naturally be slower here” from the start, avoiding the anxiety caused by dropping power numbers, which can further disrupt your breathing rhythm.
- Breathing rhythm: Deliberately deepen your breaths and lengthen your exhalations to improve the efficiency of each exchange.
- Don’t chase wattage: Shift your goal from “maintaining power” to “maintaining forward motion.” Use your easiest gear to spin a steady cadence, relying on willpower rather than brute force to crest the final climb.
Getting weaker at the summit isn’t your fault—it’s the laws of physics. Smart riders factor the altitude effect into their pacing plan rather than letting it catch them off guard in the final stretch.
Descending Risk Management: The Real Danger Is Often on the Return
Most people focus all their attention on the climb, overlooking the fact that the descent on the Nasu–Tōge no Chaya route is the true high-risk zone. Plunging from 1,462 meters back down to Nasu-Yumoto, you’ll contend with low temperatures, wind chill, changeable weather, and possible volcanic dust in the area.
Descent safety checklist:
| Risk Item | Countermeasure |
|---|---|
| Hypothermia | Put on a windbreaker/vest immediately at the summit; wear full-finger gloves |
| Stiff hands | Periodically relax your fingers one at a time to avoid delayed brake response from prolonged gripping |
| Tire grip | Volcanic roads may have fine sand; slow down before corners and avoid hard braking on painted lines |
| Sudden visibility loss | If fog rolls in, reduce speed and turn on your rear light—better slow than reckless |
| Brake overheating | Use “intermittent pulsing” rather than continuous dragging on long descents to avoid overheating rotors or rims |
Core concept: Getting up takes fitness; getting down safely takes judgment. Many riders’ injuries don’t happen on the painful climb but on the descent when they let their guard down. Treat the descent as an equally important half of the entire ride.
Training Advice: How to Prepare for This Route
If you want to challenge Nasu–Tōge no Chaya in peak condition, your pre-ride training should target the route’s specific characteristics—long-duration aerobic endurance + preserved explosive power for the final stretch.
Recommended training directions:
- Long aerobic rides (Zone 2): Schedule one 2–3 hour ride per week to build fat-burning capacity—this is the physiological foundation for the “conservative” strategy on the early gentle slopes.
- Climbing practice under fatigue: Simulate the route profile by riding a substantial distance first, then—with legs already tired—perform 20–30 minutes of climbing intervals to train your body to still produce output when glycogen is running low.
- Cadence adaptation: Practice maintaining 65–75 rpm at low speed with high torque to strengthen climbing-specific muscle power and knee joint stability.
- Altitude acclimatization if possible: If you can do one or two rides at moderate altitude before the challenge, your body’s adaptation to hypoxic conditions will noticeably benefit your performance in the final section.
This route rewards riders who “come prepared.” Its difficulty lies not in any single explosive segment, but in overall endurance distribution and the willpower required at the end—abilities that can absolutely be built through training.
Frequently Asked Questions Q&A
Here are the answers to the most common questions challengers ask, all in one place:
Q: With an average gradient of only 3.2%, isn’t this an easy scenic route?
A: This is the most dangerous misconception. The 3.2% average is diluted by the long, gentle early slopes; the steep section near Tōge no Chaya reaches 8–10% or more, and combined with nearly 1,000 meters of altitude effect, the actual difficulty far exceeds what the numbers suggest. Setting out with a tourist mindset but blowing up with a racer’s effort is the most common script on this route.
Q: Can beginners take on this challenge?
A: Yes, but with the right mindset and preparation. Set your goal as “finishing without putting a foot down” rather than chasing a time. Equip a low gear ratio (46/30, or at least 50/34 with an 11-34T cassette), bring ample supplies and warm layers, and control your early pacing—beginners can absolutely enjoy this route.
Q: Is a power meter essential?
A: Not required, but helpful. Without one, use heart rate and the “talk test” to manage intensity—full sentences on the early slopes, and allow yourself to be reduced to single words by the end. The key is holding back in the first half.
Q: Road bike or mountain bike?
A: Prefectural Route 17 is in good condition; a road bike is fully capable and more efficient. The key is having a light enough gear ratio to handle the steep final section.
Q: How early should I start?
A: Mountain weather tends to change in the afternoon, so an early morning start is recommended. Allow ample time to avoid descending in the dark or in afternoon thunderstorms.
Pre-Ride Checklist (Departure Day)
Check off each item before you leave to avoid major problems from minor oversights:
- [ ] Tire pressure normal, no debris, no cuts on the tread
- [ ] Front and rear shifting smooth; confirm the easiest gear is usable
- [ ] Brakes (disc/rim) functioning properly; brake pads/shoes have sufficient material
- [ ] Both bottles filled; sufficient energy supplies packed
- [ ] Windbreaker/vest and full-finger gloves stowed in the saddle bag
- [ ] Front and rear lights fully charged
- [ ] Phone charged; today’s Nasu mountain weather and wind direction checked
- [ ] Puncture repair tools, spare tube/patch kit, pump/CO2 all ready
Quick Data Reference Table: Final Confirmation Before Departure
Save this table to your phone and review it before heading out:
| Aspect | Key Figure/Point |
|---|---|
| Distance | 20.5 km |
| Elevation gain | Approx. 995 m |
| Average gradient | 3.2% (steepest final section 8–10%+) |
| Summit elevation | Approx. 1,462 m (Tōge no Chaya) |
| Recommended gearing | 50/34 or 46/30 chainring + 11-32/34T cassette |
| Resupply point | Nasu-Yumoto (last reliable resupply) |
| Essential gear | Windbreaker/vest, full-finger gloves, front and rear lights |
| Best season | May–June for fresh greenery, September–October for autumn foliage |
| Summit temperature difference | Approx. 8–10°C cooler than the base |
Conclusion: A Climb That Tells a Story
The allure of Nasu–Tōge no Chaya lies in how the landscape itself narrates the escalating difficulty. You depart from a lush resort forest and, as elevation rises, step by step enter the volcanic wilderness of Mount Nasu. This transition from verdant to barren makes that final steep pitch more than just a physical test—it feels like a rite of passage.
From an engineer’s perspective, here’s the strategic core of this route: deliberately hold back on the early gentle slopes to conserve glycogen, force a resupply at Nasu-Yumoto, lower your power expectations on the final steep section to account for the altitude effect, and layer up immediately at the summit before descending cautiously. Get these four critical elements right, and you’ve mastered eighty percent of what it takes to succeed on this route.
Arm yourself with data, manage your pace with discipline, and protect yourself with warm layers—this route will reward you with one of the Kanto region’s finest volcanic climbs. When you stand at Tōge no Chaya and look back at the winding Volcano Highway below, you’ll understand: every single pedal stroke of those 20.5 kilometers was worth it.
Related Reading
- The Volcanic Road of a Thousand-Year-Old Hot Spring: Nasu–Tōge no Chaya’s Onsen, Legends, and Wilderness Riding
- Yabitsu Pass (Yabitsu) Practical Guide: Segment Pacing and Gear Ratio Breakdown for 11.5 km with 642 m of Climbing
- Mount Rokko Driveway Complete Guide: Segment Pacing, Gear Ratios, and Steep Wall Strategy for 4.7 km at 8.8% Average Gradient
- Hakone Pass (Route 1) Practical Guide: Segment Pacing and Gear Ratio Breakdown for 15.6 km with 846 m of Climbing
台北闊瀨陡坡 騎旅 / 日本單車雜誌編輯車友臨時加入!/ 髮香才是最強的 / feat. 北迴歸線小隊 / 公路車 CT Yeh
6 個月前
阿里山塔塔加 兩倍特濃版!全新隧道開通! 進喔!公路車 | CT Yeh
3 年前
大武山20%魔王陡坡【JJSC南台灣遊騎Day2】!屁股真的要裂開了...凡士林抹滿也沒用?神秘金教堂還有超便宜夜市
3 個月前
那瑪夏x茶山 阿里山系深山單車行 Day2 累積爬升6000M | 🥶超陡連續下坡 整路看隊友刷 | 爬升一座西進武嶺 | JJSC | 公路車 | CT Yeh
3 年前
大武山後門26%歡樂陡坡!JJSC南台灣單車行Day2 / 被颱風追著跑 / 公路車 / CT Yeh
2 年前
半日 小台灣 極限單車路線挑戰實錄
7 年前
西進武嶺 8000名單車友數據分析 PART1 | 從新手到高手數量/瓦數/推力比/FTP推力比/功率計使用率 大解析 | 公路車 | CTYeh
5 年前
萬年峽谷! 30% 超激陡坡 里佳部落DAY2 還是很硬! | 公路車 | CT Yeh
3 年前