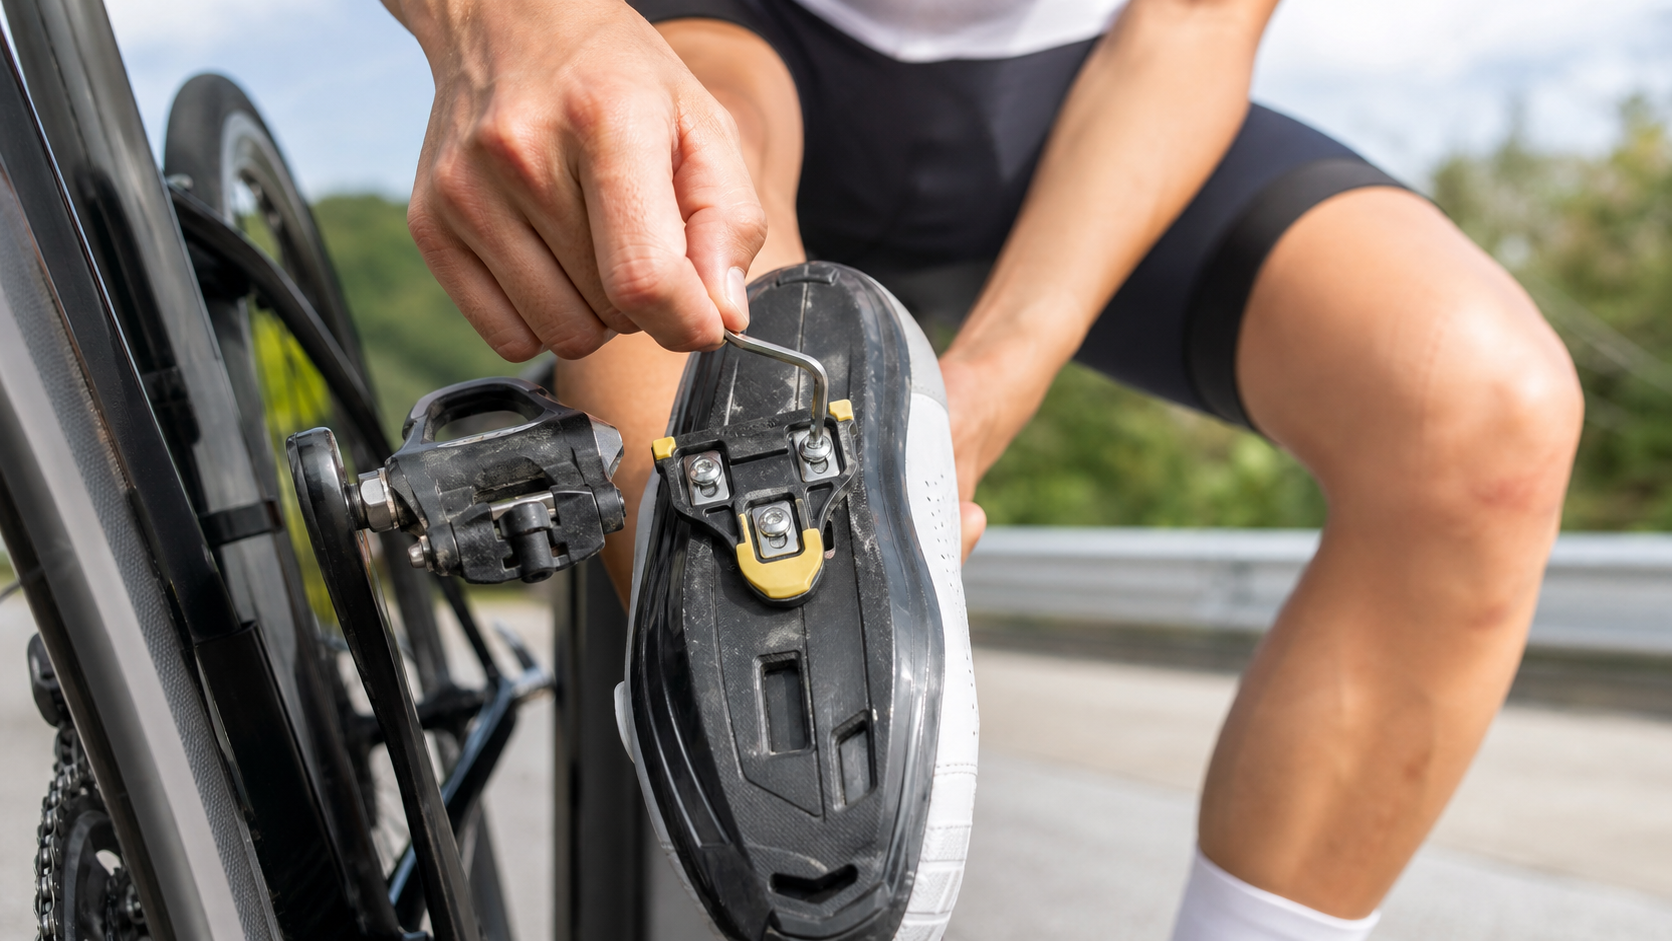
Cleat Position Adjustment: Fore-Aft, Medial-Lateral, and Rotational Angle Solutions for Pain
Introduction
The metal or plastic cleat on the bottom of a cycling shoe is the only interface connecting the rider to the pedal. With every pedal stroke, force travels from the sole of the foot through the cleat to the pedal, and the cleat’s position determines the direction of that force. A 3mm positional offset may seem trivial, but accumulated over more than 5,000 pedal strokes per hour, it is enough to turn mild knee discomfort into an acute injury requiring weeks of recovery.
The Three Adjustment Axes of a Cycling Cleat
Axis One: Fore-Aft Position
The fore-aft position of the cleat determines where the pedal spindle contacts the foot relative to the metatarsal head (the bony prominence just behind the “web” of the toes).
Golden rule: the pedal spindle should align with the center line of the first through fifth metatarsal heads.
How to do it:
- Put on your cycling shoes and use an oil-based marker to mark the location of the first metatarsal head bump on the side of the shoe
- Align that mark with the pedal spindle
- Adjust the cleat’s fore-aft position until the two line up
| Cleat Position | Effect | Common Symptoms |
|---|---|---|
| Too far forward (toe side) | Excessive load on the gastrocnemius (back of the calf) | Calf cramping, Achilles tendinitis |
| Standard (metatarsal head) | Most efficient force transfer | No symptoms |
| Too far back (heel side) | Excessive ankle dorsiflexion | Achilles tendon discomfort |
Axis Two: Medial-Lateral Position
The medial-lateral position of the cleat affects the degree of knee valgus or varus during pedaling.
- Cleat shifted medially (toward the heel): knee shifts outward (knee valgus), increasing the risk of iliotibial band friction syndrome
- Cleat shifted laterally (toward the toe): knee shifts inward (knee varus), increasing the risk of pes anserine tendinitis
How to check: have someone observe your knee tracking from behind while you pedal — it should move in a straight vertical line without drifting left or right.
Axis Three: Rotational Float
Rotational angle is the most complex and most individualized adjustment. People naturally have a “toe-out” or “toe-in” gait tendency, and the cleat’s rotational angle should match this natural gait pattern.
Most clipless pedal systems offer a certain range of “float”:
- Shimano SPD-SL: red cleat 0°, yellow cleat 6°, blue cleat 2°
- Look Keo: black cleat 0°, grey cleat 4.5°, red cleat 9°
- Speedplay: infinitely adjustable from 0–15°
Recommendation: beginners should start with the maximum float (e.g. Shimano yellow cleats), allowing the knee more freedom to find its own natural angle, then fine-tune as needed.
Pain-to-Adjustment Reference Table
| Pain Location | Possible Cause | Adjustment Direction |
|---|---|---|
| Lateral knee (IT band) | Cleat shifted medially / excessive toe-out rotation | Move cleat outward / reduce external rotation |
| Medial knee (pes anserine) | Cleat shifted laterally / excessive toe-in rotation | Move cleat inward / reduce internal rotation |
| Posterior knee | Saddle too high + cleat too far back | Lower saddle + move cleat forward |
| Achilles tendon | Cleat too far back, excessive ankle dorsiflexion | Move cleat forward |
| Numbness on outer foot | Cleat shifted laterally, compressing the superficial peroneal nerve | Move cleat inward |
| Pain under the first metatarsal head | Cleat too far forward, excessive pressure on the metatarsal head | Move cleat backward |
Advanced Tools: Insoles and Wedges
For some riders, foot arch structure (such as flat feet or high arches) or the natural deviation angle of the ankle cannot be fully corrected through cleat adjustment alone. In these cases, consider:
- Custom cycling insoles: provide personalized arch support and reduce torsional movement of the foot inside the shoe
- Shims/Wedges: placed between the cleat and the sole to compensate for leg length discrepancy or knee valgus/varus
- Dynamic fit assessment: a fitter uses video analysis to track ankle and knee motion and determine which type of correction is needed
Notes for Self-Adjustment
- Adjust only one axis at a time — do not change the fore-aft position and rotation simultaneously
- Record your settings after each adjustment (photograph or measure) so you can restore them if needed
- Use a torque wrench to tighten the screws: cleat screws should generally be torqued to about 4–5 Nm — too loose and the cleat will slip, too tight and it may damage the sole
- Ride at least 3–4 times on a new setting (roughly 100–150km total) before evaluating the result
Conclusion
Cleat position is one of the most nuanced and patience-demanding adjustments in a bike fit. Because it involves three independent axes and individual gait differences, it’s best to start with maximum float cleats and gradually narrow the float range, using the pain reference table above for initial diagnosis. If symptoms persist after self-adjustment, a full dynamic fit assessment can typically identify the root cause within an hour.
Related Reading
#公路車 #Fitting 靠人工智慧APP 幫你調整單車
6 年前
Nepest NOVA 碳條輪組:輕量、空力、舒適一次滿足!/ 公路車 / CT Yeh
7 個月前
碟煞公路車 銑面器 !? 原來銑完差這麼多! 降低蹭碟機率! | TIME 公路車 保養小記錄 | CT Yeh
3 年前
超開放的自行車錶!可以玩遊戲裝APP!?/ SRAM合併的 Hammerhead Karoo深入開箱!/ 即時爬坡偵測 / 全球導航地圖 / Garmin Bryton / CT Yeh
1 年前
Insta 360 One 超級防手震技術實測
7 年前
再一組! 全碳幅條 碟煞/無內胎輪組 開箱! 到底好騎嗎? UNAAS X40 | 公路車 | CT Yeh
4 年前
靠單車減肥35公斤 心得分享與整理
7 年前
摔車後補裝備: 好市多新款單車安全帽& Specialized Romin 北高整路屁股都不痛的坐墊 | 一千元居然有MIPS | CT Yeh | 公路車
4 年前