Gravel Repair Techniques: A Practical Guide to Changing Inner Tubes and Fixing Broken Chains in the Wild
Gravel Repair Skills: A Practical Guide to Changing Inner Tubes and Fixing Broken Chains in the Wild
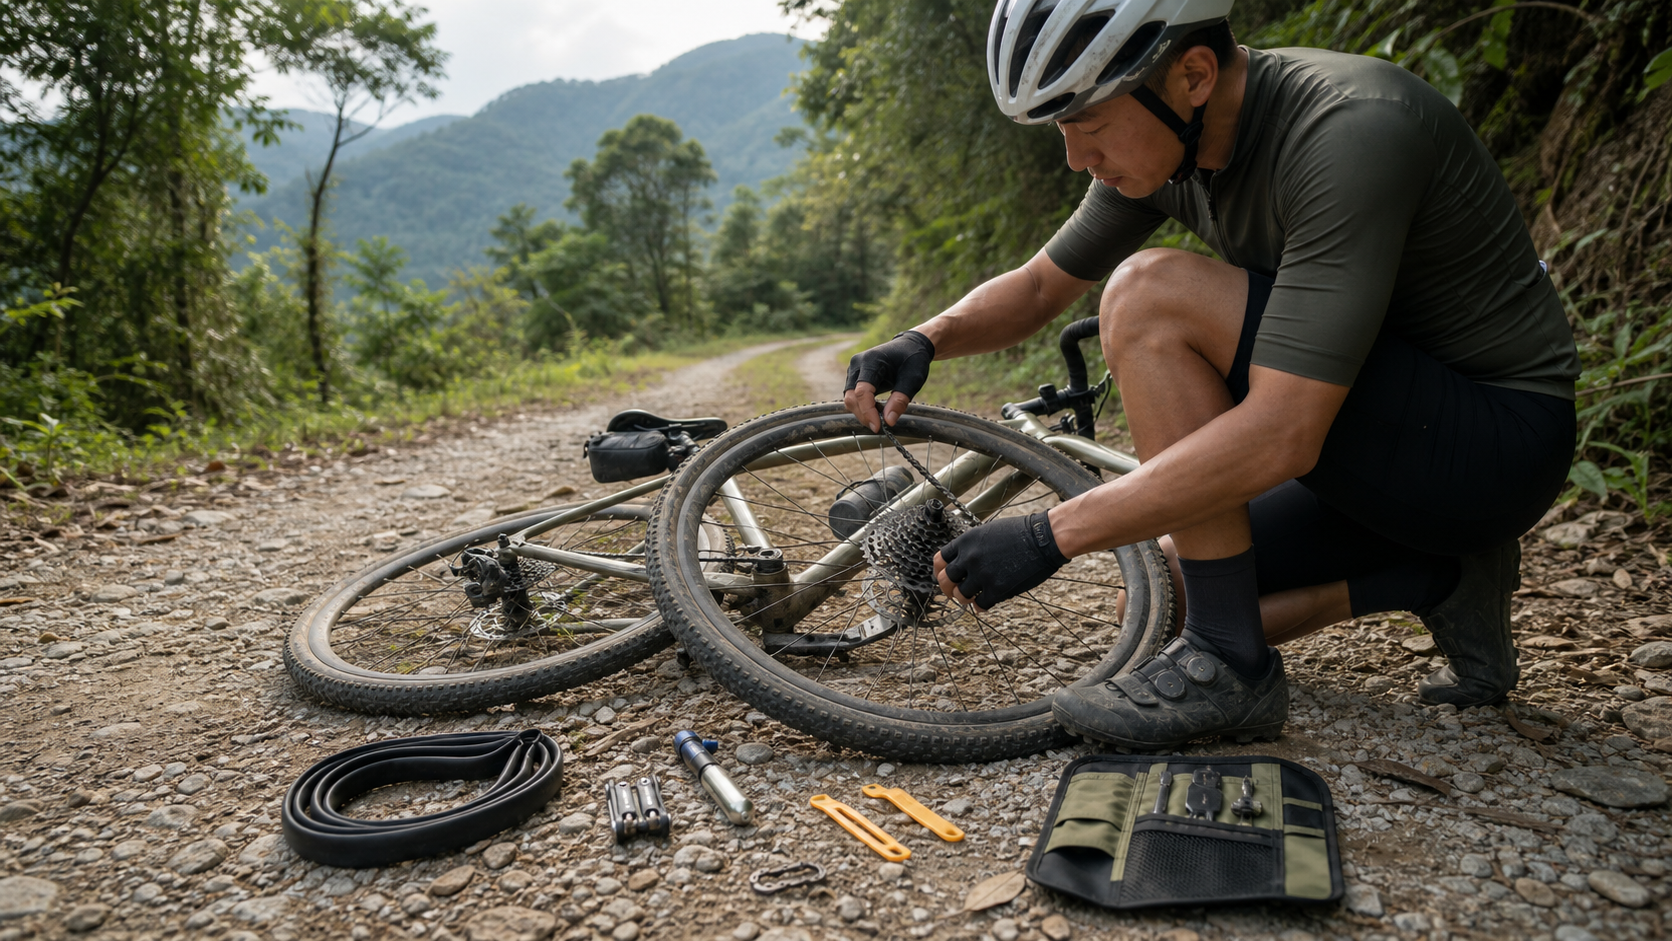
Almost every Gravel rider who has ridden the gravel routes in Taiwan’s mountainous regions has experienced a flat tire deep in the mountains. It’s a unique feeling: silence all around, no phone signal, and no idea how far the nearest person is. At that moment, the spare tube and tool bag in your pocket are your only lifeline.
Field repair skills are not advanced knowledge, but they require repeated practice at home to be completed quickly in an emergency. This article provides two of the most critical field repair procedures: changing an inner tube and rejoining a chain. Each step is as specific as possible so you can follow along directly.
The Essential Field Repair Tool Kit
Before every long Gravel ride, confirm the following tools are on your bike:
| Tool | Purpose | Weight |
|---|---|---|
| Spare tube (1–2) | Replace a punctured inner tube | 80–120g each |
| Tire levers (2–3) | Remove the tire | 10–20g each |
| Hand pump or CO₂ cartridge | Inflate | 80–150g |
| Quick-link chain connector (1–2) | Rejoin a broken chain | 5g |
| Chain tool | Cut a damaged chain | 30–50g |
| Multi-tool (Allen keys 3–6mm) | Adjust various bolts | 80–120g |
| Sealant (for tubeless) | Repair small punctures on tubeless tires | Carry a 50ml refill |
| Plastic bags (2) | Wrap dirty tools, protect from rain | Very light |
Important reminder: Personally verify that the above tools are in your bag before departure. Don’t rely on the assumption that “they weren’t used last time, so they should still be there.”
Procedure 1: Changing an Inner Tube in the Wild
A complete inner tube change should take 8–12 minutes once you’re proficient. The following procedure assumes you’re using a tubed system; tubeless handling is explained separately below.
Step 1: Find a suitable location
Choose a spot with relatively flat ground and some shade (to avoid working under the midday sun). If you get a flat on a slope, coast to the shoulder before stopping. Lay the bike on its side (derailleur facing up to avoid damage) or lean it against something.
Step 2: Release tire pressure
Open the valve cap and fully release any remaining air. Confirm the tire is completely deflated before proceeding to the next step.
Step 3: Remove the wheel
- Quick-release system: Open the quick-release lever; if you need to pull the wheel outward, slightly spread the disc brake caliper (you can gently pry it with a tire lever)
- Thru-axle system: Loosen the thru-axle with an Allen key (usually 5mm or 6mm), fully remove the thru-axle, then take off the wheel
Step 4: Remove the tire from the rim
Use tire levers to pry one side of the tire bead off the rim:
- Insert the first lever at the position opposite the valve (180°), and pry the bead outward
- Insert the second lever about 15–20cm to the right of the first lever, prying the bead out the same way
- Slide the second lever along the circumference, gradually working the entire bead off
- Remove the inner tube starting from the valve
Common issue: If the tire is too tight, use your thumbs to push the bead toward the center of the rim (the deepest part of the channel) along the circumference. Once enough slack has accumulated, use the levers to pry it off.
Step 5: Find the cause of the puncture
This step is very important. Many people skip it and get the new tube punctured by the same nail.
- Carefully run your fingers along the inside of the tire (rotating slowly, checking section by section) to feel for any lodged debris
- At the same time, visually inspect the outside of the tread to find the puncture point
- If you find a nail or glass shard, remove it with your fingers (carefully) or with the multi-tool
Step 6: Install the new inner tube
- Put a small amount of air in the new tube first (to give it shape and prevent it from being pinched during installation)
- Starting at the valve, tuck the inner tube inside the tire
- Confirm the tube is not twisted inside the tire
- Starting from both sides of the valve, use your hands (not tire levers) to push the tire bead back onto the rim
- The last few centimeters are usually the tightest; use both thumbs to press from both sides toward the final unseated point
Warning: Do not use tire levers to push the bead back onto the rim—it’s very easy to pinch the tube and create a new puncture.
Step 7: Inflate and reinstall the wheel
Inflate to 70–80% of normal pressure (field inflation may be insufficient), and confirm the tire bead is seated evenly on the rim (check the bead seating line near the rim edge). Reinstall the wheel, confirm the disc rotor is correctly positioned in the caliper, and tighten the quick-release or thru-axle.
Field Response for Tubeless Systems
Tubeless systems have a different field repair procedure:
Small puncture (under 3mm diameter):
Sealant usually seals it automatically. If the sealant hasn’t coagulated on its own, spin the wheel to let the sealant flow to the puncture point, wait 1–2 minutes, then inflate.
Larger puncture (3–6mm):
Use a tire plug to insert into the puncture hole. A tire plug tool typically consists of an insertion needle with a rubber strip: thread the rubber strip through the needle, push the needle into the puncture hole, and when you pull the needle out, the rubber strip remains in the hole to seal it. Then inflate and confirm there’s no further air loss.
Severe sidewall cut:
If there’s a large cut on the sidewall, neither sealant nor tire plugs can repair it. You’ll need to take a spare inner tube from your bag, remove the valve core, and install it on the tubeless rim (following the tubed procedure).
Procedure 2: Fixing a Broken Chain in the Wild
Chain breakage happens more frequently on gravel roads than on pavement because pedaling on gravel is often more irregular, and shifting timing tends to be less precise.
Step 1: Locate the break
Remove the chain from the drivetrain (if it’s still attached) and find the break point. Usually, the outer plates of the link at the break will show obvious deformation.
Step 2: Remove the damaged link
Using a chain tool:
- Place the damaged link into the slot of the chain tool
- Turn the screw to push out the chain pin
- Remove the damaged link (you may need to remove 2–4 links to fully clear the damaged section)
Note: Modern 11-speed/12-speed chain links are more precise. When breaking the chain, don’t push the pin all the way out—leave it barely touching on the other side to make realignment easier.
Step 3: Install a quick-link connector
Quick-link connectors (Magic Link / Power Link) are the most convenient tool for rejoining a chain in the field:
- Thread each half of the quick link through the openings of the chain ends
- Insert the pins on both ends into the corresponding holes
- Pull the two ends of the chain tight so the quick link pins lock under tension
Chain speed compatibility with quick links: Confirm that the speed rating of the quick link matches your chain (10-speed, 11-speed, and 12-speed are not interchangeable).
After rejoining the chain:
- Once connected, rotate the wheels a few times to confirm the chain runs smoothly without catching
- A field chain repair is a temporary fix; replace the chain with a new one once you’re home
- The chain will be shorter after the repair, so you may need to avoid certain large/large gear combinations
Build the Habit of Practicing at Home
The biggest obstacle to field repair isn’t technical difficulty—it’s the panic of encountering a problem for the first time. The best way to prepare is:
- Practice changing a tube at home on a discarded tire, timing yourself to see if you can finish within 12 minutes
- Find an old chain and practice breaking and rejoining links until the motions become second nature
Conclusion
Field repair capability is a symbol of a Gravel rider’s self-sufficiency. Being able to independently solve mechanical problems in remote mountain areas lets you dare to explore farther routes without worrying that a small breakdown will end the entire trip. This confidence and ability are among the most worthwhile skills for anyone who takes Gravel riding seriously.
Related Reading
- MTB Repair Basics: A Complete Guide to Changing Inner Tubes and Chains
- Handling Mechanical Issues on Long Rides: Emergency Fixes for Flat Tires, Broken Chains, and Loose Bolts in the Field
- Handling Mechanical Issues on a Round-Island Tour: Self-Rescue Steps for Flat Tires and Broken Chains in the Wild
- Emergency Bicycle Mechanical Fixes: On-the-Spot Handling of Flat Tires and Broken Chains While Riding
#北橫 + #北進武嶺 最硬的員工旅遊 EP1 | #公路車 #拉拉山 | 明池 | 武嶺 | 武陵農場 | 雲海 | Taiwan Cycling Route Wulin
6 年前
Canyon 公路車斷把手 五年老車特規還能修嗎? 維修保養全記錄 feat. 501單車監理站 | 公路車 | CT Yeh
4 年前
FTL 與 SYB 車隊專訪 西進武嶺 實用攻略分享! 2小時 如何練?!你不知道的眉角!新手準備武嶺必看 EP1 | 實力派女車友 | 精華版 | 公路車 | CTYeh
4 年前
空拍機 炸機 卡樹 救援隊出動! DJI Mavic Pro #空拍機
6 年前
CT趣訪 西進武嶺 2小時組 EP2 全村的希望 蔣緯緯! 訓練菜單&技巧公開 |公路車 |CT Yeh
4 年前
#公路車 #西進武嶺 配速配瓦實驗 坡度分析 四小時內攻略 建大盃 NeverStop #西進武嶺攻略
6 年前
單車 一日北高 ( 雙城 ) 肥宅雙人瘋狂行 紀錄片 REACTO
10 年前
洗單車神器 吹水機! 實際洗車用用看 暴力洗鍊條大法 | 公路車 | CT Yeh
4 年前