Fueling Isn't Just About Stuffing Pockets: A Complete Guide to Athletes' Portioning, Carrying, and Race-Day Packing
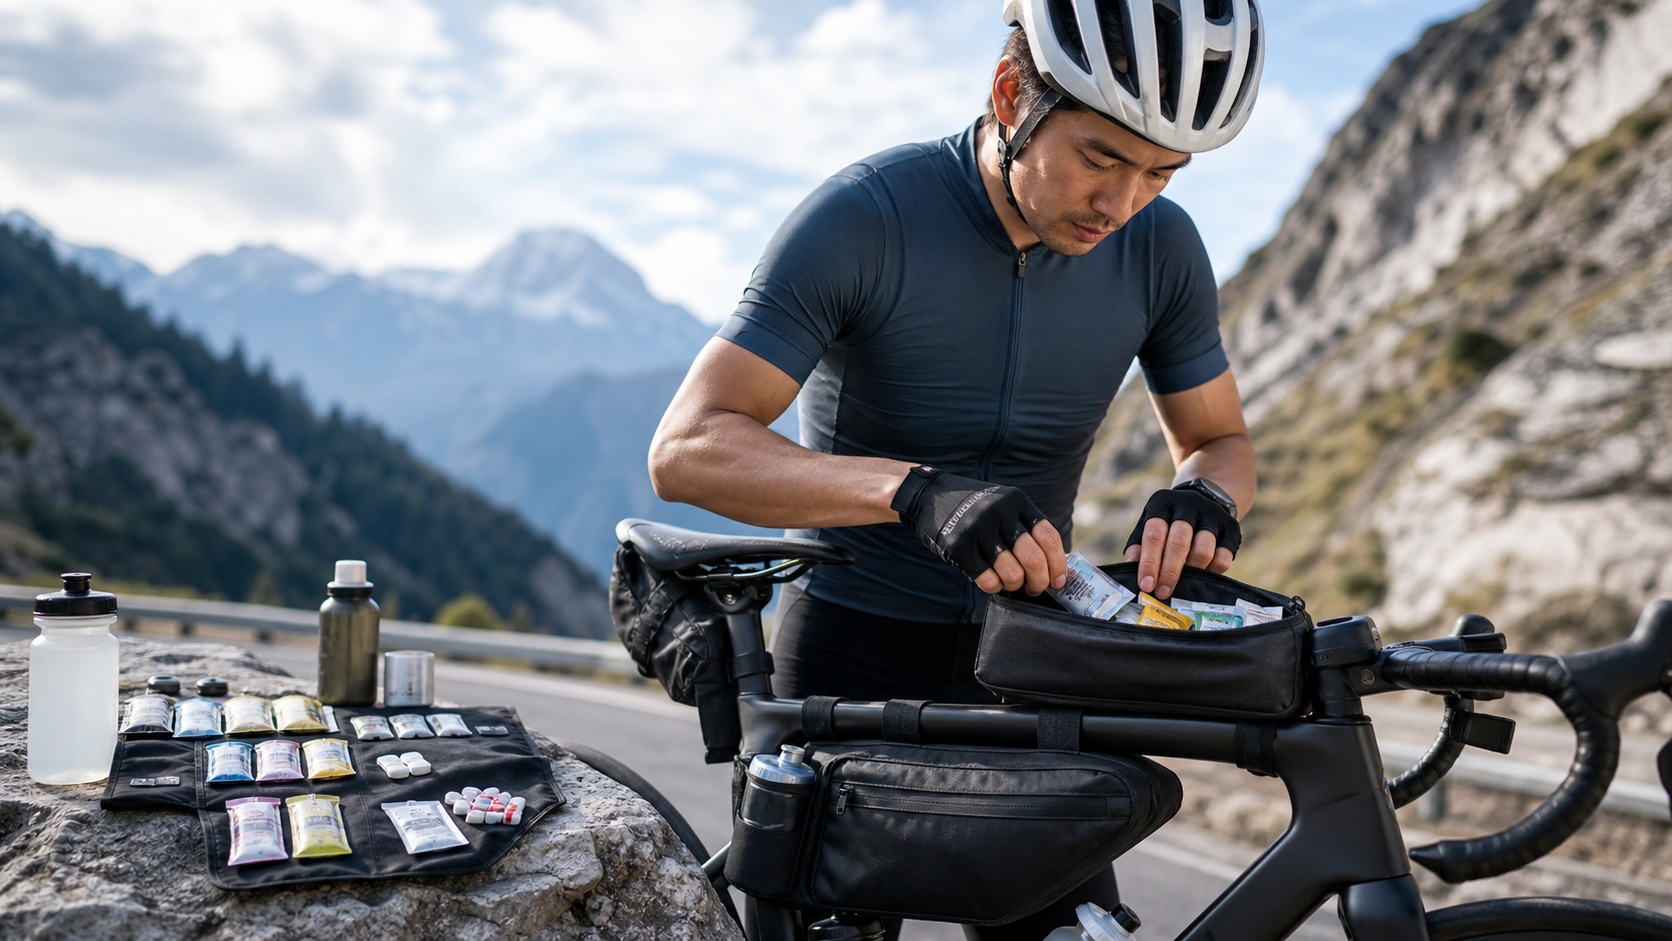
Starting with a Race Where Nutrition Went Scattered
I once coached a student named A-Kai who was preparing for the Westbound Wuling climb. His fitness was actually in great shape—an FTP of 4.2 W/kg and a well-practiced rhythm for long climbs. But on race day, as he reached for his third gel on the steep section before Kunyang, he looked down into his back pocket and found his gels, salt tablets, and a small packet of drink mix all stuck together in a clump, the packaging soaked through with sweat and impossible to tear open. He fumbled, trying to bite the package open with one hand while his speed dropped and his heart rate spiked to 175 bpm, and he nearly clipped his rear wheel. That day, he finished almost 12 minutes slower—not because his legs failed him, but because of how he carried his nutrition.
In this article, I want to seriously discuss something many people consider trivial, but which often determines success or failure: portioning, carrying strategies, and race-day packing for nutrition. This is rarely covered in textbooks, yet it’s a problem I’ve dealt with repeatedly in the field over 15 years of coaching athletes at all levels and general fitness enthusiasts. You can think of your nutrition strategy as having two layers: the first is “what to eat and how much” (nutrition science), and the second is “how to get it into your mouth smoothly at the right time” (engineering and logistics). Most people only train the first layer, but it’s the second layer where they fall apart.
Let me be clear: this article is educational content. Its focus is on helping you bring your already-decided nutrition plan to the event in a smarter way, not on prescribing a nutritional regimen for you.
Concepts and Scientific Basis: What Exactly Are You Carrying?
To plan your carrying strategy, you first need to know the three main things your body needs to replenish during prolonged exercise: carbohydrates, fluids, and electrolytes (especially sodium). Once you understand the requirements for these three, you’ll know how much you need to have on you each hour.
Carbohydrates: The Primary Fuel
As exercise duration increases, glycogen stores gradually deplete, making exogenous carbohydrates the key to endurance. The current consensus in sports nutrition generally falls into these ranges:
- Exercise under 1 hour: Extra carbohydrates are usually not needed.
- 1 to 2 hours: 30 to 60 grams of carbohydrates per hour is generally sufficient.
- Over 2 hours: 60 to 90 grams per hour is a common target, and athletes who have undergone “gut training” can push even higher.
According to data compiled from Precision Hydration and multiple sports science sources, individuals who haven’t trained their gut can tolerate about 60 grams of carbohydrates per hour. After several weeks of progressive training, most people can reach 90 g/hour, and a few can push to 120 g or more. Here’s a frequently overlooked point: the gut is trainable. Research indicates that gut training can start showing results in as little as two weeks, with a more complete training block scheduled over 4 to 6 weeks, increasing your hourly intake by about 10 grams every 1 to 2 weeks until you find your new comfortable limit.
This is directly related to carrying: if your target is 90 grams of carbohydrates per hour, a 5-hour long event means you need to carry around 450 grams of carbohydrates. This isn’t something one or two gels can solve. You must calculate the “total amount” in advance, then decide which carriers (gels, energy bars, drink mix powder, real food) to use for distribution.
Fluids: Amount Varies by Person and Weather
Taiwan’s summers are humid and hot, with sweat rates often starting at 1 liter per hour and exceeding that during long distances in the heat. General practical advice is: if you haven’t done a sweat test, start with about 400 to 800 ml per hour, then adjust based on climate, intensity, and how you feel. A more precise method is to measure “body weight difference before and after exercise”—each kilogram lost represents roughly 1 liter of fluid lost, so aim to replace that amount next time under similar conditions.
The implication for your carrying plan is: Taiwan’s humidity and heat significantly increase your fluid-carrying needs. On the same route, one bottle might suffice in winter, but in midsummer you might need two bottles plus a plan for refill points along the way.
To help you better estimate your fluid needs, the table below maps “different sweat rates” to “how much water you should prepare for a 3-hour session.” You can roughly categorize yourself first (by measuring post-exercise weight loss):
| Sweat Type | Approximate Sweat Rate | Estimated Loss in 3 Hours | Carrying + Refill Plan Concept |
|---|---|---|---|
| Less Prone to Sweating | ~500ml per hour | ~1.5 liters | One bottle + one refill along the way |
| Moderate Sweating | ~800ml per hour | ~2.4 liters | Two bottles + refill at aid stations once or twice |
| Heavy Sweating (common in Taiwan’s heat) | 1000ml+ per hour | 3+ liters | At least two bottles + multiple refills along the way, with sodium intake increased accordingly |
Please note this is just a “starting estimate”; the truly accurate method is still weighing yourself. Don’t force fluids—drinking far more than you’re losing in a short time can actually dilute blood sodium, which is why hydration must be planned together with sodium intake.
Electrolytes: Sodium is the Star
The electrolyte lost most in sweat and most needing replenishment is sodium. Individual variation here is huge—according to data compiled from STYRKR and related sports science sources, some people lose only about 230 mg of sodium per hour, while others exceed 1,000 mg. A common practical recommendation is: for sessions lasting over 60 minutes, supplement 300 to 700 mg of sodium per hour; in terms of drink concentration, 500 to 900 mg of sodium per liter of water is a common range, with heavy-salty sweaters taking the higher end.
Laying these three out, you’ll see that “carrying nutrition” is essentially a packing math problem: hourly requirement × estimated duration = total amount, then break that total down into forms that are easy to carry, easy to access, and easy to consume.
Caffeine: If You Use It, Calculate and Test It First
Beyond the three main components—carbohydrates, fluids, and sodium—many endurance athletes use caffeine to boost alertness and reduce perceived fatigue during exercise. The commonly cited dosage range in the literature is about 3 to 6 mg per kilogram of body weight. For a 65 kg rider, that’s roughly 195 to 390 mg, which can be taken about an hour before the event or in divided doses during the latter part of the race.
But from a “carrying” perspective, caffeine has several practical points: First, caffeinated gels must be clearly marked and separated from regular gels; otherwise, taking them in the wrong order and getting a big dose late in the race can bring on heart palpitations, shaky hands, and stomach upset. I usually have my athletes mark them with different colored rubber bands or a permanent marker for instant recognition. Second, caffeine tolerance varies greatly between individuals. Those sensitive to caffeine, with a history of arrhythmia, or with high blood pressure should definitely discuss it with a doctor first and not self-medicate. Third, test it during training—don’t make the race your experiment.
Practical Methods: Precision Portioning of Your Nutrition
Now that we’ve covered the requirements, let’s get to my favorite part—getting hands-on with portioning. The goals of portioning are threefold: precise dosage, minimal volume, and fastest access.
Comparison of Different Nutrition Carrier Characteristics
| Carrier Form | Approx. Carbs per Unit | Pros | Cons | Best Suited For |
|---|---|---|---|---|
| Energy Gel | 20-30 g | Easily absorbed, small volume, fixed dosage | Sticky texture, needs water, packaging can get sticky | Medium-to-high intensity, quick carb top-ups |
| Energy Bar | 20-40 g | Provides chewing satisfaction, more filling | Hard to chew at high intensity, melts in heat | Low intensity, long flat rides |
| Sports Drink Mix | 15-40 g per serving (self-mixed) | Replenishes fluids + carbs + electrolytes simultaneously, adjustable dosage | Needs to be pre-filled into bottles | Almost all endurance scenarios |
| Salt/Electrolyte Tablets | Almost no carbs | Provides sodium alone, precise | Requires water to take | Hot weather, heavy-salty sweaters |
| Real Food (rice balls, bananas) | Varies greatly | Easy to digest, cheap, gut-friendly | Bulky, dosage hard to calculate | Ultra-long distances, ultramarathons, all-day bike rides |
Specific Portioning Methods
Portioning sports drink mix is what I recommend most beginners start with. Large commercial powder bags are hard to measure accurately on the course. My approach is to pre-portion “one bottle’s worth” of powder into small ziplock bags, seal them, and label them with the carbohydrate gram count. This way, at an aid station, you just tear open a bag, pour it into your bottle, add water, shake—30 seconds and done, with precise concentration control.
There’s a detail particularly important in Taiwan’s humid heat when portioning: moisture protection. Powders are most afraid of clumping from humidity. After portioning the small bags, I suggest putting them all into a larger ziplock bag with a small food-grade desiccant packet. Especially in summer when they’re stored in a car trunk or stuffed in a backpack, discovering they’ve clumped on race day is a real hassle.
Carrying gels needs to solve three problems: “sticky packaging, hard to tear open, and where to put the trash.” My recommendations:
- Before departure, tear a small notch in the tear notch of each gel (but don’t tear it all the way), so you can pull it open easily on the course without biting it with your teeth.
- Use small rubber bands to bundle 3 to 4 gels together in “consumption order”, pulling from the outside in, so you don’t have to rummage through your pocket.
- Prepare a small dedicated bag for empty wrappers (or designate a fixed jersey pocket), so trash is collected uniformly—neither littering nor sticking to uneaten gels.
Salt and electrolyte tablets are small and most susceptible to moisture and melting. Portion them into a small waterproof pill organizer (the weekly compartment kind you can buy at a pharmacy), arranging them by “one per hour” or your actual plan. One compartment represents one time point, so you know where you are just by seeing which compartment is next—it doubles as a timing reminder.
Energy bars and real food need special care in Taiwan’s heat to avoid melting and spoilage. My approach: pre-cut the top edge of energy bar wrappers for easy one-handed tearing; for real food (like small rice balls, sweet potatoes, bananas), wrap them in plastic wrap or small bags in bite-sized portions to avoid gnawing on a large chunk on the course, which is hard to digest and prone to dropping. For ultra-long distances, placing real food in an insulated nutrition bag significantly reduces the chance of it going off in the summer heat.
I also remind my athletes of a little trick during portioning: package each time block’s nutrition into “one small bag”. For example, the “Hour 3 bag” contains the gels and salt tablets needed for that hour. When the time comes, you just pull out one whole bag instead of searching for individual items. This is especially useful for people whose memory tends to fail when fatigued.
A Sample Portioning Plan for a 5-Hour Cycling Race
Using A-Kai’s re-planned Westbound Wuling as an example, let’s assume a target of 75 g carbohydrates per hour, 500 mg sodium per hour, and 600 ml water per hour (hot weather):
| Time Block | Carbohydrate Source | Sodium Source | Fluids |
|---|---|---|---|
| Hour 1 | 1 serving drink mix (40g) + 1 gel (25g) | Sodium in drink mix + ~400mg sodium in gel | 1 bottle, 600ml |
| Hour 2 | 1 serving drink mix (40g) + half an energy bar (15g) | Drink mix + 1 salt tablet to top up | Refill at aid station |
| Hour 3 | 2 gels (50g) + half a banana | 1 salt tablet | 1 bottle |
| Hour 4 | 1 serving drink mix (40g) + 1 gel (25g) | Drink mix + 1 salt tablet | Refill at aid station |
| Hour 5 | 2 gels (50g) | 1 salt tablet | Remaining water |
The point of this table isn’t for you to copy the numbers exactly, but to demonstrate a thought process: first calculate your hourly targets, then work backward to determine which carriers you need for each time block and where to put them. With this table, portioning becomes a matter of filling each compartment accordingly, and during the race you just follow it hour by hour—almost nothing gets missed.
Calculate a “Total Quantity Checklist” Before Portioning
Many people portion by feel, resulting in either carrying too much (heavy, bulky, uneaten) or too little (running out mid-race). I teach my athletes a more rigorous approach: calculate a total quantity checklist before portioning, quantifying the entire race’s needs into specific numbers, then working backward to determine how many packs or servings to bring.
| Item | Calculation Method | 5-Hour Race Example |
|---|---|---|
| Total Carbohydrates | Hourly target × hours | 75g × 5 = 375g |
| Number of Gels Needed | (Total carbs − other sources) ÷ carbs per gel | About 8 to 10 gels (including spares) |
| Total Sodium | Hourly target × hours | 500mg × 5 = 2500mg |
| Number of Salt Tablets | Total sodium ÷ sodium per tablet − sodium already in drinks | About 4 to 6 tablets |
| Total Fluids | Hourly target × hours | 600ml × 5 = 3000ml (including aid stations) |
The value of this checklist is turning “vague feelings” into “checkable numbers.” After portioning, you can compare what you actually have against this table—add if short, subtract if over. I often say the biggest fear in nutrition planning is “I think it’s about right,” because “about right” often means a big difference at the critical moment.
Carrying Strategies: Put Things in the Right Place So You Can Reach Them
Once portioning is done, the next step is “where to put it.” A carrying strategy needs to consider two things: priority of access and constraints of the sport type.
Position Items Based on Frequency of Use
I teach my athletes a simple principle: the more often and more urgently you need to eat something, the easier it should be to reach.
- Easiest to reach (center of jersey back pocket, front of running belt, triathlon bento box): Gels and salt tablets you’ll consume in the current hour or two.
- Moderately easy (side jersey pockets, backpack side pockets): Energy bars and spare gels you’ll need in the middle section.
- Hardest to reach (deep in backpack, saddle bag): Full-race spares, spare tubes and tools, emergency nutrition—things you won’t touch regularly.
Carrying Priorities for Different Sports
Road bike/Mountain bike: Bottle cages are your biggest advantage—use them for sports drinks. The three rear jersey pockets are the main battlefield. I suggest “left pocket for solids, right pocket for gels, center for what you’re eating right now.” Develop this fixed habit so you won’t grab the wrong thing even when your brain is oxygen-deprived late in the ride. A top tube bag (fuel tank bag) is great for the most urgent gels—you can grab them with a quick glance down without taking your hands off the bars.
Road running/Marathon: No bottle cages, so you rely on a hydration belt or handheld bottle. For a full marathon, I recommend a belt that can hold 4 to 6 gels, and test it during training runs to see if it bounces or chafes. Many marathons in Taiwan have frequent aid stations, so you can reduce how much fluid you carry, but gels and salt tablets—things “the race may not provide in your preferred brand”—should always be self-supplied.
Triathlon/Ultramarathon: The most complex to carry. In triathlon, make good use of a bento box on the bike frame (tape carb gels to the top tube, peel them off as you eat). Transition bags should be pre-sorted for T1 and T2. Ultramarathons often return to real food, combined with aid stations and a drop bag strategy for staged replenishment.
I coached an athlete named David who was tackling a 113 half-ironman. His biggest headache was the chaos of transition-area nutrition. Our solution was to break the entire race into three independent nutrition bags—“after swim,” “bike leg,” and “run leg”—with each bag containing only what would be used in that segment, and the bag openings marked with different colors. All bike-leg gels were taped to the top tube in order of mileage; for the run leg, he used a handheld soft flask plus a hydration belt. This way, he didn’t have to rummage or think in transition—he just grabbed the corresponding bag and went. His transition time dropped by nearly two minutes, and his stomach was much more settled because he wasn’t frantically stuffing things in. The core of staged packing is letting each phase of you only deal with that phase’s nutrition.
Local Taiwan Context: Weather and Eating Out
Taiwan’s humidity and heat deserve a special mention. High temperatures can melt and deform energy bars and chocolate-based nutrition. In summer races, I generally advise against energy bars with chocolate coatings. Gels and powders are relatively heat-resistant and are the better choice in hot weather. Additionally, Taiwanese people are accustomed to eating out before races. I’ve seen countless cases of stomach issues from eating too greasy or spicy food the night before, or from street food with questionable hygiene—in the 24 hours before a race, be conservative with your diet and stick to foods your stomach knows well. No nutrition strategy can save a gut that’s already upset before the start.
Temperature Management in Humid Heat
There’s another often-overlooked enemy in Taiwan’s nutrition carrying: temperature. By midday in summer, gels in your back pocket can get warm from the sun, not only tasting worse and becoming stickier and harder to squeeze, but some energy bars with oils can even turn mushy. In practice, I recommend:
- Chill your bottles the night before or fill them half-frozen, so they start cold and stay cold longer. In Taiwan’s heat, drinking warm sports drinks is psychologically and physiologically off-putting, leading to under-drinking.
- Place melt-prone nutrition in less stuffy areas of your body, avoiding spots that are hot and sweaty, like directly against your back or inner thighs.
- Use small insulated pouches. For ultra-long distances or drop bags, include an ice pack to extend the freshness of real food and reduce the risk of stomach upset.
A Case Study of a Marathon Runner
Let me share another running example. I coached a runner named Xiao-Ting who was preparing to break 4 hours at the Taipei Marathon. She had “blown up” after the 30K mark in her two previous attempts. Reviewing the issue, the problem wasn’t fitness—it was nutrition carrying: she had stuffed all 5 gels at the very bottom of a small waist pack. Late in the race, with stiff fingers, tired and frantic, she couldn’t get them out, so she gave up on nutrition altogether. The result was depleted glycogen and a collapsed pace.
Our fix was simple: we switched her to a hydration belt with external gel holders, arranged the 5 gels in order of consumption timing—“8, 15, 22, 28, 35 km”—from front to back, and had her test it on three training runs to confirm it didn’t bounce or chafe. We also put her salt tablets in an easy-open small case, fixed to the front center of the belt. In that race, she ate every single one on time and finished comfortably in 3 hours 55 minutes. This reinforces my core point: for many people, the nutrition problem isn’t about what to eat—it’s about being able to reach it.
Common Mistakes and Corrections
The mistakes I’ve seen over the years in nutrition carrying can almost all be categorized into the following types. Check how many you recognize.
Mistake 1: Trying New Nutrition for the First Time on Race Day
This is the most fatal and most common. Many people see a new gel or drink brand handed out by race sponsors and use it directly on race day, only to have stomach issues, diarrhea, or nausea. Correction: anything you plan to use on race day must be tested at least 2 to 3 times during training, and tested in workouts close to race intensity, not while sitting on the couch. This also ties back to the gut training mentioned earlier—your gut needs time to adapt to specific products and dosages.
Mistake 2: Only Carrying Carbs, Forgetting Sodium
Many people load up on gels but bring no salt tablets at all, resulting in cramps, dizziness, and nausea during long hot sessions. In Taiwan’s summer, you sweat a lot and it’s salty. Replacing fluids without sodium can even dilute blood sodium and cause problems. Correction: treat sodium as an independent line in your nutrition plan. Don’t assume “there’s a little sodium in my drink, that’s enough.” Heavy-salty sweaters especially need additional salt tablets in hot weather.
Mistake 3: Stuffing Everything in the Same Pocket
When everything is crammed into one back pocket, finding a specific item means dumping everything out—impossible to do while riding. Correction: separate items by access order and category, and practice at home to see if you can grab the right thing without looking, just by feel.
Mistake 4: Portioning Without Labels, Guessing Dosages
Pouring powder into unlabeled bags and forgetting how many grams are in each at the event leads to inconsistent concentrations. Correction: write the contents and carbohydrate gram count clearly on every portioned bag with a permanent marker for at-a-glance clarity.
Mistake 5: Ignoring Trash and the Environment
Tossing wrappers carelessly not only violates race rules (many races will DQ athletes for littering) but also harms the environment. Correction: designate one pocket as your “trash bag” and put all empty wrappers in it. Plan your trash flow during portioning.
Quick FAQ
| Question | My Recommendation |
|---|---|
| Do gels always need water? | High-concentration gels are recommended with water to aid absorption and avoid stomach upset; liquid-style gels can skip it |
| Do I need as much water in cold weather? | Needs decrease, but don’t stop drinking; thirst sensation is dulled in cold weather, making dehydration more likely |
| Can I rely only on race aid stations? | Water and common drinks, yes; but bring your preferred gels and salt tablets—don’t gamble on the race having your brand |
| How long can portioned powder be stored? | Sealed and moisture-proof, several weeks is fine; but in Taiwan’s humidity, I suggest portioning 1-2 days before the race and adding a desiccant |
| What if nutrition makes me nauseous? | Usually it’s too concentrated or eaten too fast; slow down, drink water, reduce the single serving size, and review whether your gut training is sufficient |
| Can I bring extra caffeinated gels? | You can bring spares, but clearly separate them from regular gels to avoid accidentally taking too much and getting heart palpitations or shakes |
| What if my waist pack bounces a lot? | Usually the center of gravity is too far back or the strap is too loose; move heavier items forward and center, tighten the strap, and test during training until it’s stable |
Mistake 6: Imbalance Between Liquids and Solids
There’s another advanced but common mistake: carrying only gels for the entire race. Gels are convenient, but eating several in a row without enough water spikes the sugar concentration in your gut. When osmotic pressure is thrown off, you get bloating and nausea. Correction: split your nutrition into two parallel lines—“liquid carbs (drink mix)” and “concentrated carbs (gels)”. The drink mix handles fluids, carbs, and sodium simultaneously, while gels provide a quick dose at key sections. Combining the two puts much less strain on your gut. This is why, in the time-block table earlier, I arranged both drink mix and gels for nearly every hour.
Actionable Advice for Readers at Different Levels
Beginners New to Endurance Sports
If you’re just starting to ride or run, don’t rush to chase the fancy 90 g/hour nutrition. First master three things:
- Start seriously supplementing carbs only when exercise exceeds 1 hour, beginning with 30 to 40 g per hour and one bottle with sports drink mix.
- Buy a box of small ziplock bags and a waterproof pill organizer, and learn to portion and label your drink mix and salt tablets.
- Treat every training session as a nutrition rehearsal, recording what you ate and how your gut reacted, gradually finding your own rhythm.
Intermediate Athletes with Some Foundation
You already have a consistent training volume; the goal is to make your nutrition more precise:
- Do a simple sweat assessment—measure pre- and post-exercise weight difference, observe salt stains on your jersey, and determine if you’re a heavy-salty sweater, then adjust your sodium carrying amount accordingly.
- Undertake a 4 to 6 week gut training block, in one or two long sessions per week, increasing carb intake by 10 g every 1 to 2 weeks, pushing toward 80 to 90 g/hour.
- Build your own “time-block nutrition table” (like the sample above), rehearse it in every race, and review and adjust afterward.
Veterans Preparing for Long Distances or Major Races
Your goal is zero mistakes:
- Create a standardized race-day packing checklist (see next section) and pack according to the same checklist every race to reduce the risk of forgetting items.
- Customize your carrying plan for the target race’s climate and aid station layout—add water and salt in hot weather, and use drop bags strategically if available.
- Lock down your nutrition combination completely two weeks before the race, trying no new products, so both your body and your actions become muscle memory.
- Prepare a Plan B—in case a nutrition item is lost, damaged, or unavailable at an aid station, have a backup plan rather than falling apart on the spot. The composure of a veteran often comes from having “already thought through the unexpected.”
Race-Day Packing Checklist: Copy This One
Finally, I’ve condensed years of team management experience into a race-day packing checklist. Pack everything the night before—don’t leave it for a frantic morning.
Nutrition Items
- [ ] Gels (quantity per time-block table + 1 to 2 spares)
- [ ] Energy bars/real food (per plan)
- [ ] Sports drink mix (pre-portioned, labeled with gram count)
- [ ] Salt/electrolyte tablets (in waterproof pill organizer, compartmentalized by time block)
- [ ] Caffeine nutrition (if planned, tested in training first)
Carrying Containers
- [ ] Water bottles × sufficient quantity (bring an extra one in hot weather)
- [ ] Hydration belt/top tube bag/tape for bento box
- [ ] Empty wrapper trash bag (a small ziplock works)
- [ ] Waterproof pill organizer, permanent marker, desiccant packets
Logistics and Contingency
- [ ] Drop bag contents (for ultra-long events)
- [ ] Race aid station map (printed or saved on phone)
- [ ] Personalized time-block nutrition table (taped to top tube or saved in phone notes)
- [ ] Spare stomach medication, sunscreen, basic first aid (based on individual needs; those with chronic conditions should consult a doctor first)
Packing Order Reminder: First, put on and test the nutrition you’ll use on your body, in order of access, to confirm nothing bounces; then place spares and logistics items into your backpack or drop bag. This order lets you do a final quick check at the last moment before departure to ensure everything you need on you is in the right place.
Nutrition Timeline from Three Days Out to the Start Line
Packing is just the final step; good nutrition carrying actually begins days before the race. I’ve organized a simplified timeline in the table below to connect “preparation” with “carrying”:
| Time Point | What to Do |
|---|---|
| 3 days before | Confirm all nutrition items are ready and not expired; lock in all products to be used, no new experiments |
| 2 days before | Portion drink mix, label gram counts, add desiccant; count gels and salt tablets against the total quantity checklist |
| 1 night before | Complete all portioning and packing; eat conservatively, avoid raw food and overly greasy/spicy dishes; chill water bottles |
| 1 to 3 hours before | Eat your pre-race meal per personal habit; if using caffeine, take it per your planned schedule |
| 15 minutes before start | Final check of nutrition positions on your body; put the most urgent gels in the easiest-to-reach pocket |
The spirit of this timeline is: make all decisions that require thinking well before race day. By the start line, you only need to “execute,” not “think.” During a race, with an oxygen-deprived and fatigued brain, decision-making ability drops. The fewer on-the-spot decisions you need to make, the lower the chance of mistakes.
Conclusion: Mastering the Small Things Is What Makes a Professional
Back to A-Kai’s story. The following year, he returned to Westbound Wuling. We spent three weeks completely overhauling his nutrition carrying: all drink mix portioned and labeled, gels pre-torn and bundled in order, salt tablets in a waterproof pill organizer, and his time-block nutrition table printed and taped to his top tube. That day, he never once fumbled. When it was time to eat, the nutrition was right there in his hand. He improved his personal best by nearly 15 minutes. His legs were the same legs—the only difference was how he carried his nutrition.
Nutrition carrying may seem trivial, but it’s one of the few areas with “small input, big return.” You don’t need to spend money on expensive gear. A box of ziplock bags, a pill organizer, a permanent marker, plus a bit of advance planning, can solidly protect the results of your training. Especially in Taiwan’s humid heat and eating-out culture, getting the details right—moisture protection, melt prevention, sodium replenishment—is often the difference between finishing and a DNF.
At your next training session, start by “portioning and labeling a week’s worth of nutrition.” Master the small things, and you’ll find race day becomes much more composed.
Finally, I want to emphasize a mindset: nutrition carrying is something you can “continuously iterate and optimize.” Every race and every long workout is an opportunity to collect data—which gel didn’t get eaten? Which pocket was hard to reach? Under which weather conditions did you not carry enough water? Write these into your post-race notes and fix one thing next time. Accumulate three to five races, and your carrying plan will become increasingly tailored to your body and habits, eventually turning into a standard process you can pack with your eyes closed, almost without thinking. At that point, you can put your full attention back on what truly matters: focusing on the pedals, focusing on your pace, and focusing on enjoying the race itself. That is the greatest value of getting nutrition carrying right.
This article is educational content and cannot replace individual diagnosis and treatment advice from a physician, physical therapist, or nutritionist. If you have diabetes, high blood pressure, heart disease, or other chronic conditions, your nutrition and electrolyte strategy must be discussed with your medical team and individualized—do not blindly apply general recommendations. If you experience persistent chest tightness, severe headache, confusion, or abnormal heart palpitations during exercise, stop immediately and seek medical attention. Taiwan has convenient healthcare with accessible National Health Insurance; don’t ignore the warning signs your body sends.
References
- Precision Hydration — How much carbohydrate do athletes need per hour?: https://www.precisionhydration.com/performance-advice/nutrition/how-much-carbohydrate-carbs-athletes-per-hour/
- TrainingPeaks — How to Train Your Gut for High Carbohydrate Intake: https://www.trainingpeaks.com/blog/how-to-train-your-gut-for-high-carbohydrate-intake/
- STYRKR — How much sodium do you lose in sweat?: https://styrkr.com/en-us/blogs/training-and-nutrition-hub/how-much-sodium-do-you-lose-in-sweat
- Gatorade Sports Science Institute — Dietary Water And Sodium Requirements For Active Adults: https://www.gssiweb.org/sports-science-exchange/article/sse-92-dietary-water-and-sodium-requirements-for-active-adults
Related Reading
- Energy Gels and Bars Fully Explained: Sugar Ratios, Osmolality, Caffeine, and DIY Recipes
- Cycling Race Nutrition Strategy: What Goes in Your Pockets and When to Eat
- How to Design a Race-Day Nutrition Plan: A Practical Framework from One Week Out to Every Hour After the Start
- Training Your Nutrition: Why Race Nutrition Should Be Rehearsed on Long Training Days
西進武嶺 自製新版AI配速表產生器 x 賽前攻略 抱佛腳! 沒有功率計也可以產生配速表嗎?有什麼其他眉角賽前要注意的呢? | 西進武嶺 / 東進武嶺 KOM 攻略 | 公路車 | CT Yeh
4 年前
FTL 與 SYB 車隊專訪 西進武嶺 實用攻略分享! 2小時 如何練?!你不知道的眉角!新手準備武嶺必看 EP1 | 實力派女車友 | 精華版 | 公路車 | CTYeh
4 年前
CT 喇低賽) 武嶺牽車 才是王道 西進牽車四小時內秘訣 攝手位置 如何判斷 防抽筋小秘訣
7 年前
#公路車 #西進武嶺 配速配瓦實驗 坡度分析 四小時內攻略 建大盃 NeverStop #西進武嶺攻略
6 年前
一日北高前的高裝檢 | 北高 360 | 挑戰11小時的裝備 | 一日雙塔 | 補給
6 年前
西進武嶺 8000名單車友數據分析 PART1 | 從新手到高手數量/瓦數/推力比/FTP推力比/功率計使用率 大解析 | 公路車 | CTYeh
5 年前
一日北高/長距離團騎 常見問題補充篇 / 組團或跟團的眉角 / 壯車友容易被瘦車友慢性拉爆 / 原來屁股痛可能是這個原因...? / 風場配速法 / 公路車 / CT Yeh
2 年前
昇陽SYB車隊 & Fuji 菁英選手們的趣味經驗分享,長知識了!市民車友必看~ 一路被拉爆後才給問 | 戀戀197 武嶺 凸台經驗分享 | 公路車 | CT Yeh
4 年前