Athlete Posture Assessment and Correction: Reclaiming the Power of Breath from a Misaligned Body
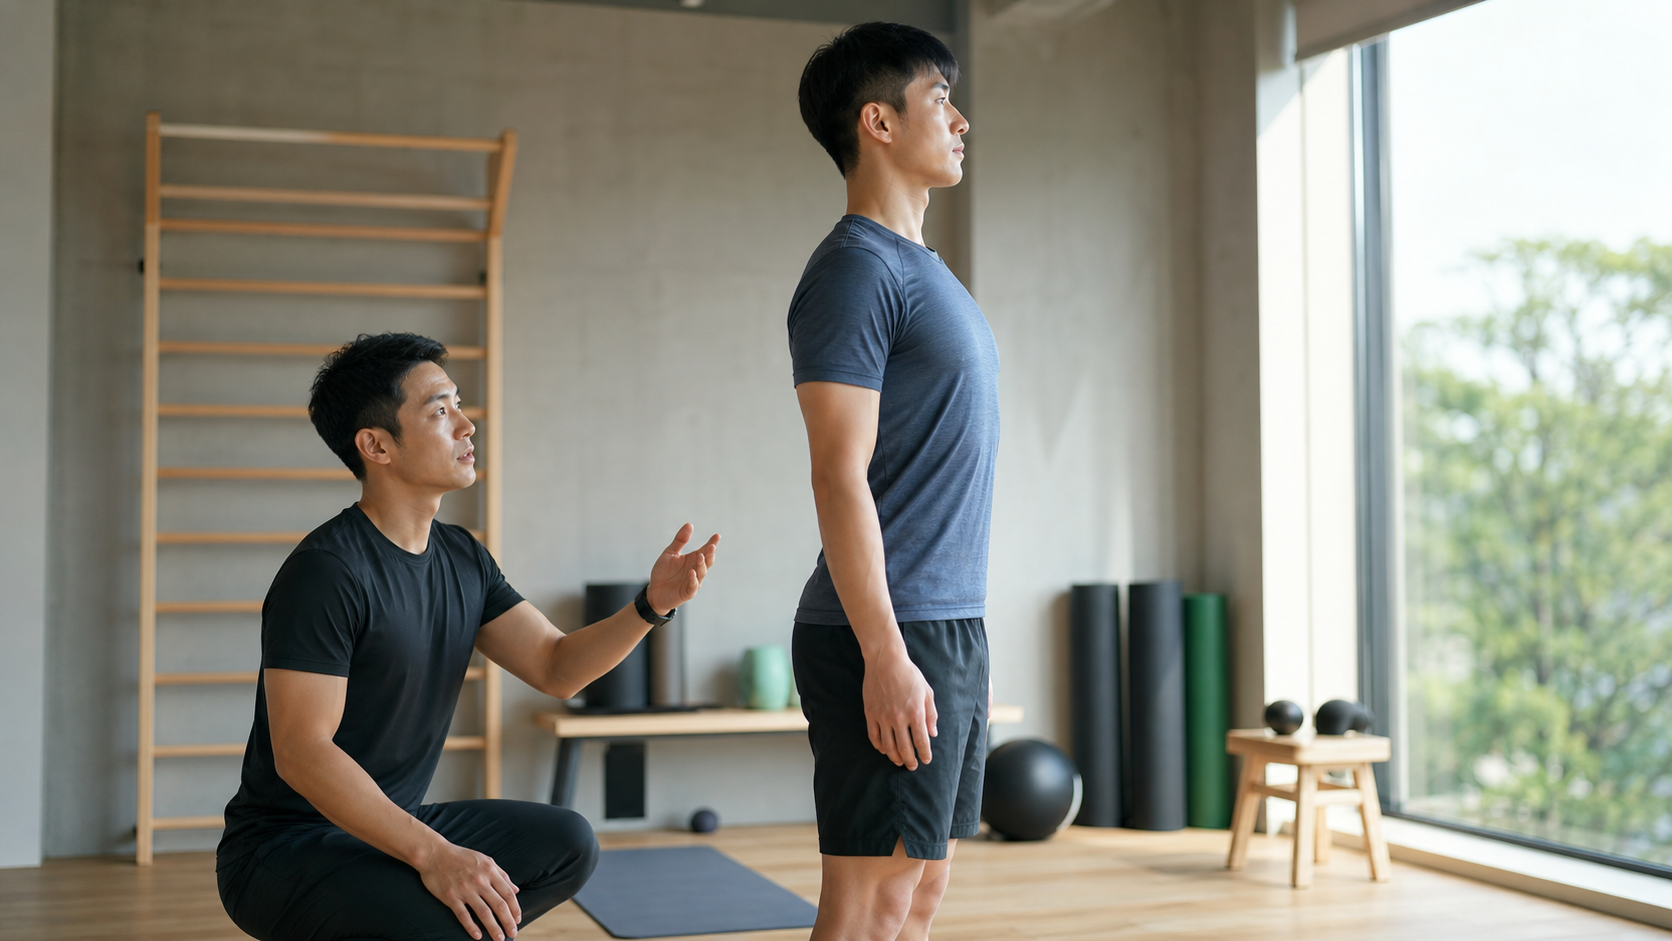
Opening: The Athlete Who “Trained Hard but Hit a Plateau”
I’ve been coaching athletes and general fitness enthusiasts for exactly fifteen years now. If there’s one thing I’ve learned most deeply over the years, it’s not that some training method is magical or some power meter is more accurate—it’s that—many people aren’t losing because of fitness, they’re losing because of posture.
I remember one case vividly: an engineer working in the Hsinchu Science Park, let’s call him A-Zhe. He was dedicated, riding over 200 kilometers a week, and had pushed his Functional Threshold Power (FTP) to nearly 4 watts per kilogram of body weight—impressive numbers. But he was stuck on a strange problem: after riding for more than an hour and a half, pain would start between the back of his neck and the middle of his right shoulder blade. It got so sore that he couldn’t put out power properly in the latter part of the ride. His heart rate was still in the aerobic zone, around 140-something bpm, but his body was already twisted and crooked.
The first time I did a standing assessment with him, I asked him to stand naturally. Looking from the side, his ears were almost a fist’s width in front of his shoulders. His shoulders were rounded and rolled forward, and his upper back had a slight hunch. This wasn’t caused by cycling alone—it was from sitting in front of a screen for eight to ten hours a day, combined with long hours hunched over the handlebars while riding. The two postures reinforced each other, stacking and amplifying the problem.
I told him: “What you’re missing right now isn’t more interval workouts—it’s standing your body up straight first.” Over the next eight to ten weeks, we slightly reduced his training volume and added posture assessment and correction work. Three months later, he came back and told me not only was his neck pain gone, but he even had the energy to sprint out of the saddle in the final 30 kilometers of long rides. This article is about laying out the complete framework I’ve used over the years to help athletes with “posture assessment and correction,” so you can understand it too.
Why Do Athletes Need to Care About Posture Even More?
Many people assume posture is something only “office workers and phone-addicts” need to worry about—athletes move so much, they should be fine. The truth is the opposite. Athletes’ problems are often more hidden because your fitness is enough to “compensate” for postural flaws, carrying you along until you hit a breaking point and it all comes crashing down.
Posture Problems Aren’t About “Laziness”—They’re About Muscle Tension Imbalance
The most common postural problem in modern people is described in sports medicine as “Upper Crossed Syndrome.” Its hallmark is forward head, rounded shoulders, and upper back hunching all appearing together. The cause isn’t that one muscle is “broken,” but that one group of muscles is too tight while the opposing group is too weak, creating a crossed imbalance:
- Too tight (overactive): pectoralis major, pectoralis minor, upper trapezius, levator scapulae, suboccipital muscles
- Too weak (lengthened, inhibited): deep cervical flexors, mid/lower trapezius, rhomboids, serratus anterior
You can imagine it like this: the chest muscles are like a drawn bow, pulling the shoulders forward, while the muscles in the back that should pull the shoulders back are slacking off. This imbalance can’t be solved by “reminding yourself to stand up straight,” because that’s actively forcing it with willpower—the moment you relax, it collapses back. To truly change it, you need to do both: relax what’s too tight and awaken what’s too weak.
According to a systematic review and meta-analysis of therapeutic exercises for Upper Crossed Syndrome, prevalence rates across different populations and age groups range roughly from 11% to 60%—a wide range, but the key point is: it’s extremely common, and it’s more pronounced in groups that maintain prolonged forward-leaning postures (sedentary workers, cyclists who spend long hours hunched over the handlebars) (see references at the end of the article).
The Specific Risks for Cyclists
Cycling is particularly “dangerous” in terms of posture because the riding position itself locks the body into a forward-leaning, slightly hunched upper back, with the neck extended backward to look ahead. A long ride easily lasts two to three hours, meaning you’re “practicing” a less-than-ideal posture continuously for hours at a time.
If you also sit hunched over at work during the day, the two postural directions stack, and problems accelerate. This is why the combination of “daytime engineer, weekend cyclist” like A-Zhe is especially prone to getting hit.
Foundational Concept: Posture Isn’t “Standing Straight”—It’s “Moving Well”
Before I teach you how to assess, I want to break a myth first.
Many people hear “posture correction” and think it means training yourself to stand rigidly like a soldier at attention. It’s not. Good posture isn’t a stiff static position; it’s the body keeping joints in efficient, low-stress positions during various movements. A body that can stand naturally relaxed and still maintain stability in a squat, a sprint out of the saddle, or a running landing—that’s what good posture looks like.
Posture Affects More Than Just Appearance
When posture is misaligned, the cost goes far beyond “looking hunched”:
- Breathing efficiency: Rounded shoulders and a hunched back compress the ribcage, reducing the space for the diaphragm and ribs to move. Your breathing becomes shallower, relying more on accessory neck muscles, making you more easily winded during exercise and slower to recover.
- Force transmission: If your core and shoulder blades are unstable, some of the force you generate from pedaling and pushing gets lost through “misaligned joints”—meaning you spend the same effort but produce less power.
- Injury risk: Long-term tension imbalances put uneven loads on certain tendons and joints, gradually accumulating into neck pain, shoulder impingement, and lower back pain.
- Neurological symptoms: Severe and prolonged forward head posture and rounded shoulders are clinically associated with issues like cervicogenic headaches and thoracic outlet syndrome (in such cases, you must seek medical evaluation—don’t self-diagnose).
So I often tell my athletes: taking care of your posture is like upgrading your breathing, strength, and pain tolerance all at once—it’s the highest ROI training investment there is.
Practical Method One: Self-Posture Assessment (Do It at Home)
Alright, concepts are covered—now let’s get hands-on. Here’s the assessment process I actually use with athletes. At home, all you need is a full-length mirror, a phone tripod, and a few photos. No expensive equipment required.
Preparation Before the Assessment
- Wear form-fitting clothing or sleeveless tops so your body lines are visible.
- Have a family member help, or use a phone tripod, to take photos of your natural standing posture from the front, side, and back.
- The key is to “stand naturally”—don’t deliberately puff out your chest or suck in your stomach. Stand the way you normally do, because that’s the only way to see the real problems.
Five Key Checkpoints
The table below is the five key points I use to quickly scan athletes. You can compare them one by one against your own photos:
| Checkpoint | How to Observe | Ideal State | Common Problems |
|---|---|---|---|
| Head position | From the side, look at the relative position of the earlobe and the acromion | Earlobe roughly aligned directly above the acromion | Ear clearly in front of the shoulder (forward head) |
| Shoulders | From the side, check if the shoulders roll forward | Shoulders naturally lowered, not rolled forward | Rounded shoulders, palms facing backward (rounded shoulders) |
| Upper back | From the side, look at the thoracic spine curve | Smooth, natural curve | Upper back visibly hunched or protruding |
| Pelvis | From the side, check lumbar lordosis and pelvic tilt | Neutral, lower back not excessively arched | Anterior pelvic tilt (protruding belly, swayback) or posterior tilt |
| Knees and feet | From the front, check knee and ankle alignment | Hip, knee, and ankle roughly in a straight line | Knock knees, collapsed arches, toes pointing inward |
Three Simple Functional Tests
Photos alone aren’t enough—posture is dynamic. These three tests can be done at home and reveal whether there’s compensation “in motion”:
Test One: Wall Standing Test. Stand with your back against the wall, trying to press your head, upper back, buttocks, and heels against it. If you have to strain hard to get the back of your head to touch the wall—or can’t touch it at all—it means you have a significant degree of forward head posture and upper back tightness. Note “how many finger-widths your head is from the wall”—this is a great tracking metric.
Test Two: Wall Arm Raise Test (Wall Angel). Again, stand with your back against the wall, with elbows and the backs of your hands against the wall, sliding your arms up and down along the wall surface. If the backs of your hands lift off the wall, or your shoulders shrug up, it indicates limited thoracic spine mobility and weaker scapular control.
Test Three: Overhead Squat Observation. Hold a stick overhead and perform a squat, filming from the side. If you fall forward as soon as you descend, with excessive forward lean of the torso, it means there’s limited mobility somewhere in the ankles, hips, or thoracic spine that needs further investigation.
Coach’s Note: This assessment is for “self-awareness” and “tracking progress,” not diagnosis. If you already have obvious pain, numbness, or weakness, go directly to a rehabilitation physician or physical therapist—you can book an appointment under National Health Insurance. Don’t try to force-correction yourself.
Practical Method 2: Corrective Exercise Program
Once the assessment is done, the logic of correction boils down to four words: Release, Mobilize, Activate, Integrate. First release what’s overly tight, restore joint mobility, then activate dormant muscles, and finally integrate everything into daily movement patterns.
Below is the beginner program I most commonly prescribe for clients with “Upper Crossed Syndrome” (forward head posture + rounded shoulders + upper back hunching). It applies to cyclists, runners, and desk workers alike.
Core Corrective Exercises and Dosage Table
| Phase | Exercise | Target | Dosage |
|---|---|---|---|
| Release | Pectoralis minor/major massage ball release | Loosen overly tight front side | 60–90 seconds per side |
| Release | Gentle suboccipital muscle release | Relieve posterior neck tension | 60 seconds, light pressure |
| Mobilize | Thoracic extension (foam roller) | Restore upper back mobility | 8–10 reps |
| Mobilize | Cat-Cow | Segmental spinal mobility | 8–10 cycles |
| Activate | Chin Tuck | Activate deep neck flexors | 10 reps × 2–3 sets |
| Activate | Wall Angel | Activate mid/lower trapezius | 10 reps × 2–3 sets |
| Activate | Prone Y-T-W arm raises | Strengthen rhomboids, lower traps | 8–12 reps per letter |
| Integrate | Band Face Pull | Integrate posterior chain pulling pattern | 12–15 reps × 3 sets |
Key Movement Cues
Chin Tuck is my favorite move—simple yet effective. Imagine someone gently pushing your chin straight back with a finger, creating a “double chin” while lengthening the back of your neck. It’s not looking down—it’s moving the head horizontally backward. Hold each rep for 3–5 seconds before releasing. The deep neck flexors this activates are exactly the muscles most critical for countering forward head posture.
Face Pull is the key to integration. Anchor the band at face height, pull both hands toward the sides of your face while externally rotating and squeezing the shoulder blades together. This move integrates nearly all the “posterior chain that needs training,” which is why I include it in almost every client’s warm-up.
How to Schedule It Across a Week?
Corrective exercise doesn’t require doing the full routine every time. The key is high frequency, short duration. Here are recommendations for different situations:
| Profile | Frequency | Duration per Session | Focus |
|---|---|---|---|
| General desk worker | Once daily | 8–10 minutes | Release + Activate primarily |
| Amateur athlete | 4–5 times per week | 12–15 minutes | Full four phases |
| Those with noticeable symptoms | Per therapist’s instructions | — | Seek medical evaluation first |
I usually advise clients to place “Release + Mobilize” before cycling or running as part of their warm-up, and “Activate + Integrate” after training or before bed. This way, you don’t need to carve out extra time—it blends into your existing training rhythm, making it sustainable.
Common Mistakes and Corrections
Over the years, I’ve found that people who don’t see results from posture correction aren’t necessarily lacking effort—they’ve fallen into a few common traps.
Mistake 1: Only Stretching, No Strengthening
Many people hear “muscles are too tight” and go all-in on stretching and releasing, rolling their chest on a foam roller for ages. But if you only release the over-tight muscles without activating the weak back muscles, those lengthened and inhibited muscles remain weak, and your posture collapses again within hours. Releasing opens the door; strengthening is what walks in and arranges the furniture. Both are indispensable.
Mistake 2: Forcing “Chest Up, Shoulders Back” Through Willpower
Deliberately puffing your chest and pinching your shoulder blades back will exhaust you within ten minutes—and often you’re just over-arching your lower back and flaring your ribs to fake “good posture.” True good posture is natural alignment in a relaxed state, achieved through rebalanced muscle tone, not through bracing.
Mistake 3: Ignoring Breathing
Posture and breathing are intertwined. If you habitually take shallow breaths using your chest and neck, the accessory breathing muscles (scalenes, upper traps) become chronically overused, worsening rounded shoulders and forward head posture. During correction, be sure to practice diaphragmatic belly breathing—on inhalation, let the ribs expand sideways and backward. This itself is a form of posture training.
Mistake 4: Only Focusing on the Upper Body, Forgetting the Pelvis and Foundation
The body is a kinetic chain. For many people, the root of upper back hunching lies lower down—anterior or posterior pelvic tilt, or collapsed arches—all of which travel up the chain to affect posture. If your assessment reveals a tilted pelvis or flat feet, training only the upper back is treating the symptom. In such cases, I add glute activation and foot stability work, and may even suggest a shoe insole assessment.
Mistake 5: Three-Minute Enthusiasm
Posture is a habit built over thousands of hours; it can’t be reversed in a week. My expectation for clients is pragmatic: First aim for daily consistency, then aim for quality. Eight minutes a day for eight consecutive weeks is far more effective than one hour done once before giving up.
The Taiwan Context: What Environment Shapes Our Bodies?
Posture issues are never just about “during exercise”—they’re the sum of how you spend your entire day. Several factors in Taiwan’s living environment are particularly prone to cultivating poor posture, and they deserve a dedicated discussion.
The Double Whammy of Prolonged Sitting + Head Down
Taiwan has many tech industry and office workers; sitting 8–10 hours a day is the norm, and smartphone usage ranks among the highest globally. A systematic review and meta-analysis on neck pain in office workers found that specific strengthening exercises for the neck and shoulders can effectively reduce neck pain intensity in symptomatic office workers (though the effect is less clear for asymptomatic populations—see references at the end). This gives us two takeaways: first, if you have symptoms, you need to move and strengthen; second, don’t wait until it hurts to start.
Eating Out and Weight Management
Taiwan’s food culture is convenient and delicious, but diets high in oil, sodium, and refined carbs tend to push body fat and weight upward. Weight gain alters the body’s mechanical load—especially abdominal fat accumulation, which worsens anterior pelvic tilt and lower back strain. Pairing posture correction with sensible dietary control (more vegetables, adequate protein, fewer sugary drinks) yields more comprehensive results.
Climate and Training Venues
Taiwan’s summers are hot and humid, so many people stay indoors in air-conditioned rooms, reducing outdoor activity. Meanwhile, cyclists and runners often train in concentrated sessions at dawn or dusk, and warm-ups and cool-downs around training are frequently skipped. My advice: bring corrective exercises indoors and into fragmented time—do Wall Angels while binge-watching a show, Chin Tucks while waiting for coffee. Don’t let the weather dictate your consistency.
Healthcare Resources: Make Good Use of NHI
Taiwan’s National Health Insurance and rehabilitation resources are actually very accessible. If your posture is already accompanied by pain, numbness, or weakness, or if several weeks of self-correction haven’t improved things, go directly to a rehabilitation medicine clinic and let physicians and physical therapists conduct a professional assessment. The instrument-based evaluations, manual therapy, and individualized exercise prescriptions they provide are things self-correction simply cannot replicate. Spending a small consultation fee to get the right direction is well worth it.
Actionable Advice for Readers at Different Levels
By this point, you might be thinking, “So how exactly do I start?” Based on three different situations, here are concrete starting points.
If You’re a “Desk Worker Without an Exercise Habit” Beginner
- This Week’s Goal: Do an 8-minute “Release + Activate” mini-routine once daily (chest release 60 seconds + Chin Tucks 10 reps + Wall Angels 10 reps × 2).
- Environment Adjustments: Raise your monitor to eye level, adjust your chair so your feet rest flat on the floor, and get up and move every 45 minutes of sitting.
- Mindset: Don’t chase perfect posture; first build the habit of “changing positions often and moving often.”
If You’re an “Amateur Athlete With a Training Habit”
- This Week’s Goal: Incorporate the full four-phase routine (Release → Mobilize → Activate → Integrate) into 4–5 training sessions per week—front phases in the warm-up, integration at the end.
- Training Adjustments: Cyclists, check your bike fit—sometimes posture issues partly stem from an ill-fitting bike; runners, pay attention to foot strike and pelvic stability.
- Tracking: Every four weeks, retake a side-profile photo and the wall test, using “how many fingers’ width between the back of your head and the wall” as an objective metric.
If You Already Have Obvious Pain or Discomfort
- Step One: See a doctor first. Visit a rehabilitation department and let a professional assess whether you have simple postural tension imbalance or other conditions that need to be addressed.
- Follow Treatment: Do individualized exercises under the guidance of physicians and physical therapists. The program in this article can serve as a basis for communication and understanding, but do not replace professional prescriptions.
- Conservative Mindset: Pain is not the enemy; it is the body’s signal. Don’t push through it, don’t try to adjust yourself recklessly—progressing step by step is the fastest way.
Case Review: What Happened to A-Zhe?
Back to the engineer trainee from the beginning. What we did then was actually not complicated:
First, we slightly adjusted his daily training volume to make time for corrective work. Second, we taught him a five-minute office micro-exercise routine, setting an alarm to do chin tucks and wall angels every two hours. Third, we re-checked his bike fitting, raising the handlebars slightly to reduce the angle of neck extension while riding. Fourth, and most crucially—we taught him diaphragmatic breathing and reminded him while riding to “drop the shoulders, push the back of the head back.”
Eight weeks later, the distance between the back of his head and the wall in the wall test had visibly shortened, and the forward head posture in his side profile had improved. More importantly, the scapular soreness that had plagued him for a long time almost completely disappeared during long rides. He told me: “Turns out what I was missing all along wasn’t fitness—it was putting my body in the right position.”
I want to give those words to every one of you who trains hard but feels stuck.
Second Case: A Runner with a Misaligned Lower Body, Suffering in the Upper Body
A-Zhe is a classic case of “upper crossed syndrome,” but postural issues don’t only happen in the upper body. Let me share another trainee, a female runner I’ll call Xiao-Yu. She’s a road running enthusiast with a weekly mileage of about 40 kilometers. What troubled her long-term wasn’t her neck, but the outside of her right knee and her lower back. She once thought it was a shoe problem and switched three pairs of running shoes without any effect.
When I assessed her, I asked her to stand on one leg and noticed that the moment she stood on her right leg, her pelvis dropped to the left and her knee caved inward. This is a very typical case of gluteus medius weakness + insufficient pelvic stability. Her core and glutes were weak, so with every running stride, her knee absorbed uneven lateral forces, and over time problems emerged. In the upper body, because of the anterior pelvic tilt, her lower back compensatorily overworked, increasing the lumbar lordosis.
This case highlights a key concept: Posture is an entire kinetic chain—wherever there’s weakness, other areas compensate. Xiao-Yu’s problem wasn’t fundamentally in her knee or her shoes, but in the “foundation”—the stability of the pelvis and glutes. Our focus was on gluteus medius activation (side-lying leg raises, clamshells, banded lateral walks), single-leg stability training, and core anti-rotation capacity. After about six weeks, her pelvis no longer dropped during single-leg standing, and both her knee pain and lower back pain were significantly relieved.
Key Assessment Points for Lower Body Posture
Many people only look at the upper body when doing postural assessments, which is a major blind spot. Here’s a self-check table for the lower body that both runners and cyclists are advised to review:
| Check Item | Test Method | Issue It Indicates |
|---|---|---|
| Single-leg stand | Stand on one leg with eyes closed, observe if the pelvis drops or the knee caves in | Gluteus medius weakness, poor balance |
| Wall squat | Squat facing a wall, knees must not touch the wall | Insufficient hip/ankle mobility |
| Pelvic tilt | Look from the side at the relative position of the anterior superior iliac spine and pubic bone | Anterior/posterior pelvic tilt |
| Arch | In standing position, check if the medial foot collapses; inspect old shoe wear | Flat feet, overpronation |
Common Questions FAQ
Having trained students for so many years, there are some questions almost everyone asks. I’ve compiled them into an FAQ to answer them all at once.
Q1: How long until I see results from postural correction?
This depends on two aspects. Short-term improvement in muscle tension—many people feel looser and less sore within two to three weeks. But long-term change in postural habits usually takes eight to twelve weeks or more, because you need to retrain the neuromuscular default pattern. My advice to trainees is to stick with it for at least eight weeks and track progress with objective indicators (like the wall test), not just how you feel.
Q2: Can I fix rounded shoulders with just stretching?
No, or the effect will be very limited. As mentioned earlier, rounded shoulders are an imbalance of “tight front, weak back.” If you only relax the front side without strengthening the back, the shoulders will still be pulled back forward. Stretching is a necessary half, but strengthening the rhomboids and mid/lower trapezius is the more critical half.
Q3: Are sleeping posture and pillows important?
Very important, but often overlooked. People sleep six to eight hours a day, meaning a third of the time is spent being shaped by the pillow and mattress. Sleeping on the stomach is the most unfriendly posture for the cervical spine (the neck is forced into prolonged rotation), so I usually recommend switching to sleeping on the back or side. Pillow height should maintain the natural curve of the cervical spine as a principle; too high will worsen forward head posture.
Q4: Will corrective exercises affect my training performance?
In the short term, almost not at all, and in the long term they’ll actually help you. Corrective exercises are low-intensity and energy-efficient, so they won’t consume your recovery resources. On the contrary, because breathing and force transmission improve, many trainees report better training efficiency. The only thing to note is that corrective exercises should be done at the right time (relaxation and mobility in the warm-up, strengthening after the main session)—don’t turn them into another burden that fatigues you.
Q5: Do these apply to children and the elderly?
The principles are universal, but the dosage and movements need adjustment. For adolescents who are still developing and already show obvious hunchback or forward head posture, early intervention works best, but excessive loading should be avoided. For the elderly, be more conservative, reduce the range of motion, and prioritize ruling out conditions like osteoporosis and degenerative arthritis. For these groups, I strongly recommend evaluation by a rehabilitation physician before starting.
Adjusting Your Desk and Riding Environment
No matter how good your corrective exercises are, if you spend ten hours a day undoing them, you’ll get half the results with twice the effort. Environmental adjustments are just as important as exercise. Here’s the checklist I give trainees for their desk and bike setup:
| Environment | Adjustment Focus | Goal |
|---|---|---|
| Desk | Top of screen at eye level, keyboard positioned so elbows are about 90 degrees | Reduce looking down and shrugging shoulders |
| Office chair | Lumbar support, feet flat on the floor | Maintain neutral pelvis |
| Phone | Raise it close to eye level, avoid prolonged looking down | Reduce neck load |
| Bicycle | Raise handlebars moderately, confirm saddle height and fore-aft position | Reduce neck extension and excessive forward lean |
| Commute | Wear backpack on both shoulders, avoid long-term unilateral loading | Avoid left-right asymmetry |
One reminder: bike fitting isn’t about raising the handlebars as high as possible—that could sacrifice aerodynamics and pedaling efficiency. Ideally, seek professional fitting services to balance “comfort, efficiency, and health.” If you consistently feel soreness in a specific area after long rides, that’s often a signal from your fitting.
Debunking a Common Myth: “A Hunched Back Means Bone Deformity, It Can’t Be Changed”
Many trainees, when they first see their hunched back in a side profile photo, react with frustration: “My bones are already set—is there no hope?” I want to help everyone clear up this misunderstanding.
The vast majority of postural issues in adults are functional (soft tissue and muscle tension) imbalances, not structural (bone deformation itself) changes. Functional issues can be significantly improved through relaxation, mobility, activation, and integration—which is exactly the goal of the program in this article. Truly structural problems (such as fixed kyphosis from Scheuermann’s disease, scoliosis beyond a certain angle, or degenerative changes) require imaging and medical treatment.
So how do you quickly self-assess which type you have? There’s a simple method: When lying prone or standing against a wall, try to actively correct your posture. If you can visibly improve your posture with a little effort and stretching, it means most of it is functional and there’s plenty of room for improvement; if no matter how you adjust, it stays stuck at that angle and won’t move, then you should see a doctor for further evaluation. This observation of “whether you can actively correct it” is my first criterion for judging improvement potential.
So don’t rush to despair. Most people’s hunched backs and rounded shoulders are more salvageable than you think. Whether you’re willing to spend a few minutes a day and stick with it for months is what determines the outcome.
A Five-Minute Warm-Up You Can Follow Right Now
After all that explanation, I know some people just want “skip the talk and tell me exactly what to do.” Fine—this is the five-minute warm-up I most often give athletes, and you can follow it directly before riding or running. It covers both relaxation and activation in one go:
- Cat-Cow 8 cycles: Awakens the spine, warming up mobility in the thoracic and lumbar regions.
- Thoracic Rotation Stretch 8 reps per side: From a quadruped position, place one hand behind your head and rotate upward to open the chest.
- Wall Angels 10 reps: Activates the scapulae and mid/lower trapezius. The key is keeping the backs of your hands against the wall without shrugging your shoulders.
- Chin Tucks 10 reps: Awakens the deep neck flexors to counter the forward head posture you’ll face while riding.
- Diaphragmatic Breathing 5 deep breaths: Expand the ribs laterally and posteriorly to connect your core with your breathing.
These five movements take about five minutes total, yet they put your body in an aligned, ready-to-produce-force state the moment you get on the bike or start running. Almost every athlete I’ve tried this with has said: “The difference in how smooth the first ten minutes feel with versus without a warm-up is huge.” Make it a fixed ritual before every workout, and over time it becomes ongoing posture maintenance.
How to Track Progress Objectively—Don’t Just Rely on Feelings
The biggest reason people quit posture correction halfway is “not seeing progress.” Because change is gradual, looking in the mirror every day won’t reveal a difference. That’s why I always require athletes to keep objective records. Here’s the tracking method I recommend:
| Metric | How to Measure | How Often | What Progress Looks Like |
|---|---|---|---|
| Head-to-wall distance | Stand against a wall, measure how many finger-widths between the back of your head and the wall | Every 2–4 weeks | Distance decreases |
| Side-view photo | Take a side-view standing photo at the same angle and lighting | Every 4 weeks | Earlobe moves closer to the acromion |
| Wall angel height | Record how far your hands can slide up the wall and whether your shoulders shrug | Every 2–4 weeks | Greater range, less compensation |
| Symptom intensity | Rate soreness on a 0–10 scale | Weekly | Score decreases |
The key is “comparing under the same conditions”—the same wall, the same angle, the same time of day (e.g., always in the morning). Log these numbers in your phone’s notes or a spreadsheet, and you’ll clearly see the curve trending in the right direction. That positive feedback is the best fuel for staying consistent. I often say: What gets measured gets improved.
Posture and Long-Term Health: It’s Not Just About Now, It’s About Future You
Let me close with a point often overlooked by young athletes: posture is a form of “compound interest.” In your twenties and thirties, your fitness is good and recovery is fast, so postural flaws get papered over by your body—you don’t feel much. But these tension imbalances accumulate. By your forties and fifties, when your body’s repair capacity declines, a lot of chronic pain erupts all at once.
Untreated forward head posture, rounded shoulders, and upper-back kyphosis are clinically linked to cervicogenic headaches, shoulder impingement, and chronic low back pain; severe, long-standing cases can even be associated with conditions like thoracic outlet syndrome. This isn’t meant to scare you—it’s a reminder: spending five minutes now on your posture is saving your future self a huge amount of pain and medical costs. Especially if you plan to ride and run for a lifetime, the health of this kinetic chain determines whether you can keep exercising happily into your seventies and eighties.
This also echoes the research direction mentioned earlier—exercise intervention shows clear benefits for people who “already have symptoms,” but the smarter approach is not to wait until it hurts. Treat posture maintenance like brushing your teeth, and you’re making the most cost-effective long-term investment. Any situation involving numbness, weakness, or radiating pain warrants a doctor’s visit—don’t tough it out on your own.
Turning Correction into a Lifestyle Habit
Finally, I want to address a mindset issue. The hardest part of posture correction has never been the exercises—it’s consistency. I can teach you the movements in five minutes, but doing them daily for two months is where the real skill lies.
Here are a few “painless habit-building” tricks I give athletes: anchor corrective exercises to existing behaviors (do wall stands while brushing your teeth, chin tucks while waiting at red lights), set a phone alarm to stand up every two hours, and find one or two training partners to remind each other. Habits aren’t built on willpower—they’re built on design. Tuck correction into things you already do, and it will survive.
One more thing: don’t chase perfection, chase the average. Nobody can maintain perfect posture all day, and I can’t either. The point isn’t to stand straight every second—it’s to stay reasonably close to ideal “most of the time” and to change positions frequently. What the human body hates most is actually “maintaining one position for a long time,” even if that position is textbook-perfect. So, just move.
Conclusion: Stand Tall First, and Strength Will Follow
Posture correction doesn’t sound as exciting as interval training—no impressive power numbers, no thrill of breaking a PB. But it’s the foundation of all training. If the foundation is crooked, the higher you build, the more dangerous it gets; if the foundation is solid, you can build upward.
Remember four words: relax, mobilize, activate, integrate. Remember the three frequencies: beginners eight minutes daily, recreational athletes four to five times a week, and see a doctor first if you have symptoms. Then start today—don’t wait until you have time, don’t wait to buy equipment. Stand up and do ten chin tucks. That’s the best first step.
Your body remembers every investment you make in it. Give it time, and it will repay you with easier breathing, smoother power output, and less soreness.
This article is for educational purposes and does not replace individual diagnosis or treatment advice from a physician, physical therapist, or nutritionist. If you have persistent pain, numbness, or weakness, seek medical attention promptly.
References
- The effect of various therapeutic exercises on forward head posture, rounded shoulder, and hyperkyphosis among people with upper crossed syndrome: a systematic review and meta-analysis, BMC Musculoskeletal Disorders. https://link.springer.com/article/10.1186/s12891-024-07224-4
- Effectiveness of exercise in office workers with neck pain: A systematic review and meta-analysis, PMC. https://pmc.ncbi.nlm.nih.gov/articles/PMC6093121/
- Workplace-Based Interventions for Neck Pain in Office Workers: Systematic Review and Meta-Analysis, Physical Therapy (Oxford Academic). https://academic.oup.com/ptj/article/98/1/40/4562646
Related Reading
- The Science of Fitness Testing: How to Assess Your Conditioning, Choose the Right Venue, and Track Progress
- Exercise and Rehabilitation: A Complete Map from Injury Back to the Race Course
- The Complete Guide to Exercise and Spinal Health: Spinal Protection, Core Training, and Everyday Posture
- Exercise and Stress Management: A Coach’s Guide to Using Physiological Mechanisms and Daily Exercise Prescriptions to Ride Stress Back into a Controllable Range
一日北高/長距離團騎 常見問題補充篇 / 組團或跟團的眉角 / 壯車友容易被瘦車友慢性拉爆 / 原來屁股痛可能是這個原因...? / 風場配速法 / 公路車 / CT Yeh
2 年前
CT 喇低賽) 單車 比賽總是沒照片? 攝影師的觀點大公開 姿勢就是力量! 請加速1.25倍收看
7 年前
西進武嶺 免費訓練分析服務 Intervals | 練不夠還是練過頭?你哪一種類型選手?AI模型告訴你! | 備戰神器 | 公路車 訓練 | CT Yeh
4 年前
西進武嶺 自製新版AI配速表產生器 x 賽前攻略 抱佛腳! 沒有功率計也可以產生配速表嗎?有什麼其他眉角賽前要注意的呢? | 西進武嶺 / 東進武嶺 KOM 攻略 | 公路車 | CT Yeh
4 年前
福隆鐵人團練隨拍
8 年前
一個測試有沒有認真練車的方法😂 #公路車
10 個月前
實景訓練台) 彰化經典百K 高強度喵團 90分鐘 跟著一起練功 2019 Indoor workout Changhua Classic 100 Taiwan
7 年前
風櫃嘴 | 全台最多大砲的單車路線 | 尋寶網攝影師告訴你怎麼擺拍起來才好看 | 熱門攝影地點巡禮
6 年前