Trail Running Downhill Technique: Center of Gravity Control, Foot Placement Selection, and Knee Protection
Introduction
Downhill running is the most love-hate aspect of trail running. The sense of speed and flight is addictive, but one mistake can lead to a sprain or even a fracture. The impact on the knees is also a major reason many runners end their trail running careers. In fact, good downhill technique not only allows you to run faster but also significantly reduces the risk of injury—the key lies in understanding and controlling gravity, rather than fighting against it.
The Basic Mechanics of Downhill Running
On flat ground, your legs absorb impact forces of about 2.5–3 times your body weight; when running downhill, this number rises to 3.5–5 times. The increase in impact force comes mainly from two sources: the conversion of potential energy from vertical drop, and the eccentric contraction required for braking.
The core strategy for reducing downhill injuries is to disperse the impact:
- Shorten ground contact time
- Increase cadence (reducing the impact per step)
- Land with your foot beneath your center of gravity rather than in front of your body
- Utilize the shock-absorbing capacity of the ankle and knee joints
Center of Gravity Position: The Foundation of All Technique
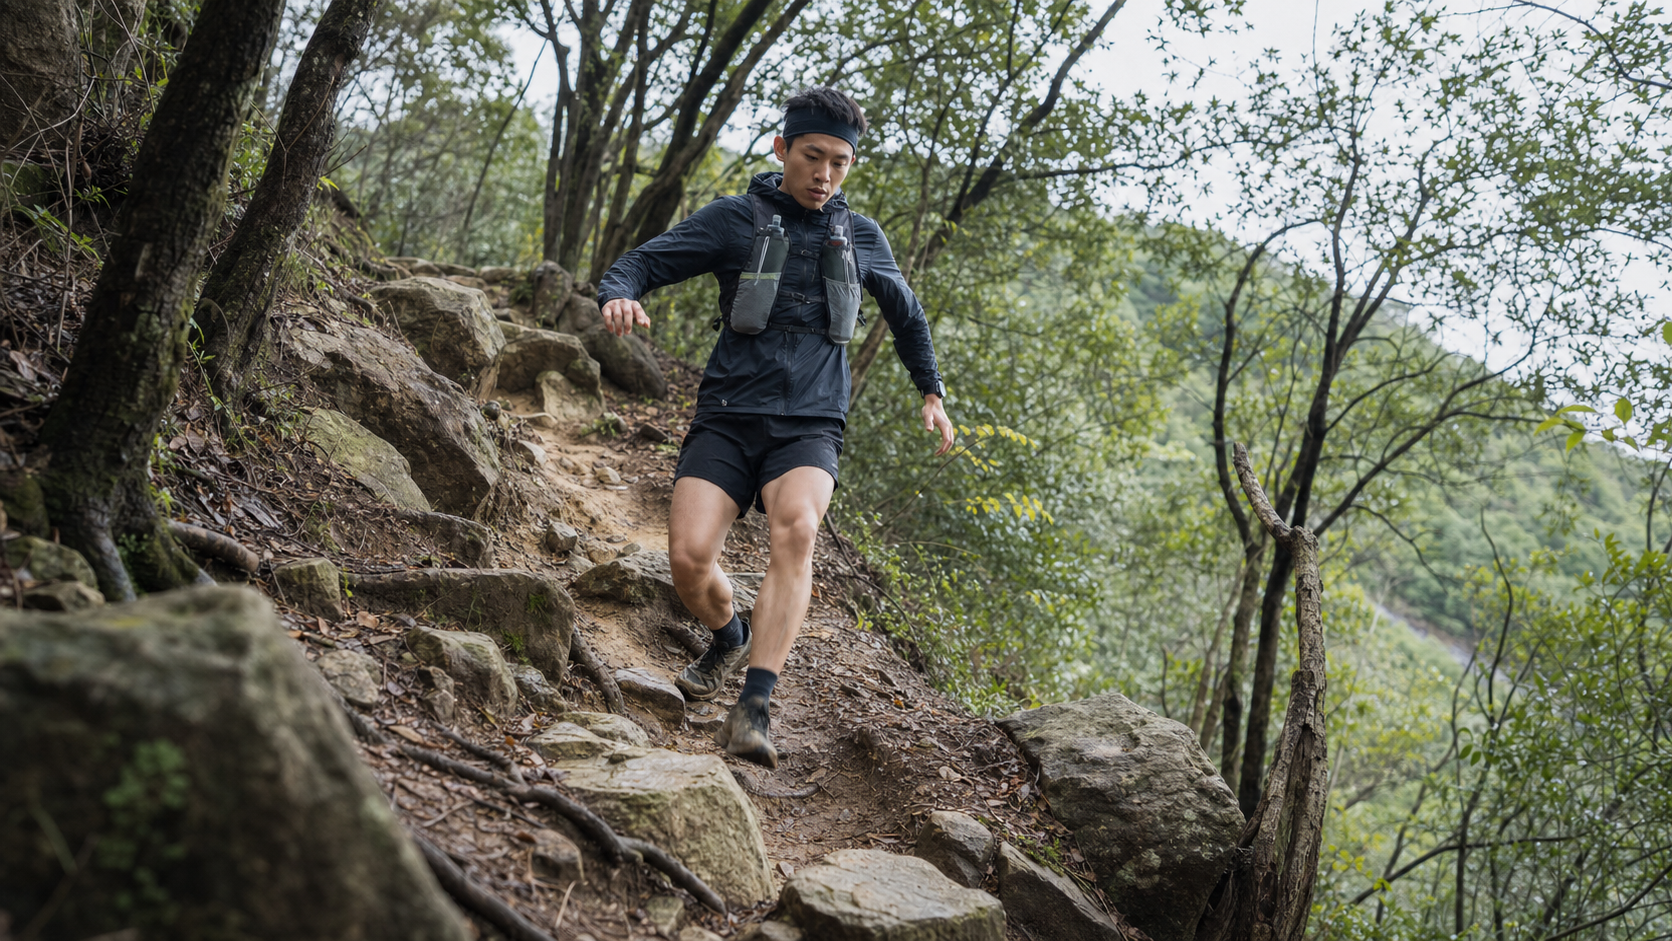
The most common downhill mistake is “leaning back to brake”—tilting the body backward and slamming the heels into the ground to slow down. Although this feels intuitive, it is the biggest source of knee and ankle injuries.
| Posture | Center of Gravity Position | Knee Pressure | Speed Control |
|---|---|---|---|
| Leaning back (incorrect) | Behind the heels | Extremely high (braking impact) | Poor (prone to losing control) |
| Upright | Directly above the feet | Moderate | Average |
| Slight forward lean (correct) | Above the forefoot | Lower (adequate shock absorption) | Good (can actively control) |
Correct posture:
- Lean the body slightly forward, keeping the center of gravity above the forefoot
- Keep the knees slightly bent (not locked), continuously absorbing impact
- Look 3–5 meters ahead, not at your feet
- Extend both arms out to the sides to increase lateral stability
Foot Placement Selection Strategy
Downhill mountain trails are covered with various obstacles: rocks, tree roots, wet leaves, and mud. Quickly reading the terrain for foot placement is a core skill in downhill technique.
Reading priority:
- Avoid: Slippery rocks, leaf-covered ground (may hide holes), pointed tips of individual rocks
- Prefer: Dry dirt, rock surfaces with traction, the side of tree roots (rather than directly on top)
- Special cases: If you cannot avoid a wet rock, place your entire foot flat against the rock surface, rather than using your toes or heel
“Terrain preview” practice method:
- Look 3–5 meters ahead, allowing your brain to plan the route in advance
- Identify a “best line,” letting your eyes guide your feet
- When encountering obstacles, step over them rather than going around (going around wastes time and may lead to worse ground)
Downhill Techniques for Common Taiwan Terrain
Rocky Terrain (Yangmingshan, Wuliaojian, etc.)
- Land on the flat surface of rocks, not the edges
- Increase cadence to reduce dwell time on each step
- Use rock arrangements for boulder hopping, but assess rock stability first
Muddy Terrain (Southern mountain areas after the rainy season)
- Press the foot firmly downward into the mud to increase traction
- Avoid lateral sliding steps; maintain forward direction
- If the mud is too deep (over 5 cm), switch to adjacent vegetation or rocks
Root-covered Trails (Northern forest trails)
- Step on the top of the raised surface of tree roots, not the sides
- Wet roots are extremely slippery; choose to go around or step on adjacent ground
- Be especially cautious when leaves cover roots; test each step before committing
Active Strategies for Knee Protection
The primary knee injury mechanism in trail running is loss of control after quadriceps fatigue. Here are specific practices to protect the knees:
- Shorten stride length: Use a shorter stride than on flat ground to reduce the eccentric contraction per step
- Increase cadence: Aim for 170–180 spm to distribute impact across more steps
- Knee tracking: Ensure the knee stays directly above the toes, avoiding inward collapse (knee valgus is a major cause of iliotibial band syndrome)
- Glute activation: Consciously engage the gluteus maximus upon landing to reduce the load borne independently by the knee joint
Warm-up before descending: Before a long descent, perform 10–15 squats and lunges to activate the glutes and quadriceps.
Practical Advice
- Practice on short slopes: Find a safe 50–100 meter downhill section and repeatedly practice the forward-lean posture
- Progress from slow to fast: Ensure correct posture first, then gradually increase speed
- Quadriceps strength training: Perform eccentric squats (slow descent) weekly to build the strength needed for downhill running
- Use trekking poles: On technical sections, trekking poles provide additional points of support and significantly reduce injury risk
- Slow down when fatigued: Downhill injuries most often occur in the later stages of a workout; learn to recognize fatigue signals and proactively reduce speed
Conclusion
Mastering downhill technique is a learning process that requires patience. In the early stages, slowing down and focusing on posture is more important than chasing speed. When center of gravity control, terrain previewing, and cadence management become automated muscle memory, your downhill speed will naturally increase—and much faster than using “braking mode.” Protecting your knees is what allows your trail running journey to go further and last longer.
Related Reading
- Trail Running Downhill Technique: Complete Analysis of Center of Gravity, Cadence, Gaze, and Braking Muscle Training
- Ultramarathon Downhill Technique: Knee Protection and Sprinting Downhill Footwork
- Trail Running Downhill Technique: Managing Deceleration Muscles, Cadence, and Braking Force
- Key Technical Points for Uphill and Downhill Running
大禹嶺 到 武嶺牌樓 全程前後實況錄影 | 北進武嶺 | 東進武嶺 | KOM | 訓練台 | 坡度分析 | Taiwan KOM Last 10 km HARD | 公路車
6 年前
CT 喇低賽) 武嶺牽車 才是王道 西進牽車四小時內秘訣 攝手位置 如何判斷 防抽筋小秘訣
7 年前
公路車 爬坡 破PR 紀錄 小技巧 分享
6 年前
CT 喇低賽) 單車 比賽總是沒照片? 攝影師的觀點大公開 姿勢就是力量! 請加速1.25倍收看
7 年前
一日北高/長距離團騎 常見問題補充篇 / 組團或跟團的眉角 / 壯車友容易被瘦車友慢性拉爆 / 原來屁股痛可能是這個原因...? / 風場配速法 / 公路車 / CT Yeh
2 年前
靠單車減肥35公斤 心得分享與整理
7 年前
大武山後門26%歡樂陡坡!JJSC南台灣單車行Day2 / 被颱風追著跑 / 公路車 / CT Yeh
2 年前
單車 梅山36灣 坡度介紹 路段介紹 空拍 (相關遊記影片,請參考說明或我的頻道喔,歡迎訂閱)
6 年前