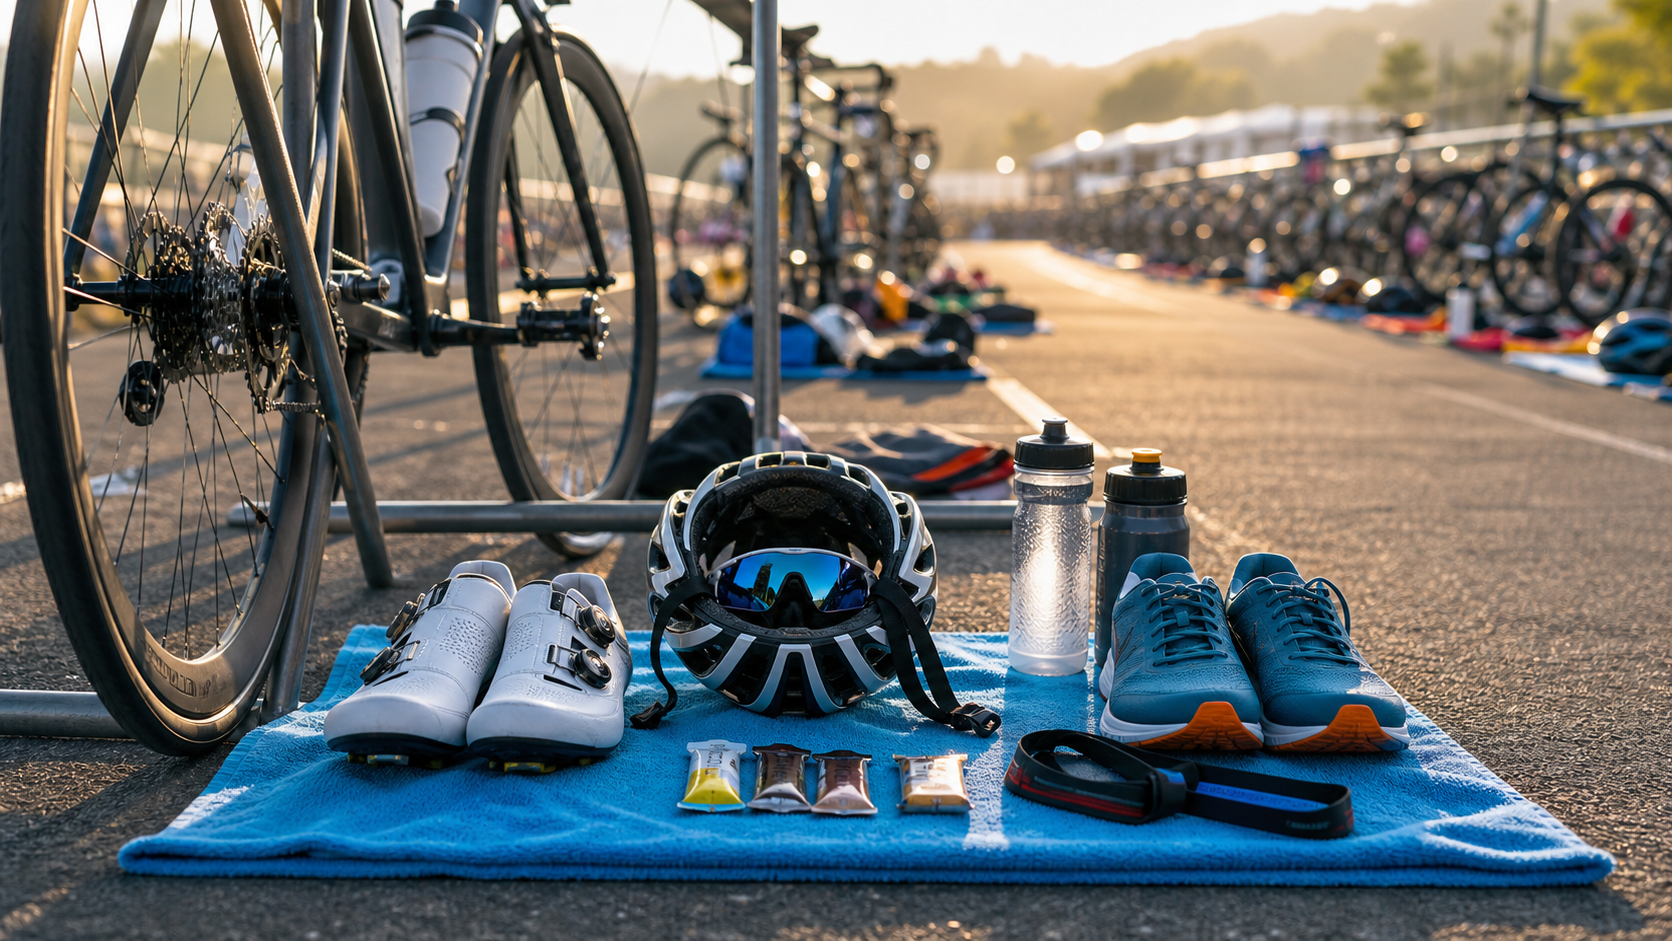
Triathlon Transition Area Gear Placement: The Optimal Order for Towels, Nutrition, and Helmets
Once in the transition area, age-group athletes spend an average of 30–60 seconds looking for their gear, while elite athletes need only 5–10 seconds. The difference isn’t “speed” but “placement logic.” A well-designed layout can save more than 30 seconds.
1. Core Principles of Placement
- Order of use = Order of placement: Items used first go on top or closest to you
- Highly visible and easy to find: Use contrasting colors, special markers
- Correct orientation: Helmet facing, shoe direction
- Won’t be disturbed: Others passing by won’t kick it
- Rain protection: Pack items separately in plastic bags
2. T1 Placement (Swim → Bike)
Front-to-Back Placement Order
[ Bike Rack ]
   ↓
[ Helmet (opening facing forward, straps spread out) ]
   ↓
[ Sunglasses (lenses facing up) ]
   ↓
[ Cycling Shoes (if not clipped to pedals) ]
   ↓
[ Race Belt + Nutrition ]
   ↓
[ Towel (for stepping on, drying off) ]
   ↓
[ Non-slip Mat / Wetsuit Discard Zone ]
Detailed Position Design
Helmet
- Position: On the handlebars (hung upside down) or on the ground in front of the bike frame
- Orientation: Front and back must not be mixed up (first confirm the logo position)
- Straps: Left and right straps already separated to avoid fumbling for the buckle after putting it on
- Sunglasses: Placed inside the helmet with arms facing up; put on glasses before the helmet
Cycling Shoes
- Position: Left side of the rear wheel
- Orientation: Toes pointing forward (toward the direction you’ll ride off)
- Condition: Velcro or Boa already loosened
- Advanced: Secure shoes to pedals with rubber bands (flying mount technique)
Towel
- Color: Choose a bright color (red, orange, yellow) for easy spot recognition
- Size: A small 60×40 cm towel is sufficient
- Purpose: Step on it to dry feet, place gear on it
Race Belt
- Position: Next to the shoes
- Condition: Buckle already fastened (one side left open to slip around your waist)
- Orientation: Number facing backward (no need for front display during the bike leg)
3. T2 Placement (Bike → Run)
Placement Order
[ Running Shoes (laces already opened) ]
   ↓
[ Run Cap / Visor ]
   ↓
[ Nutrition Belt (gels already loaded) ]
   ↓
[ Sunglasses (if using a different pair for the run) ]
   ↓
[ Towel / Sponge ]
T2 Special Tips
- Place running shoes behind the bike rack (directly in front of you when you rack the bike)
- Place the run cap on top of the shoes (grab it as you stand up)
- Place the nutrition belt next to the shoes; slip it on while putting on shoes
- Race belt is already on from T1; at T2, simply rotate it to the front
4. Single-Space (Shared T1/T2) Placement
Most races share the same space for T1 and T2, requiring a dual-purpose layout:
        [ Bike Rack ]
       /            \
  [For T1]        [For T2]
  Helmet           Running Shoes
  Cycling Shoes    Run Cap
  Race Belt        Nutrition Belt
  Wetsuit Discard  Sunglasses (if different pair)

        [ Towel (shared) ]
Key: Left side for T1 gear, right side for T2 gear, visually separated.
5. Nutrition Placement Strategy
Bike Leg Nutrition
- Position: Bottle cages on the frame, top tube bag
- Don’t leave it on the ground in the transition area: If you forget it, you’re done
- Special nutrition: Salt tablets, energy bars taped to the front of the frame
Run Leg Nutrition
- Belt style: Nutrition pouches already threaded on; grab the whole belt at T2
- Handheld bottle: Place next to running shoes
- Gel flasks: Clip onto running shoe laces (clip to belt after heading out)
6. Placement Adjustments for Rain and Extreme Heat
Rainy Conditions
- Store running shoes in a waterproof bag (clear bag for easy identification)
- Pack nutrition separately in sealed bags
- Cover the towel with a plastic bag
- Turn the helmet upside down to prevent water pooling
- Sunglasses can be skipped (lenses will have water on them)
Extreme Heat
- Put the run cap on top of everything
- Secure sunglasses to the run cap brim
- Add 1 cooling towel (gel pack filled with water and refrigerated)
- Place sunscreen in the nutrition bag
7. Identification Markers
With 500+ bikes in the transition area, failing to find your rack is a cardinal sin. Recommended markers:
| Marker Method | Effectiveness |
|---|---|
| Red balloon tied to the bike rack | Visible from 50 meters away |
| Bright yellow towel | Quick identification up close |
| Fluorescent tape on the ground | Personalized marker |
| Digital watch note | Row number + position |
| Photo memory | Pre-race photo + marked features |
8. Pre-Race Placement Process
From the night before to race morning, placement should be done in stages:
The Night Before (Organize at Home)
- Pack in clear ziplock bags: T1 bag + T2 bag + spare bag
- Check items in each bag (cross-reference with checklist)
- Attach race number to the race belt
- Load gels into nutrition pouches
Race Morning Early (4–5 AM)
- Enter the transition area (per race regulations)
- Find your bike rack position
- Arrange gear according to placement logic
- Take a photo for reference (in case things get disturbed, you can restore)
- Walk the “entry/exit route” 1–2 times
30 Minutes Before the Start
- Final check: helmet straps, cycling shoes, running shoe orientation
- Nutrition in place
- Wetsuit on
- Leave the transition area and head to the swim start
9. Checklist
T1 Essentials
- [ ] Helmet (correct orientation)
- [ ] Sunglasses
- [ ] Cycling shoes (or shoes already clipped to pedals)
- [ ] Race belt (already buckled)
- [ ] Nutrition (gels, energy bars)
- [ ] Towel
- [ ] Bike (check tire pressure, gears)
T2 Essentials
- [ ] Running shoes (elastic laces)
- [ ] Run cap
- [ ] Nutrition belt
- [ ] Sunscreen (small pack)
- [ ] Salt tablets
- [ ] Race belt (rotated to front)
10. Top Ten Placement Mistakes
- Helmet orientation wrong (can’t buckle it after putting it on)
- Running shoes facing the wrong way (need to turn 180° to put them on)
- Nutrition scattered across the towel instead of centralized
- Race belt buried under shoes and hard to find
- Sunglasses left bare (kicked or stepped on, cracked)
- No markers (can’t find the bike rack)
- No waterproofing on rainy days (gear soaked)
- Run cap tucked too far inside (requires digging)
- Forgot to loosen cycling shoe straps
- Wetsuit discarded in the path (tripping yourself)
Placement is the invisible deciding factor in T1/T2 speed—easier to improve than physical fitness.
Related Reading
- Triathlon Transition Area Fully Deconstructed: T1, T2 Route Design, Gear Placement, and Every Minute You Can Save
- Triathlon Transition Area (T1/T2) Speed-Up Tips, Route Planning, and Gear Selection Complete Guide (Series 378)
- Triathlon Transition Area (T1/T2) Speed-Up Tips, Route Planning, and Gear Selection Complete Guide (Series 132)
- Triathlon Transition Area (T1/T2) Speed-Up Tips, Route Planning, and Gear Selection: The Pro Runner’s Secret Weapon (Series 63)
相關影片
訂閱CT的頻道 西進武嶺 免費訓練分析服務 Intervals | 練不夠還是練過頭?你哪一種類型選手?AI模型告訴你! | 備戰神器 | 公路車 訓練 | CT Yeh
4 年前
CT 喇低賽) 武嶺牽車 才是王道 西進牽車四小時內秘訣 攝手位置 如何判斷 防抽筋小秘訣
7 年前
福隆鐵人團練隨拍
8 年前
多到選擇障礙... 換個單車把帶想一個小時 / BTP / 編織&軟木特有材質超吸睛! / 公路車 / CT Yeh
1 年前
3D 列印車褲墊 / 舒適改善? / 無痕 x 分區壓縮 / ATK & Decider系列 / JE22黑科技 / #公路車 #CTYEH
11 個月前
FTL 與 SYB 車隊專訪 西進武嶺 實用攻略分享! 2小時 如何練?!你不知道的眉角!新手準備武嶺必看 EP1 | 實力派女車友 | 精華版 | 公路車 | CTYeh
4 年前
武嶺配速表最佳使用方式 #bike
1 年前
西進武嶺 自製新版AI配速表產生器 x 賽前攻略 抱佛腳! 沒有功率計也可以產生配速表嗎?有什麼其他眉角賽前要注意的呢? | 西進武嶺 / 東進武嶺 KOM 攻略 | 公路車 | CT Yeh
4 年前