Complete Hub Maintenance and Lubrication Guide: The Key to Extending Wheelset Lifespan
文章導覽
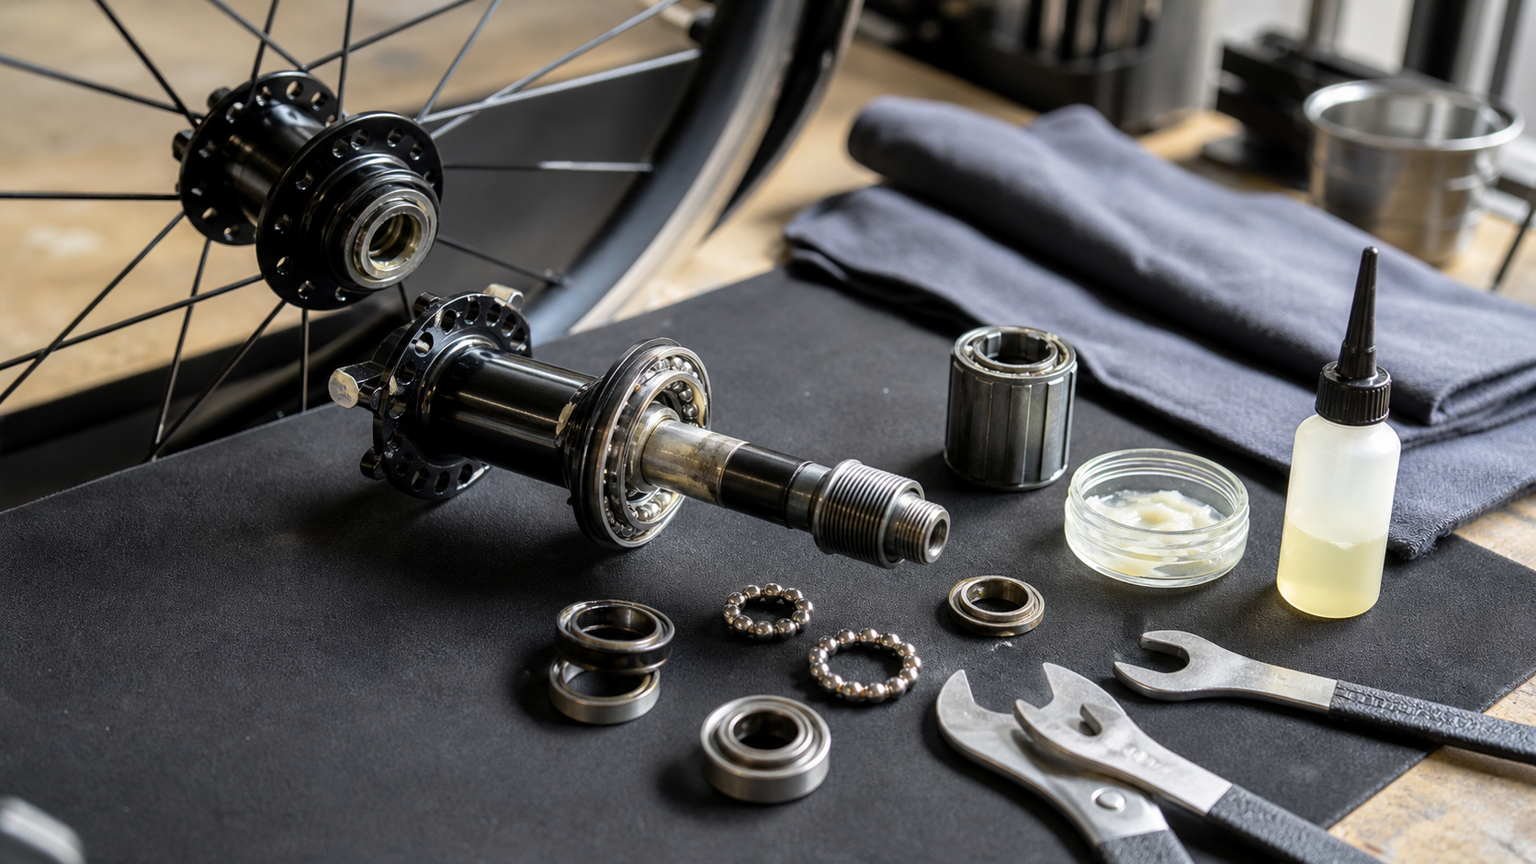
Complete Hub Maintenance and Lubrication Guide: The Key to Extending Wheel Lifespan
The hub is the most precision-engineered mechanical component of a wheel. It bears the rider’s weight and rotates thousands of times on every ride. Most cyclists pay attention to chain lubrication and brake pad replacement, but forget that hubs also require regular maintenance. A well-maintained hub can last over a decade, while a neglected one may need to be scrapped within two to three years.
Types of Hub Bearings
Understanding which bearing system your hub uses is essential for choosing the correct maintenance approach:
| Bearing Type | Structure | Advantages | Disadvantages | Common Brands |
|---|---|---|---|---|
| Cup & Cone | Steel balls roll between cup and cone | Adjustable preload, serviceable | Requires skill to adjust | Shimano |
| Cartridge/Sealed | Fully sealed bearing unit | Simple maintenance, good water resistance | Not adjustable, replace entire unit when worn | DT Swiss, Chris King, most brands |
| Ceramic | Ceramic balls | Lower friction, corrosion resistant | High cost | CeramicSpeed, Chris King |
When Does the Hub Need Maintenance?
Inspection Methods
- Spin Test: Remove the wheel and spin the hub axle by hand; it should feel smooth with no resistance
- Wobble Test: Hold the rim and rock it side to side; there should be no lateral play in the axle
- Noise Diagnosis: If you feel roughness, hear abnormal sounds, or sense drag when spinning, maintenance is needed
- Rear Hub Freehub Sound: The ratchet sound during freewheeling should be crisp and even; a muffled or intermittent sound may indicate insufficient lubrication
Recommended Maintenance Intervals
| Riding Environment | Cup & Cone Bearings | Cartridge Bearings |
|---|---|---|
| Dry road | Every 5,000-8,000 km | Every 8,000-15,000 km |
| Riding in rain | Every 2,000-3,000 km | Every 5,000-8,000 km |
| Off-road/mud | Every 1,000-2,000 km | Every 3,000-5,000 km |
| Racing use | Once before and after each season | Once before and after each season |
Shimano Cup & Cone Hub Maintenance
Shimano is one of the few brands that insists on using cup and cone bearings. The maintenance process is more involved but very rewarding:
Required Tools
- Cone Wrench: 13mm, 15mm, 17mm (depending on hub model)
- Open-end wrench: Matching lock nut size
- Magnetic rod or magnetic tray: To collect the balls
- Bearing grease: Shimano Premium Grease or equivalent quality
- Degreaser (such as white spirit or dedicated bearing cleaner)
- Clean rags and cotton swabs
- Tweezers
Disassembly Procedure
Front Hub:
- Remove the quick-release skewer or thru-axle
- Use a cone wrench to hold the cone nut on one side
- Use an open-end wrench to loosen the outer lock nut
- Remove the lock nut, washer, and cone nut
- Carefully pull the axle out from that side; the balls may scatter
- Use a magnet to collect all the balls, and record the count
- Remove the balls from both sides
Additional Steps for Rear Hub:
- Remove the cassette first (using a cassette lockring tool and chain whip)
- Disassemble the non-drive side (left side) to extract the axle
- The drive side cone nut usually does not need to be removed
Key Reminder: Each hub has a fixed number of balls. Count them before disassembly, and not a single one can be missing during reassembly. Common counts: 10-11 balls per side on the front hub, 9-10 balls per side on the rear hub.
Cleaning Procedure
- Soak all balls in degreaser
- Use cotton swabs to clean the cup inside the hub shell
- Clean the cone surface of the cone nut
- Clean the axle
- Inspect all parts:
- Ball surfaces should be shiny with no pitting
- Cup surfaces should be smooth with no scoring
- Cone surfaces should be smooth with no wear marks
- Any parts with pitting or severe wear need to be replaced
Lubrication and Assembly
- Apply an ample amount of bearing grease inside the hub cup
- Place the balls one by one into the cup (the tackiness of the grease will hold them in place)
- Confirm the ball count is correct
- Carefully insert the axle from one side
- Install the cone nut, washer, and lock nut on the other side
Preload Adjustment (The Most Critical Step)
The performance of a cup and cone hub depends on the precision of the preload adjustment:
- Tighten the cone nut with a cone wrench until you feel slight resistance
- Then back it off about 1/8 turn
- Hold the cone nut in place and tighten the outer lock nut
- Check:
- The axle should spin completely smoothly
- No play when rocking side to side
- Installing the quick-release skewer or thru-axle will add a small amount of preload, so leaving a tiny bit of play during adjustment is acceptable
Preload Judgment Criteria:
| Condition | Spinning Feel | Play | Verdict |
|---|---|---|---|
| Too tight | Resistance, not smooth | None | Needs loosening |
| Correct | Smooth, almost no resistance | None to extremely slight | Perfect |
| Too loose | Smooth | Noticeable wobble | Needs tightening |
Sealed Cartridge Bearing Hub Maintenance
Maintenance on cartridge bearing hubs is relatively simple, with the focus on the ratchet system:
Ratchet Maintenance (Using DT Swiss as an Example)
- Remove the quick-release skewer or thru-axle
- Pull out the freehub body — most DT Swiss models can be pulled straight off
- Clean the ratchet rings and springs
- Apply a thin layer of grease or dedicated ratchet oil to the ratchet rings
- Confirm the ratchet springs return properly
- Reinstall the freehub body
Important: The DT Swiss Star Ratchet system requires dedicated grease; do not use regular motor oil. Chris King hubs require Chris King RingDrive Lube.
Sealed Bearing Replacement
When cartridge bearings develop roughness or drag:
- Use a bearing puller to remove the old bearings
- Record the bearing number (e.g., 6802, 6902, etc.)
- Clean the bearing seat
- Use a bearing press tool to install the new bearings
- Always use a press tool, never a hammer
Common Hub Bearing Specifications:
| Bearing Number | Inner x Outer x Thickness | Common Location |
|---|---|---|
| 6800 | 10x19x5mm | Front hub |
| 6802 | 15x24x5mm | Rear hub |
| 6902 | 15x28x7mm | Rear hub (larger) |
| 6803 | 17x26x5mm | Some hubs |
| 6001 | 12x28x8mm | Certain DT Swiss models |
Choosing the Right Grease
| Grease Type | Best For | Characteristics |
|---|---|---|
| Bearing-specific grease | Loose-ball bearings, cup-and-cone | High load capacity, waterproof, long-lasting |
| Lightweight grease | Cartridge bearing injection | Low resistance, ideal for efficiency seekers |
| Pawl-specific oil | Pawl systems | Does not affect pawl engagement force |
| Ceramic bearing grease | Ceramic bearings | Extremely low friction, chemically compatible |
Never use: WD-40, motorcycle chain oil, or chassis grease (lithium grease). These are unsuitable for bicycle bearings and will accelerate wear or compromise seals.
Post-Service Inspection
- [ ] Hub spins smoothly with no gritty feel or unusual noise
- [ ] No lateral play (re-check after lightly tightening the quick-release)
- [ ] Rear hub freehub pawls engage properly
- [ ] No grease has migrated onto the brake disc surface
- [ ] After a 10-minute test ride, re-check temperature and condition
Hub maintenance is a quiet, meticulous job, but every time you finish and hear that nearly silent, smooth rotation, you’ll know it was all worth it. Regular hub service not only extends the life of your wheelset but is also an investment in the efficiency of every pedal stroke.
Related Reading
- Complete Bicycle Wheelset Maintenance Guide: Hub, Spoke, and Rim Care Tips
- Complete Road Bike Hub Maintenance Tutorial: Disassembly, Cleaning, Lubrication, and Assembly
- Hub Maintenance: Service Intervals for Sealed Bearings vs. Cup-and-Cone Bearings
- Rear Hub Ratchet Maintenance: Make Your Hub Sound Crisper